

Now that we’ve prepared our ASP.NET Core application, we are going to learn how to install and use Docker on Windows 10, the reasons behind using Docker, and some useful Docker CLI commands. Understanding how the Docker CLI works is crucial, and you’ll most definitely have a hard time proceeding to the next part without getting a grasp of the basic commands Docker offers through its powerful CLI.
This is the second article of our Docker Series. You can find the other parts on our Docker Series page.
In this part, we are going to talk about:
- Short Intro to Docker on Windows
- Why Docker?
- Using Docker to Keep Local Environments Clean
- Using Docker to Test Your App in a Clean Environment
- Persisting the Changes and Cross-Platform Development
Let’s get down to business.
Short Intro to Docker on Windows
Docker Desktop for Windows, as well as some basic instructions, can be found in the docker store. The installation is pretty straightforward and you can easily test if it worked with a quick docker --version command. We recommend using PowerShell for all the docker commands we use since it’s more verbose than plain old Command Prompt.
Docker basically relies on Windows 10 Hyper-V to instantiate the virtual machines which we need as a base for our containers. If you haven’t enabled it, you’ll need to do it in order to proceed.
But before that, let’s go through some very basic concepts regarding Docker and ASP.NET Core.
As you know, Docker images consist of a bunch of layers witch attribute to the final environment inside that image. There are a lot of predefined images we can pull from the Docker Hub, but we can also make our own images by adding our layers on top of existing ones to create an image that suits our needs.
On Windows 10, Docker lets you choose between Linux and Windows containers, which is a very nice feature. In this series, we are going to stick with the Linux containers, but the principles apply both to Windows or Linux containers. The syntax and underlying architecture (eg. paths) may vary a bit.
Why Docker?
Before we dive completely into Dockerfiles, compositions and advanced features of Docker, let’s play around a bit with the Docker CLI.
Understanding how the Docker CLI works will help you later when we move on to Dockerfiles.
So, we have an application to play with now, it builds, the tests are passing and we can run it on a local machine. The starting point application can be downloaded from the docker-series-app-prepared branch of the docker-series repo on GitHub.
So, how do we start working with Docker?
When we started learning Docker, the main problem we had was to grasp the big picture. It looked like just some complicated tool that produces an overhead in our projects. We’ve been already familiar with continuous integration and delivery, and Docker didn’t seem to fit into our CI/CD pipelines.
So we’ll try to explain why we use Docker and how to use the Docker CLI with our ASP.NET Core app.
Scenario One: Using Docker to Keep Local Environments Clean
Let’s say you have a Java-oriented friend and you want to explain to him why .NET Core kicks ass. We’ll call him Mike. Mike is quite a stubborn lad and doesn’t want to install all that Microsoft mumbo-jumbo on his machine, which is perfectly understandable.
.NET SDK and Visual Studio can take time and disk space to install and Mike doesn’t want that. But, Mike has heard how awesome Docker is and he even installed it at one time on his machine some time ago.
So how do we help Mike start with .NET Core as soon as possible?
First, give him some ASP.NET Core application to clone. For example our application.
Next, navigate to the root of the project and build the project by typing (works only in PowerShell):
docker run --rm -it -w /home/app/AccountOwnerServer/ -v ${PWD}:/home/app mcr.microsoft.com/dotnet/core/sdk:3.1 dotnet buildFollowed by:
docker run --rm -it -w /home/app/AccountOwnerServer/ -p 8080:5000 -v ${PWD}:/home/app mcr.microsoft.com/dotnet/core/sdk:3.1 dotnet runAnd just like that we have built and run our application on Mike’s machine even though he doesn’t have any Microsoft dependencies installed.
Now you can run the application on your local machine by typing http://localhost:8080/swagger/ in your browser and you’ll get the familiar Swagger docs page.
Isn’t that just awesome?
But those commands look really complicated. Let’s break them down.
A Bit of Clarification
These commands look scary when you see them for the first time but they are not that complicated once you get familiar with the syntax.
The actual command is docker run, followed by a few options, and then the image name, which is the name of the one we’ve built in the last step.
Let’s explain what each option stands for:
--rm: Automatically removes the container once it stops. If you exclude this command you’ll see the Docker container is still attached by typingdocker ps -a-it: This command is actually comprised of two parts, -i which means interactive mode, and -t which enables the pseudo-terminal. These commands can be used separately to get the same result, but they are usually used together. The -it command basically gives us the means to see and interact with our application through the terminal.-w /home/app/AccountOwnerServer/: Sets the current working directory for the container when it gets instantiated. In our case that will be/home/app/AccountOwnerServer/where the main app resides, so we can run our commands from there-p: Maps the external port (left) to the internal port (right) of the Docker container. In our case, this means that we can access our application through thehttp://localhost:8080on our local machine, although it runs on a port 5000 inside the Docker container-v ${PWD}:/home/app: This one is a bit tricky but once you get it, it can do wonders. What this actually means is that it maps our current directory to the/home/appdirectory inside the container. This enables us to change the code on our local system and build it in the container. You can learn more about Docker volumes here.
The options are followed by the image name, and finally the command we want to run inside the instantiated container.
So, what does this mean for Mike the Java programmer?
This means Mike can safely change the code on his machine using any IDE, and then run the container to see the results of his work without having had to install any of the dependencies on his machine.
You can now watch Mike and enjoy his conversion to C#. 🙂
Scenario Two: Using Docker to Test Your App in a Clean Environment
Mike is now a full-fledged C# programmer. He tried it and he loved it so much that he decided to install the .NET Core SDK on his own machine.
Since Mike is a web developer in heart, he wants to make a small ASP.NET Core application to learn how web programming works in .NET Core. By sheer luck, he stumbled across the Code Maze blog and found out there is a great tutorial on how to create ASP.NET Core app and how to prepare it for dockerization.
Just what he needs.
But since Mike is a good developer and knows about the “It works on my machine” phenomenon, he wants to run the app in a clean environment to test it out and make sure the app works every time.
What can Mike do in this situation?
He can, of course, build his application on some of the many available CI/CD tools, and then deploy the application on the staging machine. Or he can publish directly using the Visual Studio publish tools. And he needs to do that both for Windows and Linux.
But there might be a faster and easier way he can do that: spin up a local docker container optimized for the ASP.NET Core runtime.
How can Mike do that?
We learned some commands in the previous example, so let’s use them here too. We won’t rely on mcr.microsoft.com/dotnet/core/sdk:3.1 image since Mike builds his application locally.
What he wants to use is the mcr.microsoft.com/dotnet/core/aspnet:3.1 image which is optimized for runtime.
But first, he needs to publish his app and make a small Dockerfile in the AccountOwnerServer folder that will instruct Docker to copy the contents of the publish folder to the container.
So, Mike should navigate to /AccountOwnerServer and then type dotnet publish. This will publish the application into the ./bin/Debug/netcoreapp3.1/publish directory.
After that, he needs to add the Dockerfile to the project root:
FROM mcr.microsoft.com/dotnet/core/aspnet:3.1

WORKDIR /home/app
COPY bin/Debug/netcoreapp3.1/publish .

ENTRYPOINT ["dotnet", "AccountOwnerServer.dll"]
Build his own image using that Dockerfile (make sure not to forget to put the dot at the end of the command):
docker build -t accountownerapp .
And then simply run the image:
docker run -p 8080:80 accountownerapp
That’s it, Mike has run the application on a clean environment and now he can sleep peacefully because he knows that his app can run on more than just his machine.
Scenario Three: Persisting the Changes and Cross-Platform Development
Mike has been working now for a few weeks on his ASP.NET Core app. But he has already planned a nice trip with his family and he won’t be able to continue working on his desktop machine. But he brings his Mac wherever he goes.
Up until now, Mike has been working locally and using the local Docker environment.
So in order to continue working in the evening, after his long walks through the woods, he needs a mechanism to persist his work and bring it with him.
So how can Mike do this?
Creating the Image and Pushing It to Docker Hub
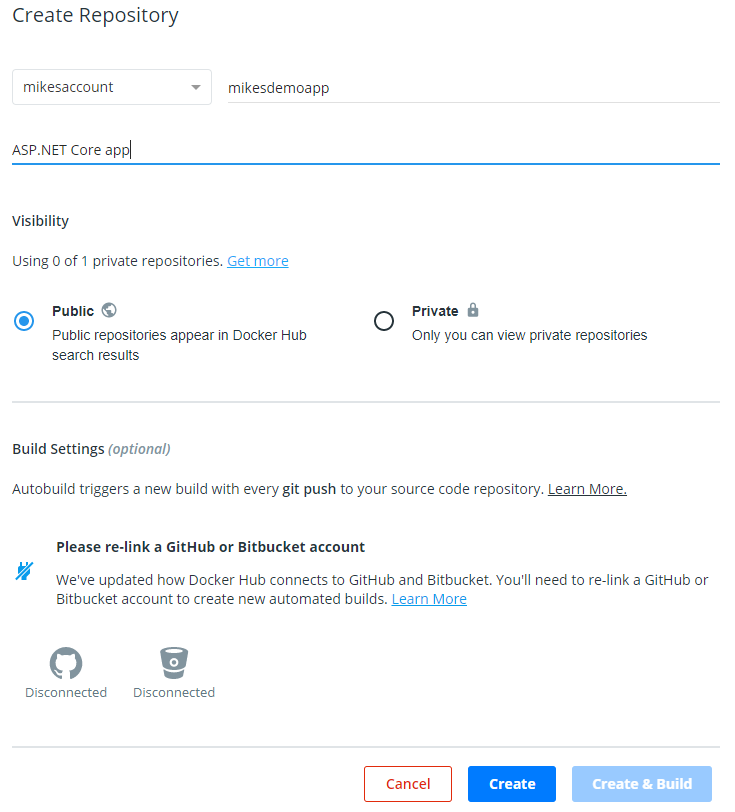
First, he needs to create an account on Docker Hub. It’s an easy process and in a few minutes, Mike has a Docker Hub account.
Then he can create his own repository and name it MikesDemoApp:
To be able to work on the project, he needs to use mcr.microsoft.com/dotnet/core/sdk:3.1 image, optimized to build and run ASP.NET Core applications.
So, he needs to modify the Dockerfile a bit:
FROM mcr.microsoft.com/dotnet/core/sdk:3.1

WORKDIR /home/app
COPY . .
And build his own image and tag it
mikesaccount/mikesdemoapp:docker build -t mikesaccount/mikesdemoapp .
And then he can log in to his Docker Hub account and push the image through the Docker CLI:
docker login -u mikesaccount -p SomeCoolPassword
docker push mikesaccount/mikesdemoapp
The result in the console should look something like this:

And now Mike can navigate to the “Tags” tab on the Docker Hub repository to see his image:
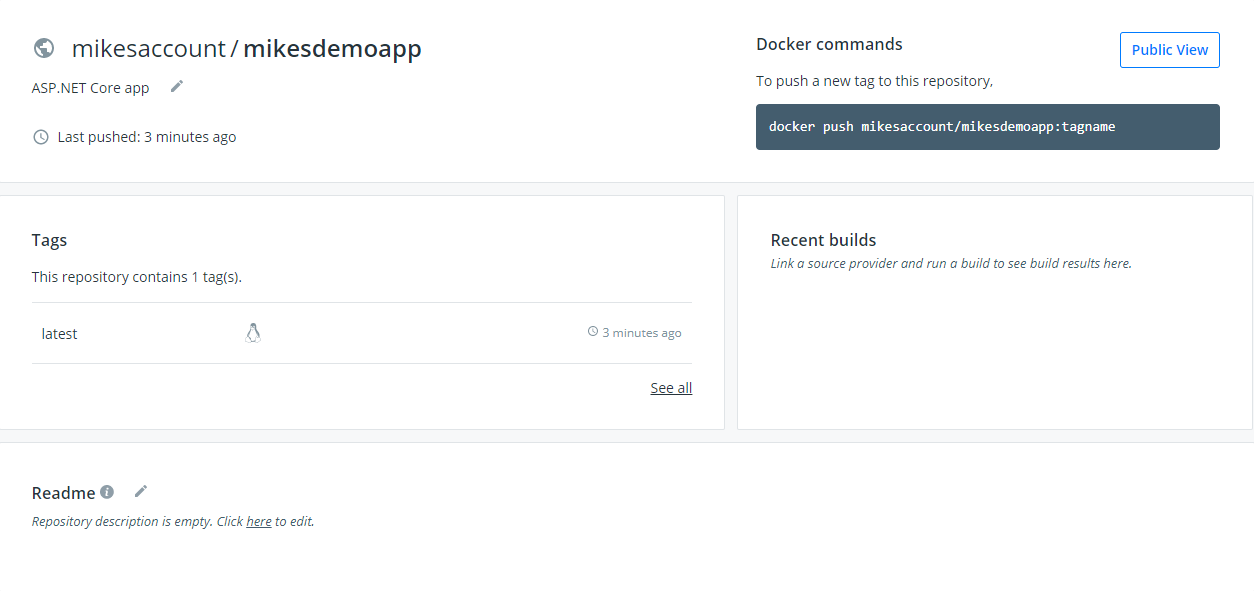
Now Mike can safely pull the image to his Mac and work some more on his app before he goes to sleep:
docker pull mikesaccount/mikesdemoimage
Conclusion
These scenarios are just a few of the unlimited number of possible Docker usages. You have seen how powerful the Docker CLI can be but we’ve just scratched the surface.
Docker’s full potential can only be seen when you deploy multiple microservices and connect them together.
You can dockerize everything. Applications, databases, monitoring tools, CI tools… Name it and there is an image of it.
I encourage you to play around with the Docker CLI and learn a bit more about it since it’s a good foundation for what’s coming up next: Dockerization of ASP.NET Core application using Dockerfiles.

