

After the IIS deployment, the last part of this series is the .NET Core Linux deployment. We use Ubuntu 16.04 Linux version on our VM, but you may use any version you want.
Whether you want to deploy an application to the local VM with the Linux OS or to the VM you have purchased from the provider, the process is similar but a few steps may vary but we are going to cover them all. The important thing is that if you are using a local VM set its adapter connection on a bridge adapter. It is usually in the Settings and then Network menu, but it varies depending on the VM software you are using.
To communicate with our VM, we are going to use PuTTY SSH client and FileZilla for the file transfer. You can, of course, use your own software, but if you want to follow along with the steps of this tutorial you can download them for free:
https://www.ssh.com/academy/ssh/putty
https://filezilla-project.org/download.php
So, let’s start.
If you want to see all the basic instructions and complete navigation for the .NET Core series, check out the following link: Introduction of the .NET Core series.
For the complete navigation and all the basic instructions of the Angular series, check out: Introduction of the Angular series.
For the previous part check out: Creating Angular client side – IIS Deployment
This post is divided into several sections:
- Machine’s IP Address and SSH
- Credentials and File Preparations With FileZilla
- Installing MySQL and Restoring the Backup File
- Removing MySQL Case Sensitivity
- Configuring Firewall
- .NET Core Installation
- Small File Modifications
- Starting the Application
- Working With Kestrel
- Nginx Configuration
- Conclusion
Machine’s IP Address and SSH
If you have purchased a VM from the provider, then you have its IP address and SSH enabled for sure. But if you are using a local VM, you need to find out the IP address and to enable SSH on it.
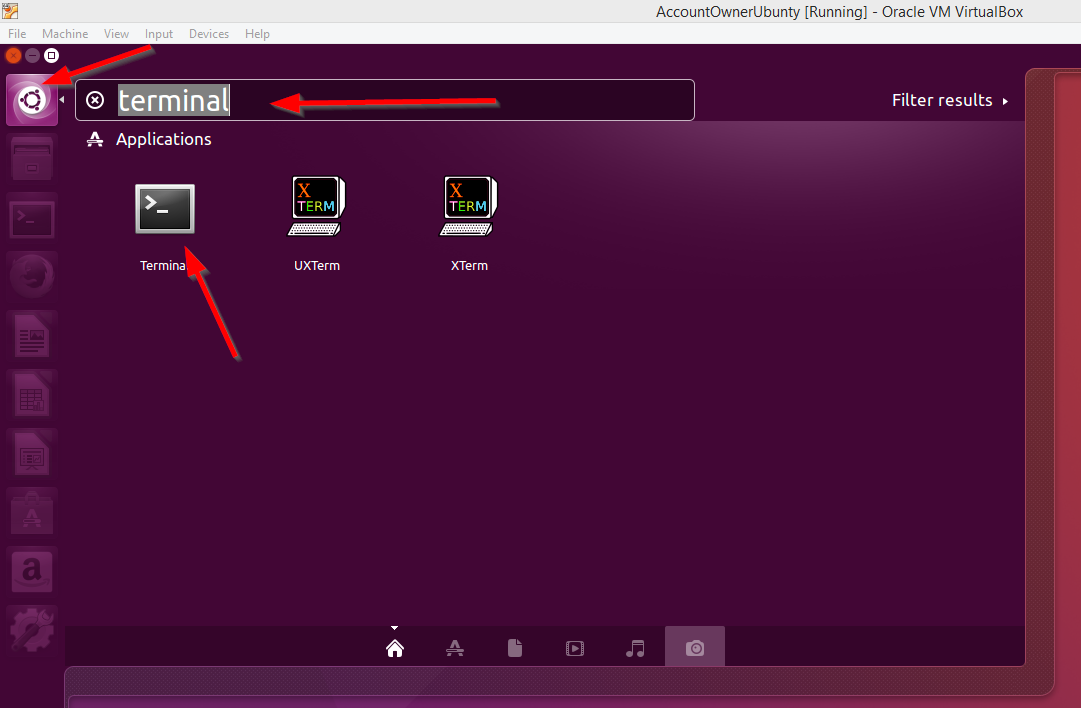
To find out our VM’s IP address, let’s log in to the Linux OS and search for a terminal window. Then type ifconfig to locate the IP address:
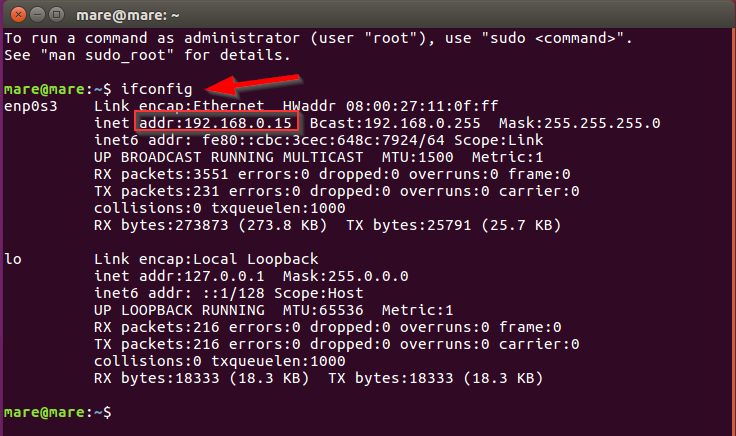
Great.
Now we have our IP address, and let’s enable SSH by typing the command:
sudo apt-get install openssh-server openssh-client
After that, let’s open PuTTY and connect to our VM with a valid IP address. The default port number should be 22.
Credentials and File Preparations With FileZilla
It is bad practice to log in to a VM as the root user. So if your current user is the root user, you should create a new one with the command: sudo adduser usermod –aG sudo
Let’s create a new folder on the local machine and name it publishLinux. Place it next to the IIS publish folder, which we have created in the previous part. Copy all the files from the windows publish folder to a new one. We have created the production files in the previous part, so feel free to read it if you haven’t already done that.
To prepare the database on Linux, open FileZilla and login to your VM with it. Then transfer your backup.sql file to a VM, because we are going to need that file to populate the database:

Once we transfer a backup file to the VM, we need to install MySQL server and import that file.
Installing MySQL and Restoring the Backup File
First, let’s update the packages with the command:
sudo apt-get update
Then, when the update finishes, we need to install MySQL with the command:
sudo apt-get install mysql-server
Moreover, after the MySQL installation finishes, for the secure installation we need to execute the command:
mysql_secure_installation
We are going to answer all the questions with the default answers except the one about creating a password. We don’t want to create a new password because it has been created during MySQL installation.
Let’s log in to the MySQL server by executing:
sudo mysql –p
Enter the password and we are in.
Now we are going to create a database accountowner with the command:
Create database accountowner;
Notice the semicolon character. It is mandatory for the MySQL statements.
To use this new database, we have to type:
use accountowner;
With this command, we are notifying MySQL server which database is currently active. Finally, to restore the backup file let’s execute the command:
source /home/mare/Desktop/2017-11-29-backup.sql;
(this depends on your file name and the location your backup file is in).
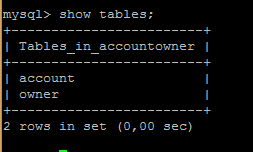
To see if all the tables are created just type:
show tables;
Removing MySQL Case Sensitivity
MySQL server is case-sensitive, and that could lead to certain problems once the application is published. So, we are going to ignore case sensitivity for the table names inside the MySQL configuration file.
To do that let’s type
sudo nano /etc/mysql/my.cnf
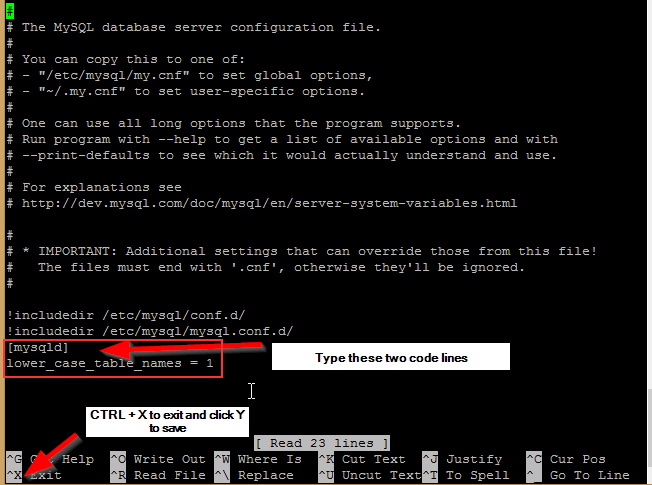
Now, let’s restart MySQL with the command:
sudo /etc/init.d/mysql restart
Configuring Firewall
Great, we are done with a database, and now we need to configure the firewall by executing:
sudo ufw default deny
sudo ufw default allow outgoing
sudo ufw allow ssh
sudo ufw allow 80/tcp
sudo ufw allow 443/tcp
sudo ufw enable
sudo ufw status verbose
.NET Core Installation
We have MySQL on our machine, let’s install .NET Core.
First, we have to register the Microsoft signature, and for that, we need the curl on our Linux system:
sudo apt install curl
After the installation, let’s register the Microsoft key and the feed:
curl https://packages.microsoft.com/keys/microsoft.asc | gpg --dearmor > microsoft.gpg
sudo mv microsoft.gpg /etc/apt/trusted.gpg.d/microsoft.gpg
To continue, let’s register the Microsoft product feed on Ubuntu 16.04:
sudo sh -c 'echo "deb [arch=amd64] https://packages.microsoft.com/repos/microsoft-ubuntu-xenial-prod xenial main" > /etc/apt/sources.list.d/dotnetdev.list'
If you are using some other Linux version check out: https://www.microsoft.com/net/download/linux-package-manager/ubuntu16-04/runtime-2.0.6 and in drop-down list choose your own version.
Then let’s install .NET Core:
sudo apt-get update
sudo apt-get install dotnet-sdk-2.0.3
Small File Modifications
Before we transfer all of the published files to VM, we need to change one more thing. If you may remember, in part nine of the series, we have configured URL address for the production environment to be:
Furthermore, in the nlog.config file we need to change the path for the logging messages:
fileName="/home/mare/logs/${shortdate}_logfile.txt"
(Again, this is the path on our machine. You probably have a different folder name after the home part).
Starting the Application
Let’s use FileZilla to create a new folder and name it var. Inside that folder, create another one and name it publish. All these folders must reside inside the folder with your username:
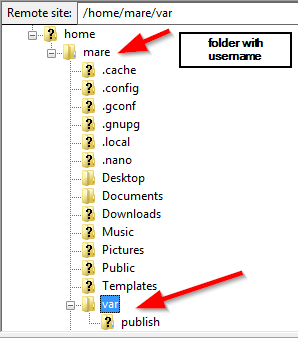
Let’s create one more folder with name logs, for our logging files. Finally, transfer all the publishing files from the local machine to this new publish folder.
To start the application and check if everything works, we need to navigate to the place where we transferred our publish files and to execute:
dotnet AccountOwnerserver.dll
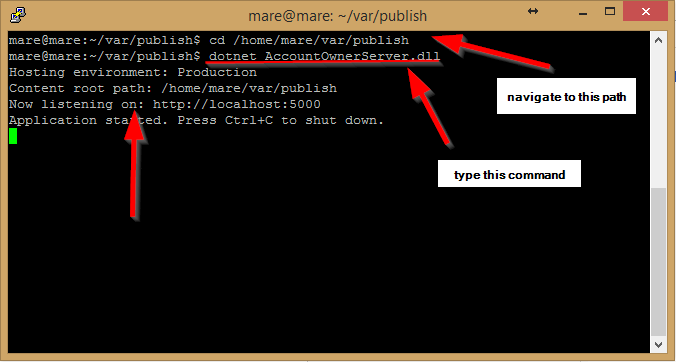
If you see the screen like this, then you’ve successfully started the application. But we don’t want to start our application manually. So, let’s create a service which will start our application automatically as soon as the server starts.
Working With Kestrel
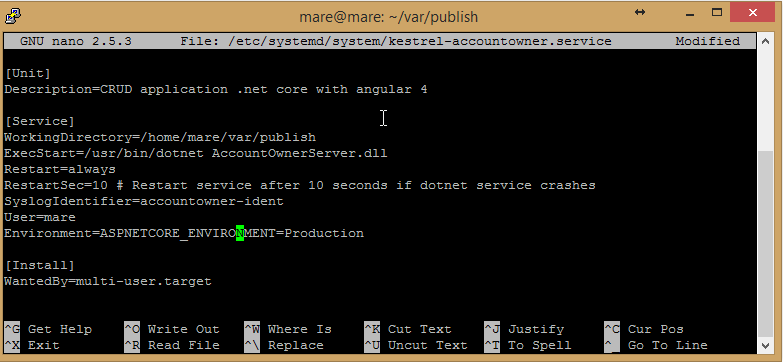
Execute the command:
sudo nano /etc/systemd/system/kestrel-accountowner.service
and modify the file:
Now, we need to enable this service, start it and check its state:
sudo systemctl enable kestrel-accountowner.service
sudo systemctl start kestrel-accountowner.service
sudo systemctl status kestrel-accountowner.service

Nginx Configuration
If you may remember, in part 2 of this tutorial we’ve added this code:
app.UseForwardedHeaders(new ForwardedHeadersOptions
{
    ForwardedHeaders = ForwardedHeaders.All
});
Nginx supports reverse proxy, and while directing client requests towards the backend server, some data could be lost (http or https, the client IP address…). Therefore, we need the UseForwardedHeaders middleware to retrieve these data through the HTTP headers.
Now let’s install Nginx on Linux OS:
sudo apt-get install nginx
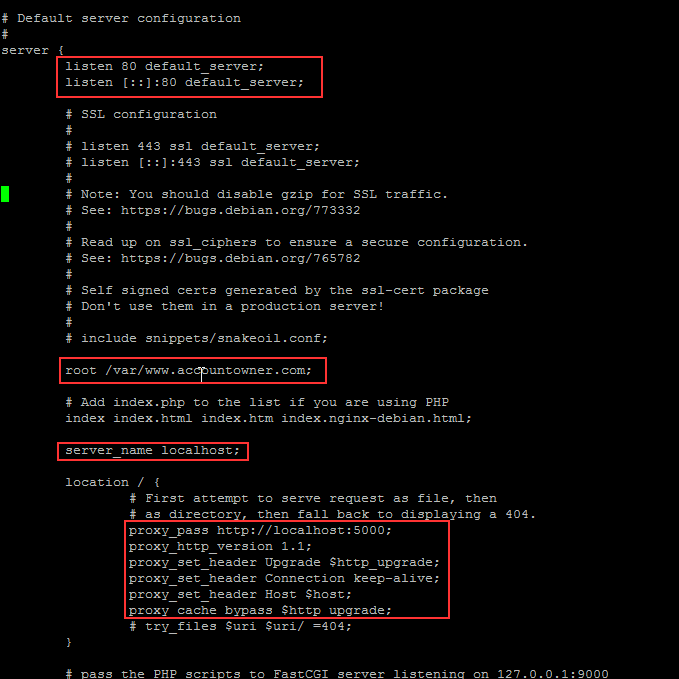
After the installation is completed, open and modify this file:
sudo nano /etc/nginx/sites-available/default
We won’t delete any commented parts, just modify the parts that we need:
Test our Nginx configuration with the command:
sudo nginx –t
And just reload nginx if everything looks alright:
sudo nginx –s reload
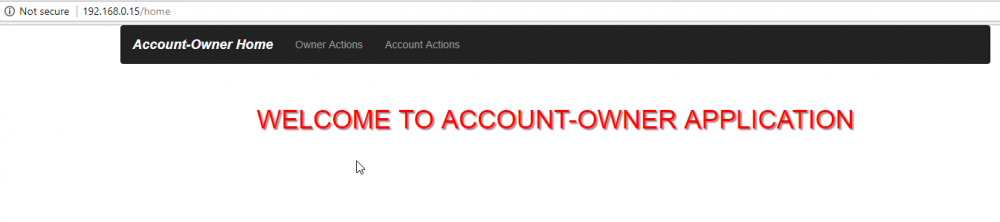
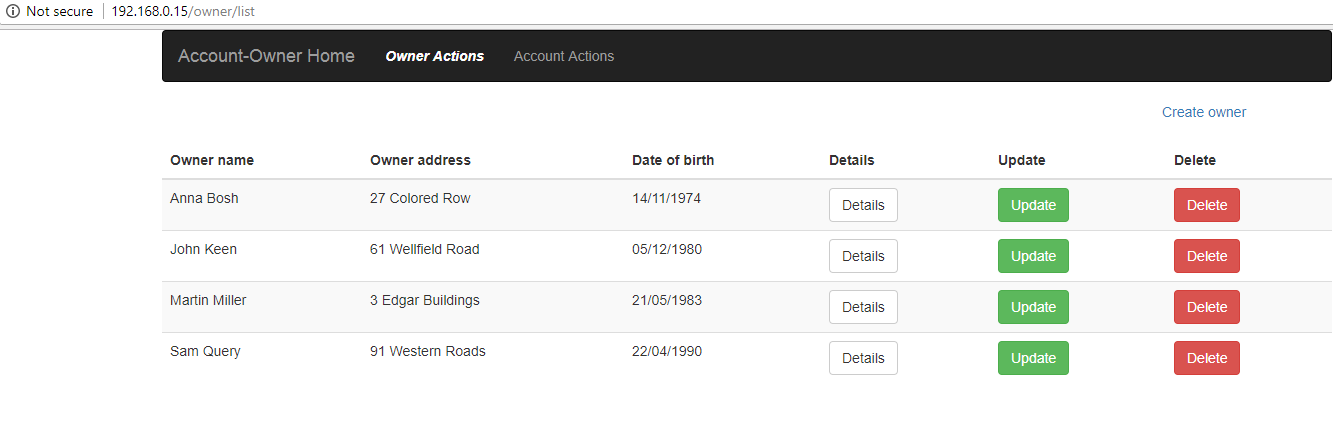
That is it, now let’s navigate to our IP address with a browser and see the application deployed on the Linux server.
Conclusion
With this post, we have wrapped up all the actions to create and deploy our AccountOwner application.
By reading this post you have learned:
- How to set up a user account on VM
- The way to install MySQL on Linux
- The way to install .NET Core on Linux
- How to set up Kestrel for automatic application start
- How to set up Nginx
Thank you for reading the post, hopefully, it was helpful to you.

