

Before we start the deployment process, we would like to point out one important thing. We should always deploy an application in the production environment as soon as we start with development. That way we are able to observe how the application behaves in a production environment from the beginning of the development process.
That leads us to the conclusion that the deployment process should not be the last step of the application’s lifecycle. We should deploy our application to the staging environment as soon as we start building it.
For the purpose of this deployment, we are going to build our Angular application for production to produce optimized static files and to combine them with the .NET Core server.
This process is pretty much the same for any client-side project you want (React, Vue.js, or any other).
So, let’s start.
For the complete navigation and all the basic instructions of the Angular series, check out: Introduction of the Angular series.
Let’s start
Building Angular Production Files
First, we need to create the production files for our Angular project by executing publish command:
ng build
This is the way to create the production files for the Angular project. But if we were to use React or Vue.js for the client-side, the command would be:npm run build:
Initial Chunk Files           | Names         |  Raw Size | Estimated Transfer Size
main.8d06eac460cfb2ee.js      | main          | 594.60 kB |               141.63 kB
styles.1167dc02a4a3b18f.css   | styles        | 175.44 kB |                19.49 kB
polyfills.e3ea17d938d5ba3a.js | polyfills     |  33.04 kB |                10.59 kB
runtime.b5d59dc9d79c9787.js   | runtime       |   1.22 kB |               655 bytes

                              | Initial Total | 804.31 kB |               172.35 kB
We can see all the published files.
Publishing .NET Core Files for the IIS Deployment
Before we publish our files to the required location, we have to modify our .NET Core app configuration a bit:
var app = builder.Build();

// Configure the HTTP request pipeline.
if (app.Environment.IsDevelopment())
    app.UseDeveloperExceptionPage();
else
{
    app.Use(async (context, next) =>
    {
        await next();
        if (context.Response.StatusCode == 404 && !Path.HasExtension(context.Request.Path.Value))
        {
            context.Request.Path = "/index.html"; await next();
        }
    });

    app.UseHsts();
}

app.UseHttpsRedirection();

app.UseStaticFiles();
If we don’t modify our configuration like this, we won’t be able to start our deployed application at all (as soon as we type the required URL address). But with it, we are safe to continue.
Angular CLI is going to create a new folder with the name “dist” inside our project and publish all the production files inside. Copy all those files from the dist/account-owner-client folder and paste them into the wwwroot folder inside the .NET Core’s main project. Now with the static files in the right place, we are going to use Visual Studio’s feature to create publish files for the entire application.
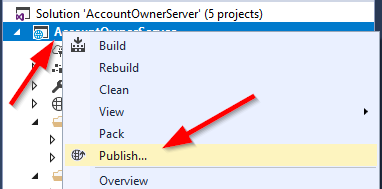
Let’s create a folder on the local machine with the name Publish. Inside that folder, we want to place all of our files for deployment. Then, right-click on the AccountOwnerServer project and click the Publish option:
In the next window, we are going to pick a Folder as the publish target, choose the place where we want to publish our files, and click Finish.
In the next window, we should just click the Publish button.
Now we have all the files in the right place.
Windows Server Hosting Bundle and the Hosts File
Prior to any further action, let’s install .NET Core Windows Server Hosting bundle (we use x64) on our system to install the .NET Core Runtime. Furthermore, with this bundle, we are installing the .NET Core Library and the ASP.NET Core Module. This installation will create a reverse proxy between IIS and the Kestrel server, which is crucial for the deployment process.
During the installation, it will try to install the Microsoft Visual C++ 2015 Redistributable, so just let it do that.
If you have a problem with missing SDK after installing Hosting Bundle, follow this solution suggested by Microsoft:
Installing the .NET Core Hosting Bundle modifies the PATH when it installs the .NET Core runtime to point to the 32-bit (x86) version of .NET Core (C:\Program Files (x86)\dotnet\). This can result in missing SDKs when the 32-bit (x86) .NET Core dotnet command is used (No .NET Core SDKs were detected). To resolve this problem, move C:\Program Files\dotnet\ to a position before C:\Program Files (x86)\dotnet\ on the PATH environment variable.
After the installation, locate the Windows hosts file on C:\Windows\System32\drivers\etc and add the a new record at the end of the file:
127.0.0.1 www.accountowner.com
Finally, save the file.
Installing IIS and the Site Deployment
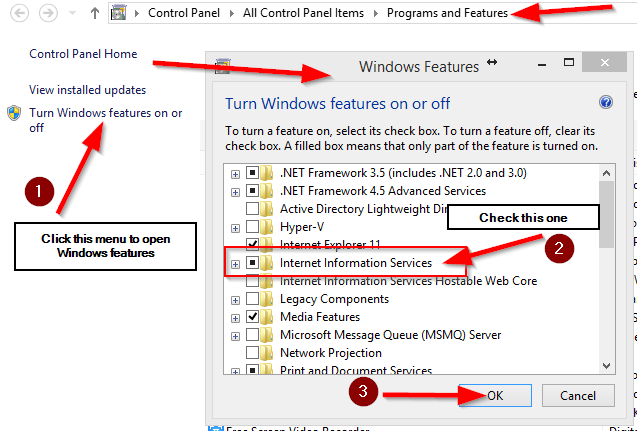
If you don’t have IIS installed on the machine, you need to install it by opening ControlPanel and then Programs and Features:
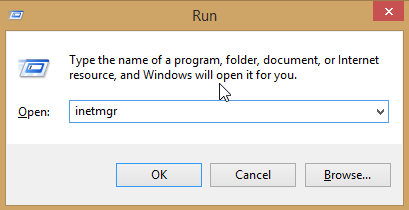
After the IIS installation finishes, open the Run window (windows key + R) and type: inetmgr to open the IIS manager:
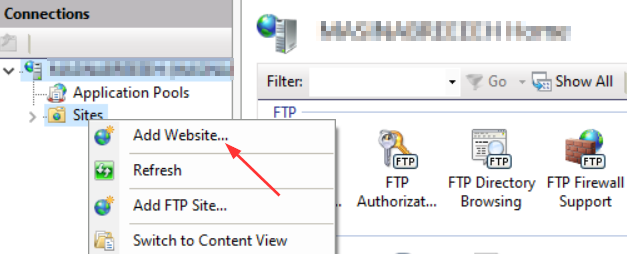
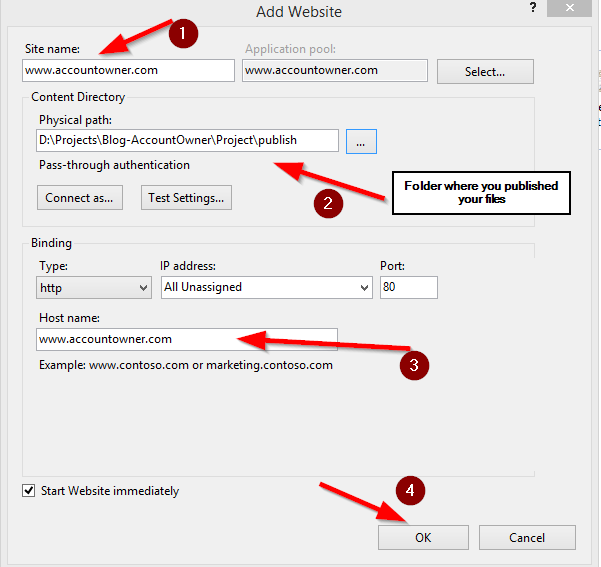
Now we can create a new website:
In the next window we need to add a name to our site and a path to the published files:
After this step, we are going to have our site inside the sites folder in the IIS Manager. Additionally, we need to set up some basic settings for our application pool:
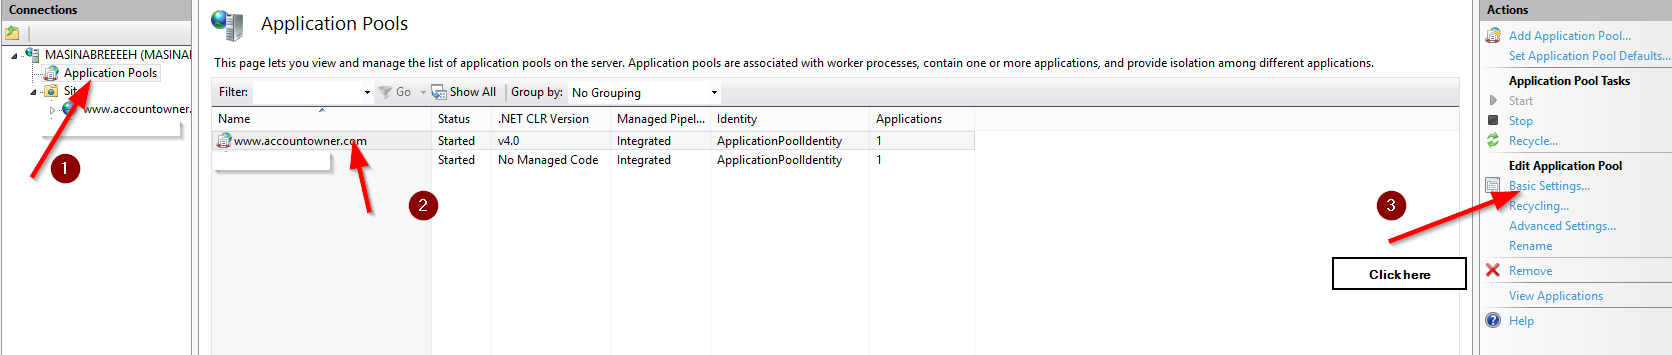
After we click on the Basic Settings link, let’s configure our application pool:
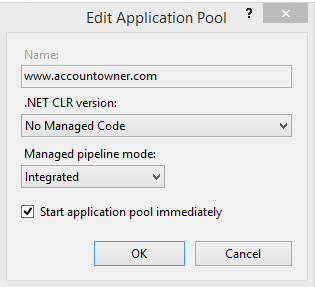
Your website and the application pool should be started automatically.
In order to deploy the application to IIS, we need to register the IIS integration in our .NET Core part of the project. We have already done that in our ServiceExtensions class, in Part 2 of this tutorial.
Excellent.
Everything is in place.
Now let’s open a browser and type http://www.accountowner.com to inspect the result:

Note: If you get an IIS error “cannot read configuration file due to insufficient permissions”, all you have to do is to add permissions to the Publish folder to the IIS_IUSRS user. To do that, we have to right-click on the Publish folder, choose properties, select the Security tab, click Edit, then Add, and add our new user with all the required permissions.
Also, if we navigate to the Owner Actions menu item, we will see all the records displayed.
Conclusion
By reading this post you have learned:
- How to build production files from the client-side application
- The way to publish files by using Visual Studio
- Which additional resources do we need for IIS deployment to work
- How to install IIS
- To deploy the application on IIS
Thank you for reading the post, hopefully, it was helpful to you.
In the next part of the series, we are going to publish this complete application to the Linux environment.

