
We’ve discussed why continuous integration is important, what makes a good CI tool and we’ve learned how to use TeamCity to build, test and deploy a “dockerized” .NET Core Application.
As Jenkins is one of the most popular CI tools on the market with over a thousand plugins, in this article, we are going to set up a CI pipeline for the same .NET Core Application.
So before we get right into it here are few highlights of what’s to come ahead.
We are going to use Pipeline as a code plugin to create our Jenkins job. The cool part of using this plugin is that our entire Jenkins job configuration can be created, updated and version-controlled along with the rest of our source code. Along with that, we will be using the magical powers of docker and docker-compose to set up our entire CI infrastructure out of thin air!
Exciting, right?
We recommend that you follow along with us and get your hands dirty as its much more fun!
Go ahead and fork the docker-series repo and switch over to docker-series-continuous-integration-jenkins-end branch.
Here’s what we are going to learn this time:
- The High-Level Flowchart of CI Pipeline Using Jenkins
- Setting up CI Infrastructure-As-Code Using Docker
- Creating a Pipeline-As-A-Code Job in Jenkins
- Conclusion
NOTE: Unlike other parts of this series, this part is using .NET Core 2.0 SDK. Make sure to change the base images according to your needs.
Let’s dive right into it.
The High-Level Flowchart of CI Pipeline Using Jenkins
Let’s see what a “very” high-level view of our Continuous Integration (CI) Pipeline using Jenkins looks like:
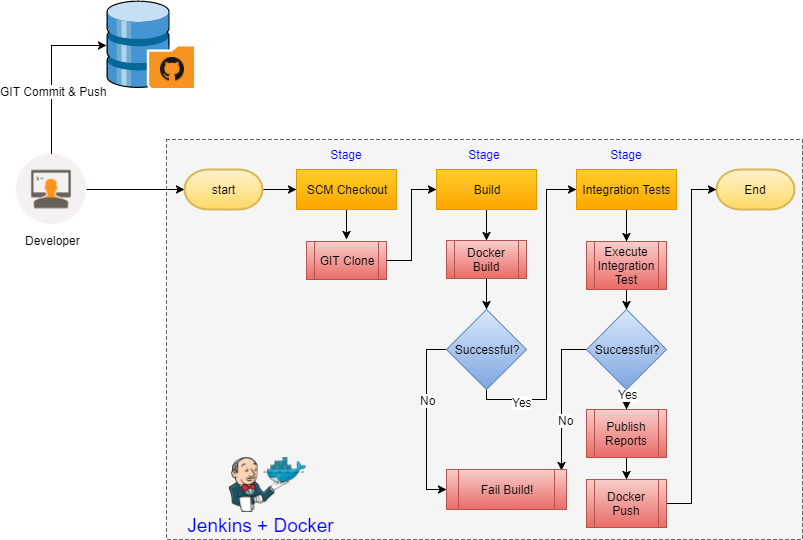
High-Level CI flow using Jenkins
The flow diagram is easy to understand however, there are few things to note,
- You may wonder as to where the code compilation and unit-test steps are? Well, the docker run step performs both the code compile and the application publish!
- The dotted line marks the boundary of our CI tool, Jenkins, in this example
- Having the docker push after a successful run of the “Integration Tests” ensures that only tested application is promoted to the next region, another very important rule of Continuous Integration (CI)
Setting up CI Infrastructure-As-Code Using Docker
Let’s get into the fun stuff now. Setting up our Jenkins infrastructure!
Although there are many things to love about the Jenkins docker image there is something that is..… Let’s say “a little inconvenient” ?
Let’s see what that little thing is.
When we run the following docker command:
docker run -d -p 8080:8080 -p 50000:50000 jenkins/jenkins
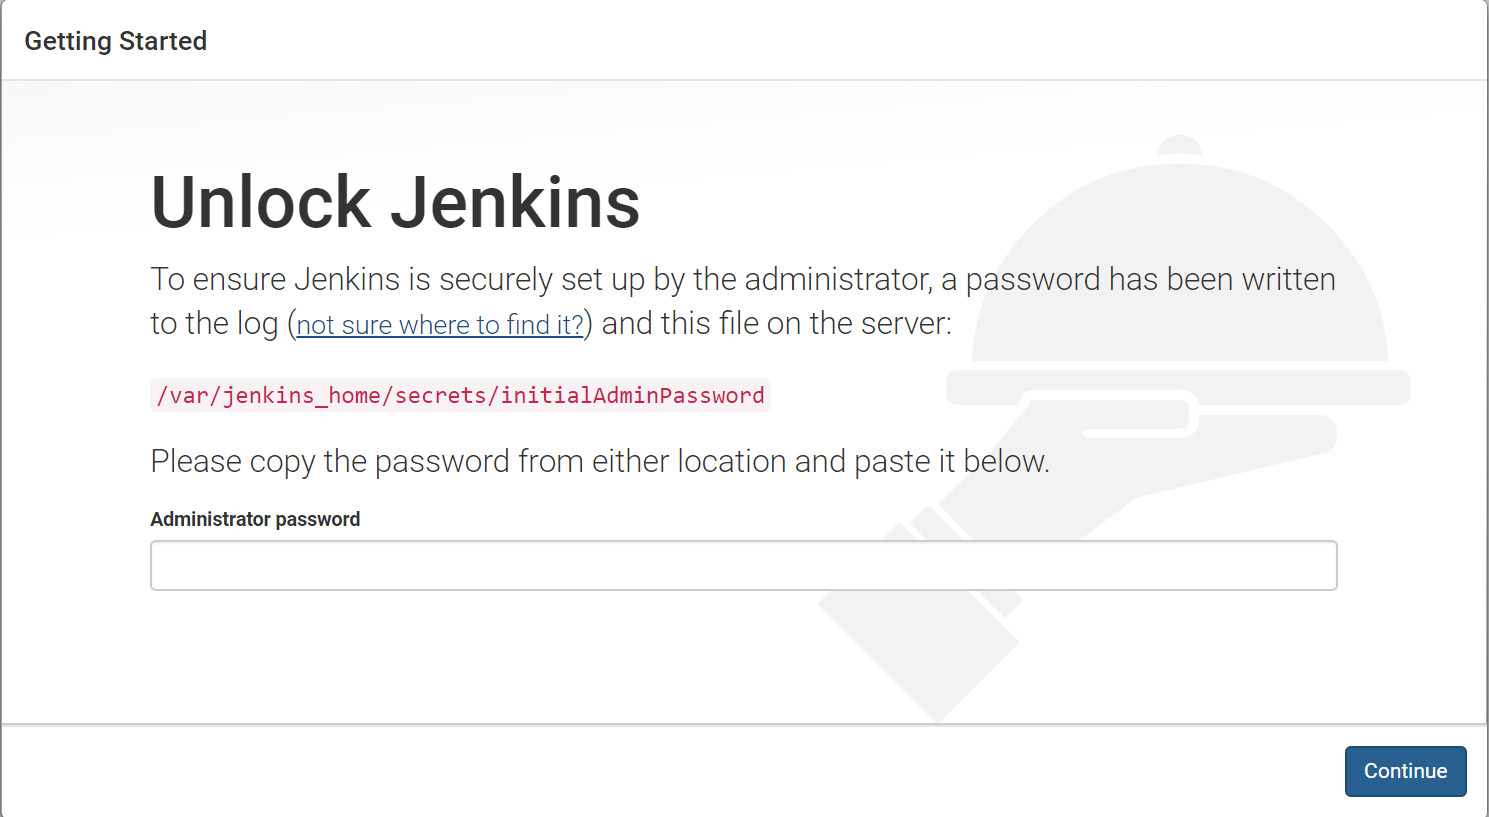
Initial Setup Wizard
Jenkins welcomes us with the “Setup Wizard Screen” which requires us to enter the “InitialAdminPassword” located under the Jenkins_Home directory defaulted to /var/jenkins_home/secrets/initialAdminPassword. The password is displayed in the start-up logs as well:
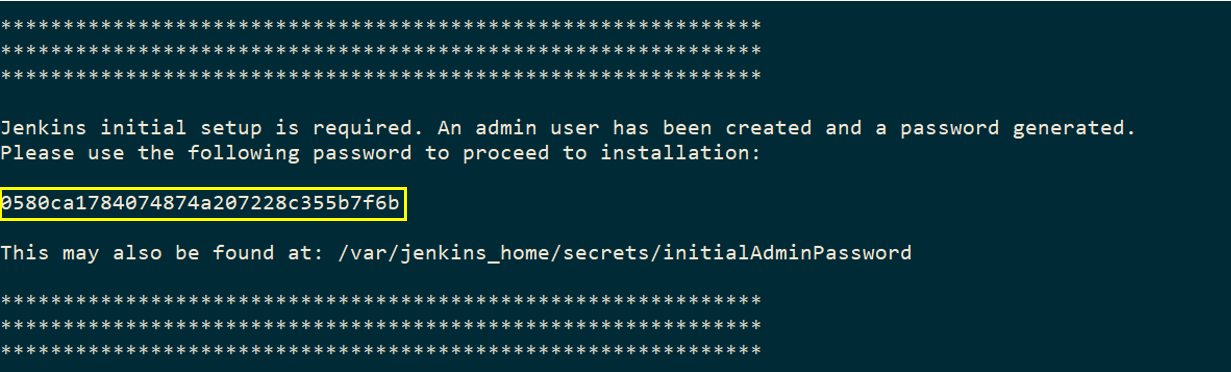
Initial Admin Password
It’s highly recommended to follow these steps to secure the Jenkins Server, however, in this example, we will be skipping this step by disabling it and creating a new user during run time.
Let’s get to it, shall we?
Setting up a Custom Docker Image for Our Jenkins Master
Let’s look at the below Dockerfile:
# Starting off with the Jenkins base Image
FROM jenkins/jenkins:latest

# Installing the plugins we need using the in-built install-plugins.sh script
RUN /usr/local/bin/install-plugins.sh git matrix-auth workflow-aggregator docker-workflow blueocean credentials-binding

# Setting up environment variables for Jenkins admin user
ENV JENKINS_USER admin
ENV JENKINS_PASS admin

# Skip the initial setup wizard
ENV JAVA_OPTS -Djenkins.install.runSetupWizard=false

# Start-up scripts to set number of executors and creating the admin user
COPY executors.groovy /usr/share/jenkins/ref/init.groovy.d/
COPY default-user.groovy /usr/share/jenkins/ref/init.groovy.d/

VOLUME /var/jenkins_home
We start with the Jenkins/Jenkins base image and install the plugins that we require.
Line# 12 is the run-time JVM parameter that needs to be passed in to disable the “Setup Wizard”
Line# 15 and 16 is to provide the container with initial start-up scripts to set the Jenkins executors and for creating the Jenkins admin user.
Let’s build this image and keep it ready. We will get back to it right after we build our agent!
docker build -t jenkins-master .
Configuring a “Dockerized” Build Agent for Compiling Our Code
As for the Jenkins build agent, we will make it “auto-attaching” to the Jenkins master using JLNP.
Here is what the agent’s Dockerfile looks like:
FROM ubuntu:16.04

# Install Docker CLI in the agent
RUN apt-get update && apt-get install -y apt-transport-https ca-certificates
RUN apt-key adv --keyserver hkp://p80.pool.sks-keyservers.net:80 --recv-keys 58118E89F3A912897C070ADBF76221572C52609D
RUN echo "deb [arch=amd64] https://download.docker.com/linux/ubuntu xenial stable" > /etc/apt/sources.list.d/docker.list
RUN apt-get update && apt-get install -y docker-ce --allow-unauthenticated

RUN apt-get update && apt-get install -y openjdk-8-jre curl python python-pip git
RUN easy_install jenkins-webapi

# Get docker-compose in the agent container
RUN curl -L https://github.com/docker/compose/releases/download/1.21.2/docker-compose-`uname -s`-`uname -m` > /usr/local/bin/docker-compose && chmod +x /usr/local/bin/docker-compose
RUN mkdir -p /home/jenkins
RUN mkdir -p /var/lib/jenkins

# Start-up script to attach the slave to the master
ADD slave.py /var/lib/jenkins/slave.py

WORKDIR /home/jenkins

ENV JENKINS_URL "http://jenkins"
ENV JENKINS_SLAVE_ADDRESS ""
ENV JENKINS_USER "admin"
ENV JENKINS_PASS "admin"
ENV SLAVE_NAME ""
ENV SLAVE_SECRET ""
ENV SLAVE_EXECUTORS "1"
ENV SLAVE_LABELS "docker"
ENV SLAVE_WORING_DIR ""
ENV CLEAN_WORKING_DIR "true"

CMD [ "python", "-u", "/var/lib/jenkins/slave.py" ]
Let’s look at some important steps in the above file,
Line# 13 takes care of downloading and installing “docker-compose” in our build agent
Line# 18 takes care of adding the magical start-up python script responsible for attaching to our master as a build agent!
Now, who likes to go through a 90 line python script? Not me ?! To make things easier let’s look at this simple flowchart to understand this!
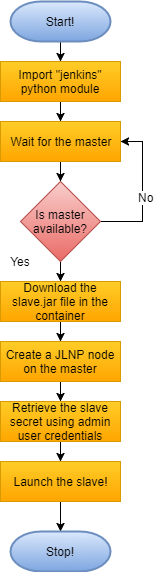
Slave start-up script
The “wait for the master” logic is going to come in very handy when we wrap the master and slave into a docker-compose file. The depends_on: tag in docker-compose doesn’t serve as well, as the jenkins master takes more time to be fully up and running than what docker-compose estimates it to be. Thus, it’s added intelligence to our slave.
Let’s build this container and warp our Jenkins infrastructure into a docker-compose file!
Building an Image and Exposing the Docker Daemon to the Agent
docker build -t jenkins-slave .
version: '3.1'
services:
    jenkins:
        container_name: jenkins
        ports:
            - '8080:8080'
            - '50000:50000'
        image: localhost:5000/jenkins
    jenkins-slave:
        container_name: jenkins-slave
        restart: always
        environment:
            - 'JENKINS_URL=http://jenkins:8080'
        image: localhost:5000/jenkins-slave
        volumes:
            - /var/run/docker.sock:/var/run/docker.sock  # Expose the docker daemon in the container
            - /home/jenkins:/home/jenkins # Avoid mysql volume mount issue
        depends_on:
            - jenkins
The Line# 17 is significant here as the mounted volume will help fix the docker in docker volume mount issue. Its covered well in our previous article here
Great!
Now its time to launch our Jenkins Infrastructure with the docker-compose up command
docker-compose -f .\docker-compose.ci.yml up
Here are the docker-compose logs for the container start-up:

docker-compose startup logs
Label 1 indicates that Jenkins container has started however, it’s not fully up and running. Thus, our wait logic coming in handy.

Agent Connected
And finally, our agent has successfully connected to our Jenkins master. We should be able to access the Jenkins web UI at port 8080 of our localhost!
And guess what, no initial startup wizard too!
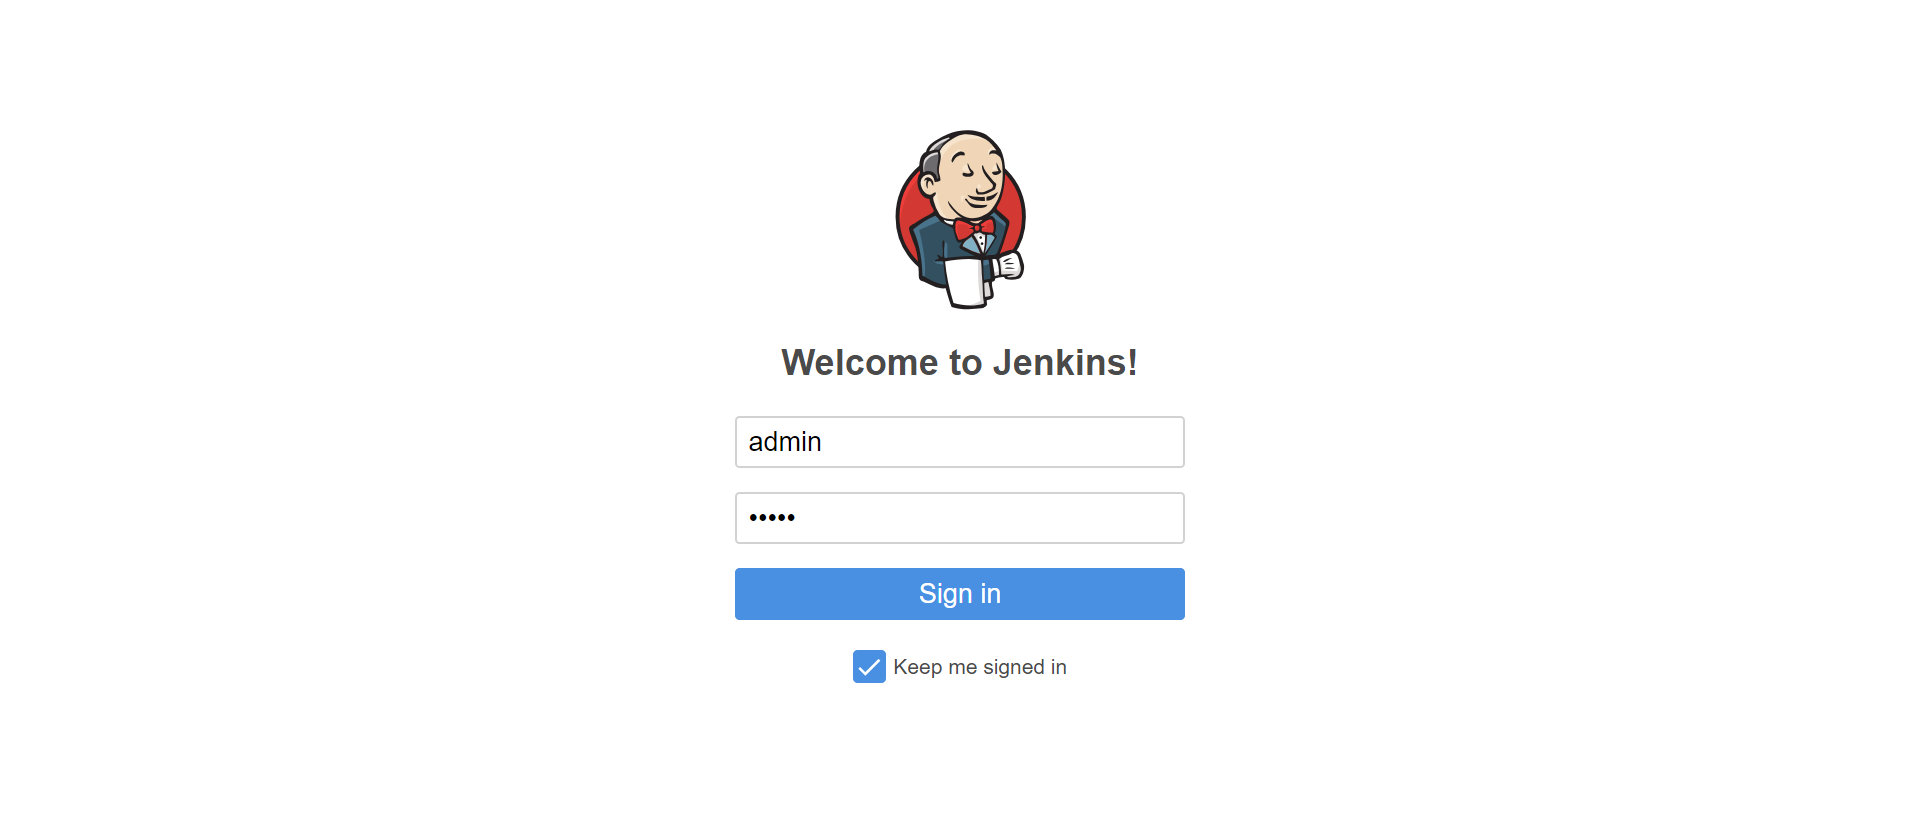
Jenkins Logon
Here, we log in with the initial admin user credentials which are admin/admin. After that Jenkins takes us to the dashboard where we can see our docker build agent ready to take on some build tasks!
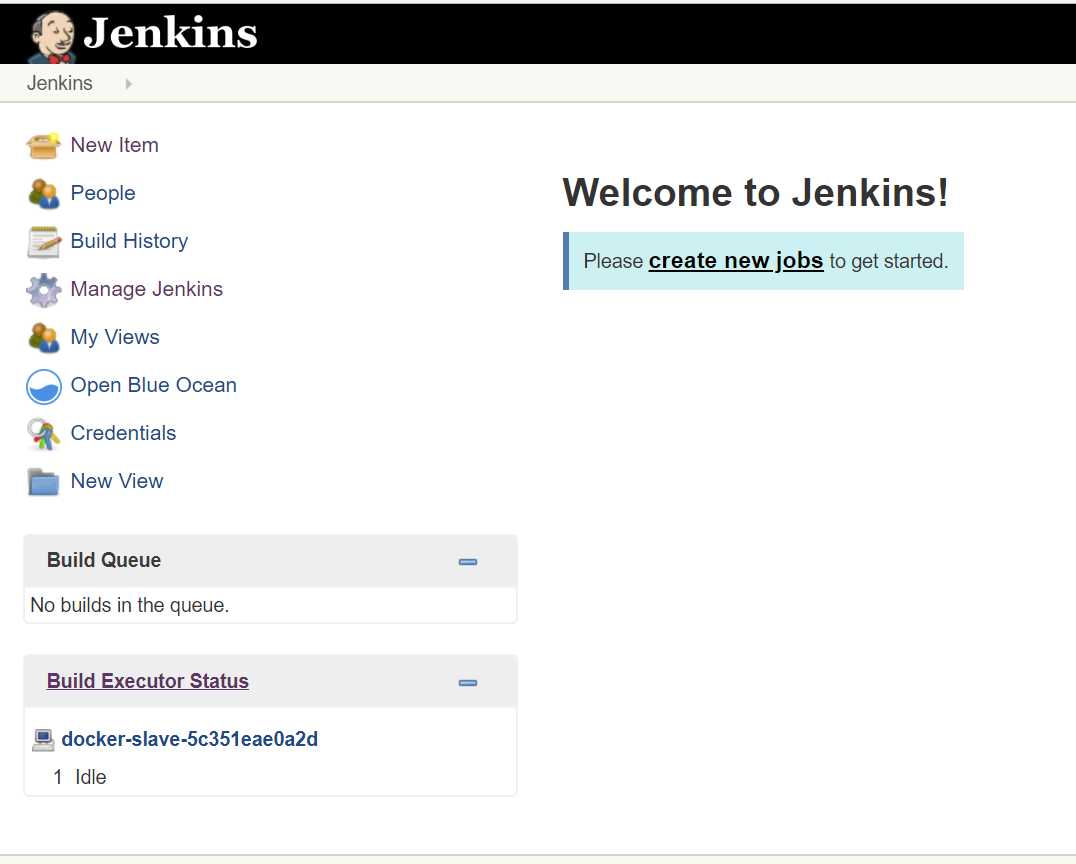
Jenkins dashboard
Creating a Pipeline-As-A-Code Job in Jenkins
Let’s start by creating a “New Item” and save it as a pipeline job as shown below:
Next step is to update the job configurations with, Job description, SCM url and the branch as shown below:

Configure Project
Writing a Jenkins File
The Jenkins file is a groovy based script that lists the different stages and steps of the Jenkins build. The benefits of this approach over using a freestyle job revolves mainly around flexibility and the ability to be able to version control.
Let’s discuss a little more about these 2 points,
Flexibility:
Usually, a freestyle job will be created to accomplish a specific task in your CI pipeline, it could be to compile our code, run integration tests or deploy our application.
However, a true CI includes all those 3 steps and chains them together in a sequential or parallel manner. This is what we call a “Pipeline”.
It is possible to achieve chaining by using freestyle jobs but at the end of the day, it’s not very convenient for a single Application. The pipeline would consist of a bunch of freestyle jobs connected in an upstream-downstream fashion. Communicating amongst these jobs for eg: sharing variables, custom statuses can be a nightmare.
All these problems go away with Pipeline Jobs!
Version Control your job configurations:
As previously mentioned, the Jenkinsfile is just a groovy script thus, it can be stored, edited and version-controlled along with the rest of the application code!
Before we go ahead and start writing our Jenkinsfile, let’s visualize the steps we need to build and publish this application:

Build Steps
The Jenkins pipeline syntax generator helps us a lot in building our Jenkinsfile line by line. Here are some of the examples:

Pipeline Syntax Generator
Here is what our Jenkinsfile looks like:
node('docker') {

    stage 'Checkout'
        checkout scm
    stage 'Build & UnitTest'
        sh "docker build -t accountownerapp:B${BUILD_NUMBER} -f Dockerfile ."
        sh "docker build -t accountownerapp:test-B${BUILD_NUMBER} -f Dockerfile.Integration ."

    stage 'Integration Test'
        sh "docker-compose -f docker-compose.integration.yml up --force-recreate --abort-on-container-exit"
        sh "docker-compose -f docker-compose.integration.yml down -v"
}
Let’s break it break it down here:
Line#1: The node keyword is used to select the build agent
Line 4, 5, 9: The stage keyword is used to define the stages in our build
Dynamic Build Versions
One of the things that we have fast-forwarded is “tokenizing” image versions with the Jenkins build number. Jenkins exposes BUILD_NUMBER as an environment variable amongst others 🙂
Each new build, auto-increments the version. To support this, the docker-compose.integration.yml file is also “tokenized” in the same fashion.
version: '3.1'

services:
  db:
    image: mysql:5.7
    environment:
      MYSQL_RANDOM_ROOT_PASSWORD: 1
      MYSQL_DATABASE: accountowner
      MYSQL_USER: dbuser
      MYSQL_PASSWORD: dbuserpassword
      DEBUG: 1
    volumes:
      - dbdata:/var/lib/mysql
      - ./_MySQL_Init_Script:/docker-entrypoint-initdb.d
    restart: always
  accountownerapp:
    depends_on:
      - db
    image: "accountownerapp:B${BUILD_NUMBER}"
    build:
      context: .
  integration:
    depends_on:
      - accountownerapp
    image: "accountownerapp:test-B${BUILD_NUMBER}"
    build:
      context: .
      dockerfile: Dockerfile.Integration
    environment:
      - TEAMCITY_PROJECT_NAME
volumes:
    dbdata:
The following link shows all the Jenkins Environment Variables:
http:///env-vars.html/
The rest of the steps are just shell scripts.
Let’s build our Jenkins job!
Building the Application
The “Build Now” link triggers a new build:
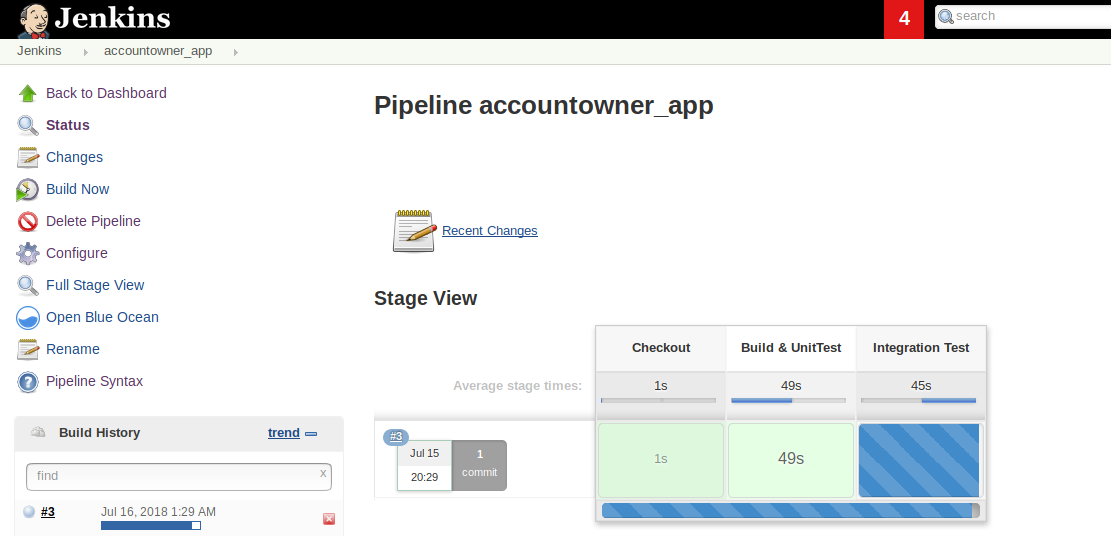
Build Progress
And here we have our first successful job! The following two snapshots show the successful job and the logs of the Build & UnitTest stage:
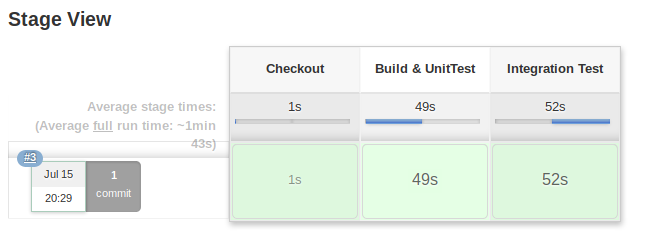
Successful Build!
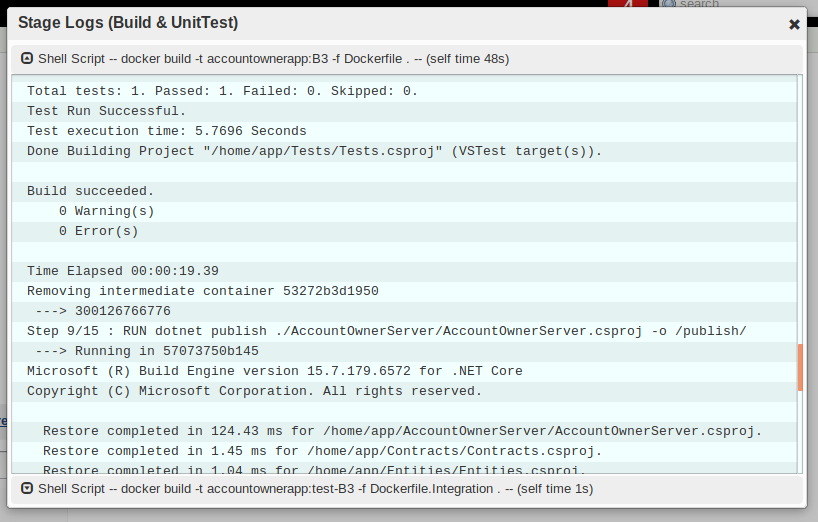
Stage Logs
Running Tests and Publishing Reports in Jenkins
We have successfully executed tests in the previous build. One of the benefits of using Jenkins is the post-build report publishing feature which helps us collate our test results and publish them as HTML reports!
We will be using the MS Test plugin to publish reports but, before that, there are two problems we need to address.
Problem 1: The container stores the results of the tests that it executes within itself.
Problem 2: Even if we publish the report, how are we going to make it available outside the application container and for Jenkins MS test plugin to read from?
Let’s tackle them one by one,
Solution 1: let’s update the Dockerfile to publish the results and store them in a folder within the container
FROM microsoft/aspnetcore-build as build-image

WORKDIR /home/app

COPY ./*.sln ./
COPY ./*/*.csproj ./
RUN for file in $(ls *.csproj); do mkdir -p ./${file%.*}/ && mv $file ./${file%.*}/; done

RUN dotnet restore

COPY . .

RUN dotnet test --verbosity=normal --results-directory /TestResults/ --logger "trx;LogFileName=test_results.xml" ./Tests/Tests.csproj

RUN dotnet publish ./AccountOwnerServer/AccountOwnerServer.csproj -o /publish/

FROM microsoft/aspnetcore

WORKDIR /publish

COPY --from=build-image /publish .

COPY --from=build-image /TestResults /TestResults

ENV TEAMCITY_PROJECT_NAME = ${TEAMCITY_PROJECT_NAME}

ENTRYPOINT ["dotnet", "AccountOwnerServer.dll"]
Line # 13 Additional command line parameters are added to publish the logs and to store it under the
/TestResults folder.
Note that the test results folder is still within the container
Solution 2: Here we will be using some docker magic to copy the results out of the container
We can effectively use the docker cp command to copy content out of the container, however, it requires the running container. Not a big deal, we can use some shell script to tackle that.
Here is the updated Jenkinsfile with a dedicated stage to Publish test results:
node('docker') {

    stage 'Checkout'
        checkout scm
    stage 'Build & UnitTest'
    sh "docker build -t accountownerapp:B${BUILD_NUMBER} -f Dockerfile ."
    sh "docker build -t accountownerapp:test-B${BUILD_NUMBER} -f Dockerfile.Integration ."

    stage 'Pusblish UT Reports'
        containerID = sh (
            script: "docker run -d accountownerapp:B${BUILD_NUMBER}",
        returnStdout: true
        ).trim()
        echo "Container ID is ==> ${containerID}"
        sh "docker cp ${containerID}:/TestResults/test_results.xml test_results.xml"
        sh "docker stop ${containerID}"
        sh "docker rm ${containerID}"
        step([$class: 'MSTestPublisher', failOnError: false, testResultsFile: 'test_results.xml'])

    stage 'Integration Test'
        sh "docker-compose -f docker-compose.integration.yml up --force-recreate --abort-on-container-exit"
        sh "docker-compose -f docker-compose.integration.yml down -v"
}
The new stage consists of shell steps to run the container, copy the test results back to the build agent and publish the report. Let’s go ahead and execute this!
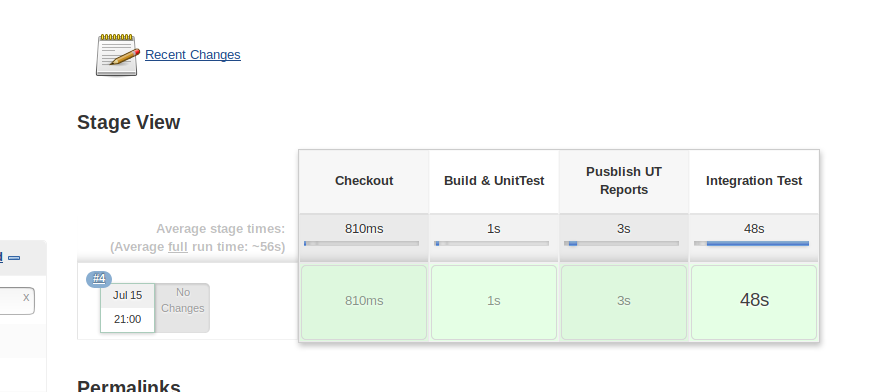
Build Status
The Jenkins build page shows the published test-results,
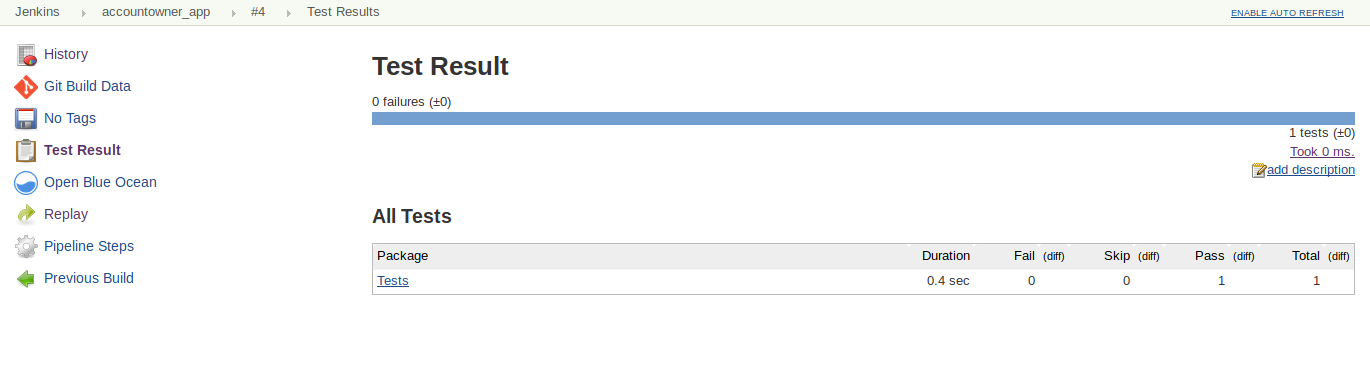
Test Results
Conclusion
Wow!
Here we are at the conclusion of our article. Integrating Jenkins is almost seamless with any existing project-lifecycle due to the abundant library of plugins and free documentation all over the internet. What we’ve seen here is just a small portion of what Jenkins has to offer as a CI tool.
In this article, we focused mostly on Jenkins as a CI tool, we haven’t changed our application code much except the docker file update to accommodate the Test Results. The Continuous Integration with TeamCity and Docker article covers the addition of integration tests in greater detail. Do read it to get the complete picture.
The entire project is available under docker-series GitHub repository under the docker-series-continuous-integration-jenkins-end branch. Feel free to go through it and ask for any help under the comments section.

