

Updated on
We have learned how to create an Azure Web App and deploy an ASP.NET Core app into it using Visual Studio in our Publishing an ASP.NET Core App to Azure App Service Using Visual Studio article. Then we looked at how to create an App Service from the Azure Portal and configure Continuous Deployment by connecting to GitHub in our Continuous Deployment from GitHub to Azure App Service article. In this article, we are going to learn about Azure API Apps.
We’ll start by learning what an Azure API app is. Then we’ll look at how to create an Azure API app from the Azure portal. After that, we’ll build an ASP.NET Core Web API app with Swagger integration and deploy it into the Azure API app. To continue the story, we’ll build an ASP.NET Core with Angular Client app that consumes the API and deploy it into an Azure Web App. After that, we’ll learn how to configure the CORS policy for our Azure API App. Finally, we’ll verify that everything works as expected inside the cloud environment.
To read more about Azure, you can visit our Azure with ASP.NET Core page, where you can find all the articles from the series.
Introduction to Azure API Apps
We can use Azure API Apps to create and deploy RESTful APIs in Azure. Additionally, it has built-in support for configuring Cross-Origin Resource Sharing (CORS). It supports RESTful APIs that are built with different programming languages such as .NET, Java, PHP, Node.js, Python, etc.
Creating an Azure API App
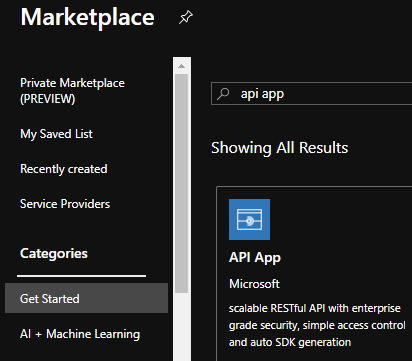
We have explained how to create an App Service from the Azure portal in the Creating an App Service section of the Continuous Deployment from GitHub article. For creating an Azure API app, we can follow the same steps, but instead of choosing the Web App, we need to choose the API App from the Azure Marketplace:
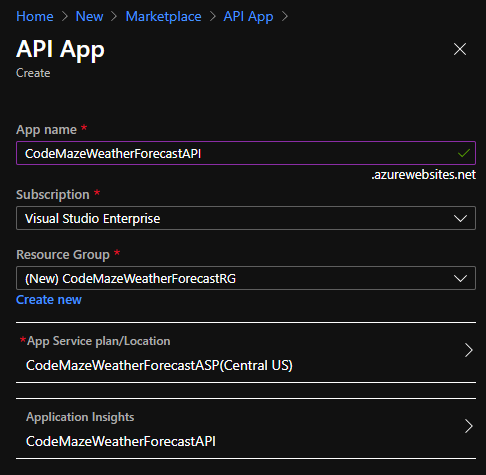
After that, we can provide some basic information about the API app and create it. These fields are similar to the ones that we provided for the Web App:
Once the API app is created, we can verify that it is up and running by navigating to its URL.
Great!
We have created our Azure API app. At this point, we are only going to see the default page that is created with an App Service. But don’t worry, we are going to create an API and deploy into it.
Remember that the API app is a type of Azure App Service with some additional capabilities for supporting RESTful APIs. Some of these additional capabilities include API management, API definition, CORS, etc:
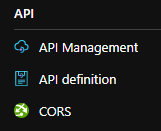
We can use API Management (APIM) to manage our services and APIs on the cloud. API Definition lets us describe our API by configuring the Swagger. By using CORS, we can specify the URLs that are allowed to make cross-origin calls to our API. We’ll learn how to configure CORS later in this article.
Building an ASP.NET Core Web API App with Swagger
The next step is building an ASP.NET Core Web API application and adding Swagger support to it.
We have explained the process of creating an ASP.NET Core Web API project in detail in our ASP.NET Core Web API – Creating a New Project article section. By following through the article, we can create a RESTful service using ASP.NET Core Web API.
After that, let’s integrate Swagger into our API project. For that, first, we need to add the NuGet package Swashbuckle.AspNetCore. Then we need to configure the Swagger middleware by making the following changes in the ConfigureServices() method of the Startup.cs class:
public void ConfigureServices(IServiceCollection services)
{
    services.AddSwaggerGen(c =>
    {
        c.SwaggerDoc("v1", new OpenApiInfo { Title = "WeatherForecast API", Version = "v1" });
    });
}
Finally, we need to enable the middleware in the Configure() method:
public void Configure(IApplicationBuilder app, IWebHostEnvironment env)
{
    app.UseSwagger();

    app.UseSwaggerUI(c =>
    {
        c.SwaggerEndpoint("/swagger/v1/swagger.json", "WeatherForecast API V1");
    });
}
To learn more about integrating Swagger into the Web API refer to the Configuring and Using Swagger UI in ASP.NET Core Web API article.
Cool!
We have created an ASP.NET Core Web API application and integrated Swagger into it. Now we are going to deploy it into the Azure API App.
Deploying the API into the Azure API App
The next step is deploying our API into the Azure API app. For that, we can follow the steps mentioned in the Publishing an ASP.NET Core App to Azure App Service Using Visual Studio article. While publishing our API, let’s choose the API App that we created earlier:
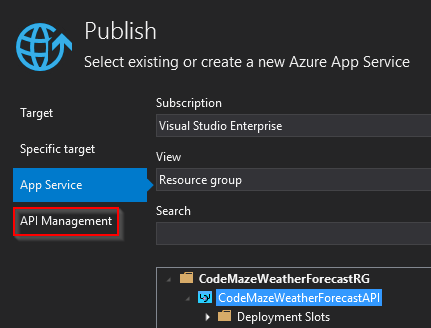
Also note that this being an API app, there is an additional option to configure API Management. That step is completely optional and let’s skip that for now.
Once the deployment is completed, we can verify that by navigating to the Azure API app URL once again:
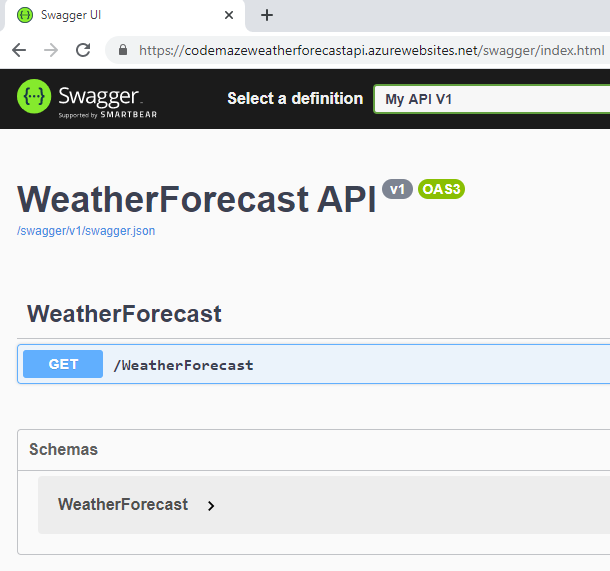
Since we have integrated Swagger, it presents a good visualization of our API by using Swagger UI.
Great!
We have deployed our API into Azure. Now let’s build a Client App and consume this API.
Creating an Angular Client App
The next step is creating a client app to consume our Azure API app. We have explained the process of creating an Angular app in detail in our Angular Project Preparation article.
In that article, we have explained the process of creating an Angular project using the Angular CLI tool. However, in this article, we are going to learn a different way of creating an Angular app. We are going to use the Angular project template with ASP.NET Core in Visual Studio.
Creating the Project
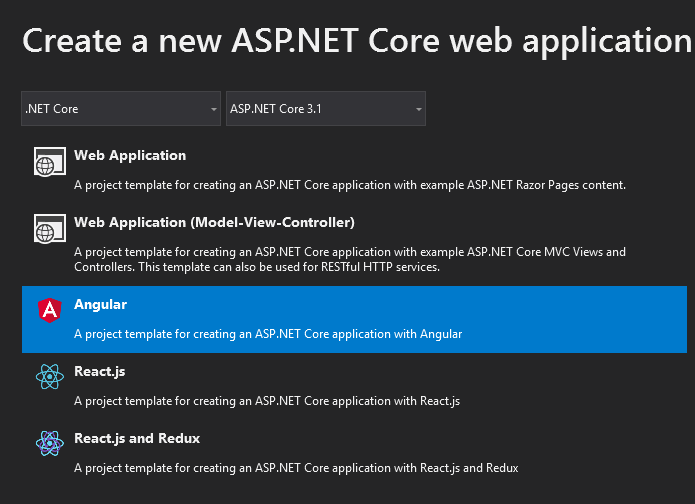
For creating an ASP.NET Core with Angular application, we need to first select the ASP.NET Core Web Application as the project template while creating a new project in Visual Studio.
Then, in the Create a new ASP.NET Core web application screen, we can choose the Angular project template:
Once the project is created, let’s examine its structure:
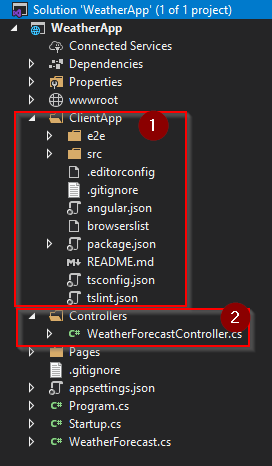
We can see that this project has two components:
- An Angular Client App.
- An API Controller
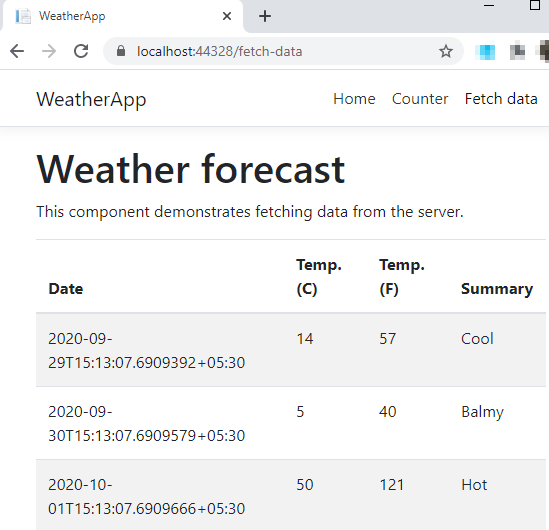
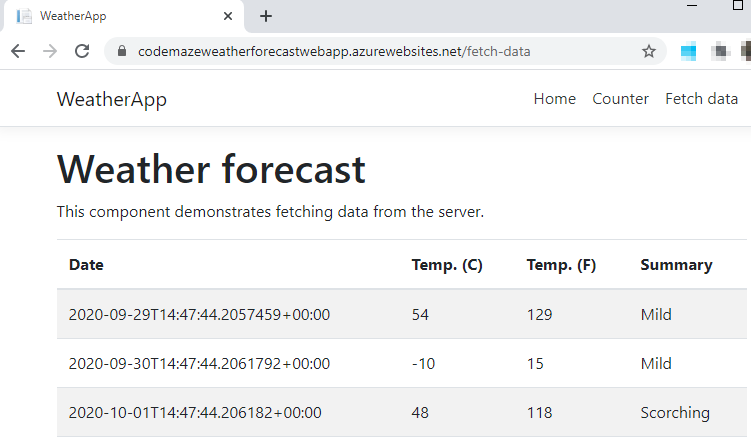
Once we run the app, we can see that there is a Fetch data menu that will fetch data from the WeatherForecastController and display it:
Cool!
Choosing an ASP.NET Core with Angular application will give us some advantages over a plain Angular CLI app especially if .NET Core and Azure are our primary development and hosting platforms:
- We can leverage the existing .NET Core capabilities like security, exception handling, logging, etc. in our client app as well.
- By using the ASP.NET Core middleware, we can have more control over our request/response pipeline and implement cross-cutting concerns using that.
- Azure App Service provides many inbuilt capabilities for an ASP.NET Core app and most of the other Azure services provide seamless integration with ASP.NET Core applications using SDKs.
In this article, we will be using only the Angular Client App component as we already have our API app in Azure. So we can delete the WeatherForecastController.cs and WeatherForecast.cs classes that are used for the API component. In the next section, we are going to modify our client app to point to the Azure API app.
Configuring the Client App to use the Azure API App
For configuring the Client App to use the API hosted in Azure, first, we need to add the API URL to the environment.ts and environment.prod.ts files:
export const environment = {
  production: true,
  API_URL: 'https://codemazeweatherforecastapi.azurewebsites.net/'
};
After that, we need to modify the getBaseUrl() method in the main.ts file to read the API URL from the environment file:
export function getBaseUrl() {
  return environment.API_URL;
}
Great!
Our Client App is now configured to connect to the Azure API app to fetch data.
Deploying the Client App
The next step is deploying our Client App into an Azure Web App. Since our client app is an ASP.NET Core web app, we can follow the steps that we described in the Publishing an ASP.NET Core App to Azure App Service Using Visual Studio article to deploy this app.
We can reuse the same Resource Group and App Service Plan that we created for the Azure API app:
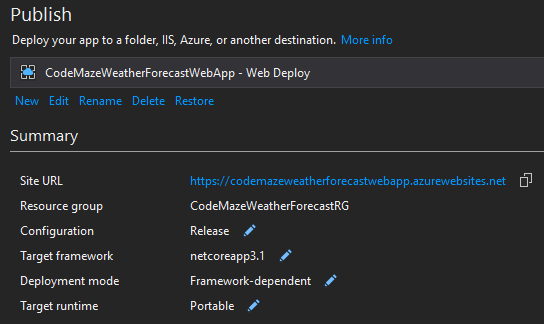
Once the deployment is completed, let’s navigate to the web app URL:
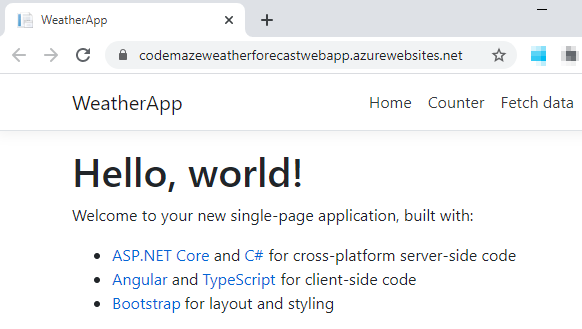
On clicking the Fetch data menu, we can see that it fails to load the data. Let’s inspect the error message in the console:
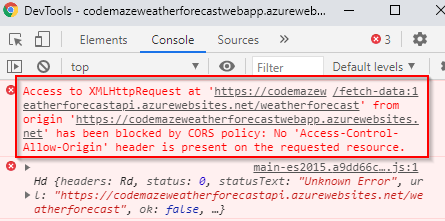
The error message indicates that the request made by our client app to the API app was blocked by the CORS policy. We have explained about CORS and how to enable that in an ASP.NET Core application in our How to Enable CORS in ASP.NET Core By Example article. That article will provide a good overview of CORS. However, in this case, since our API is hosted inside an Azure API app, we also have an option to configure the CORS policy from Azure. Let’s see how to do that.
Configuring CORS in the Azure API App
We can configure the CORS policy by navigating to the CORS menu under the API section of the Azure API Apps. Let’s add the URL of the Client App to the list of allowed origins:
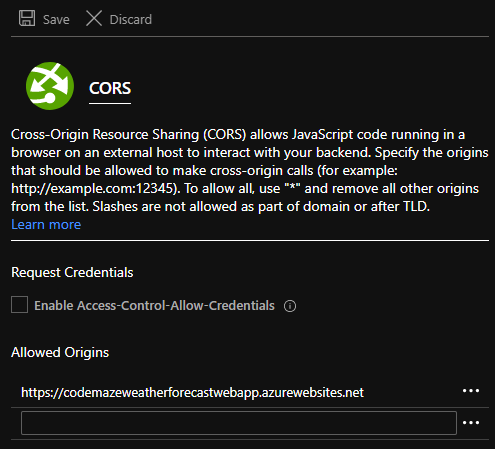
Once this change is made, the client app will be able to access the API and fetch data:
Excellent!
We have successfully configured the CORS policy for our Azure API App.
This diagram explains the deployment architecture for the scenario that we have implemented in this article:
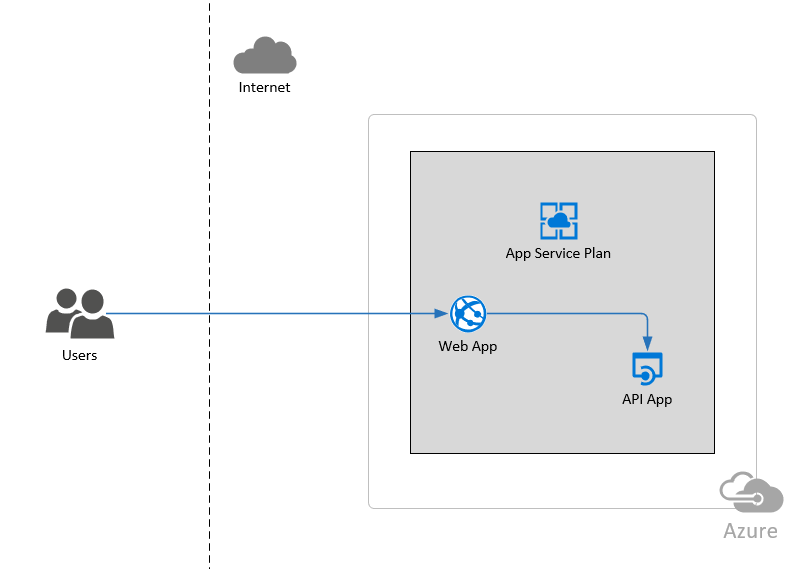
In Azure, we have a client app that is built with ASP.NET Core + Angular and hosted inside a Web App. The Web App communicates with an API App that is an ASP.NET Core Web API application. Both these apps are part of the same Resource Group. We can also see that they share the same App Service Plan.
Conclusion
We have learned the following topics as part of this article:
- What an Azure API App is
- Creating an Azure API Apps from the Azure Portal
- Deploying an ASP.NET Core Web API into Azure API App
- Creating a Client App using ASP.NET Core with Angular template that consumes an Azure API app
- Configuring CORS in the Azure API Apps

Everything went perfectly, Thank you very much
You are welcome Juan. Thanks for reading.