

In this article, we are going to look at how to implement swagger authorization in an ASP.Net Core Web API application.
We are only going to cover how to set up swagger to accept JSON Web Token (JWT) and how to utilize the token generated to access restricted resources in Swagger. That said, if you are not familiar with the JWT authentication, you can check out our articles ASP.NET Core Authentication One and ASP.NET Core Authentication Two for more information.
Additionally, for more information on configuring Swagger, you can visit our article Configuring and Using Swagger UI in ASP.NET Core.
Using the articles mentioned above as a guide, we have prepared a new ASP.NET Web API project and integrated swagger and JWT into it.
Overview of the ASP.NET Core Web API Project
Our app is going to be a straightforward product inventory.
Let’s take a look at the Product model:
public class Product
{
    public int Id { get; set; }
    public string? Name { get; set; }
}
Next, we can find a ProductStore class that acts as a mock database:
public static class ProductStore
{
    private static Product[] products = new Product[]
    {
        new Product { Id = 1, Name = "Rubber duck"},
        new Product { Id = 2, Name = "Flip flop"},
        new Product { Id = 3, Name = "Magic Wand"},
        new Product { Id = 4, Name = "Glitter pen"}
    };

    public static IEnumerable<Product> GetProducts()
    {
        return products;
    }

    public static Product? GetProduct(int id)
    {
        foreach (var product in products)
        {
            if (product.Id == id)
                return product;
        }
        return null;
    }
}
Following that, we have the ProductController that holds two action methods GetAllProducts and GetAProduct:
public class ProductController : ControllerBase
{
    [HttpGet]
    public IActionResult GetAllProducts()
    {
        var products = ProductStore.GetProducts();
        return Ok(products);
    }

    [HttpGet("{id}")]
    public IActionResult GetAProduct(int id)
    {
        var product = ProductStore.GetProduct(id);

        if (product is null)
            return NotFound();

        return Ok(product);
    }
}
Finally, we have the AuthController that contains the Login action method:
public class AuthController : ControllerBase
{
    [HttpPost, Route("login")]
    public IActionResult Login(LoginModel model)
    {
        if (model == null)
        {
            return BadRequest("Invalid client request");
        }

        if (model.UserName == "johndoe" && model.Password == "johndoe2410")
        {
            var secretKey = new SymmetricSecurityKey(Encoding.UTF8.GetBytes("superSecretKey@2410"));
            var signinCredentials = new SigningCredentials(secretKey, SecurityAlgorithms.HmacSha256);

            var tokenOptions = new JwtSecurityToken(
                issuer: "CodeMaze",
                audience: "https://localhost:5001",
                claims: new List<Claim>(),
                expires: DateTime.Now.AddMinutes(5),
                signingCredentials: signinCredentials
            );

            var tokenString = new JwtSecurityTokenHandler().WriteToken(tokenOptions);
            return Ok(new { Token = tokenString });
        }
        else
        {
            return Unauthorized();
        }
    }
}
For the sake of keeping things simple, in the code above we’ve hardcoded the expected login credentials and security key.
Adding the Authorize Attribute to an Action Method
We use the Authorize attribute when we want to restrict access to an action method and ensure that only authenticated users can access it.
So, let’s decorate our GetAllProducts action method with the Authorize attribute:
[HttpGet, Authorize]
public IActionResult GetAllProducts()
{
    var products = ProductStore.GetProducts();
    return Ok(products);
}
After that, we can run the project and log in, and we are going to get a token:
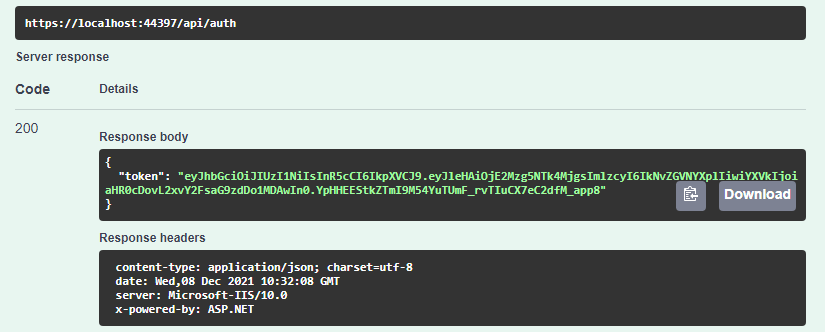
But when we try to access the GetAllProducts endpoint, we still get a 401 UnAuthorized error since we need to supply the generated bearer token to swagger to gain access.
So, let’s see how we can configure Swagger to accept bearer tokens and enable authorization with Swagger.
Configuring Authorization with Swagger – Accepting Bearer Token
To set up authorization with Swagger, we have to modify our Program.cs class, under the Swagger configuration:
builder.Services.AddSwaggerGen(opt =>
{
    opt.SwaggerDoc("v1", new OpenApiInfo { Title = "MyAPI", Version = "v1" });
    opt.AddSecurityDefinition("Bearer", new OpenApiSecurityScheme
    {
        In = ParameterLocation.Header,
        Description = "Please enter token",
        Name = "Authorization",
        Type = SecuritySchemeType.Http,
        BearerFormat = "JWT",
        Scheme = "bearer"
    });

    opt.AddSecurityRequirement(new OpenApiSecurityRequirement
    {
        {
            new OpenApiSecurityScheme
            {
                Reference = new OpenApiReference
                {
                    Type=ReferenceType.SecurityScheme,
                    Id="Bearer"
                }
            },
            new string[]{}
        }
    });
});
In the code, we added two extra SwaggerGenOptions. The AddSecurityDefinition action method tells swagger the type of protection we want for our API. It takes in the name of the security scheme and a security scheme definition. The AddSecurityRequirement action method adds the global security requirement.
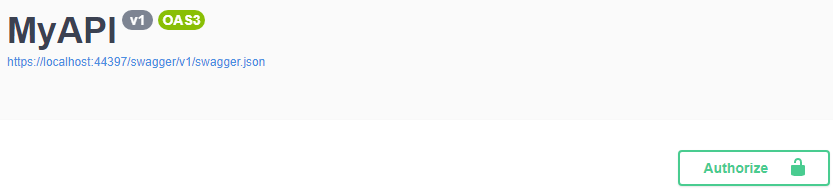
Now when we run our app, we see an authorize button at the right-hand corner of our swagger user interface:
Let’s test this out.
Using Authorization with Swagger to Access Protected Resources
We’ll log in once again to get our bearer token.
After that, we are going to click the Authorize button, which is going to bring up the authorization modal:
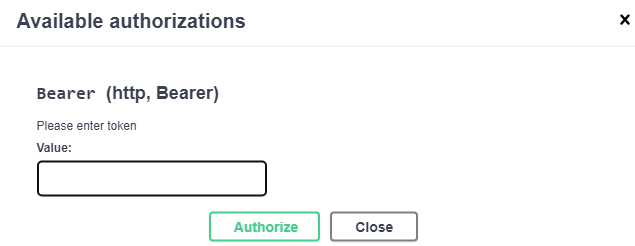
Let’s paste the generated token into the authorization modal’s input field, and then click Authorize and Close to dismiss the modal.
Now when we try to access the GetAllProducts endpoint we get a list of products from the ProductStore.
Using the generated token, we are able to get the authorization we need to access the protected GetAllProducts endpoint.
Conclusion
In this article, we have learned about:
- Adding authorize attribute to our endpoint
- How to configure the swagger user interface to accept bearer token
- How to access protected resources by passing JWT to Swagger

This works great when testing locally, but the addition of AddSecurityDefinition and AddSecurityRequirement result in an error when attempting to publish/deploy to Azure app services.
Publish has encountered an error.
Failed to update your API in Azure (Status code: BadRequest).
To be honest here, I didn’t use it with Azure deployment, but fid use it with IIS publish, and everything works perfectly. So, I am not sure what causes your error.
Thanks for the quick response. If I figure out what is wrong with my deployment, I’ll update here.
Superb article, thank you.
Thank you too, Daniel, for reading and commenting.
Thank you! that was exactly what i needed. Works like a charm
You are most welcome David. I’m glad the article helped you.
After following the steps, I’m receiving the above error
Hi there. Please download our source code. You will find an entire implementation there. This is the article about swagger authorization and thus we didn’t show the complete JWT implementation.
The swagger update is working.
To make the web api authorization work, I had to add in ‘ConfigureServices’ :
services.AddAuthentication(JwtBearerDefaults.AuthenticationScheme).AddJwtBearer(SetupJwtBearerOptions());
private Action<JwtBearerOptions> SetupJwtBearerOptions()
{
return options =>
{
options.TokenValidationParameters = new TokenValidationParameters
{
IssuerSigningKey = new SymmetricSecurityKey(Encoding.UTF8.GetBytes(“superSecretKey”)),
ValidateAudience = false,
ValidateIssuer = true,
ValidIssuer = “Someone”,
RequireExpirationTime = true,
ValidateLifetime = true,
// ValidAudience = “Audience”,
};
};
}
And in ‘Cnfigure’ :
app.UseAuthorization();
Hello RiM. If you inspect our source code (the link is at the start of the article) you can see that we have all of that already implemented. Just our version is .NET 6 so we don’t have ConfigureServices and Configure methods. We didn’t want to add complete implementation in the article since the topic is not about how to configure JWT but how to configure Swagger authorization, but as I said, our source code has the complete implementation.
Yes, you’re right. Sorry for reading over the start of the article.
The article is good work anyway.
This is insightful
Thank you.