

Authentication is inherently a complex topic to understand and implement in our applications. So, generally, we avoid writing the logic from scratch and opt for an off-the-shelf solution. Firebase, the cloud solution from Google, provides an authentication service that allows us to sign users up for our application seamlessly.
If you’d like to learn more about Firebase, please take a look at our awesome article Introduction to Firebase in .NET.
With that, let’s dive in!
Create Firebase Project
To start, let’s create a new .NET web application with the Visual Studio Project Wizard. Optionally, we can use the dotnet new webapp command.
Also, we need a Firebase project to interact with the Authentication service. Navigating to the Firebase console, we can create a new project.
Let’s retrieve the Project ID by navigating to Project settings from the Firebase console, where we’ll see the details of the project. Let’s make a note of this project ID for use later on.
While we’re in the Firebase console, we can create a Service account, which allows our applications to authenticate with Firebase. This is not for configuring user authentication.
Firebase automatically creates a service account for us when we create a project, so to retrieve the credentials, we navigate to Project settings, then Service accounts, and generate a new private key:
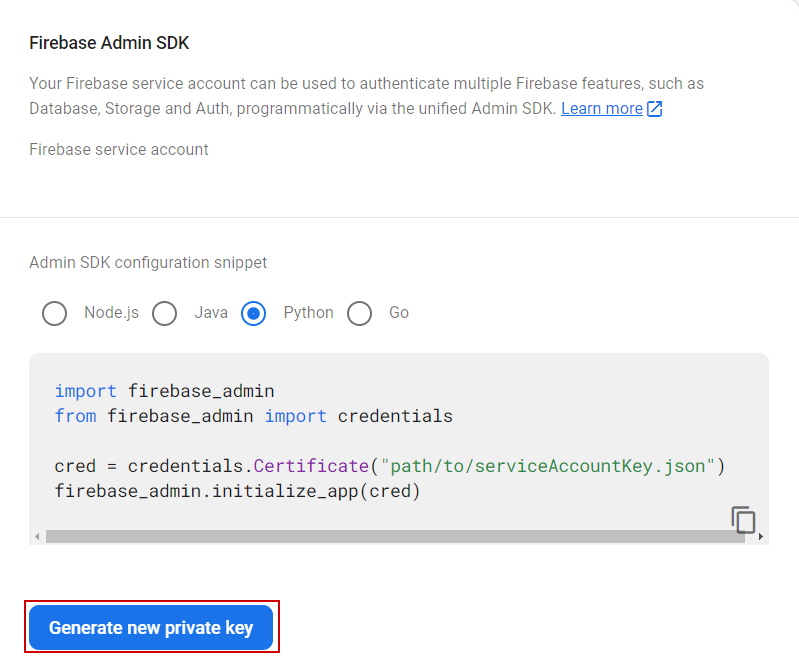
This will download a JSON file with our service account credentials.
Next, in our Program class, let’s configure the authentication for our application:
var builder = WebApplication.CreateBuilder(args);

Environment.SetEnvironmentVariable("GOOGLE_APPLICATION_CREDENTIALS", @"<PATH_TO_CREDENTIALS_FILE");
builder.Services.AddSingleton(FirebaseApp.Create());

var app = builder.Build();
Here, we use the SetEnvironmentVariable() method to set up our authentication. Note that we are using the @ symbol, which allows us to define a verbatim string literal for our file path, avoiding the need for any character escaping.
Now we’re ready to add user authentication with Firebase to our application.
How to Add Firebase Authentication in .NET?
Although the Authentication service is heavily focused on client-side devices such as Android and iOS, we do have the functionality to interact with users on the server side, such as creating new users and generating login tokens.
Google exposes their login interactions via an API, but to avoid manually implementing all this logic, let’s install a very useful open-source package FirebaseAuthentication.net, along with the FirebaseAdmin package:
Install-Package FirebaseAuthentication.net
Install-Package FirebaseAdmin
Next, let’s create a service to handle the actions we’ll require for a user to authenticate with our application:
public class FirebaseAuthService : IFirebaseAuthService
{
    private readonly FirebaseAuthClient _firebaseAuth;

    public FirebaseAuthService(FirebaseAuthClient firebaseAuth)
    {
        _firebaseAuth = firebaseAuth;
    }

    public async Task<string?> SignUp(string email, string password)
    {
        var userCredentials = await _firebaseAuth.CreateUserWithEmailAndPasswordAsync(email, password);

        return userCredentials is null ? null : await userCredentials.User.GetIdTokenAsync();
    }

    public async Task<string?> Login(string email, string password)
    {
        var userCredentials = await _firebaseAuth.SignInWithEmailAndPasswordAsync(email, password);

        return userCredentials is null ? null : await userCredentials.User.GetIdTokenAsync();
    }

    public void SignOut() => _firebaseAuth.SignOut();
}
To start, we inject a FirebaseAuthClient from the package we previously installed.
Then, we define three methods, SignUp(),Login() and SignOut(). The first two methods both take an email and a password as the parameters. The SignUp() method makes a call to CreateUserWithEmailAndPasswordAsync() to create a new user and then uses the GetIdTokenAsync() method to return a JWT.
Similarly, the Login() method makes a call to SignInWithEmailAndPasswordAsync() and also returns a JWT if the user provides the correct login details.
Our SignOut() method simply calls the SignOut() method of the FirebaseAuthClient.
Next, let’s create the pages to allow users to sign up and log in.
Create SignUp Page
Before we create our sign-up page, let’s create a DTO (data transfer object) to store our new user details:
public class SignUpUserDto
{
    [Required, EmailAddress]
    public required string Email { get; set; }

    [Required]
    public required string Password { get; set; }

    [Required, Compare(nameof(Password), ErrorMessage = "The passwords didn't match.")]
    public required string ConfirmPassword { get; set; }
}
Here, we define three properties, Email, Password and ConfirmPassword, providing each with some validation attributes to ensure we have a valid user model.
Now, let’s use this DTO in our sign-up page:
@page
@model FirebaseAuthentication.Pages.Auth.SignUpModel
@{
    ViewData["Title"] = "Sign Up";
}

<h2>Sign Up</h2>

<div class="row">
    <div class="col-md-4">
        <form method="post" enctype="multipart/form-data">
            <div class="form-group mb-2">
                <label asp-for="@Model.UserDto.Email" class="control-label"></label>
                <input asp-for="@Model.UserDto.Email" class="form-control" type="email" />
                <span asp-validation-for="@Model.UserDto.Email" class="text-danger"></span>
            </div>
            <div class="form-group mb-2">
                <label asp-for="@Model.UserDto.Password" class="control-label"></label>
                <input asp-for="@Model.UserDto.Password" class="form-control" type="password" />
                <span asp-validation-for="@Model.UserDto.Password" class="text-danger"></span>
            </div>
            <div class="form-group mb-2">
                <label asp-for="@Model.UserDto.ConfirmPassword" class="control-label"></label>
                <input asp-for="@Model.UserDto.ConfirmPassword" class="form-control" type="password" />
                <span asp-validation-for="@Model.UserDto.ConfirmPassword" class="text-danger"></span>
            </div>
            <div class="form-group">
                <input type="submit" value="Create" class="btn btn-primary" />
            </div>
        </form>
    </div>
</div>
Here, we create a basic table, asking for an email and password, as well as a confirm password field.
In our code-behind, we handle the form submission in the OnPostAsync() method:
public class SignUpModel : PageModel
{
    private readonly IFirebaseAuthService _authService;

    [BindProperty]
    public SignUpUserDto UserDto { get; set; }

    public SignUpModel(IFirebaseAuthService authService)
    {
        _authService = authService;
    }

    public async Task<IActionResult> OnPostAsync()
    {
        if (!ModelState.IsValid)
        {
            return Page();
        }

        var token = await _authService.SignUp(UserDto.Email, UserDto.Password);

        if (token is not null)
        {
            HttpContext.Session.SetString("token", token);
            return RedirectToPage("/AuthenticatedPage");
        }

        return BadRequest();
    }
}
First, we inject in the FirebaseAuthService we created earlier and use our SignUpUserDto object to bind to the email and password submitted in the form.
In the OnPostAsync() method, first we check if the model is valid. If it is, we call the SignUp() method, which if we retrieve a valid token, set the token key in the HTTP session, and redirect to an authenticated page, which we’ll create soon.
Create Login Page
Next, before we implement our login page, we need another simple DTO:
public class UserDto
{
    [Required, EmailAddress]
    public required string Email { get; set; }

    [Required]
    public required string Password { get; set; }
}
Unlike our sign-up DTO, we only need a single property for the user password.
We’ll use this to create our login page:
@page
@model FirebaseAuthentication.Pages.Auth.LoginModel
@{
}

<h2>Login</h2>

<div class="row">
    <div class="col-md-4">
        <form method="post" enctype="multipart/form-data">
            <div class="form-group mb-2">
                <label asp-for="@Model.UserDto.Email" class="control-label"></label>
                <input asp-for="@Model.UserDto.Email" class="form-control" type="email"/>
                <span asp-validation-for="@Model.UserDto.Email" class="text-danger"></span>
            </div>
            <div class="form-group mb-2">
                <label asp-for="@Model.UserDto.Password" class="control-label"></label>
                <input asp-for="@Model.UserDto.Password" class="form-control" type="password"/>
                <span asp-validation-for="@Model.UserDto.Password" class="text-danger"></span>
            </div>
            <div class="form-group">
                <input type="submit" value="Login" class="btn btn-primary" />
            </div>
        </form>
    </div>
</div>
Our login page is very similar to our SignUp page. However, we don’t need the user to confirm their password before submitting the form.
In our code behind, let’s wire up the login method:
public class LoginModel : PageModel
{
    private readonly IFirebaseAuthService _authService;

    [BindProperty]
    public UserDto UserDto { get; set; }

    public LoginModel(IFirebaseAuthService authService)
    {
        _authService = authService;
    }

    public async Task<IActionResult> OnPostAsync()
    {
       if (!ModelState.IsValid)
       {
            return Page();
       }

       var token = await _authService.Login(UserDto.Email, UserDto.Password);

       if (token is not null)
       {
           HttpContext.Session.SetString("token", token);
           return RedirectToPage("/AuthenticatedPage");
       }

       return BadRequest();
    }
}
First, we inject our IFirebaseAuthService interface into the constructor. Then, in the OnPostAsync() method, first we validate the model, and then we call the Login() method, setting the token session value if the login is successful.
Finally, we need to define some custom middleware logic in our Program class to ensure the token session variable is available:
var builder = WebApplication.CreateBuilder(args);

// code removed for brevity

builder.Services.AddSession();

var app = builder.Build();

app.UseSession();
app.Use(async (context, next) =>
{
    var token = context.Session.GetString("token");
    if (!string.IsNullOrEmpty(token))
    {
        context.Request.Headers.Add("Authorization", "Bearer " + token);
    }
    await next();
});
Here, we call the AddSession() method to ensure our application has access to browser session storage. After we build the app, we call the UseSession() method and the Use() method to retrieve the token variable from session storage and add it to the Authorization header if it exists.
Implement Logout Functionality
The final piece of authentication logic we need to wire out is our logout functionality.
So, let’s add a new page to handle this:
@page
@model FirebaseAuthentication.Pages.Auth.LogoutModel
@{
}

<header>
    <h1>Logout</h1>
    <p>You have successfully logged out of the application.</p>
</header>
In our code behind, we need to handle the logout logic:
public class LogoutModel : PageModel
{
    private readonly IFirebaseAuthService _firebaseAuthService;

    public LogoutModel(IFirebaseAuthService firebaseAuthService)
    {
        _firebaseAuthService = firebaseAuthService;
    }

    public IActionResult OnGet()
    {
        _firebaseAuthService.SignOut();

        HttpContext.Session.Remove("token");

        return Page();
    }
}
First, we inject our IFirebaseAuthService interface. Then, in the OnGet() method, we call the SignOut() method which handles the Firebase signout. Also, we must remember to remove the token from the current session.
With this done, we can add our authentication pages to our _Layout.cshtml:
<ul class="navbar-nav">
@if (!User.Identity.IsAuthenticated)
{
    <li class="nav-item">
        <a class="nav-link text-dark" asp-area="" asp-page="/auth/login">Login</a>
    </li>
    <li class="nav-item">
        <a class="nav-link text-dark" asp-area="" asp-page="/auth/signup">Signup</a>
    </li>
}
else
{
    <li class ="nav-item">
        <a class="nav-link text-dark" asp-area="" asp-page="/auth/logout">Logout</a>
    </li>
}
</ul>
In the navbar element, first we check if the current User is authenticated. If they aren’t, we show the Login/Signup links, otherwise, we show the Logout link.
Create Authenticated Pages
With our SignUp,Login and Logout pages created, we need a page that is only accessible if the user has a valid token, meaning they have successfully authorized with Firebase. This will allow us to test our authentication properly.
Let’s create a simple AuthenticatedPage that we’ll redirect to when our user successfully signs up or logs in:
<h1>Authenticated Page</h1>
<p>You have successfully authenticated with Firebase Authentication. Yay!</p>
In a similar vein, let’s create an UnauthenticatedPage to handle scenarios where the user attempts to access AuthenticatedPage when they are not successfully authenticated:
<h1>Unauthenticated Page</h1>
<p>Uh oh! It looks like you aren't authenticated with Firebase.</p>
Now, we can to wire these up in the Program class:
var builder = WebApplication.CreateBuilder(args);

builder.Services.AddRazorPages(options =>
{
    options.Conventions.AuthorizePage("/Auth/AuthenticatedPage");
});

// code removed for brevity

var app = builder.Build();

// code removed for brevity

app.UseStatusCodePages(async contextAccessor =>
{
    var response = contextAccessor.HttpContext.Response;

    if (response.StatusCode == (int)HttpStatusCode.Unauthorized)
    {
        response.Redirect("/Auth/UnauthenticatedPage");
    }
});
First, in the AddRazorPages() method, we ensure the AuthenticatedPage can only be accessed by authenticated users with the AuthorizePage() method.
Then, once our app is built, we use the UseStatusCodePages() method to check if the status code is 401 Unauthorized and redirect to our UnauthenticatedPage if so.
Retrieve Firebase Web API Key for Authentication
Before we register the required authentication services in our Program class, we need to retrieve an API key from the Firebase console. We use this to authenticate with the Google API for creating users and signing users in.
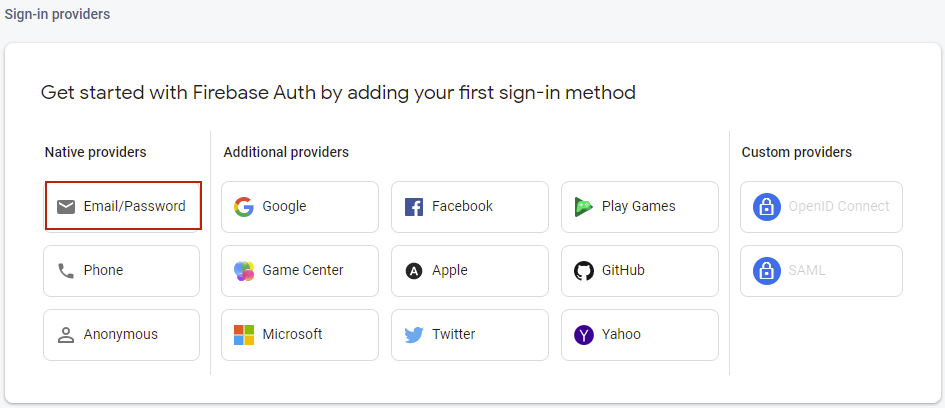
First, we need to add an authentication provider. To do so, let’s navigate to Authentication from the Firebase console and click Get Started. We are going to work with the email provider, so let’s select that:
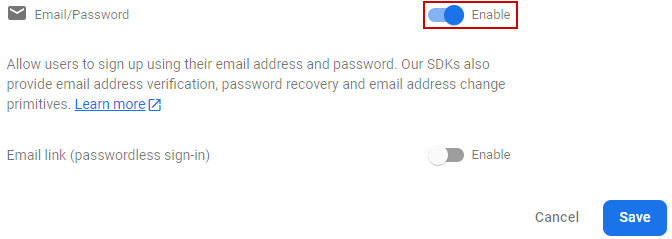
Then, we enable the email provider and save:
By doing this, we have just generated an API key, so let’s navigate to Project settings and we’ll see our Web API Key:
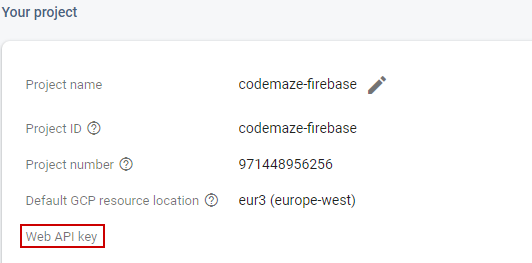
Please take note of this as we’ll be using it next.
Test Firebase Authentication
With our API key retrieved, the final changes we must make are in the Program class:
var builder = WebApplication.CreateBuilder(args);

var firebaseProjectName = "<FIREBASE_PROJECT_NAME>"

builder.Services.AddSingleton(new FirebaseAuthClient(new FirebaseAuthConfig
{
    ApiKey = "<API_KEY>",
    AuthDomain = $"{firebaseProjectName}.firebaseapp.com",
    Providers = new FirebaseAuthProvider[]
    {
        new EmailProvider(),
        new GoogleProvider()
    }
}));

builder.Services.AddSingleton<IFirebaseAuthService, FirebaseAuthService>();

builder.Services.AddAuthentication(JwtBearerDefaults.AuthenticationScheme)
    .AddJwtBearer(options =>
    {
        options.Authority = $"https://securetoken.google.com/{firebaseProjectName}";
        options.TokenValidationParameters = new TokenValidationParameters
        {
            ValidateIssuer = true,
            ValidIssuer = $"https://securetoken.google.com/{firebaseProjectName}",
            ValidateAudience = true,
            ValidAudience = firebaseProjectName,
            ValidateLifetime = true
        };
    });

// code removed for brevity

var app = builder.Build();

// code removed for brevity

app.UseAuthentication();
app.UseAuthorization();

app.Run();
Let’s break down what we’ve added here.
First, we register a singleton FirebaseAuthClient that gets injected into our FirebaseAuthService class. Here, we provide an API key, which we retrieved in the previous section. Also, we register the EmailProvider class as one of our allowed authentication providers.
After we register our FirebaseAuthService, we call the AddAuthentication() method, defining the JWT validation parameters to ensure any JWTs sent in the authorization header are valid.
Finally, after we build the app, we must remember to call the UseAuthentication() and UseAuthorization() methods.
Now we’re ready to test out our authentication. Running our application and navigating to /auth/authenticatedpage, we are redirected to /auth/unauthenticatedpage, which is what we expect for unauthenticated users.
Next, let’s sign up by navigating to /auth/signup, or using our navigation bar, and creating a new user:
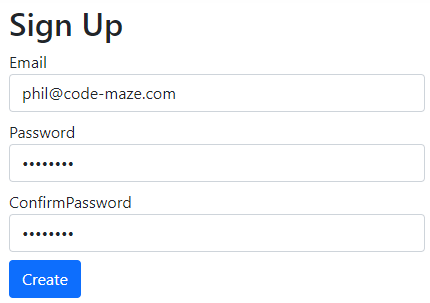
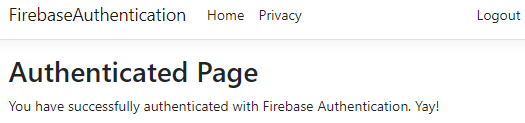
Once successfully signed up, we’ll be redirected to our AuthenticatedPage, showing we have a valid JWT.
Also, our navigation bar has now updated to allow us to logout:
Let’s click this link to log the current user out. Now if we try to access the authenticated page again, we will be redirected to the UnauthenticatedPage, proving our logout functionality works.
We can then navigate to /auth/login and use the details of the user we just signed up:
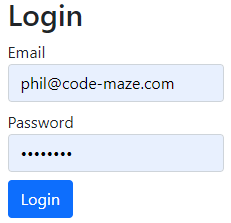
Once again, when successfully logged in, we’ll be redirected to the authenticated page.
Conclusion
In this article, we covered configuring a C# application to use Firebase Authentication to secure access to certain pages. We saw how to register new users, as well as signing in existing users, and finally covered the logout functionality. If you’d like to see more on Firebase in the future, please let us know.
