

Updated on
In this article, we’re going to talk about how to protect our sensitive configuration data in the production environment with Azure Key Vault. Previously we’ve talked about the Secret Manager and environment variables which we can use to protect our data while in development.
These methods are not suited for production because the values we keep that way are unencrypted and can be easily read if the security is compromised.
Let’s dive in.
Introduction to Azure Key Vault
One of the ways we can keep our secrets secret is by using the Azure Key Vault which is a cloud-based service that keeps cryptographic keys and secrets that our applications and services use. In simple terms, it offers a safe way to store the key-value pairs that we use in our applications.
It uses configuration data flattening as we’ve seen with user secrets and environment variables.
Microsoft Azure Key Vault configuration provider is the one we’ll use this time to migrate our configuration values to the cloud, and later on, connect to the vault and read those values.
The procedure is a bit different for Azure-hosted apps and for non-azure-hosted apps, but we’ll focus on the latter because it’s more complicated. Microsoft Azure Key vault offers an easier way for Azure-hosted apps.
There are several steps we need to do in order to use the Azure Key Vault with non-Azure-hosted apps:
- Create Azure Subscription (we won’t talk about this one, we assume you have one)
- Register Azure AD Application
- Create a Certificate and Upload it to Azure AD
- Create the Azure Key Vault
- Import our Existing Secrets
- Connect to the Key Vault through our ASP.NET Core Application
Let’s start by laying some foundation first.
Connecting to Azure Key Vault
In order to connect to our Azure Key Vault, we’ll need to register an Azure app. To do that, head on to “Azure Active Directory”, then “App Registration” and click on “New Registration”.
The dialog should look like this:
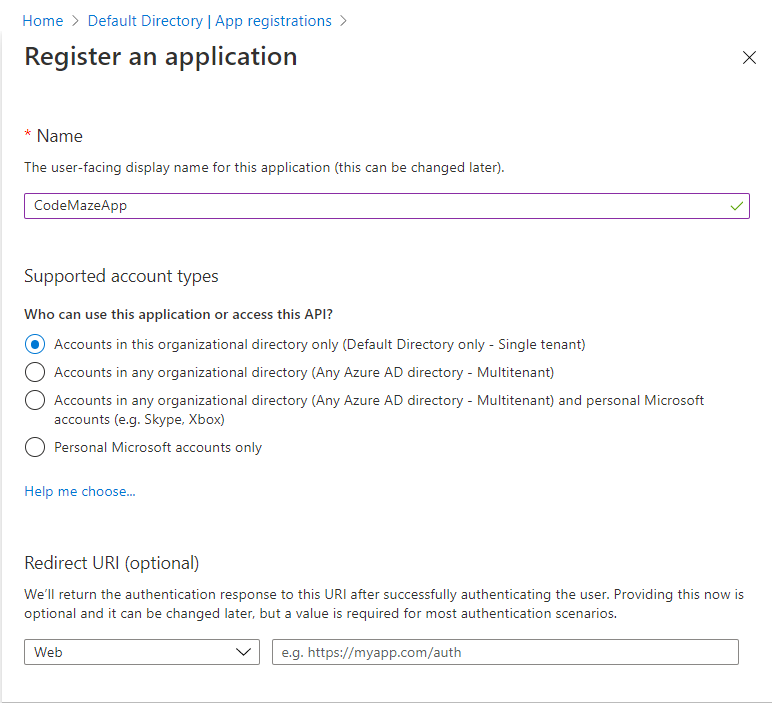
Just give your app a decent name, and click “Register”. Once the app creation is over, you can find it in the apps list. Click on it, and check out the “Application (client) ID”. Write it down, since we’re going to need it later.
Next, since we want to connect to the app securely, we need to create and upload a certificate.
Certificate creation has a few steps, and we recommend using OpenSSL to do it since it has all the tools we need.
Creating a certificate with OpenSSL
- If you don’t have OpenSSL on Windows download it and Install it
- Create a certificate by typing:
openssl req -x509 -newkey rsa:4096 -keyout key.pem -out cert.pem -days 365 - Create a .pfx file from the key and certificate files:
openssl pkcs12 -export -out domain.name.pfx -inkey domain.name.key -in domain.name.crt - Install pfx locally (double click and go through the wizard)
- Upload cert.pem to Azure AD
To complete step 5, go to the “Certificates & secrets” in your app, and then “Upload certificate”.
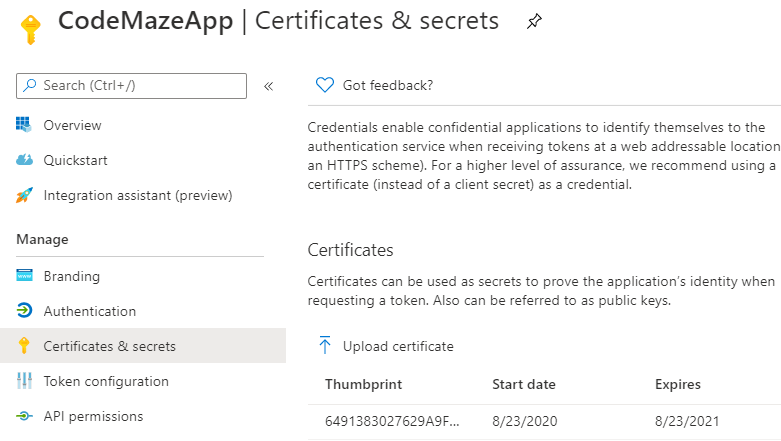
Write down the certificate thumbprint once the upload is finished.
Creating Azure Key Vault
Now we can move on to creating our vault. Go to the Azure portal home and find the “Key vaults” service. Then go to “Add” and fill in the basic stuff first:

You need to fill in subscription, resource group, name, region, and pricing tier.
After that, navigate to the second tab, Access policy. Here’s where we need to add the app that we’ve created previously. Select the “Secret Management” template, and from the “Secret permission” dropdown, select “Get” and “List” permissions.
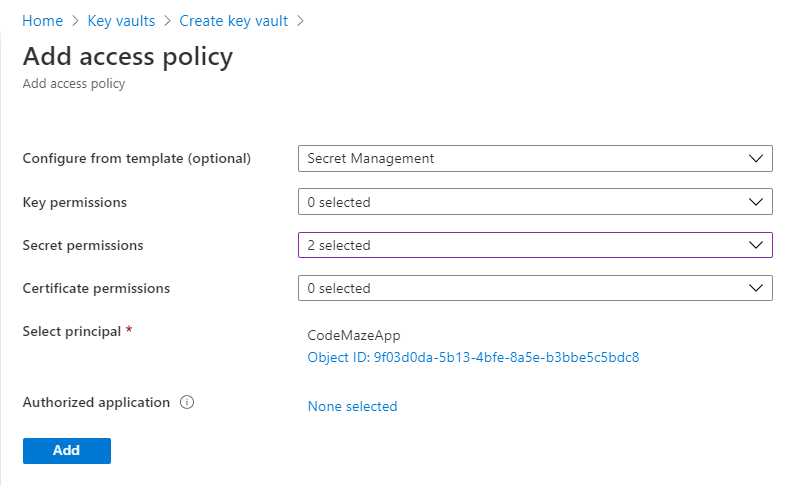
Since we’ll add our secrets manually, make sure to add your user as a principal too, and give it permissions to set and delete secrets.
That’s it, move on to the “Review + create” tab and click on the “Create” button.
Once the process is finished head over to the key vault you’ve created and write down the “DNS Name”.
At this point you should have three pieces of information:
- Application ID
- Certificate Thumbprint
- DNS Name
Now we can add our secrets to the vault.
Adding Secrets to Azure Key Vault
Now we can finally add our secrets.
Head over to the “Secrets” tab to the left, and add some secrets:
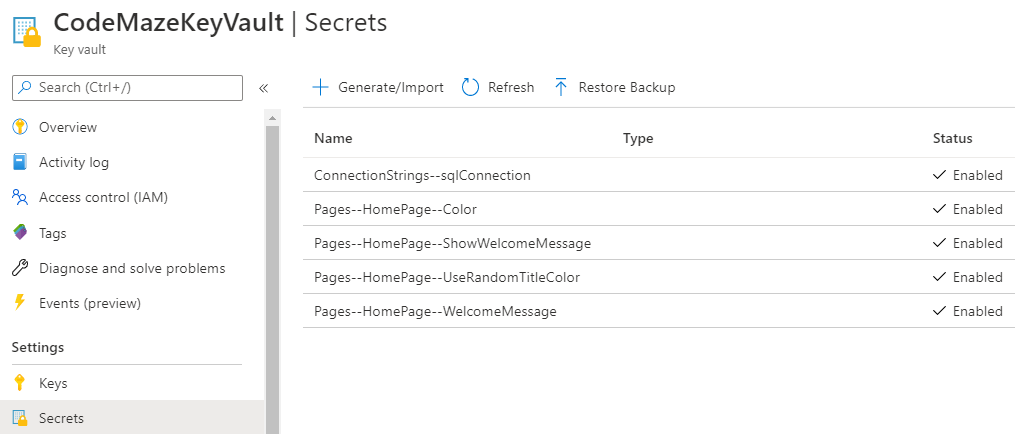
The process is pretty much straightforward. If you have a problem viewing or adding secrets (grayed out generate/import), double-check your access policies, and click refresh.
As you can see, we’ve added some secrets we’ve used so far. We’ve flattened the structure by using double dash --, and we’ve changed the “WelcomeMessage” to “Welcome to the ProjectConfigurationDemo Home Page (Azure)” so we can easily see the change.
Now let’s go back to the code and connect our application to the key vault.
Adding the Vault to our Application
In order to connect our application, we need to extend the configuration a bit.
First, we need to install a NuGet package to support our KeyVault integration:
PM> Install-Package Microsoft.Extensions.Configuration.AzureKeyVault -Version 3.1.7
After that, we need to add the values we’ve written down while creating the vault in our appsettings.json:
"Azure": {
	"ApplicationId": "85cce826-78e7-405e-8c32-301f71e1ad89",
	"CertificateThumb": "6491383027629A9F43F6CB681F299D88293785E0",
	"KeyVault": {
		"DNS": "https://codemazekeyvault.vault.azure.net/"
	}
}
Then, we need to connect to add the Key Vault as a source in the Program class:
public static IHostBuilder CreateHostBuilder(string[] args) =>
    Host.CreateDefaultBuilder(args)
        .ConfigureWebHostDefaults(webBuilder =>
        {
            webBuilder.UseStartup<Startup>();
        })
        .ConfigureAppConfiguration((hostingContext, configBuilder) =>
        {
            var builtConfig = configBuilder.Build();

            using (var store = new X509Store(StoreLocation.CurrentUser))
            {
                store.Open(OpenFlags.ReadOnly);
                var certs = store.Certificates
                    .Find(X509FindType.FindByThumbprint, builtConfig["Azure:CertificateThumb"], false);

                configBuilder.AddAzureKeyVault(
                    builtConfig["Azure:KeyVault:DNS"],
                    builtConfig["Azure:ApplicationId"],
                    certs.OfType<X509Certificate2>().Single());

                store.Close();
            }
        });
This is a standard way of adding an Azure Key Vault by using X509 certificate.
And since we’re adding the vault as the last configuration source, it will override all the previous ones like user secrets or environment variables.
Let’s see the results of our work.
Running the Application
Now if we run the application, we can clearly see that our title has changed:
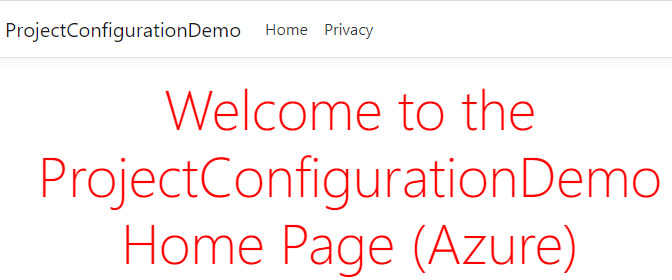
Our title now shows (Azure) at the end, so that means we’ve read the configuration from the key vault successfully.
In order to make this solution even better, we restrict our application to only add the key vault in the production environment:
public static IHostBuilder CreateHostBuilder(string[] args) =>
	Host.CreateDefaultBuilder(args)
		.ConfigureWebHostDefaults(webBuilder =>
		{
			webBuilder.UseStartup<Startup>();
		})
		.ConfigureAppConfiguration((context, builder) =>
		{
			if (context.HostingEnvironment.IsProduction())
			{
				var builtConfig = builder.Build();

				using (var store = new X509Store(StoreLocation.CurrentUser))
				{
					store.Open(OpenFlags.ReadOnly);
					var certs = store.Certificates
						.Find(X509FindType.FindByThumbprint,
							builtConfig["Azure:CertificateThumb"], false);

					builder.AddAzureKeyVault(
						builtConfig["Azure:KeyVault:DNS"],
						builtConfig["Azure:ApplicationId"],
						certs.OfType<X509Certificate2>().Single());

					store.Close();
				}
			}
		});
Now when we run our application locally, we’ll use the user secrets defined in secrets.json, and we’ll use Azure Key Vaults secrets in the production environment.
That’s it, awesome isn’t it?
Conclusion
In this article, we’ve learned how to create an Azure Key Vault to store our secrets for a production environment. We’ve also learned how to connect to the vault from our application and how to use key vault just when running the application in production.
This part wraps up our ASP.NET Core configuration series. You can find other parts of this series on the ASP.NET Core Web API page.

Hi,
I found this line confusing:
Is it related to line before:
Or for this article?
Hi Vladimir,
First of all very good article. It really helped me what i wanted to achieve. I will be greatful to you if you can help me with following queries. I am really stuck at present.
A timely response is highly appriciated.
thanks