

Up until now, in this series of articles, we have learned how to call JavaScript code from C#, how to call C# code from JavaScript, and also how to extract a JS code and use it from the Razor class library. But all the time, we had to write some JavaScript code to make the functionality works. That said, in this article, we are going to learn more about wrapping JavaScript Libraries with C# so that our library users can consume JS libraries by writing only C# code.
For our example, we are going to use the Toastr JavaScript library for showing non-blocking notifications. We are going to learn how to register it, call it, and pass configuration parameters, all from C#. Once the implementation is done, we are going to be able to use this JS library by only writing C# code.
If you want to see complete navigation for this series, you can visit our Blazor WebAssembly Page and find all of the articles from this series and many other articles as well.
So, let’s get going.
Preparing the Razor Class Library with Toastr Files
Let’s start with a project from the previous article, and let’s add another class library project named BlazorWasm.Toastr:

After the creation, let’s remove all the files from the wwwroot folder, and also ExampleJsInterop.cs and Component1.razor files.
To include the Toastr JavaScript library in our Razor class library, we have to add some .js and .css files in the project. You can find these files in the source code repository under the resources folder. Just copy all of them (two .js files and a single .css file) and paste them inside the wwwroot folder in the BlazorWasm.Toastr project:

Now, let’s reference the BlazorWasm.Toastr project from our main project, and let’s import these files inside the index.html file:
<!DOCTYPE html>
<html>

<head>
    <meta charset="utf-8" />
    <meta name="viewport" content="width=device-width, initial-scale=1.0, maximum-scale=1.0, user-scalable=no" />
    <title>BlazorWasmJSInteropExamples</title>
    <base href="/" />
    <link href="css/bootstrap/bootstrap.min.css" rel="stylesheet" />
    <link href="css/app.css" rel="stylesheet" />
    <link href="BlazorWasmJSInteropExamples.styles.css" rel="stylesheet" />
    <link href="_content/BlazorWASM.Toastr/toastrStyles.css" rel="stylesheet" />
</head>

<body>
    <div id="app">Loading...</div>

    <div id="blazor-error-ui">
        An unhandled error has occurred.
        <a href="" class="reload">Reload</a>
        <a class="dismiss">🗙</a>
    </div>
    <script src="_framework/blazor.webassembly.js"></script>
    <script src="scripts/jsExamples2.js"></script>
    <script src="_content/JSInteropExamples.OnlineStatusIndicator/onlineStatusIndicator.js"></script>
    <script src="_content/BlazorWASM.Toastr/toastrJQuery.js"></script>
    <script src="_content/BlazorWASM.Toastr/toastr.js"></script>
</body>

</html>
As you can see, we are doing the same thing as we did with the onlineStatusIndicator.js file in the previous article.
Creating a New Component and Calling a First Toastr Function
Let’s start by creating WrappingJsLibraryInDotNet.razor and WrappingJsLibraryInDotNet.razor.cs files in the Pages folder.
For now, we are just going to add a route to the .razor file:
@page "/wrappjsindotnet"

<h3>WrappingJsLibraryInDotNet</h3>
Now let’s modify the Index.razor file to link this new component:
@page "/"

<h3>
    Use the following links to explore different examples
    of using a JS code with .NET in Blazor WebAssembly Project:
</h3>

<ul>
    <li>
        <a href="/jsindotnet">
            How to call JavaScript code from .NET
        </a>
    </li>
    <li>
        <a href="/dotnetinjs">
            How to call .NET code from JavaScript
        </a>
    </li>
    <li>
        <a href="/wrappjsindotnet">
            Wrapping JS Library in C#
        </a>
    </li>
</ul>
Excellent.
If we start our application, we are going to see three links on the Home page. Clicking the last one will get us to the newly created component.
Now, in the BlazorWasm.Toastr project, under the wwwroot folder, we are going to create a new toastrFunctions.js file:
window.toastrFunctions = {
    showToastrInfo: function () {
        toastr.info("This is an info message from the Toastr notification.");
    }
}
Here, we globally expose the toastrFunctions object and create a single showToastrInfo function inside it. In this function, we just call the toastr object and call the info function to show the info notification with the provided message.
Okay, let’s get back to the index.html file and import this Javascript file:
<script src="_content/BlazorWASM.Toastr/toastrFunctions.js"></script>
Good. Let’s proceed to the service registration actions.
Creating Toastr Service
In the BlazorWasm.Toastr project, we are going to create a new Services folder and inside it a new ToastrService file:
public class ToastrService
{
    private IJSRuntime _jsRuntime;

    public ToastrService(IJSRuntime jSRuntime)
    {
        _jsRuntime = jSRuntime;
    }

    public async Task ShowInfoMessage()
    {
        await _jsRuntime.InvokeVoidAsync("toastrFunctions.showToastrInfo");
    }
}
This is a familiar code if you have followed our entire series. We just use the IJSRuntime to call the showToastrInfo function from the javascript file. Of course, since we are creating a service class, we have to inject the IJSRuntime with constructor injection.
After this, let’s create a new ServiceCollectionExtension class under the same folder:
public static class ServiceCollectionExtension
{
    public static IServiceCollection AddBlazorToastr(this IServiceCollection services)
        => services.AddScoped<ToastrService>();
}
We just create an extension on the IServiceCollection interface and register our ToastrService as a scoped service.
Then, let’s open the Program.cs class and call this extension method:
public class Program
{
    public static async Task Main(string[] args)
    {
        var builder = WebAssemblyHostBuilder.CreateDefault(args);
        builder.RootComponents.Add<App>("#app");

        builder.Services.AddScoped(sp => new HttpClient { BaseAddress = new Uri(builder.HostEnvironment.BaseAddress) });
        builder.Services.AddBlazorToastr();

        await builder.Build().RunAsync();
    }
}
That’s all it takes.
At this moment, we have the Toastr library wrapped inside a C# service, and a library user may use only C# code to work with it. Let’s see how.
Calling Toastr Functions in C#
Let’s start by modifying the WrappingJsLibraryInDotNet.razor.cs file:
public partial class WrappingJsLibraryInDotNet
{
    [Inject]
    public ToastrService ToastrService { get; set; }

    private async Task ShowToastrInfo()
    {
        await ToastrService.ShowInfoMessage();
    }
}
We inject the ToastrService service and call the ShowInfoMessage method inside the ShowToastrInfo method.
Now we have to modify the WrappingJsLibraryInDotNet.razor file:
<div class="row">
    <div class="col-md-4">
        <h4>
            Calling Toastr function
        </h4>
    </div>
    <div class="col-md-3">
        <button type="button" class="btn btn-info" @onclick="ShowToastrInfo">Show Toastr Info</button>
    </div>
</div>
Great.
As soon as we start our app and navigate to the required component, we can click the Show Toastr Info button:

Excellent.
It works perfectly.
But we are far from over.
Passing Parameters to the JavaScript Function
Right now, we are just calling the showToastrInfo function that accepts no parameters at all. But, we can pass the message to the function and also many other options to configure our Toastr notification.
To do that, we have to modify the showToastrInfo function:
window.toastrFunctions = {
    showToastrInfo: function (message, options) {
        toastr.options = options;
        toastr.info(message);
    }
}
At this point, our function accepts parameters for the message and for additional options, and inside it, we set the options and use the message to show it in the notification.
Then, we have to modify the ShowInfoMessage method inside the TostrService class:
public async Task ShowInfoMessage(string message, object options)
{
    await _jsRuntime.InvokeVoidAsync("toastrFunctions.showToastrInfo", message, options);
}
This method accepts two parameters as well – the message of type string and the options of type object – and pass them to the showToastrInfo function.
Lastly, we have to modify the ShowToastrInfo method from our component’s class:
private async Task ShowToastrInfo()
{
    var message = "This is a message sent from the C# method";
    var options = new
    {
        CloseButton = true,
        HideDuration = 300,
        HideMethod = "slideUp",
        ShowMethod = "slideDown",
        PositionClass = "toast-bottom-right"
    };

    await ToastrService.ShowInfoMessage(message, options);
}
This is the place where we create the message and options variables, and send them as arguments to the ToastrService.
Good.
Now, let’s start the app, navigate to the component, and press the button:
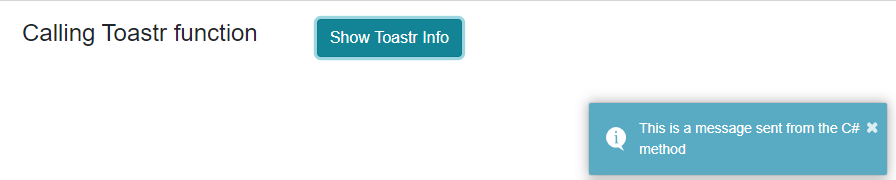
And there we go. We can see our notification on the bottom-right side, with the close button and also with some slideUp/slideDown animations while opening/closing.
Awesome. But we can make it even better.
Enabling Strongly-Typed Parameters For the JavaScript Library
Even though our solution looks good for now and we use only C# to consume and use the JS library, we can make it even better. We can make our options parameter strongly typed, thus providing IntelliSense for all kinds of options for the library users.
So, let’s start by creating a new Enumerations folder in the BlazorWasm.Toastr project, and add a new ToastrShowMethod enumeration inside:
public enum ToastrShowMethod
{
    [Description("fadeIn")] FadeIn,
    [Description("slideDown")] SlideDown
}
As you can see, for each option, we add the [Description] attribute with the value that the Toastr library expects from. We want to use enumerations because it provides some nice IntelliSense and we reduce the possibility to send an option with a wrong value. The [Description] attribute resides in the System.ComponentModel namespace.
Now, let’s create two more enumerations.
The ToastrHideMethod enumeration:
public enum ToastrHideMethod
{
    [Description("fadeOut")] FadeOut,
    [Description("slideUp")] SlideUp
}
And another one for the position:
public enum ToastrPosition
{
    [Description("toast-top-left")] TopLeft,
    [Description("toast-top-right")] TopRight,
    [Description("toast-bottom-left")] BottomLeft,
    [Description("toast-bottom-right")] BottomRight
}
That’s it. Of course, there are many other options for the Toastr library, but these will be enough for now.
Adding a Custom Converter
Since System.Text.Json can’t convert the Description attribute out of the box, we have to provide a custom converter to help with the process.
That said, let’s create a new CustomConverters folder in the BlazorWasm.Toastr project and a new CustomEnumDescriptionConverter class inside that folder:
public class CustomEnumDescriptionConverter<T> : JsonConverter<T> where T : Enum
{
    public override T Read(ref Utf8JsonReader reader, Type typeToConvert, JsonSerializerOptions options)
    {
        throw new NotSupportedException();
    }

    public override void Write(Utf8JsonWriter writer, T value, JsonSerializerOptions options)
    {
        var fieldInfo = value.GetType().GetField(value.ToString());

        var description = (DescriptionAttribute)fieldInfo.GetCustomAttribute(typeof(DescriptionAttribute), false);

        writer.WriteStringValue(description?.Description);
    }
}
Since we are going to use this converter for all three enumerations, we make it generic and restrict it to the Enum type. This class must inherit from the JsonConverter<T> abstract class and implement both abstract methods – Read and Write. Because we are not supporting the read operation for our converter, we just throw a NotSupportedException for the Read method.
In the Write method, we use the GetType method to extract the type of the T parameter, and the GetField method to extract the field with a specified name of type FieldInfo. Then, we use the reflection with the GetCustomAttribute method to extract the attribute of the provided type and cast it into that type – in this case, the DescritpionAttribute type. Finally, we use the WriteStringValue method to write a value of the Description attribute. We use the null conditional operator (?) to prevent an error if the description is null, or in other words, if the Description attribute is not provided.
Using the Strongly-Typed Options
Now, let’s create one more class in the BlazorWasm.Toastr project:
public class ToastrOptions
{
    [JsonConverter(typeof(CustomEnumDescriptionConverter<ToastrPosition>))]
    [JsonPropertyName("positionClass")]
    public ToastrPosition Position { get; set; }

    [JsonConverter(typeof(CustomEnumDescriptionConverter<ToastrHideMethod>))]
    [JsonPropertyName("hideMethod")]
    public ToastrHideMethod HideMethod { get; set; }

    [JsonConverter(typeof(CustomEnumDescriptionConverter<ToastrShowMethod>))]
    [JsonPropertyName("showMethod")]
    public ToastrShowMethod ShowMethod { get; set; }

    [JsonPropertyName("closeButton")]
    public bool CloseButton { get; set; }

    [JsonPropertyName("hideDuration")]
    public int HideDuration { get; set; }
}
Here, we provide different options for the Toastr library and for each of them use the JsonPropertyName attribute to specify the correct option name that Toastr library uses. For example, there is no Position option in the library but the positionClass option. Also, you can see that we apply our custom converter for each enumeration option.
With this in place, we can modify the ShowToastrInfo method and use the strongly-typed options:
private async Task ShowToastrInfo()
{
    var message = "This is a message sent from the C# method";
    var options = new ToastrOptions
    {
        CloseButton = true,
        HideDuration = 300,
        HideMethod = ToastrHideMethod.SlideUp,
        ShowMethod = ToastrShowMethod.SlideDown,
        Position = ToastrPosition.BottomRight
    };

    await ToastrService.ShowInfoMessage(message, options);
}
Excellent.
Now if you repeat our last test, you will get the same result. But this time, the users of our library have a complete C# experience while using the JS library.
Conclusion
In this article, we have learned:
- How to wrap the JavaScript Toastr library inside the Razor class library project
- The way to use the Toastr library with additional options
- How to create strongly-typed options for the JavaScript library
So, with all these in our minds, we can convert any JS library for our C# users without them knowing anything about the JS code.
We hope you enjoyed this article, and we see you in the other one.
