

There are a lot of browser functionalities that we can use in our Blazor WebAssembly application like local storage, session storage, offline/online status, etc. These can be quite useful, so in this article, we are going to learn how to use browser functionalities with Blazor WebAssembly. We are going to learn how to check if our application is currently online or offline and also, how to use a separate razor class library to extract our JavaScript Interop code.
If you want to see complete navigation for this series, you can visit our Blazor WebAssembly Page and find all of the articles from this series and many other articles as well.
So, let’s get down to business.
Using Online-Offline Browser Functionalities with Blazor WebAssembly
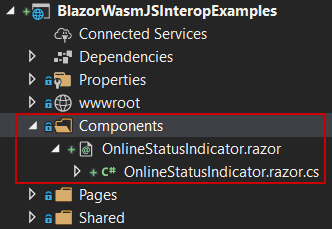
To start things off, let’s create a new Components folder and under it a new OnlineStatusIndicator component with the partial class as well:
Let’s first modify the .razor file:
<div class="rounded-circle" style="width:100px; height: 100px; background-color: @_color"></div>
Just a simple HTML code where we round our div element and set it to some width and height. Also, we conditionally render the background-color of our div element. If the status is online, we are going to color it green. Otherwise, it will be red.
With this in place, we have to move on to the .cs file:
public partial class OnlineStatusIndicator
{
    private string _color;

    [JSInvokable]
    public void SetOnlineStatusColor(bool isOnline)
    {
        _color = isOnline ? "green" : "red";
        StateHasChanged();
    }
}
Here we have our private _color variable and the SetOnlineStatusColor method that accepts one parameter and based on its value sets the value of the _color field. As we can see this method has the [JSInvokable] attribute, and from the previous article where we learned about calling C# methods from JavaScript, we know that we are going to call this method from the JavaScript file. Since this article is strongly related to the previous one, we strongly recommend reading the linked article to learn more about the topic.
Let’s open the jsExamples2.js file under the wwwroot/scripts folder, and add a new function:
jsFunctions.registerOnlineStatusHandler = function (dotNetObjRef) {
    function onlineStatusHandler() {
        dotNetObjRef.invokeMethodAsync("SetOnlineStatusColor", navigator.onLine);
    };

    onlineStatusHandler();

    window.addEventListener("online", onlineStatusHandler);
    window.addEventListener("offline", onlineStatusHandler);
}
This is a similar function to the one we used in the previous article. We are passing the DotNetObjectReference to this function and with the function inside it, we call our SetOnlineStatusColor method. Then, we invoke the onlineStatusHanlder function once and then attach it to the online and offline event listeners.
That’s it.
Passing the DotNetObjectReference Object to the JS Function
We can now go back to the OnlineStatusIndicator.razor.cs file:
public partial class OnlineStatusIndicator
{
    private string _color;

    [Inject]
    public IJSRuntime JSRuntime { get; set; }

    protected async override Task OnAfterRenderAsync(bool firstRender)
    {
        if(firstRender)
        {
            var dotNetObjRef = DotNetObjectReference.Create(this);
            await JSRuntime.InvokeVoidAsync("jsFunctions.registerOnlineStatusHandler", dotNetObjRef);
        }
    }

    [JSInvokable]
    public void SetOnlineStatusColor(bool isOnline)
    {
        _color = isOnline ? "green" : "red";
        StateHasChanged();
    }
}
So, this is a familiar logic for us (if you have followed our articles from this series). We have to inject the IJSRuntime service in order to call our JS function. Then in the OnAfterRenderAsync method, we create the DotNetObjectReference object and send it to the registerOnlineStatusHandler function.
Using OnlineStatusIndicator Component and Testing
Now we can use our component inside the CallDotNetFromJavaScript component.
All we have to do is to insert an additional HTML markup in the .razor file:
<div class="row">
    <div class="col-md-4">
        <h4>Online Status Indicator </h4>
    </div>
    <div class="col-md-4">
        <OnlineStatusIndicator />
    </div>
</div>
Of course, we have to include the using directive in the _Imports.razor file:
@using BlazorWasmJSInteropExamples.Components
Excellent.
Let’s test this, by starting the application and navigating to the CallDotNetFromJavaScript component:

And we can see that our status is green (online).
Now, let’s open the developer tools, navigate to the Application tab, and click the Service Workers menu. There, we have an offline checkbox. So, let’s click it:
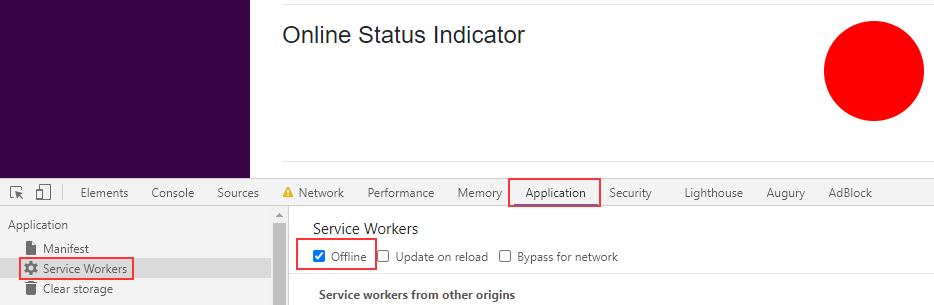
As soon as we click the Offline checkbox, the indicator turns red.
This means our component works like a charm.
Using Razor Class Library to Reuse Our Component
The OnlineStatusIndicator component has functionality that could be reused in other projects. So, having this component as a shared library is always a way to go in such cases.
That said, let’s see how we can do that.
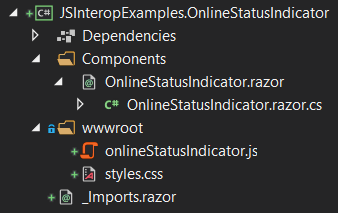
The first thing we are going to do is to create a new Razor class library project:
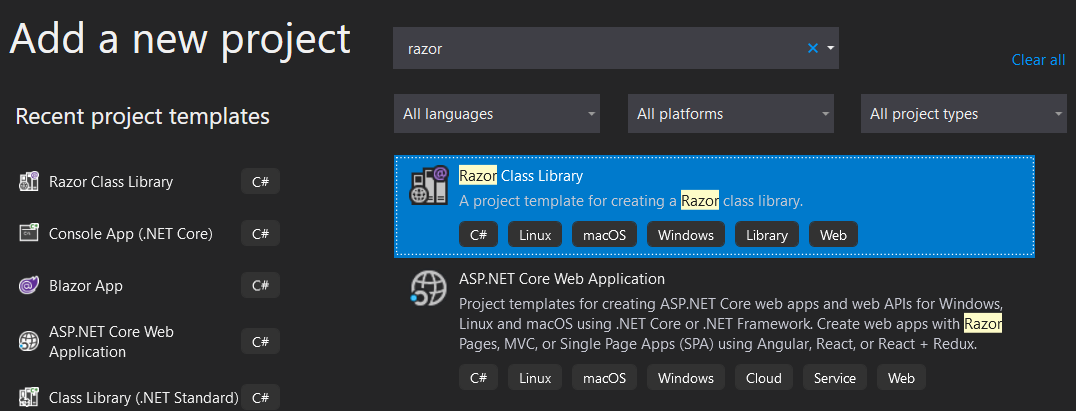
We are going to name it JSInteropExamples.OnlineStatusIndicator:
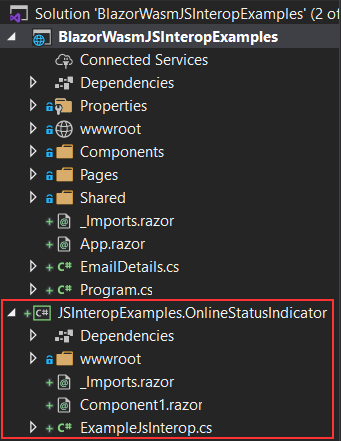
Now, let’s remove the ExampleJsInterop.cs and Component1.razor files. Also, we are going to remove the background.png file from the wwwroot folder and rename the existing js file to onlineStatusIndicator. Furthermore, we are going to move the Components folder from the main project to this new class library:
Good. But we have to do some fixing now.
First, let’s remove the @using BlazorWasmJSInteropExamples.Components from the main project’s _Imports.razor file because we don’t have that folder anymore. Then, we have to modify the namespace of the OnlineStatusIndicator.razor.cs file to JSInteropExamples.OnlineStatusIndicator.Components. Furthermore, we are going to move the registerOnlineStatusHandler function from the jsExamples2.js file to the onlineStatusIndicator.js file:
window.onlineStatusIndicator = {

    registerOnlineStatusHandler: function (dotNetObjRef) {
        function onlineStatusHandler() {
            dotNetObjRef.invokeMethodAsync("SetOnlineStatusColor", navigator.onLine);
        };

        onlineStatusHandler();

        window.addEventListener("online", onlineStatusHandler);
        window.addEventListener("offline", onlineStatusHandler);
    }
};
We are just globally exporting this function as a property of the onlineStatusIndicator object.
Because of this, we have to modify the OnAfterRenderAsync method in the OnlineStatusIndicator.razor.cs file:
protected async override Task OnAfterRenderAsync(bool firstRender)
{
    if(firstRender)
    {
        var dotNetObjRef = DotNetObjectReference.Create(this);
        await JSRuntime.InvokeVoidAsync("onlineStatusIndicator.registerOnlineStatusHandler", dotNetObjRef);
    }
}
We just use the name of a new object instead of the old one.
Using a New Library in the Main Project
After all these changes, we can finally start using our new class library.
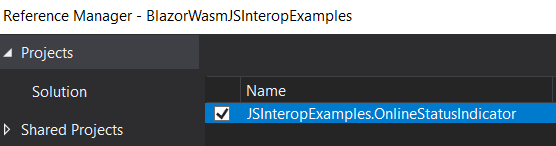
First, let’s reference our class library from the main project:
Then, in the main project’s _Imports.razor file, we are going to add a using directive of our component:
@using JSInteropExamples.OnlineStatusIndicator.Components
Since we have another js file in our class library, we have to include it in the index.html file of the main project:
<script src="_content/JSInteropExamples.OnlineStatusIndicator/onlineStatusIndicator.js"></script>
We use the _content to point to the static files of the library and then the name of the project and the name of the file.
Nice job.
If you test this now, you will see the same result as before, but this time we are using a separate class library that enables us to reuse our component.
Note: If you receive the onlineStatusIndicator could not be found error, just hard refresh (CTRL+F5) your page. Everything should work fine after that.
Conclusion
Excellent.
In this article we have learned:
- How to use the browser’s online/offline functionality in our Blazor WebAssembly application
- The way to export our component to another Razor class library for easier reusability
In the next article, we are going to learn about wrapping the JavaScript library into the C# code, so that developers may use only C# functionalities.
See you there.

