

In our .NET Core with SignalR and Angular – Real-Time charts article, we learned how to implement a real-time chart using ASP.NET Core SignalR on the server-side and Angular on the client side. As part of that article, we implemented a SignalR hub that pushes messages to all connected clients. In this article, we are going to learn how to send client-specific messages using SignalR by modifying the same project.
We highly recommend reading the mentioned SignalR article first and trying out the project we created there, if not already done. That will help you understand the concept of ASP.NET Core SignalR and will make it easy to follow along with this article.
Let’s start
Connections, Users, and Groups in SignalR
SignalR allows messages to be sent to a particular client connection, all connections associated with a specific user, as well as to named groups of connections.
Each client connecting to a SignalR hub has a unique connection id. We can retrieve this using the Context.ConnectionId property of the hub context. Using this, we can send messages just to that particular client:
public async Task BroadcastToConnection(string data, string connectionId)
    => await Clients.Client(connectionId).SendAsync("broadcasttoclient", data);
By default, SignalR uses the ClaimTypes.NameIdentifier from the ClaimsPrincipal associated with the connection as the user identifier. We can send messages to a particular user using this value:
public async Task BroadcastToUser(string data, string userId)
    => await Clients.User(userId).SendAsync("broadcasttouser", data);
Remember that when we are sending messages to a user, they will be sent to all connections associated with that user and not just any particular connection. However, sending messages to individual users requires our application to authenticate users and set the NameIdentifier claim in ClaimsPrincipal. Only then can the connections be mapped to specific users.
A SignalR group is a collection of connections associated with a name. We can send messages to all connections in a group using the group name. Groups are the recommended way to send messages to multiple connections as it is easy to manage the groups in our application based on the application’s logic. A connection can become a member of multiple groups. Connections can be added to or removed from groups via the AddToGroupAsync() and RemoveFromGroupAsync() methods respectively:
public async Task AddToGroup(string groupName)
    => await Groups.AddToGroupAsync(Context.ConnectionId, groupName);

public async Task RemoveFromGroup(string groupName)
    => await Groups.RemoveFromGroupAsync(Context.ConnectionId, groupName);
Then, we can send messages to the group using the group name:
public async Task BroadcastToGroup(string groupName) => await Clients.Group(groupName)
        .SendAsync("broadcasttogroup", $"{Context.ConnectionId} has joined the group {groupName}.");
Groups are a good choice when we want to implement notifications specific to particular user groups, roles, etc in our application.
Implementing Client-Specific Messages Using SignalR
In the previous section, we discussed how we can send messages to individual connections, users, and groups. Now let’s straight away implement client-specific messages in our SignalR app. We are going to do that by modifying the applications that we created in the linked article.
In that article, we implemented an ASP.NET Core SignalR server that uses a timer to send real-time data to all connected clients. Then, we implemented an Angular chart in the client app which consumes this data. On clicking the chart, we send a message from the client to the server, which in turn pushes a message to all connected clients.
Here, we are going to modify the last step in such a way that once we click the Angular chart on the client app, it additionally sends the connectionId to the server, which helps the server to identify this client. Then, the SignalR hub can send a message back to just this client.
To implement this, first, let’s modify the ChartHub class in our server-side project:
public class ChartHub : Hub
{
    public async Task BroadcastChartData(List<ChartModel> data, string connectionId) =>
        await Clients.Client(connectionId).SendAsync("broadcastchartdata", data);

    public string GetConnectionId() => Context.ConnectionId;
}
We change the BroadcastChartData() method to accept connectionId as an additional parameter. This way, we can find the client using the connectionId and send a message just to that client.
Additionally, we add a new GetConnectionId() method, which returns the connectionId of the client.
Next, let’s modify our Angular app. We need to change the SignalRService to get the connectionId and pass it while sending the message to the server:
export class SignalrService {
  public data: ChartModel[];
  public connectionId: string;
  public bradcastedData: ChartModel[];

  private hubConnection: signalR.HubConnection
    public startConnection = () => {
      this.hubConnection = new signalR.HubConnectionBuilder()
                              .withUrl('https://localhost:5001/chart')
                              .build();
      this.hubConnection
        .start()
        .then(() => console.log('Connection started'))
        .then(() => this.getConnectionId())
        .catch(err => console.log('Error while starting connection: ' + err))
    }

    ...

    private getConnectionId = () => {
      this.hubConnection.invoke('getconnectionid')
      .then((data) => {
        console.log(data);
        this.connectionId = data;
      });
    }

    public broadcastChartData = () => {
      const data = this.data.map(m => {
        const temp = {
          data: m.data,
          label: m.label
        }
        return temp;
      });

      this.hubConnection.invoke('broadcastchartdata', data, this.connectionId)
      .catch(err => console.error(err));
    }

    ...
}
In the startConnection() method, we call the getConnectionId() method, which invokes our hub method to return the connectionId. Once we get this value, we can set it as a property of the class. Later, when we invoke the broadcastchartdata hub method, we pass the connectionId so that our SignalR hub can identify the client using it.
That’s it. We have implemented client-specific message sending in SignalR.
Testing
Now it’s time to test the changes that we have made. For that, we need to run both the server application and the client app. To see client-specific behavior in action, let’s run two instances of the client app. Once two client instances are up and running, let’s click the chart on any one instance:
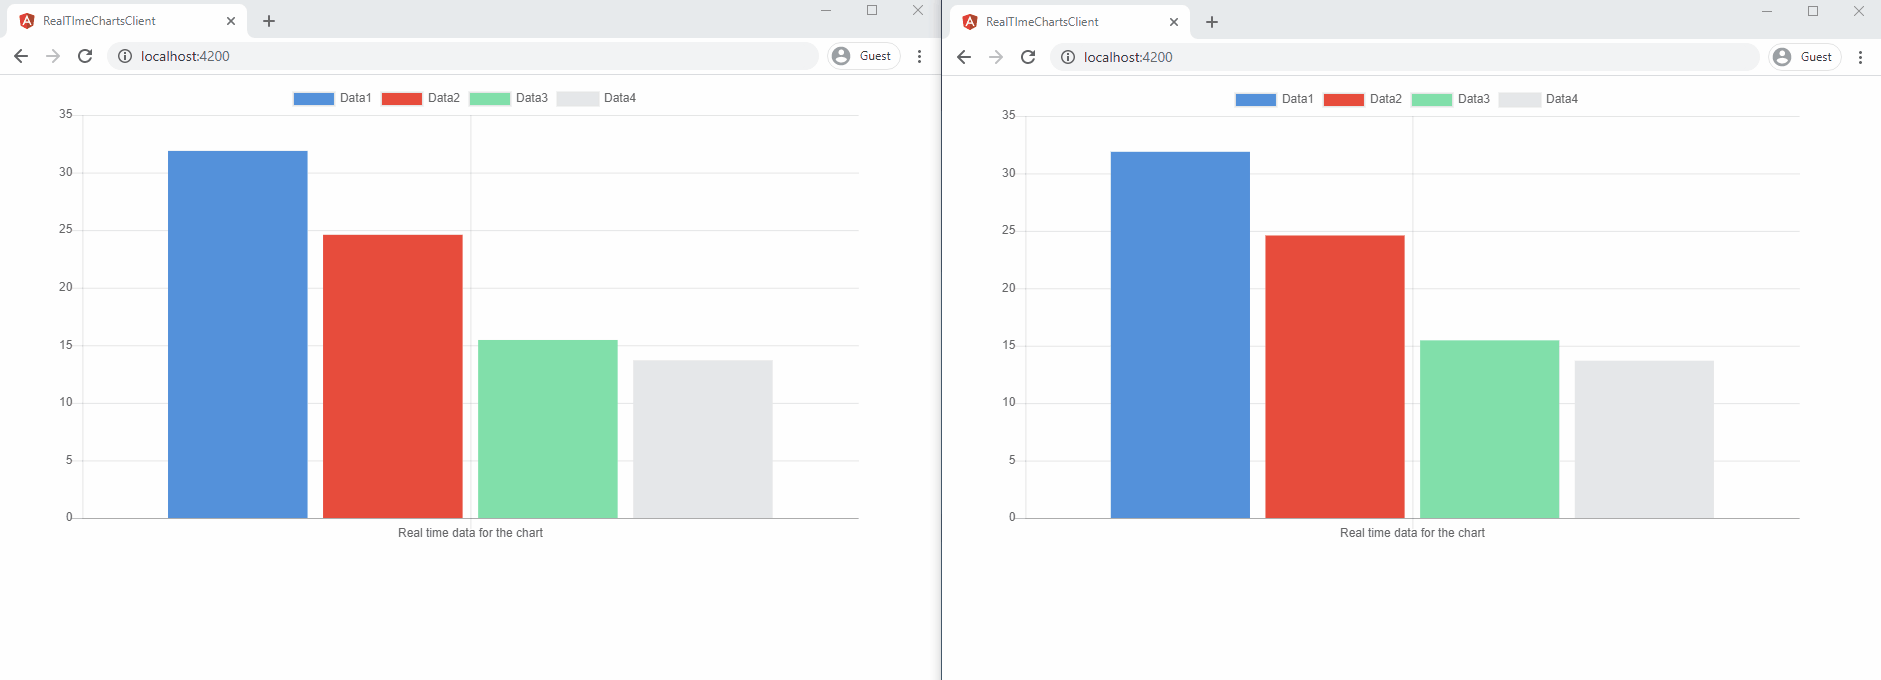
We can see that the SignalR hub sends a message back to just that client instance. Remember that before implementing this change, when we clicked the chart on any client instance, the SignalR hub was used to send a message to all connected client instances.
Now that we have learned how to send messages to specific clients, we can create a lot of cool features using this technique.
Conclusion
We have learned the following topics in this article:
- The concept of connections, users, and groups in SignalR
- How to send messages from SignalR hub to specific connections, users, and groups
- How to modify our SignalR app to send client-specific messages

