

File Upload is the process of uploading files from the user’s system to the web application’s storage. ASP.NET Core MVC actions support uploading of one or more files using simple model binding.
We have covered the file upload support in ASP.NET Core Web API in detail in the article Uploading Files With .NET Core Web API and Angular. There we looked at how to upload a file using an angular app on the client-side and an ASP.NET Core Web API on the server-side.
In this article, we are going to look at how to achieve the same functionality in an ASP.NET Core MVC application.
VIDEO: Uploading Files with ASP.NET Core WEB API and Angular video.
If you’ve missed some of the previous articles in the series we recommend visiting the series page: ASP.NET Core MVC Series.
To download this article’s source code visit: File Upload in ASP.NET Core MVC.
Let’s get down to it.
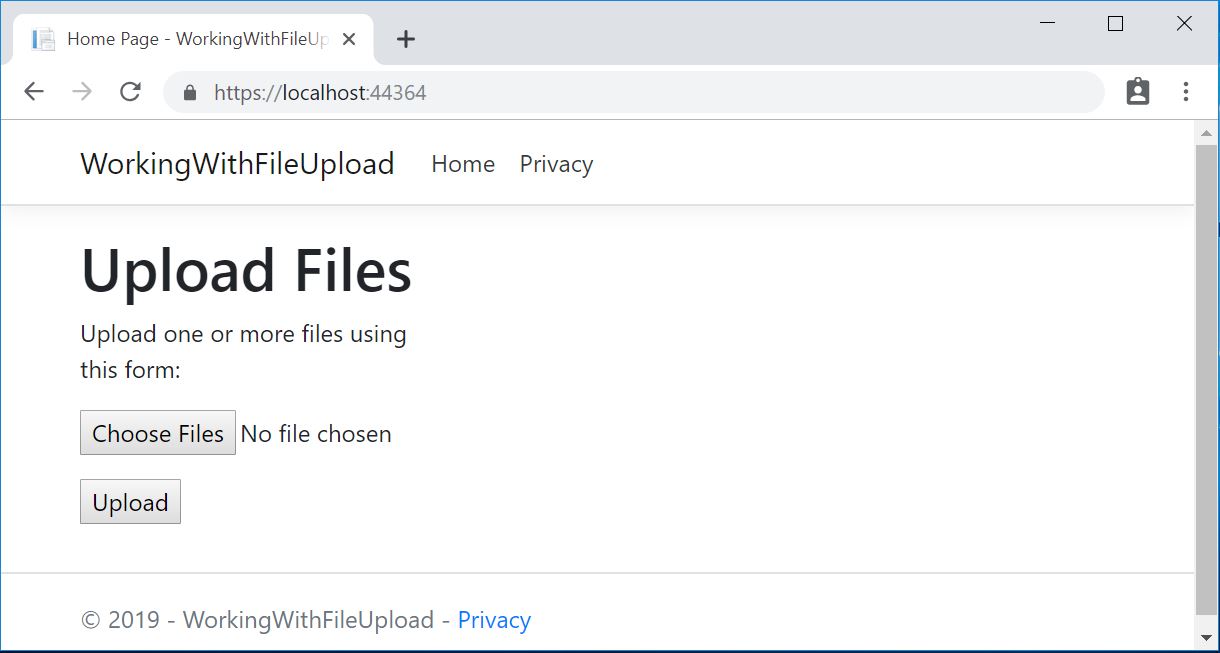
Creating a File Input Control
To upload files, let’s create a new ASP.NET Core MVC application, new FileUploadController and design an HTML form with a file input control for the Index action:
<form method="post" enctype="multipart/form-data" asp-controller="FileUpload" asp-action="Index">
    <div class="form-group">
        <div class="col-md-10">
            <p>Upload one or more files using this form:</p>
            <input type="file" name="files" multiple />
        </div>
    </div>
    <div class="form-group">
        <div class="col-md-10">
            <input type="submit" value="Upload" />
        </div>
    </div>
</form>
In order to support file uploads, we must specify the enctype as multipart/form-data. The enctype attribute specifies how the form data should be encoded when submitting it to the server. The enctype attribute can be used only if the form method is POST.
The file input element supports uploading multiple files. By removing the multiple attribute on the input element, we can restrict it to support just a single file.
The Role of Model Binding
We can access the individual files uploaded to the application through Model Binding using the IFormFile interface. Model Binding in ASP.NET Core MVC maps data from HTTP requests to action method parameters. IFormFile represents a file that is sent with the HttpRequest and has the following structure:
public interface IFormFile
{
    string ContentType { get; }
    string ContentDisposition { get; }
    IHeaderDictionary Headers { get; }
    long Length { get; }
    string Name { get; }
    string FileName { get; }
    Stream OpenReadStream();
    void CopyTo(Stream target);
    Task CopyToAsync(Stream target, CancellationToken cancellationToken = null);
}
As a security consideration, We should never rely on or trust the FileName property without validation.
When uploading files using model binding and the IFormFile interface, the action method can accept either a single IFormFile or an IEnumerable<IFormFile> representing multiple files. We can loop through one or more uploaded files, save them to the local file system and then use the files as per our application’s logic:
public class FileUploadController : Controller
{
    ...

    [HttpPost("FileUpload")]
    public async Task<IActionResult> Index(List<IFormFile> files)
    {
        long size = files.Sum(f => f.Length);

        var filePaths = new List<string>();
        foreach (var formFile in files)
        {
            if (formFile.Length > 0)
            {
                // full path to file in temp location
                var filePath = Path.GetTempFileName(); //we are using Temp file name just for the example. Add your own file path.
                filePaths.Add(filePath);

                using (var stream = new FileStream(filePath, FileMode.Create))
                {
                    await formFile.CopyToAsync(stream);
                }
            }
        }

        // process uploaded files
        // Don't rely on or trust the FileName property without validation.

        return Ok(new { count = files.Count, size, filePaths });
    }
}
Let’s place a breakpoint on the Index() method and run the application:
Once we choose files and click Upload, we can debug the code to see how files are uploaded to the server file system.
Here we just return the total number and size of files uploaded along with file paths.
Files uploaded using the IFormFile technique are buffered in memory or on disk on the webserver before being processed. Inside the action method, the IFormFile contents are accessible as a stream. In addition to the local file system, files can be streamed to Azure Blob storage or Entity Framework.
OK, that’s it for the file upload, let’s summarize what we’ve learned.
Conclusion
In this article we have learned the following topics:
- Creating a file upload control in ASP.NET Core MVC Application
- Utilize model binding to get the uploaded files
- Read and copy files to stream
In the next part of this series, we’ll look at Dependency Injection in ASP.NET Core MVC.

Is there a way to control where to file is placed? I’d love to have it load the file into my \wwwroot\images folder.
Hi Andy. In this article: https://code-maze.com/upload-files-dot-net-core-angular/ we write about different upload logic, but there, we provide a way to change the default path. So, just have a look, I think it will help you.
Excellent
Simple, easy to understand, on point.
Thanks, I needed this.
Nice! It works well. Maybe change “null” keyword to “default” as the app broke on my end until I implement that change. Other than that it gives a good background understanding.
Thank you, Jordan for the suggestion.