

In this article, we’ll learn how to use Dapper in the ASP.NET Core Web API project. We’ll talk about Dapper overall, how to use different queries and executions, how to execute stored procedures, and how to create multiple queries inside a transaction. We’ll also create a simple repository layer to wrap the logic up to avoid using Dapper queries directly inside the controller.
VIDEO: Using Dapper with ASP.NET Core Web API.
So, let’s start.
About Dapper
Dapper is an ORM (Object-Relational Mapper) or, more precisely, a Micro ORM, which we can use to communicate with the database in our projects. We can write SQL statements using Dapper as we would in the SQL Server. Dapper performs well because it doesn’t translate queries we write in .NET to SQL. It is important to know that Dapper is SQL Injection safe because we can use parameterized queries, which we should always do. One more important thing is that Dapper supports multiple database providers. It extends ADO.NET’s IDbConnection and provides useful extension methods to query our database. Of course, we have to write queries compatible with our database provider.
When discussing these extension methods, we must say that Dapper supports synchronous and asynchronous method executions. We’ll use the asynchronous version of those methods.
About Extension Methods
Dapper extends the IDbConnection interface with these multiple methods:
- Execute – an extension method that we use to execute a command one or multiple times and return the number of affected rows
- Query – with this extension method, we can execute a query and map the result
- QueryFirst – it executes a query and maps the first result
- QueryFirstOrDefault – we use this method to execute a query and map the first result or a default value if the sequence contains no elements
- QuerySingle – an extension method that executes a query and maps the result. It throws an exception if there is not exactly one element in the sequence
- QuerySingleOrDefault – executes a query and maps the result or a default value if the sequence is empty. It throws an exception if there is more than one element in the sequence
- QueryMultiple – an extension method that executes multiple queries within the same command and maps results
As we said, Dapper provides an async version for all these methods (ExecuteAsync, QueryAsync, QueryFirstAsync, QueryFirstOrDefaultAsync, QuerySingleAsync, QuerySingleOrDefaultAsync, QueryMultipleAsync).
Database and Web API Creation and Dapper Installation
Before using Dapper in our project, we must prepare a database and create a new Web API project. So, let’s start with the database.
The first thing we’ll do is create a new ASPNetCoreDapper database. After the database creation, you can navigate to our source code repository and find a script (Initial Script with Data.sql) that you can execute to create two tables and populate them with data:
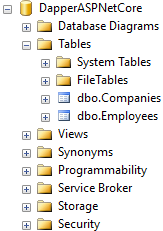
Once we have our table and the data, we can create a new Web API project.
With our project in place, we can install two required packages:
- Dapper –
PM> Install-Package Dapper - SQL Client –
PM> Install-Package Microsoft.Data.SqlClient
Excellent.
We can continue towards the Repository Pattern creation.
Creating Repository Pattern
In this section, we are going to create a simple repository pattern. We’ll make it simple because this article is about Dapper.
That said, let’s start by creating a new Entities folder with two classes inside:
public class Employee
{
    public int Id { get; set; }
    public string Name { get; set; }
    public int Age { get; set; }
    public string Position { get; set; }
    public int CompanyId { get; set; }
}
public class Company
{
    public int Id { get; set; }
    public string Name { get; set; }
    public string Address { get; set; }
    public string Country { get; set; }

    public List<Employee> Employees { get; set; } = new List<Employee>();
}
So, these are our two model classes representing our tables in the database.
After this, we can modify the appsettings.json file by adding our connection string inside:
"ConnectionStrings": {
    "SqlConnection": "server=.; database=DapperASPNetCore; Integrated Security=true"
  },
Of course, feel free to modify the connection string to fit your needs.
Also, since the Microsoft.Data.SqlClient package version 4, if your database is not using encryption, any connection will fail by default. So, you might get an error with your first request:
A connection was successfully established with the server, but then an error occurred during the login process.
(provider: SSL Provider, error: 0 - The certificate chain was issued by an authority that is not trusted.)
To avoid this, you have to modify your connection string:
SqlConnection": "server=.; database=Dapper; Integrated Security=true; Encrypt=false"
This will prevent the error.
Now, we are going to create a new Context folder and a new DapperContext class under it:
public class DapperContext
{
    private readonly IConfiguration _configuration;
    private readonly string _connectionString;

    public DapperContext(IConfiguration configuration)
    {
        _configuration = configuration;
        _connectionString = _configuration.GetConnectionString("SqlConnection");
    }

    public IDbConnection CreateConnection()
        => new SqlConnection(_connectionString);
}
We inject the IConfiguration interface to enable access to the connection string from our appsettings.json file. Also, we create the CreateConnection method, which returns a new SQLConnection object.
For this to work, we have to add several using statements:
using Microsoft.Data.SqlClient;
using Microsoft.Extensions.Configuration;
using System.Data;
After the class creation, we can register it as a singleton service in the Startup class, if you are using .NET5:
public void ConfigureServices(IServiceCollection services)
{
    services.AddSingleton<DapperContext>();
    services.AddControllers();
}
In .NET 6 and above, we can do the registration in the Program class:
builder.Services.AddSingleton<DapperContext>();
builder.Services.AddControllers();
Repository Interfaces and Classes
Next, we are going to create a new Contracts folder and a single interface inside it:
public interface ICompanyRepository
{
}
Also, let’s create a new Repository folder, and a single class inside it:
public class CompanyRepository : ICompanyRepository
{
    private readonly DapperContext _context;

    public CompanyRepository(DapperContext context)
    {
        _context = context;
    }
}
Once we start working with Dapper queries, we’ll populate both files.
Finally, let’s register our interface and its implementation as a service in the Startup class:
public void ConfigureServices(IServiceCollection services)
{
    services.AddSingleton<DapperContext>();
    services.AddScoped<ICompanyRepository, CompanyRepository>();
    services.AddControllers();
}
Of course, for .NET 6, the registration is slightly different:
builder.Services.AddSingleton<DapperContext>();
builder.Services.AddScoped<ICompanyRepository, CompanyRepository>();
builder.Services.AddControllers();
That’s it.
We can move on to our first query.
Using Dapper Queries in ASP.NET Core Web API
Let’s start with an example of returning all the companies from our database.
So, the first thing we want to do is to modify our ICompanyRepository interface:
public interface ICompanyRepository
{
    public Task<IEnumerable<Company>> GetCompanies();
}
Then, let’s implement this method in the CompanyRepository class:
public async Task<IEnumerable<Company>> GetCompanies()
{
    var query = "SELECT * FROM Companies";

    using (var connection = _context.CreateConnection())
    {
        var companies = await connection.QueryAsync<Company>(query);
        return companies.ToList();
    }
}
So, we create a query string variable where we store our SQL query to fetch all the companies. Then inside the using statement, we use our DapperContext object to create the SQLConnection object (or, to be more precise an IDbConnection object) by calling the CreateConnection() method. As you can see, as soon as we stop using our connection, we must dispose of it. Once we create a connection, we can use it to call the QueryAsync method and pass the query as an argument. Since the QueryAsync() method returns IEnumerable<T>, we convert it to a list as soon as we want to return a result.
It is important to notice that we use a strongly typed result from the QueryAsync() method: QueryAsync<Company>(query). But Dapper supports anonymous results as well: connection.QueryAsync(query). We are going to use the strongly typed results in our examples.
API Controller Logic
Now, let’s create a new CompaniesController and modify it:
[Route("api/companies")]
[ApiController]
public class CompaniesController : ControllerBase
{
    private readonly ICompanyRepository _companyRepo;

    public CompaniesController(ICompanyRepository companyRepo)
    {
        _companyRepo = companyRepo;
    }

    [HttpGet]
    public async Task<IActionResult> GetCompanies()
    {
        try
        {
            var companies = await _companyRepo.GetCompanies();
            return Ok(companies);
        }
        catch (Exception ex)
        {
            //log error
            return StatusCode(500, ex.Message);
        }
    }
}
Here, we inject our repository via DI and use it to call our GetCompanies method.
A few notes here. Since we don’t have any business logic, we are not creating a service layer to wrap our repository layer. For this type of application, the service layer would call repository methods and nothing more, adding an unnecessary level of complexity to the article. Of course, we always recommend using the service layer in larger-scale applications.
We’ll use try-catch blocks in each action in our controller for the example’s sake. But to avoid code repetition, we strongly suggest reading our Global Error Handling article.
We’ll not explain a controller’s logic; we assume you are familiar with Web API development. If you want to learn more about that, you can read our ASP.NET Core Web API series
Now, we can start our app and test it:
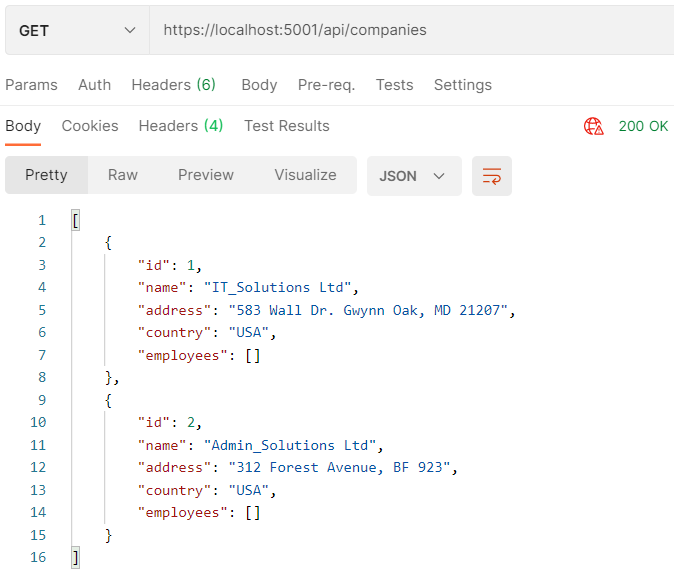
Excellent.
We can see both our companies as a result.
Different Property and Column Names
Right now, all the properties from the Company class have the same names as the columns inside the Companies table. But what would happen if those don’t match?
Let’s check it out.
First, we are going to modify the Name property inside the Company class:
public class Company
{
    public int Id { get; set; }
    public string CompanyName { get; set; }
    public string Address { get; set; }
    public string Country { get; set; }

    public List<Employee> Employees { get; set; } = new List<Employee>();
}
Now, if we run the same request, we are going to get a different result:

As we can see, the companyName property is null. This is because Dapper can’t map it.
So, let’s modify the query inside the GetCompanies method by using aliases:
public async Task<IEnumerable<Company>> GetCompanies()
{
    var query = "SELECT Id, Name AS CompanyName, Address, Country FROM Companies";

    using (var connection = _context.CreateConnection())
    {
        var companies = await connection.QueryAsync<Company>(query);
        return companies.ToList();
    }
}
As you can see, we are using the AS keyword to create an alias for the Name column.
Now, we can send the same request from Postman:
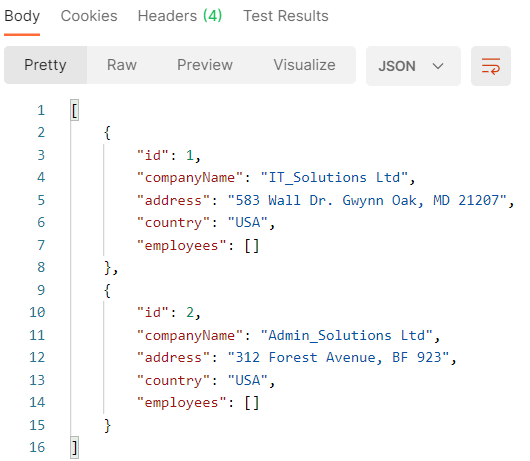
We can see the mapping works perfectly.
Let’s return everything to a previous state to avoid writing aliases in future queries.
Using Parameters With Dapper Queries
As we said at the beginning of this article, Dapper supports parameterized queries, making it 100% SQL injection-safe. It supports anonymous, dynamic, list, string, and table-valued parameters. We are mostly going to use dynamic and anonymous parameters in this article.
That said, let’s start with the interface modification:
public interface ICompanyRepository
{
    public Task<IEnumerable<Company>> GetCompanies();
    public Task<Company> GetCompany(int id);
}
Then, let’s add a method implementation in the CompanyRepository class:
public async Task<Company> GetCompany(int id)
{
    var query = "SELECT * FROM Companies WHERE Id = @Id";

    using (var connection = _context.CreateConnection())
    {
        var company = await connection.QuerySingleOrDefaultAsync<Company>(query, new { id });

        return company;
    }
}
This method is almost the same as the previous one, but with one exception because we are using the QuerySingleOrDefaultAsync method here and provide an anonymous object as the second argument. We’ll show you how to use dynamic parameters in the next example, where we’ll create a new Company entity in our database.
Next, we have to modify our controller:
[HttpGet("{id}", Name = "CompanyById")]
public async Task<IActionResult> GetCompany(int id)
{
    try
    {
        var company = await _companyRepo.GetCompany(id);
        if (company == null)
            return NotFound();

        return Ok(company);
    }
    catch (Exception ex)
    {
        //log error
        return StatusCode(500, ex.Message);
    }
}
That’s it.
We can test this with Postman:
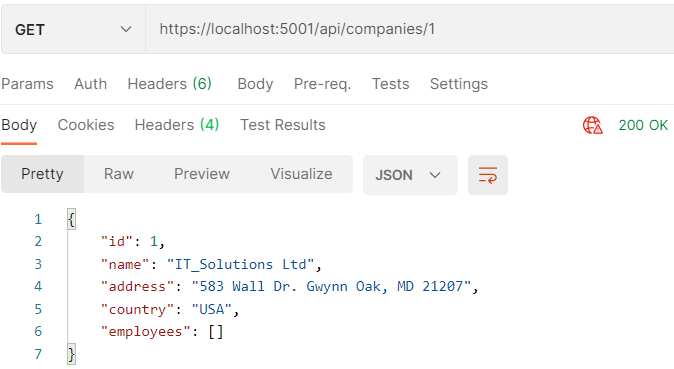
Excellent. It works like a charm.
Adding a New Entity in the Database with the Execute(Async) Method
Now, we are going to handle a POST request in our API and use the ExecuteAsync method to create a new company entity in the database.
The first thing we are going to do is to create a new Dto folder, and inside it, a new CompanyForCreationDto class that we are going to use for the POST request:
public class CompanyForCreationDto
{
    public string Name { get; set; }
    public string Address { get; set; }
    public string Country { get; set; }
}
If you want to learn more about why we use this DTO (and we are going to use another one for the Update action), you can read our ASP.NET Core Web API series of articles, where we explain the reason behind this (articles 5 and 6 from the series).
After creating this class, we are going to modify our interface:
public interface ICompanyRepository
{
    public Task<IEnumerable<Company>> GetCompanies();
    public Task<Company> GetCompany(int id);
    public Task CreateCompany(CompanyForCreationDto company);
}
And, of course, let’s implement this method in the repository class:
public async Task CreateCompany(CompanyForCreationDto company)
{
    var query = "INSERT INTO Companies (Name, Address, Country) VALUES (@Name, @Address, @Country)";

    var parameters = new DynamicParameters();
    parameters.Add("Name", company.Name, DbType.String);
    parameters.Add("Address", company.Address, DbType.String);
    parameters.Add("Country", company.Country, DbType.String);

    using (var connection = _context.CreateConnection())
    {
        await connection.ExecuteAsync(query, parameters);
    }
}
Here, we create our query and a dynamic parameters object (we are not using an anonymous object anymore). We populate that object with our three parameters and then call the ExecuteAsync method to execute our insert statement. The ExecuteAsync method returns int as a result, representing the number of affected rows in the database. So, if you need that information, you can use it by accepting the return value from this method.
Now, if we call this method and pass a company for creation to it, it will create a new entity for us. But, while creating API’s POST action, it is a good practice to return a link, which the API’s users can use to navigate to the created entity. Our Ultimate ASP.NET Core Web API book explains this in great detail. We can’t easily do that with the code, as we have it in this method. So, we have to modify a couple of things.
Creating a Better API Solution
Firstly, let’s modify the interface:
public interface ICompanyRepository
{
    public Task<IEnumerable<Company>> GetCompanies();
    public Task<Company> GetCompany(int id);
    public Task<Company> CreateCompany(CompanyForCreationDto company);
}
This time, we want our method to return a created company entity.
Next, we have to modify the method implementation:
public async Task<Company> CreateCompany(CompanyForCreationDto company)
{
    var query = "INSERT INTO Companies (Name, Address, Country) VALUES (@Name, @Address, @Country)" +
        "SELECT CAST(SCOPE_IDENTITY() as int)";

    var parameters = new DynamicParameters();
    parameters.Add("Name", company.Name, DbType.String);
    parameters.Add("Address", company.Address, DbType.String);
    parameters.Add("Country", company.Country, DbType.String);

    using (var connection = _context.CreateConnection())
    {
        var id = await connection.QuerySingleAsync<int>(query, parameters);

        var createdCompany = new Company
        {
            Id = id,
            Name = company.Name,
            Address = company.Address,
            Country = company.Country
        };

        return createdCompany;
    }
}
We modify our query by adding another SELECT statement, which returns the last identity value created in the current scope. Then, we extract that id value by calling the QuerySingleAsync() method. This method executes both INSERT and SELECT statements. Once we have the Id value, we create a new company object with the required fields. Of course, you can do this with any mapping tool you like. Finally, we return our created entity.
With this out of the way, we can add a POST action in our controller:
[HttpPost]
public async Task<IActionResult> CreateCompany(CompanyForCreationDto company)
{
    try
    {
        var createdCompany = await _companyRepo.CreateCompany(company);
        return CreatedAtRoute("CompanyById", new { id = createdCompany.Id }, createdCompany);
    }
    catch (Exception ex)
    {
        //log error
        return StatusCode(500, ex.Message);
    }
}
As you can see, after creating a new company in the database, we return a route to fetch our newly created entity.
Let’s test it:
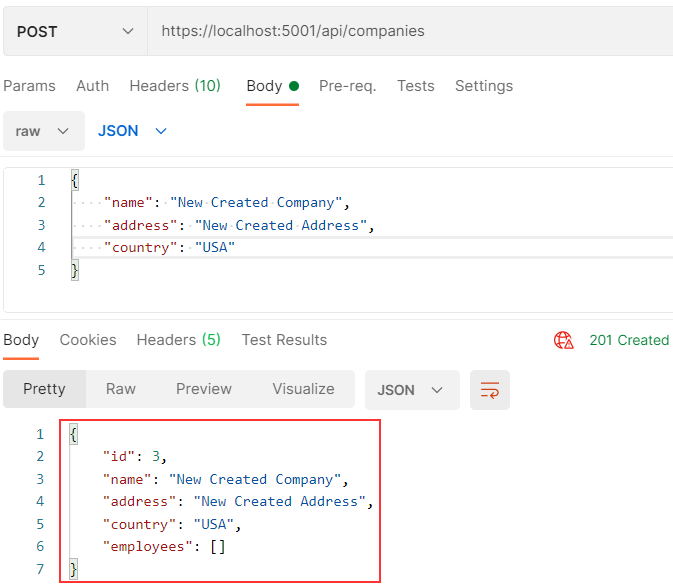
There is our new company.
Also, if we inspect the Headers tab of the response, we are going to find a URI for this company:
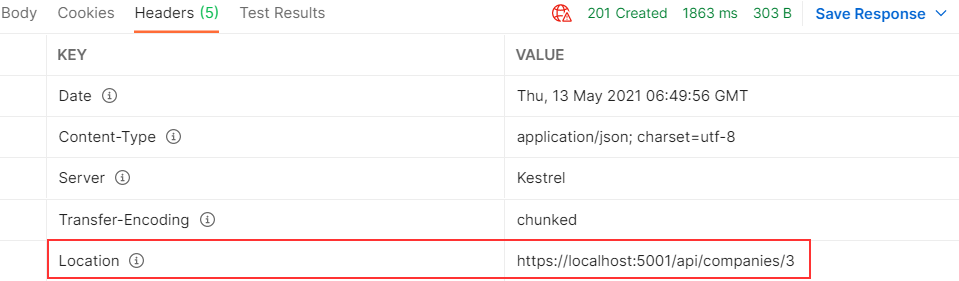
Awesome.
Let’s move on.
Working with Update and Delete
Working with the update and delete is pretty simple because we already have all the required knowledge. So, let’s jump straight to the code.
We are going to start with a new DTO:
public class CompanyForUpdateDto
{
    public string Name { get; set; }
    public string Address { get; set; }
    public string Country { get; set; }
}
Then, let’s modify the interface:
public interface ICompanyRepository
{
    public Task<IEnumerable<Company>> GetCompanies();
    public Task<Company> GetCompany(int id);
    public Task<Company> CreateCompany(CompanyForCreationDto company);
    public Task UpdateCompany(int id, CompanyForUpdateDto company);
    public Task DeleteCompany(int id);
}
Next, we have to implement these two methods in a repository class:
public async Task UpdateCompany(int id, CompanyForUpdateDto company)
{
    var query = "UPDATE Companies SET Name = @Name, Address = @Address, Country = @Country WHERE Id = @Id";

    var parameters = new DynamicParameters();
    parameters.Add("Id", id, DbType.Int32);
    parameters.Add("Name", company.Name, DbType.String);
    parameters.Add("Address", company.Address, DbType.String);
    parameters.Add("Country", company.Country, DbType.String);

    using (var connection = _context.CreateConnection())
    {
        await connection.ExecuteAsync(query, parameters);
    }
}

public async Task DeleteCompany(int id)
{
    var query = "DELETE FROM Companies WHERE Id = @Id";

    using (var connection = _context.CreateConnection())
    {
        await connection.ExecuteAsync(query, new { id });
    }
}
As you can see, there is nothing new with these two methods. We have a query and parameters, and we execute our statements with the ExecuteAsync method.
Finally, we have to add two actions to the controller:
[HttpPut("{id}")]
public async Task<IActionResult> UpdateCompany(int id, CompanyForUpdateDto company)
{
    try
    {
        var dbCompany = await _companyRepo.GetCompany(id);
        if (dbCompany == null)
            return NotFound();

        await _companyRepo.UpdateCompany(id, company);
        return NoContent();
    }
    catch (Exception ex)
    {
        //log error
        return StatusCode(500, ex.Message);
    }
}

[HttpDelete("{id}")]
public async Task<IActionResult> DeleteCompany(int id)
{
    try
    {
        var dbCompany = await _companyRepo.GetCompany(id);
        if (dbCompany == null)
            return NotFound();

        await _companyRepo.DeleteCompany(id);
        return NoContent();
    }
    catch (Exception ex)
    {
        //log error
        return StatusCode(500, ex.Message);
    }
}
That’s it.
We can test this with Postman by sending both PUT and DELETE requests:
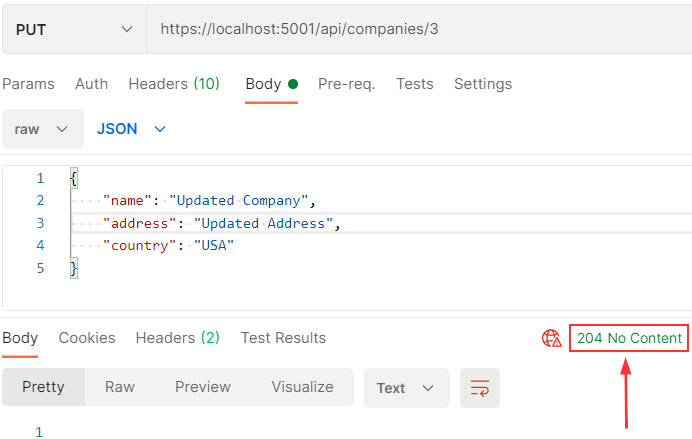
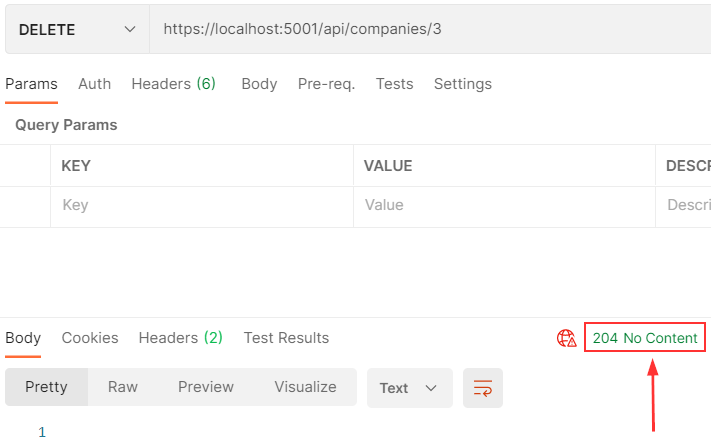
Great job.
Running Stored Procedures with Dapper
Before we show you how to use Dapper to call a stored procedure, we have to create one in our database:
USE [DapperASPNetCore]
GO

SET ANSI_NULLS ON
GO

SET QUOTED_IDENTIFIER ON
GO

CREATE PROCEDURE [dbo].[ShowCompanyForProvidedEmployeeId] @Id int
AS
SELECT c.Id, c.Name, c.Address, c.Country
FROM Companies c JOIN Employees e ON c.Id = e.CompanyId
Where e.Id = @Id

GO
This procedure returns a company’s Name, Address, and Country with an employee with a provided Id value.
With the stored procedure in place, we can move on to the interface modification:
public interface ICompanyRepository
{
    public Task<IEnumerable<Company>> GetCompanies();
    public Task<Company> GetCompany(int id);
    public Task<Company> CreateCompany(CompanyForCreationDto company);
    public Task UpdateCompany(int id, CompanyForUpdateDto company);
    public Task DeleteCompany(int id);
    public Task<Company> GetCompanyByEmployeeId(int id);
}
Then, let’s modify the class:
public async Task<Company> GetCompanyByEmployeeId(int id)
{
    var procedureName = "ShowCompanyForProvidedEmployeeId";
    var parameters = new DynamicParameters();
    parameters.Add("Id", id, DbType.Int32, ParameterDirection.Input);

    using (var connection = _context.CreateConnection())
    {
        var company = await connection.QueryFirstOrDefaultAsync<Company>
            (procedureName, parameters, commandType: CommandType.StoredProcedure);

        return company;
    }
}
Here, we create a variable that contains a procedure name and a dynamic parameter object with a single parameter inside. Because our stored procedure returns a value, we use the QueryFirstOrDefaultAsync method to execute it. Pay attention that if your stored procedure doesn’t return a value, you can use the ExecuteAsync method for execution.
As usual, we have to add another action in our controller:
[HttpGet("ByEmployeeId/{id}")]
public async Task<IActionResult> GetCompanyForEmployee(int id)
{
    try
    {
        var company = await _companyRepo.GetCompanyByEmployeeId(id);
        if (company == null)
            return NotFound();

        return Ok(company);
    }
    catch (Exception ex)
    {
        //log error
        return StatusCode(500, ex.Message);
    }
}
And, of course, the test:

We can see how easy it is to call a stored procedure with Dapper in our project.
Executing Multiple SQL Statements with a Single Query
Using the QueryMultipleAsync() method, we can easily execute multiple SQL statements and return multiple results in a single query.
Let’s see how to do that with an example.
As always, we’ll modify our interface first:
public interface ICompanyRepository
{
    ...
    public Task<Company> GetCompanyEmployeesMultipleResults(int id);
}
Then the implementation:
public async Task<Company> GetCompanyEmployeesMultipleResults(int id)
{
    var query = "SELECT * FROM Companies WHERE Id = @Id;" +
                "SELECT * FROM Employees WHERE CompanyId = @Id";

    using (var connection = _context.CreateConnection())
    using (var multi = await connection.QueryMultipleAsync(query, new { id }))
    {
        var company = await multi.ReadSingleOrDefaultAsync<Company>();
        if (company != null)
            company.Employees = (await multi.ReadAsync<Employee>()).ToList();

        return company;
    }
}
As you can see, our query variable contains two SELECT statements. The first will return a single company, and the second one will return all the employees of that company. After that, we create a connection and then use that connection to call the QueryMultipleAsync method. Once we get multiple results inside the multi variable, we can extract both results (company and employees per that company) by using the ReadSignleOrDefaultAsync and ReadAsync methods. The first method returns a single result, while the second returns a collection.
All we have to do is to create an action in the controller:
[HttpGet("{id}/MultipleResult")]
public async Task<IActionResult> GetCompanyEmployeesMultipleResult(int id)
{
    try
    {
        var company = await _companyRepo.GetCompanyEmployeesMultipleResults(id);
        if (company == null)
            return NotFound();

        return Ok(company);
    }
    catch (Exception ex)
    {
        //log error
        return StatusCode(500, ex.Message);
    }
}
And let’s test it:
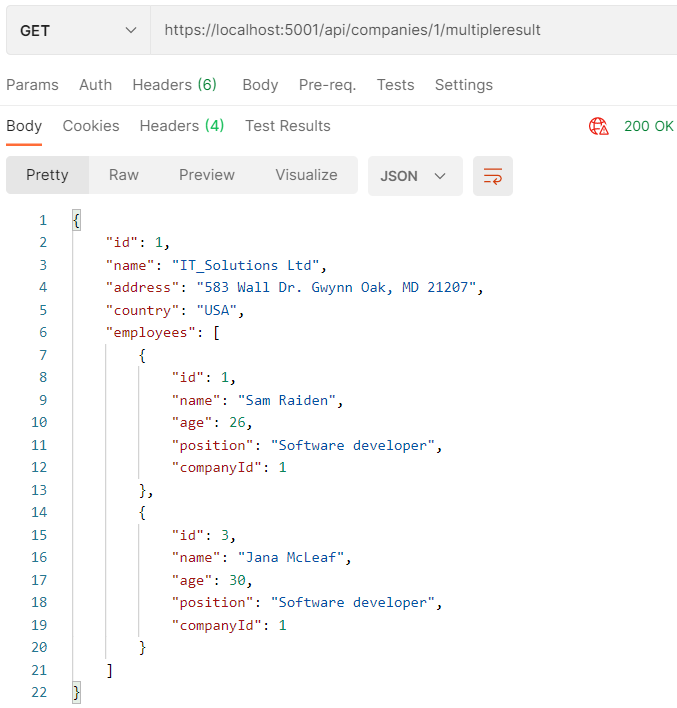
There we go. We can see all the employees attached for a single company.
Multiple Mapping
In a previous example, we used two SQL statements to return two results and then join them together in a single object. But usually, for such queries, we don’t want to write two SQL statements. We want to use a JOIN clause and create a single SQL statement. Of course, if we write it like that, we can’t use the QueryMultipleAsync() method anymore. We have to use a multiple mapping technique with a well-known QueryAsync() method.
So, let’s see how we can do it.
As usual, we are going to start with the interface modification:
public interface ICompanyRepository
{
    ...
    public Task<List<Company>> GetCompaniesEmployeesMultipleMapping();
}
Next, the implementation:
public async Task<List<Company>> GetCompaniesEmployeesMultipleMapping()
{
    var query = "SELECT * FROM Companies c JOIN Employees e ON c.Id = e.CompanyId";

    using (var connection = _context.CreateConnection())
    {
        var companyDict = new Dictionary<int, Company>();

        var companies = await connection.QueryAsync<Company, Employee, Company>(
            query, (company, employee) =>
            {
                if (!companyDict.TryGetValue(company.Id, out var currentCompany))
                {
                    currentCompany = company;
                    companyDict.Add(currentCompany.Id, currentCompany);
                }

                currentCompany.Employees.Add(employee);
                return currentCompany;
            }
        );

        return companies.Distinct().ToList();
    }
}
So, we create a query, and inside the using statement, a new connection. Then, we create a new dictionary to keep our companies in. To extract data from the database, we are using the QueryAsync() method, but it has a new syntax we haven’t seen this time. We can see three generic types. The first two are the input types we’ll work with, and the third is the return type. This method accepts our query as a parameter and a Func delegate that accepts two parameters of type Company end Employee. Inside the delegate, we try to extract a company by its Id value. If it doesn’t exist, we store it inside the currentCompany variable and add it to the dictionary. Also, we assign all the employees to that current company and return it from a Func delegate.
After mapping, we return a distinct result converted to a list.
All we have left to do is to add an action to the controller:
[HttpGet("MultipleMapping")]
public async Task<IActionResult> GetCompaniesEmployeesMultipleMapping()
{
    try
    {
        var company = await _companyRepo.GetCompaniesEmployeesMultipleMapping();

        return Ok(company);
    }
    catch (Exception ex)
    {
        //log error
        return StatusCode(500, ex.Message);
    }
}
That should be it.
Let’s test it:
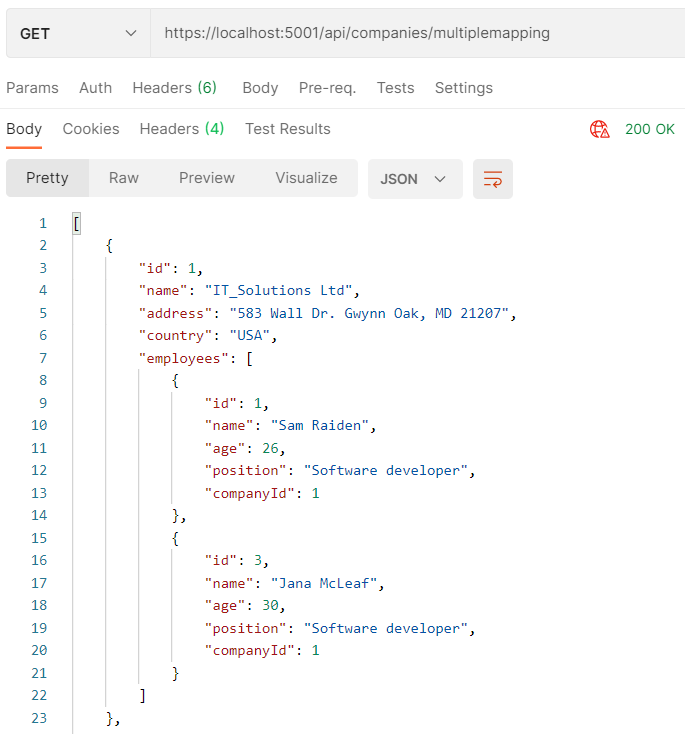
And we can see it works like a charm.
We have one more thing left to cover – transactions.
Transactions
Transactions are pretty simple to use with Dapper. We can execute it using the Dapper library (the one we already use) or the Dappr.Transaction library, which is the same thing as Dapper, just with the extended IDbConnection interface. In our example, we are going to use the Dapper library.
We’ll show you just the repository method where we implement transactions. All the rest is pretty simple as we repeated the steps several times in this article:
public async Task CreateMultipleCompanies(List<CompanyForCreationDto> companies)
{
    var query = "INSERT INTO Companies (Name, Address, Country) VALUES (@Name, @Address, @Country)";

    using (var connection = _context.CreateConnection())
    {
        connection.Open();

        using (var transaction = connection.BeginTransaction())
        {
            foreach (var company in companies)
            {
                var parameters = new DynamicParameters();
                parameters.Add("Name", company.Name, DbType.String);
                parameters.Add("Address", company.Address, DbType.String);
                parameters.Add("Country", company.Country, DbType.String);

                await connection.ExecuteAsync(query, parameters, transaction: transaction);
            }

            transaction.Commit();
        }
    }
}
So, there are four additional things here we haven’t seen so far. First, we have to open the connection. Then, inside the using statement, we start our transactions by calling the BeginTransaction() method. In the ExecuteAsync() method, we specify our transaction. And finally, we call the Commit method to commit the transaction.
If you want to simulate an error and test that no rows will be created in the database, you can throw an exception below the await code line. You will find no new rows in the Companies table.
Conclusion
There we go.
We’ve learned how to integrate Dapper into the ASP.NET Core project and how to use queries, executions, stored procedures, and transactions with Dapper.

Can You Explain How Consume Dapper API in Other ASP.NET Core MVC Project
Thanks
Mian Jamshaid
Hi Mian.
As much as I know, you can follow pretty much the same procedure in your MVC app to use Dapper. I see no reason for anything to be different.
I create Dapper API successfully, but I cannot understand for use API in other Project please provide me any reference for use API in other project
I am sorry, but we don’t have any articles covering Dapper with the MVC project.
How to manage multiple connection String?
Hi , why register context as SingleTon? and repos as scoped ? Can you please a bit explain best practices ?
Hi. To be honest, this has nothing to do with any best practices, it is all about the lifetimes of your registered services. You can read more about lifetimes here: https://code-maze.com/dependency-injection-lifetimes-aspnet-core/
Basically, DbContext is a class that you need only once to provide a single instance thus the singleton service. For each repo class, you want each object to be provided per request, thus scoped.
For each repo class, you want each object to be provided per request, thus scoped.
But you are creating single instance of DapperContext class and doing every time new SqlConnection(). And you using that context every time in newly created repository. One question would it be ok if instead repositories that you make scoped you made them as transient ?
This is correct. You need just a single instance of a DapperContext class because you just use it to provide an access to the CreateConnection method. So still, DbContext should be registered as a singleton. This has nothing to do with each repository object and its service registration. Those objects are created only per request.
You can create them as transient if you want that type of behavior.
When would you prefer using Transient vs Scoped vs Singleton ? In terms of repository classes, and BLL service classes ?
Please, read the article I linked in my comment. Everything is there, and that’s the main reason why I put the link there. You will find the table explaining when to use each of those lifetime services among a lot of other information.
Hi, thanks for the awsome article. It is just what I need. One thing I dont understand is why is DapperContext registered as Singleton and not as Scoped? Maybe I lack understanding of the differences of these two lifetime possibilities.
Hello Stefan. This DapperContext shouldn’t be confused with the EF Core’s DbContext class. The EF Core’s DbContext directly creates a connection to the db and it needs to be disposed of as soon as your request is finished. Thus, we register it as a scoped service by default by using the AddDbContext method (this method registers the Context by default as a scoped service).
Now, this DapperContext class is just a wrapper around the Dapper’s SqlConnection class, which creates a connection to the database. That’s why we don’t have to register it as a scoped service – we don’t have to dispose of it at all. On the other hand, we do have to dispose of the SqlConnection class, but we already use it in the using block
which will dispose of it as soon as we are done with the query/command.
I hope this clears your doubts.
Disclaimer – I do not know EF core, I have never used it. But (!) I think I understand what is the difference here. The DapperContext will not open the connection to the Db until the CreateConnection method is called. Contrary, EF core will open the connection to the Db with a similar method which is called in its constructor, and so we need to dispose of the DbContext instance after every HTTP request. Did I get it?
Yes, that is correct. Just, EF Core’s context object will be disposed of automatically, we don’t have to wrap it inside the using directive or anything similar. Of course, as long as we register it as a scoped service.
Understood, thank you very much for the kind explanation, and always the quickest replies on the internet! 🙂
One suggestion, offtopic. Maybe consider adding a top sidebar to quickly jump to headings inside an article, similar to how MSDN has. It would be really useful for long articles like this one.
All the best!
I bought your “Ultimate ASP.NET Core Web API” course. I use Entity Framework Core as the ORM. Your course is very good but you don’t show how stored procedures are called when using EF Core. What’s the best way to do this? Hope you include this in an update to the course. Thanks.
Hello Mac. We didn’t cover that as our main book is about API development not that much about the EF Core itself. Yeah, we are using EF Core to access the db but again we don’t dive deep in EF Core as simply the book is not about it. Calling SPs had nothing to do with API development, as it is completely related to EF Core’s functionality. You can always use the context from the base class and call FromSqlRaw method to call a SP. But again, there are so many things to be explained about this feature and any other EF Core’s features, but as I said, EF Core is not the main book’s topic.
Hi Marinko. Thanks for the explanation. I see that you show how to call a SP using Dapper, another ORM, but I think I understand what you’re saying. The main book is mainly about API development while the API implementation using Dapper is more about Dapper than API development. Did I understand you correctly? Thanks again.
That is completely true. Dapper book is a bonus book and mainly dedicated to using Dapper with API.
Fantastic article Marinko! Really useful and has helped me out a lot. In regards to:
Is there a limitation as to how many you’d be able to do? Doing some research, I’ve found out that
QueryAsyncis capped to 7 and in my scenario I’d need 8. What would you suggest to get around that?Thanks!
To be honest, I never used more than 3-4, so I am not sure how to overcome that. Do you think this can help: https://riptutorial.com/dapper/example/1198/mapping-more-than-7-types
This was very useful thanks! I’m focussing on the POST method now and I’m getting a
SQL ExceptionofMust declare the scalar variable. Would you happen to know how I could overcome this please? Thanks!For reference on the article:
Hello Matas. I think the easiest way to solve this issue is to download our source code and then compare it with yours. That way you will find the difference for sure
Thanks Marinko! After thorough comparison with your source code, the only difference that I’m able to notice lies within the
SELECT CAST(SCOPE_IDENTITY as int). Instead of theint, I've got it defined as avarchar. Would that be possible to do withSCOPE_IDENTITY` or is it only feasible with int? Thanks!Apologies, just realised how badly I messed up the
markdownthere! Here’s a tidied up version of it:After thorough comparison with your source code, the only difference that I’m able to notice lies within the
SELECT CAST(SCOPE_IDENTITY as int).Instead of theint, I’ve got it defined as avarchar. Would that be possible to do withSCOPE_IDENTITY()or is it only feasible withint? Thanks!Well, if you take a look at a definition of scope identity: (Returns the last identity value inserted into an identity column in the same scope.) you can’t see that they mention any specific type. But, I wasn’t able to use it with GUID values, for that I had to use Output (this is something I used while writing the Dapper bonus book for our API book package).
Okay thanks! I managed to actually find a solution in the end. Just another question from my end. What would be the best way to do a concatenation (
join) between two tables to then an insert via Dapper?Well, if I understood correctly, I would do it step by step. I would create a query that returns a joined result. And then use it to create parameters for the Insert statement. Or, you can be even more SQL oriented by using the Insert Into statement. Something like this:
This is just a dummy example I found online, but you get the point.
Great article! Just a question though, how come there is no inheritance of the DbContext class?
Hi Jayce. You don’t have that class. This class you are talking about is from EF Core.
Great article, thanks! Getting this issue with the connection.
https://stackoverflow.com/questions/73631083/net-6-0-web-api-dapper-getting-exception-in-the-connection-after-querying
Great article!! and very well explained .. i have one cuestion … how can i create a Controller for the last part of the tutorial ? i mean a controller for multiple transactions … do you have an example??
Hello Julio. You have a link to the source code at the beginning of the article, right below the video. There you can find all the code from the article
Thanx very much.
We have long been expecting this wirte up from that will show us how to use dapper in ASP.Net core WEB API.
We hope that in the coming articles, the use of datpper will be connected to MUDBLAZOR interface and and generate graphs as done in these articles
https://code-maze.com/using-mudblazor-to-create-product-details-page/
Once again,
Thanx Very Much
Excelent article!!
Thank you Adolfo.
I resolve the problem with:
  public IDbConnection CreateConnection()
        => new SqlConnection(_connectionString);
(error 40: pipe names) or ” i cant get the connection)
Replace “SqlConnection” with :
Thank you Julio for sharing the solution.
Nice article really useful
Thank you. I’m glad you like it.
excellent post
I did all the steps but I am getting error 40 — Named Pipes Provider, error: 40 – Could not open a connection to SQL Server
—
I did it with Dapper and visual studio 2022 and when I put my connection in the Program.cs everything worked. but when I put it in the appsettings.json as in the example I get the error 40… any idea how to solve it??
I really don’t know why you have that issue. Especially since while the connection is placed in the program class everything works well. I’ve just used this example, with the newest library versions, and for me, everything works well following all the steps from this article.
Maybe if i show you my code you see what i didnt see ..
appsettings.json :
"ConnectionStrings": {
    "SqlConnection": "Server=102.1.21.3126;Database=CaeefarNrtov;user id=sa;password=fdsfwefdfsf;Integrated Security=true; Encrypt=false"
And my Context.cs:
  public class DapperContext
    {
        private readonly IConfiguration _configuration;
        private readonly string _connectionString;


        public DapperContext(IConfiguration configuration)
        {
            _configuration = configuration;
            _connectionString = _configuration.GetConnectionString("SqlConnection");
        }


        public IDbConnection CreateConnection()
            => new SqlConnection(_connectionString);
}
Hope you can see it .. and thanks!
Well, all I can see is that you are using Integrated Security = true and also your user id and password inside the connection string, which you shouldn’t. If you set Integrated security to true, it means it will use a windows authentication to authenticate against the SQL server and you don’t have to provide a user id and password. Of course, if you are using SQL auth, then use both user id and password but without Integrated Security.
thankyou very much…..it was very helpful
You are most welcome. I’m glad you liked it.
I extremely liked this post. Just wanted to add few points like is there any way can we make or use that DapperContext class to as a common context class. And instead of passing always one connectionstring value can we pass a different database connection value. So in future as an example if I want to access StudentDb database I can use that DapperContext class easily.
Hello Sagar Chowdhury. Thank you for reading and commenting on this article. I’m glad you liked it. Regarding your question, there’s certainly a way to do that. It only depends on how you want to implement it. There is no space or time here to try to explain all the ways, but the easiest one would be to extract the connection string inside the CreateConnection method and not inside the constructor. Also, you would have to add a parameter in the same method for the connection string name. Again, this is just one simple solution, but you can create a factory and use some other techniques as well.
Thank you. I managed to create a functioning web api using this guide. However, I stumbled a bit since I’m using ASP.NET Core 6. There is no Startup.cs. Later I figured out using the builder.Services inside Program.cs
Yeah, if you are not using Startup in .NET 6, you have to use the builder object.
Nice article & solved my problem in dapper… Thank you for your great effort. 🙂
It is always a pleasure to hear something like that. Thanks for the comment.
Very helpful, thanks a lot.
You are most welcome. I’m glad you like it.
thanks dear ,great article
You are most welcome. I’m glad you like it.
Congratulations on the article, very well detailed.
Thanks a lot, Ricardo. I’m glad you like it.
Good article. Very well explained and very useful.
I have a question for you that might be of interest to other readers: how to adapt the code to run in a Production environment? I have 3 configuration files: AppSettings for general app settings, .Development for the Development DB connections and .Production for the Production DB. Any suggestion?
The class I created, shown below, always gives me back the Production DB connection…
[Code]
public class ConnectionManager
{
public static IDbConnection GetConnection(string connName = “SqlServerCon”)
{
IDbConnection connection;
IConfigurationRoot configuration = new ConfigurationBuilder()
.SetBasePath(AppDomain.CurrentDomain.BaseDirectory)
.AddJsonFile(“appsettings.json”)
.AddJsonFile(“appsettings.Development.json”)
.AddJsonFile(“appsettings.Production.json”)
.Build();
string connectionString = configuration.GetConnectionString(connName);
connection = new SqlConnection(connectionString);
return connection;
}
}
[Example]
public async Task<AutorDTO> GetAuthorById_Async(int Id)
{
string uSP = “usp_Autor_GetSingle”;
using (IDbConnection connection = ConnectionManager.GetConnection())
{
var result = await connection.QueryAsync<AutorDTO>(uSP, new { Id }, commandType: CommandType.StoredProcedure);
return result.FirstOrDefault();
}
}
Regards,
Fausto
Try using IWebHostEnvironment interface. Inject it inside the constructor and use it like it is used in the Startup class: if env.IsDevelopment() then add the development appsettings file to the configuration, also do the similar thing for production etc.
My class factory resides in the Application layer, being a library class, so I don’t have access to ‘IWebHostEnvironment ‘, I did import the Hosting package.
Maybe I didn’t understand well what you explained… 🙂
I haven’t tried ‘IWebHostBuilder’ yet, maybe it can resolve. What do you think?
Thanks once more.
Fausto
I solved it, by adding
<ItemGroup>
<FrameworkReference Include=”Microsoft.AspNetCore.App”></FrameworkReference>
</ItemGroup>
to the project.
Anyway, thank you for your support.
Keep on your good work!
Best regards,
Fausto
Portugal
Great, I’m glad you’ve managed to solve this.
Great atricle.
how can I update specific fields in multipleMapping?
and how add API key in adapper project?
Thank you in advance
Do you have a book about Dapper ?
No, we don’t. Our Web Api book uses EFa Core.
Great article!
Thanks a lot. Glad you like it.
Excellent article. Helped me a lot, specially the multiple mapping.
How can we create a DTO for inserting this multiple mapping through post requests?
If you want to create a single company with multiple employee objects, you have to create the same CompanyForCreationDto, as we have it in this article but with an additional collection of EmployeeForCreationDto property. This is the technique we explained in our Web API book linked in this article. Since you can extract the Id of the created main entity, you can easily assign it to each of the child entities and save them as well.
Thanks a lot for clarity. I did that by creating a DTO and it is working fine.
One query regarding the multiple mapping: The result is a list even if we have extracted a single parent object with where clause, how to modify the query and logic to remove that parent array wrapper when we get a single parent object?
Well, I don’t know and don’t have your code, so I am not sure what you do there, but when you say: “extracted a single parent object with where clause”, I have to say that Where is returning IEnumerable, so it is obvious that you will get a collection. Try using First, FirstOrDefault… Again, maybe this is not a solution, but since I can’t see your project, this is just my guess.
Can i make CompanyRepository a singleton too? what can go wrong with that?
Well by reading different posts around the internet, I can see that if you properly dispose of your connection, you can register it as a singleton. But, personally, since I mostly work with EF Core, I register my repositories as scoped. Of course, this is dapper, and I think the recommendation is to be transient.
very nice article !
Thanks a lot. I’m glad you like it.