
In this article, we are going to learn how to implement the OAuth2 refresh token actions in our Angular application. This action will enable us to silently refresh the access token when it is close to expiry. Also, it will provide a better user experience because the user doesn’t have to manually log in every time the access token expires in our application.
If you want to read the entire IdentityServer4, OAuth2, and OIDC series, feel free to do that and learn a lot more about the application security in ASP.NET Core.
Let’s move on.
More About the Token Management Actions
The OAuth2 access tokens have a fixed expiration time which can lead to some issues while users interact with our application. For example, if our access token’s lifetime is five minutes and the user needs at least 10 minutes to fill out the form on our site, they will receive an unauthorized response from the server on the submit action. That’s because the access token expires and the server can’t authorize the user.
This means we have to redirect the user to the Login screen on the IDP level, and then reload the Angular application. So, unless we preserve the user’s actions somehow locally, the user could lose all their work.
This is not a good user experience at all.
Also, increasing the lifetime of the access token to several days is not a good solution for security reasons. You can read more about that in our article about the refreshing JWT with ASP.NET Core and Angular.
So, what should we do in this case?
About Cookies
Every time the user logs in, the IDP establishes a cookie-based secure session between the user’s browser and the IDP itself. That means when a user sends a request to the server, the session cookie is going to be sent with that request as well. This is a sliding session and it resets the expiration of the cookie. So, if the login session with IDP lasts longer than the lifetime of the access token, the IDP can support the issuing of a new access token, as long as the IDP’s session is still active.
What we need to understand is that using only cookies is not enough. They have some security flaws – XSS (cross-site scripting) and CSRF (cross-site request forgery). On the other side, the tokens don’t have most of the XSS and CSRF vulnerabilities that cookies do. But the cookies can support the sliding expiration in the ways that tokens can’t.
That said, it turns out that the best approach is by combining these two.
In our Angular application, we can do this by sending a request to the /authorize endpoint with the prompt parameter set to none: /authorize?prompt=none. This tells the IDP to try to authenticate the user without prompting or trying to show any UI. If the authorization succeeds, the IDP will return a new access token and all we have to do is to replace the original one with a new one. This new token will be used for all the subsequent requests towards the API.
Even though this sounds a bit complicated to implement, it is not, since the oidc-client library does most of the work for us.
Automatic Logout Without OAuth2 Refresh Token Implemented
If we inspect the client configuration on the IDP level, we are going to see the lifetime of the access token set to 600 seconds. For this example’s purpose, let’s lower that value to the 60 seconds:
new Client
{
    ...
    RequireConsent = false,
    AccessTokenLifetime = 60
}
Now, you can remove the database and start the IDP application again, or you can just modify the value of the AccessTokenLifetime column inside the Clients table in your database.
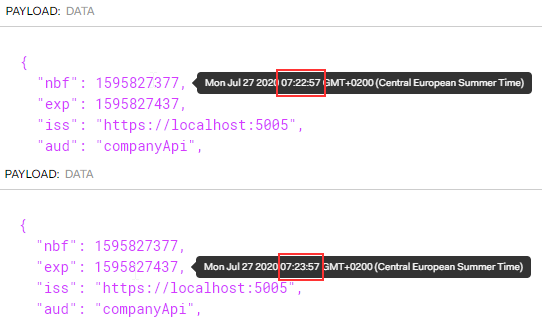
As soon as we log in, we can inspect our access token and see the expiration time of one minute for it:
Let’s improve our application, by showing the Login button, as soon as our token expires.
To do that, let’s modify the constructor of the Auth service:
constructor() {
  this._userManager = new UserManager(this.idpSettings);
  this._userManager.events.addAccessTokenExpired(_ => {
    this._loginChangedSubject.next(false);
  });
}
With the addAccessTokenExpired function, we subscribe to an event as soon as the access token expires. There, we just fire the loginChanged observable through its subject.
In the same way, we are going to modify the finishLogout action:
public finishLogout = () => {
  this._user = null;
  this._loginChangedSubject.next(false);
  return this._userManager.signoutRedirectCallback();
}
Excellent.
We can log in now and after one minute, we are going to see the Login link. Also, Companies and Privacy links will be hidden.
Enabling OAuth2 Refresh Token Actions
Right now, we can enable the silent renew of the access token and see it in practice.
The first step we have to do is to modify the configuration in the client application:
private get idpSettings() : UserManagerSettings {
  return {
    authority: Constants.idpAuthority,
    client_id: Constants.clientId,
    redirect_uri: `${Constants.clientRoot}/signin-callback`,
    scope: "openid profile companyApi",
    response_type: "code",
    post_logout_redirect_uri: `${Constants.clientRoot}/signout-callback`,
    automaticSilentRenew: true,
    silent_redirect_uri: `${Constants.clientRoot}/assets/silent-callback.html`
  }
}
We have two new properties. The first one enables the silent renew action and the second one points to the silent renew URI. Pay attention that this URI must be the same as the one in the client configuration on the IDP level:

From this URI, we can see that we require an additional HTML page. So, let’s add that page under the assets folder and name it silent-callback.html:
<!DOCTYPE html>
<html lang="en">
    <head>
        <meta charset="UTF-8">
        <meta name="viewport" content="width=1024, initial-scale=1.0">
        <meta http-equiv="X-UA-Compatible" content="ie=edge">
        <title>Silent-Callback</title>
    </head>
    <body>

    </body>
</html>
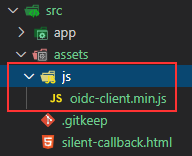
We have to load the oidc-client on this page and we will do that by copying the oidc-client.min.js file from the node_modules/oidc-client/dist folder and pasting it in the assets/js folder:
Then, we have to modify our HTML file:
<!DOCTYPE html>
<html lang="en">
    <head>
        <meta charset="UTF-8">
        <meta name="viewport" content="width=1024, initial-scale=1.0">
        <meta http-equiv="X-UA-Compatible" content="ie=edge">
        <title>Silent-Callback</title>
        <script src="/assets/js/oidc-client.min.js"></script>
    </head>
    <body>
        <script>
            const idpSettings = {
                authority: "https://localhost:5005",
                clientId: "angular-client",
                scope: "openid profile companyApi",
                response_type: "code"
            };

            new Oidc.UserManager(idpSettings).signinSilentCallback()
                .catch(error => {
                    console.log(error);
                });
        </script>
    </body>
</html>
Here, we load our script file and create the idpSettings object with required settings compatible with the Auth service user manager. Finally, we pass the idpSetting to the UserManager class and call the signinSilentCallback function to signin silently.
Testing the Functionality
Now if we start our application and log in successfully, as soon as we inspect the Network tab, we are going to see several calls in the loop:
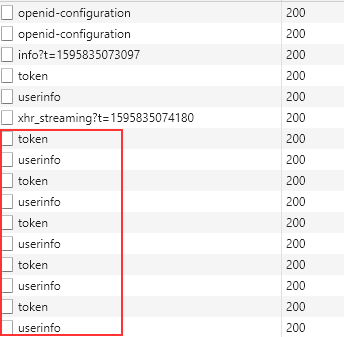
This happens because the oidc-client triggers the silent renew process 60 seconds before the token expiration. Since our token lifetime is 60 seconds, we are always within the time limit. To solve that, we are going to increase our token lifetime to 120 seconds (InMemoryConfiguration and Database).
Now if we log in, the token and userinfo requests will repeat once per 60 seconds since our token lifetime is 120 and, as we explained, the UserManager triggers the silent renew process 60 seconds before the expiration.
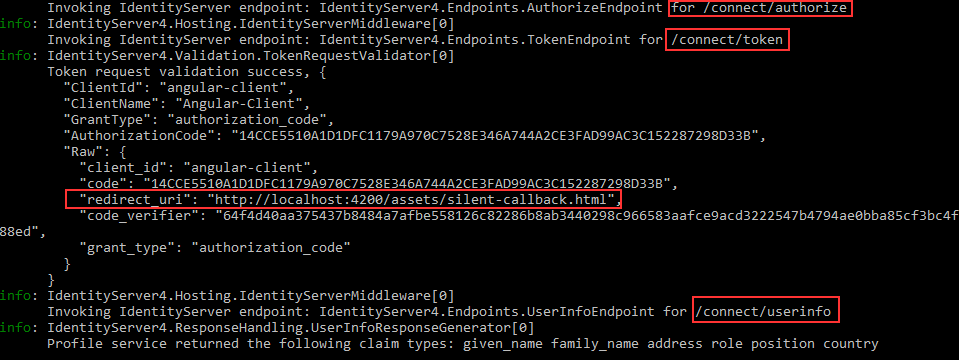
We can inspect the logs to see the call to the /authorize, /token and /userinfo endpoints:
Finally, we can inspect the URI from the request to the /authorize endpoint:
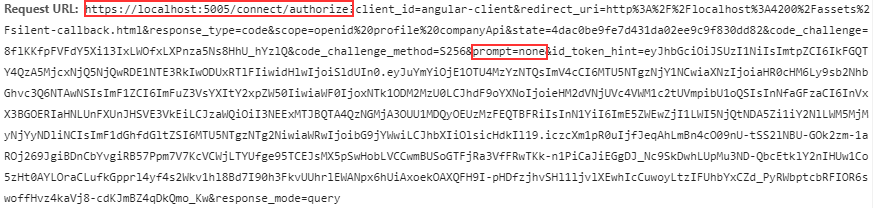
As you can see, there is the prompt parameter we’ve talked about with the value none.
Also, we are not logged out after the 120 seconds because our token is refreshed.
Cookie Lifetime Setup
If we want to restrict the lifetime of a cookie, we can do that by providing additional options in the AddIdentityServer method:
services.AddIdentityServer(opt =>
{
    opt.Authentication.CookieLifetime = TimeSpan.FromMinutes(4);
})
.AddTestUsers(InMemoryConfig.GetUsers())
.AddDeveloperSigningCredential() //not something we want to use in a production environment;
.AddProfileService<CustomProfileService>()
.AddConfigurationStore(opt => ...
Again, the four minutes lifetime is just for the example purpose.
Now, our application will refresh our token several times every sixty seconds, but after the cookie’s lifetime expires, the user will be forced to log in again.
Conclusion
Great job.
We have learned how to implement the OAuth2 Refresh Token in our Angular application using the oidc-client library and IdentityServer 4. We’ve seen that the process is not that hard because the oidc-client helps us a lot.
Until the next article,
Best regards.

