

In this article, we are going to use the popular open-source search and analytics engine – Elasticsearch to power a simple search system in ASP.NET Core.
Before we jump into code, in the first section let’s spend a moment explaining Elasticsearch and some common use cases.
What is Elasticsearch?
Elasticsearch is a free, open-source search database based on the Lucene search library.
Some key features include:
- Distributed and scalable, including the ability for sharding and replicas
- Documents stored as JSON
- All interactions over a RESTful HTTP API
- Handy companion software called Kibana which allows interrogation and analysis of data
- A wealth of client-side libraries for all popular languages
In a previous article, we discussed CQRS and how sometimes we’d like to split out the read system into a separate database. Elasticsearch can fit this situation perfectly, as it’s optimized for the read scenarios and provides near real-time search functionality because of the way the engine is designed.
In the next section, let’s look at how to connect to our local Elasticsearch cluster in an ASP.NET Core application.
Adding Data to Elasticsearch
There are a number of ways to add data to Elasticsearch, but a simple way for our purposes is to make use of the Bulk REST API, which allows us to send simple curl requests to Elasticsearch. Documents in Elasticsearch are stored in “indexes”, which can be thought of as “tables” in a relational database.
In this article, we are going to use “Books” as sample data. You can download the sample data file here.
Let’s open up a command prompt and run the command (change the port as necessary):
curl -XPOST localhost:9200/books/book/_bulk --data-binary @sample-data.json -H "Content-Type: application/json"
The command simply reads the sample JSON file, and adds the data to a new index called “books”. It’s worth mentioning here that instead of allowing Elasticsearch to create the document mappings for us (what we are doing here), we can have more control over this behavior. However, that’s a more advanced topic so here we are just accepting the defaults.
We should see lots of output in the command window signifying all the successful index operations. To confirm everything worked, let’s open up a browser and go to http://localhost:9200/_search:
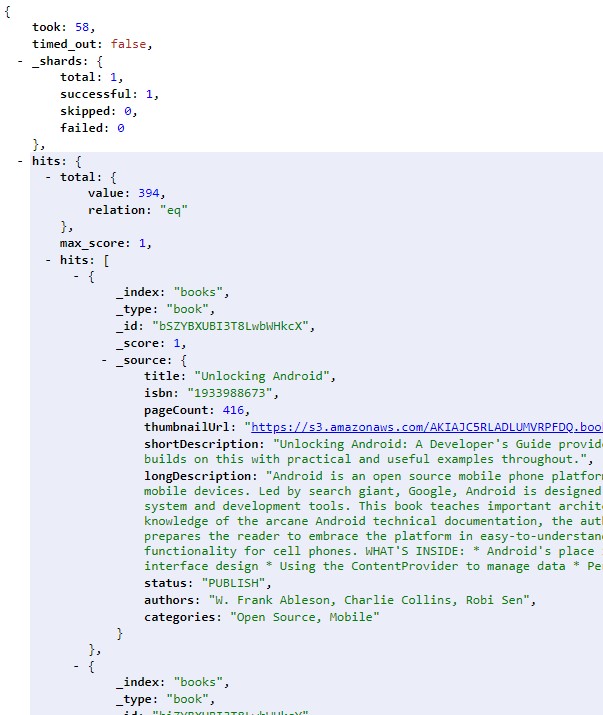
We can see that our sample data was inserted successfully into Elasticsearch, which is fantastic!
In the next section, we’ll see how to connect to Elasticsearch in ASP.NET.
Connecting to Elasticsearch in ASP.NET Core
To demonstrate how to use Elasticsearch in ASP.NET Core, we’re going to create a simple web application with a text field input. When the user enters some text and clicks a button, we’ll send that search query to Elasticsearch.
Creating the ASP.NET Core MVC application
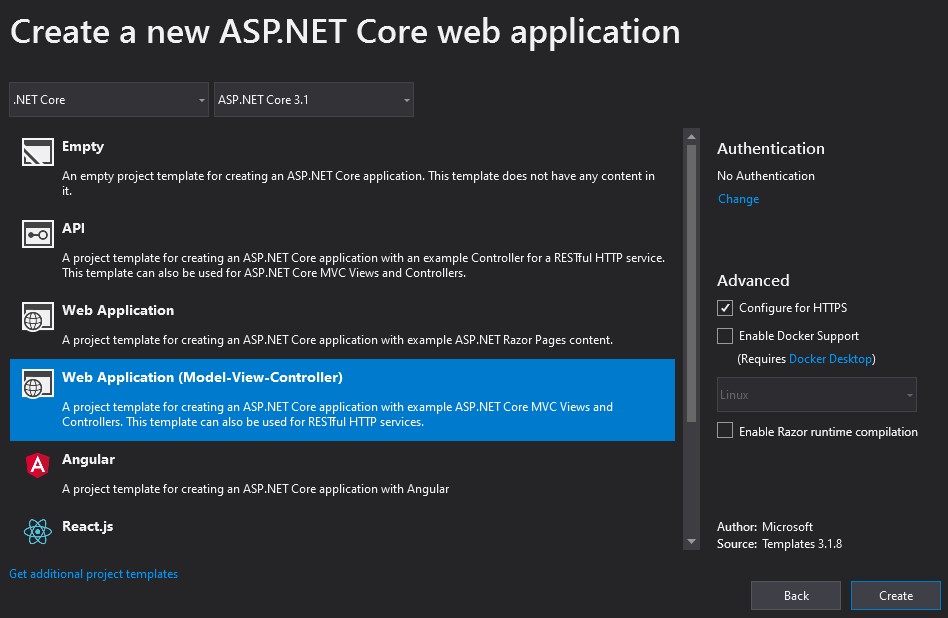
Let’s get started by creating a standard ASP.NET Core application in Visual Studio, choosing Web Application (MVC) as the type:
Creating the model
We will need a class to deserialize the JSON results from Elasticsearch, so let’s add the following class called “Book” to the Models folder:
public class Book
{
    public string Title { get; set; }
    public string Isbn { get; set; }
    public int PageCount { get; set; }
    public string ThumbnailUrl { get; set; }
    public string ShortDescription { get; set; }
    public string LongDescription { get; set; }
    public string Status { get; set; }
    public string Authors { get; set; }
    public string Categories { get; set; }
}
Creating an Elasticsearch connection
To connect to Elasticsearch, we’ll use the official NEST library developed by the team at Elastic.
Let’s open up the Package Manager Console and install NEST:
PM> install-package NEST
Next, let’s open up Startup.cs and create the connection in the ConfigureServices method:
var pool = new SingleNodeConnectionPool(new Uri("http://localhost:9200"));
var settings = new ConnectionSettings(pool)
    .DefaultIndex(“books”);
var client = new ElasticClient(settings);
services.AddSingleton(client);
There are a lot more configuration options available when creating the connection, but let’s keep things very simple here and keep all the defaults.
Creating the Search interface
Next, let’s open up Index.cshtml and add the following HTML:
@model Nest.ISearchResponse<Book>

<form asp-controller="Home" asp-action="Index" method="post">
    <input type="text" name="query" />
    <input type="submit" value="Search" />
</form>

@if (Model.Documents.Any())
{
    <h3>Search Results</h3>
    <ul>
    @foreach (var book in Model.Documents)
    {
        <li>Title: @book.Title (ISBN: @book.Isbn)</li>
    }
    </ul>
}
Let’s discuss our HTML:
- First, we strongly type the view to ISearchResponse<Book>. This is the type of response from Elasticsearch calls
- Then we add an HTML form which will allow us to post the search query back to the server, which we will then pass along to Elasticsearch and render the results.
- Finally, we add a simple loop that iterates through the matching documents and renders the title and ISBN.
Now that we’ve got the foundation set up, in the next section we’ll explore the foundation of searches in Elasticsearch, “Queries”.
Elasticsearch Queries
Now that we have our data in Elasticsearch, we want to be able to query it. Elasticsearch offers a very powerful DSL to perform numerous types of search operations, and the NEST library offers two approaches to use that DSL: object initializer syntax, and a Fluent API. In this article, we are going to use the Fluent API.
MatchAll query
The simplest query of all is the MatchAll query, which as the name suggests returns all the documents in an index. It can be likened to a “SELECT *” query in a relational database.
Let’s open up HomeController and firstly assign a local instance of ElasticClient:
private readonly ElasticClient _client;

public HomeController(ILogger<HomeController> logger, ElasticClient client)
{
    _logger = logger;
    _client = client;
}
Next, let’s modify the Index() method:
public IActionResult Index()
{
    var results = _client.Search<Book>(s => s
        .Query(q => q
            .MatchAll()
        )
    );

    return View(results);
}
Here we’re using the Search method on the client, specifying our Book model as the type parameter. This tells NEST how to deserialize the results coming back from Elasticsearch.
We’re then calling the MatchAll() method on the Query() method to do the search and return the View with the results.
If we run our app, we should see the following:
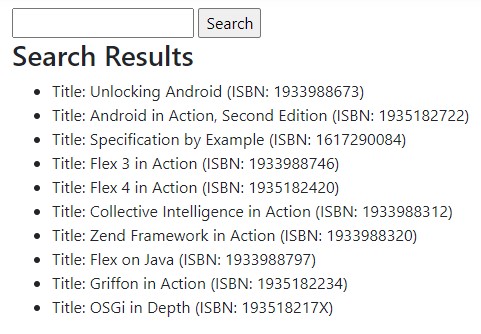
These results are the first ten books from the index.
Term query
Probably the most common query in Elasticsearch is the Term query. This allows us to find documents matching an exact query, which is great for scenarios like searching by ID or a simple value.
Let’s modify our Index() method again:
public IActionResult Index(string query)
{
    ISearchResponse<Book> results;

    if (!string.IsNullOrWhiteSpace(query))
    {
        results = _client.Search<Book>(s => s
            .Query(q => q
                .Term(t => t
                    .Field(f => f.Isbn)
                    .Value(query)
                )
            )
        );
    }
    else
    {
        results = _client.Search<Book>(s => s
            .Query(q => q
                .MatchAll()
            )
        );
    }

    return View(results);
}
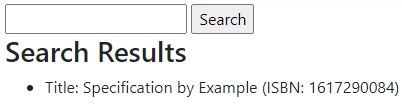
We’ve amended our code to accept a parameter called “query” into the method. This corresponds to the text field submitted in the form post, which if supplied uses the Term method to search upon the ISBN field.
Let’s run our application again, and if we enter one of the ISBNs and hit search, the page should be refreshed with the expected result:
Match query
Often with search systems, we want the user to enter in some text, and we want that text to match any part of the content in the document. That’s where the Match query comes in.
Let’s modify the first if statement in the Index method again:
results = _client.Search<Book>(s => s
    .Query(q => q
        .Match(t => t
            .Field(f => f.Title)
            .Query(query)
        )
    )
);
The syntax is very similar to the Term query. This time we’re searching upon the Title field, which has multiple words, which Elasticsearch analyses in order for us to query upon.
Let’s run our application again, and this time enter the text android and hit Search:
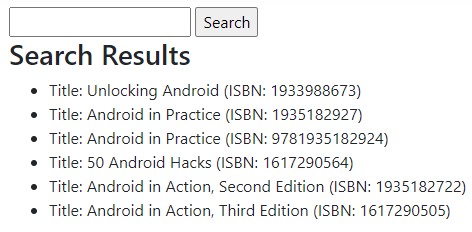
There are a few key points here worth mentioning:
- We match multiple documents
- All matching documents contain the text “android” in the title
- Even though we specified android in lowercase, it still matched documents with Android (title case). This behavior can be overridden with custom analyzers, but that’s an advanced topic for another time.
There are a lot of other queries supported by Elasticsearch, but the Term and Match queries form the basic use cases.
In the next section, we’ll go over another Elasticsearch feature called Aggregations.
Elasticsearch Aggregations
When we have a large data set, often we want to summarise or ‘aggregate’ that data, to serve functionality like:
- Summary page
- Paging or counts
- Faceted navigation
- Tag bubbles
This is where we can use aggregations to quickly compute results.
Range Aggregation for PageCount
Since we are dealing with books, it might be interesting to see some statistics on the number of pages. For this, we can make use of the Range aggregation.
Let’s modify our MatchAll query to include this aggregation:
results = _client.Search<Book>(s => s
    .Query(q => q
        .MatchAll()
    )
    .Aggregations(a => a
        .Range("pageCounts", r => r
            .Field(f => f.PageCount)
            .Ranges(r => r.From(0),
                    r => r.From(200).To(400),
                    r => r.From(400).To(600),
                    r => r.From(600)
            )
        )
    )
);
Here in addition to our MatchAll query, we are using the Aggregations method to specify some aggregations, in our case the “Range” aggregation.
Let’s open our Index.cshtml and add some HTML to render our new aggregation:
@if (Model.Aggregations != null)
{
    <h3>Aggregations</h3>

    @if (Model.Aggregations.ContainsKey("pageCounts"))
    {
        <h4>PageCounts (Range)</h4>
        <ul>
        @foreach (var bucket in Model.Aggregations.Range("pageCounts").Buckets)
        {
            <li>@bucket.Key: @bucket.DocCount</li>
        }
        </ul>
    }
}
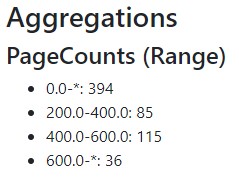
Similar to the previous HTML, we’re simply looping through each “bucket” (or group) in the pageCounts aggregations, and rendering the information about it.
Let’s run our app again, and we should see the results:
Terms Aggregation for Categories
We mentioned previously the use case of tag bubbles or faceted UI systems. This is where the Terms aggregation comes in. It’s similar to a “GROUP BY” clause in a relational database, where we can get statistics on various words (or ‘terms’) across documents.
Let’s modify our Aggregations code again:
results = _client.Search<Book>(s => s
    .Query(q => q
        .MatchAll()
    )
    .Aggregations(a => a
        .Range("pageCounts", r => r
            .Field(f => f.PageCount)
            .Ranges(r => r.From(0),
                    r => r.From(200).To(400),
                    r => r.From(400).To(600),
                    r => r.From(600)
            )
        )
        .Terms("categories", t => t
            .Field("categories.keyword")
        )
    )
);
Notice we’ve added the “Terms” aggregation in addition to the existing Range aggregation. An interesting part here is the field value set to the string “categories.keyword”. The reason for this is that Terms aggregation is an expensive operation, and isn’t usually done on “text” fields. However, all text fields by default have backing “keyword” sub-fields, which are optimized for this use case.
This approach shows how we can do the terms aggregation on text fields. Another approach would be to explicitly map the field as “keyword”, but then we lose the full-text search functionality like “Match”. So this approach gives us the best of both worlds.
Let’s modify our Index.cshtml for our new aggregation:
@if (Model.Aggregations != null)
{
    <h3>Aggregations</h3>

    @if (Model.Aggregations.ContainsKey("pageCounts"))
    {
        <h4>PageCounts (Range)</h4>
        <ul>
        @foreach (var bucket in Model.Aggregations.Range("pageCounts").Buckets)
        {
            <li>@bucket.Key: @bucket.DocCount</li>
        }
        </ul>
    }

    @if (Model.Aggregations.ContainsKey("categories"))
    {
        <h4>Categories (Terms)</h4>
        <ul>
        @foreach (var bucket in Model.Aggregations.Terms("categories").Buckets)
        {
            <li>@bucket.Key: @bucket.DocCount</li>
        }
        </ul>
    }
}
Let’s run our app again:
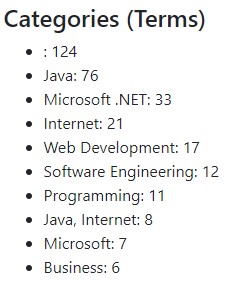
As expected we now have the number of documents matching each of the categories.
This approach shows how we can do the terms aggregation on text fields. Another approach would be to explicitly map the field as “keyword”, but then we lose the full-text search functionality like “Match”. So this approach gives us the best of both worlds.
Conclusion
In this article, we provided a very basic introduction to Elasticsearch in ASP.NET Core. We touched on some basic queries and aggregations that are the starting point for most developers. Elasticsearch is a very mature database with lots more features that have been introduced here, but hopefully, this puts you in the right direction.

