

As developers, we often have different ideas for writing our code. While coding style preferences can differ, being consistent is important. In this article, we will explore the benefits of StyleCop Analyzers and how they can help us enforce a unified coding style across our project and our team.
Let’s get started.
What Is StyleCop Analyzers?
StyleCop Analyzers are a tool we can use to ensure consistent and standardized coding styles. Its primary purpose is to analyze source code and provide us with feedback based on predefined style rules and conventions.
These rules can cover various aspects of code formatting, naming conventions, documentation, and other style-related guidelines. We can find the complete list of default rules and their grouping on the Stylecop Github.
Once installed, the analyzer scans our code and identifies violations or potential areas for improvement. When code analysis detects rule breaks, we can see them in the error list window or when building our code as warnings, errors, or information, depending on the set configuration.
Now that we know a little bit more about Stylecop, let’s see how we can set it up!
Implementing StyleCop
We will start by creating a new ASP.NET Core Web API project. We can do it using the ASP.NET Core Web API template in Visual Studio, or using .NET CLI:
dotnet new webapi
After the project is successfully created, let’s build it. If we take a look at the error list window, we can see that there are no errors, warnings, or information present.
Now, we can install Stylecop and see what happens. To do so, we can install the StyleCop.Analyzers Nuget package:
dotnet add package StyleCop.Analyzers
If we build the project again, we can see a whole new list of warnings coming from our newly installed StyleCop:
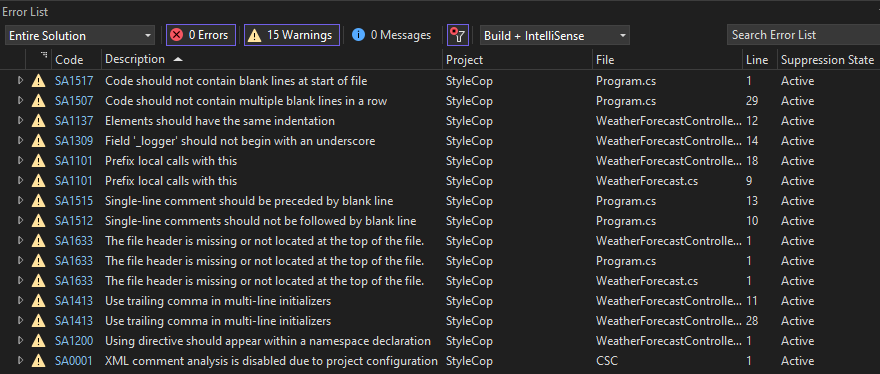
Among other things, in the error window, we can see the warning code, its description, and that it comes from the project named StyleCop. Also, we can see that the SupressionState is Active.
If we want to learn more about each warning we can click on the Code id and it will redirect us to the StyleCop GitHub page. There we can find documentation for the selected rule. For example, if we want to learn more about the rule SA1137 Elements should have the same indentation, we will end up on the rule documentation page.
Now we know how to enable StyleCop Analyzers in our project, but we often want to customize the given rule set to fit our specific needs, let’s find out how.
Customizing StyleCop Analyzers Rules
When modifying the StyleCop Analyzers rules, there are two ways to do it. The first thing we can do is adjust the severity of a certain rule or suppress it in the given rule set. We can do this via the .editorconfig file or through the StyleCop XML rule set file. Furthermore, if we wish to have more control and adjust the default rule set to cater to our preferences, we can add a stylecop.json file, but more about it later on.
Changing Rule Severity
Let’s say that our team agrees that we don’t want to treat rule SA1101 "Prefix local calls with this" as a warning, but as a suggestion. The first way we can do it is to go directly into the .editorconfig file and edit it there.
Using .editconfig File
In .NET, .editconfig file is a configuration file that is used to enforce coding style conventions. It specifies rules for code formatting, such as indentation, line spacing, and more. All of this helps to ensure consistency across developers by placing the file in the project’s root directory and making it available for everyone by checking it in the version control.
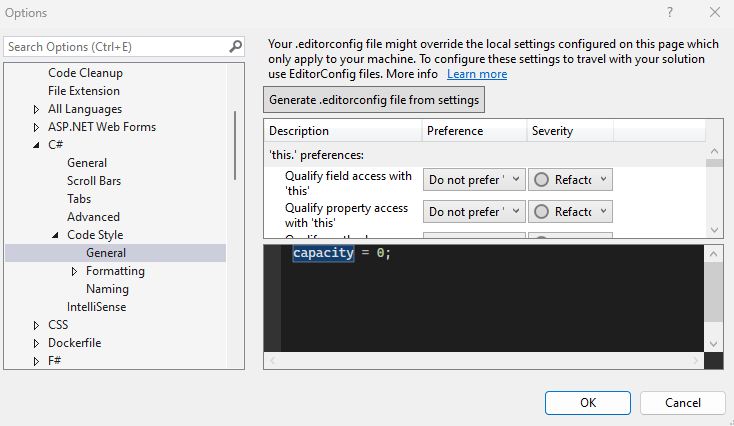
To get access to this file in our project, in Visual Studio we can go to Tools then Options. Here, and under the C# section, we search for the code style general section and click Generate .editorconfig file from settings. Then, we can save the generated file in the root of our repository and name it .editorconfig:
Now, let’s open the file, and under the Analyzers tab search for the rule we want to modify, in our case the id is SA1101:
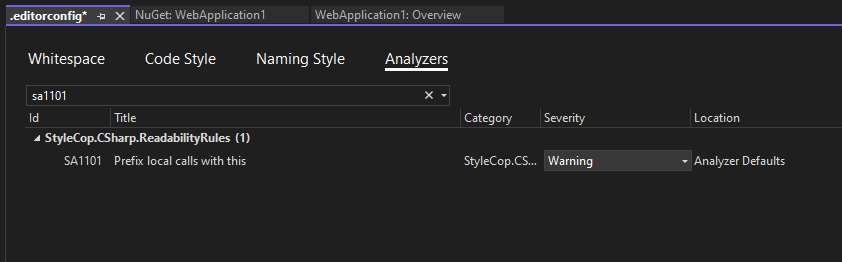
Here, under the severity, we want to set it as a suggestion. Now, all we need to do is save our changes to the .editconfig file and the new severity will be applied to our project.
Going Through Visual Studio
Another way to do it is to open the StyleCop Analyzers under our project’s dependencies. There, we can see all the defined rules:
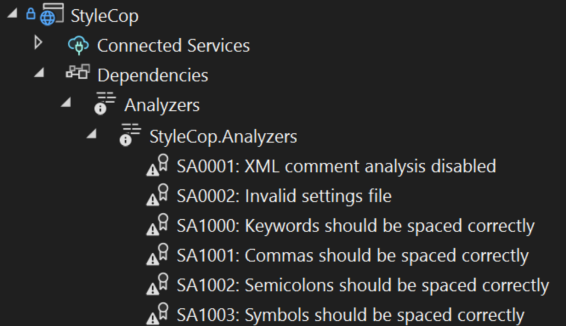
Right-clicking on a given rule will open a tab where we can click on Set severity. There we can choose our desired severity level, which in our case would be a suggestion.
If we go with this approach, we will see that .editconfig file got included in the code project, since we changed the default rule set.
Suppressing Rules
When working with Stylecop, one more common requirement can be to suppress a certain rule.
One way we can do it is to set its severity to None or Silent. The difference between the two is that by using None we completely disable the rule. On the other hand with Silent the rule violation is detected and recorded but without generating visible warnings or errors.
Another way to suppress a rule is to hover over a place where the rule violation is appearing:
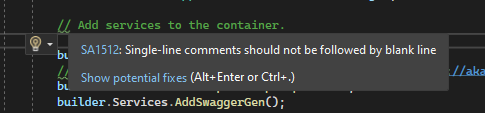
Here, we can click on Show potential fixes or use a shortcut to access the action menu by pressing “Alt+Enter” or “Ctrl + .” Now we get a new dialog with multiple options to suppress the rule violation:
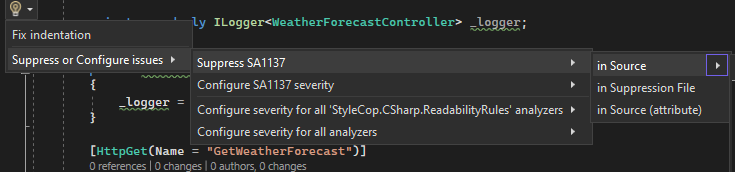
If we decide to do it in Source, we will see our file got modified:
#pragma warning disable {ruleCode} // {ruleDescription}
//code which is breaking the rule
#pragma warning restore {ruleCode} // {ruleDescription}
By using #pragma warning disable, we tell our compiler not to display the selected rule violation in certain places in our code. After it, we should add #pragma warning restore to re-enable the warning after the code block, restoring the default behavior.
Using Global Suppression File
If we wish to suppress a rule on the project level, we can choose the second option, in Suppresion File. This will create a GlobalSuppressions.cs file inside our project folder:
// This file is used by Code Analysis to maintain SuppressMessage
// attributes that are applied to this project.
// Project-level suppressions either have no target or are given
// a specific target and scoped to a namespace, type, member, etc.

using System.Diagnostics.CodeAnalysis;

[assembly: SuppressMessage(
"StyleCop.CSharp.ReadabilityRules",
"SA1137:Elements should have the same indentation",
Justification = "For testing purposes",
Scope = "member",
Target = "~F:StyleCop.Controllers.WeatherForecastController.Summaries")]
We use GlobalSuppressions.cs file to suppress specific StyleCop warnings or rule violations within certain projects. It allows us to selectively disable or ignore certain rules for specific sections of code or individual code.
To make it selective we use Scope and Target properties. The Scope property determines the level at which the suppression is applied. It can have values like namespace, type, member, module, resource, or assembly, depending on the desired level of granularity. On the other hand, we use the Target property to specify the specific code element to which the suppression applies within the chosen scope. Its value depends on the selected Scope and should match the name or identifier of the target code element.
In our case, the rule suppression for rule “SA1137:Elements should have the same indentation” will be applied only to the Summaries field within the WeatherForecastController class.
Also, we can see that we have Justification property. We can use this property to inform other team members why a certain rule was suppressed. If we don’t set it, we will also get a warning from Stylecop that it should be set.
Adding stylecop.json
In addition to .editorconfig and suppression files, to gain more control over Stylecop implementation we can use stylecop.json file. If we hover over a rule violation, we get an Add StyleCop settings file to the project option and a preview of the added stylecop.json file:
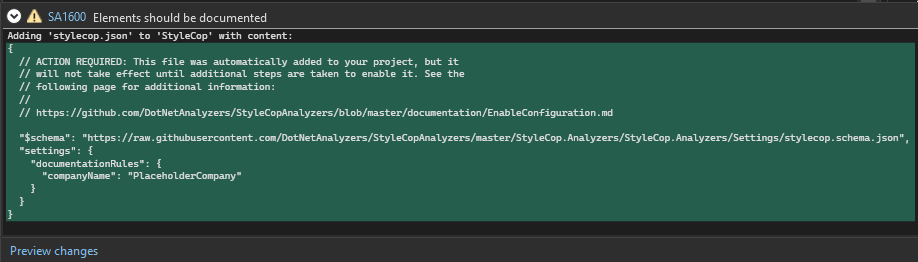
This will create a stylecop.json file:
{
  // ACTION REQUIRED: This file was automatically added to your project, but it
  // will not take effect until additional steps are taken to enable it. See the
  // following page for additional information:
  //
  // https://github.com/DotNetAnalyzers/StyleCopAnalyzers/blob/master/documentation/EnableConfiguration.md

  "$schema": "https://raw.githubusercontent.com/DotNetAnalyzers/StyleCopAnalyzers/master/StyleCop.Analyzers/StyleCop.Analyzers/Settings/stylecop.schema.json",
  "settings": {
    "documentationRules": {
      "companyName": "PlaceholderCompany"
    }
  }
}
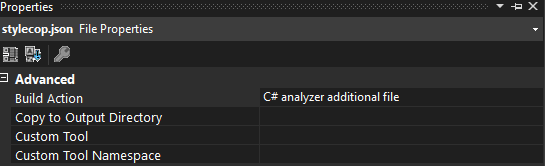
First, we have a comment that says that we need to take additional steps to enable its usage. What this means is that we need to change the build action of the file. To do so, we need to go to the properties of the file and select that the build action is C# analyzer additional file:
In the file, the JSON field $schema specifies the URI of the JSON schema file that defines the structure and validation rules for the stylecop.json file. In this case, the URI points to the schema file on the GitHub repository of StyleCop Analyzers. This will ensure that the configuration file follows the correct schema.
Next, we have a settings section where we can define our own rules. We already have one rule predefined, and it is a documentationRule. Inside it, we can find a companyName property that we can replace with our desired name.
If we take a look at our existing warnings, we can see that we have a rule break SA1633 "The file header is missing or not located at the top of the file". Now, if we go to that rule break and hover over it, we can select Add file header:
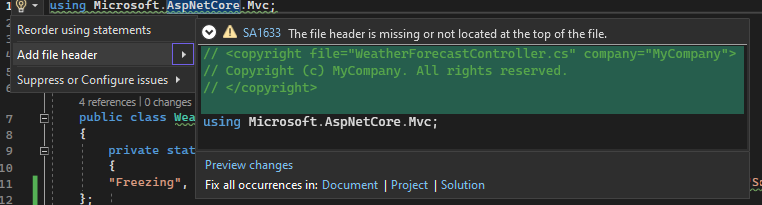
In the preview of the added header, we can see it will generate a header with our company name inside of the class. In our case, we renamed it to CodeMaze.
Now, let’s see how we can add our own custom rule.
Adding Custom Rules
Let’s say we want to define an array of strings:
private readonly static string[] Summaries = new[]
       {
       "Freezing", "Bracing", "Chilly", "Cool", "Mild",
       "Warm", "Balmy", "Hot", "Sweltering", "Scorching"
       };
If we do it like this, we would get a warning that a static modifier should appear before readonly. If we want this to be the default ordering of our keywords, we can add it to the stylecop.json file:
"settings": {
  "documentationRules": {
    "companyName": "CodeMaze"
  },

  "orderingRules": {
    "elementOrder": [ "kind", "accessibility", "constant", "readonly", "static" ]
  }
}
We add a new section and name it orderingRules. This section deals with the order of elements within a code file. The elementOrder array specifies the desired order of different code elements. In our case, we order it to have static a modifier after the readonly one, to enforce the desired behavior.
Now, when we save the changes to the stylecop.json file, the warning related to the ordering will be gone.
This was just a simple example of how to add a change to a custom rule set. There are plenty of other possibilities for working with stylecop.json file. We can find a full list of possible customization with stylecop.json in their documentation.
Conclusion
In this article, we saw how implementing StyleCop in Visual Studio improves code quality and consistency by enforcing coding standards. Also, we saw how we can configure it to make sure it aligns with our team’s vision and the project’s needs. Overall, with the real-time feedback and build-time analysis Stylecop has to offer, we developers can have an easier way to maintain standardized coding, readability, and collaboration in our team.
