

Until the release of .NET 5, to be more precise .NET 5 Preview 8, we could’ve used only the global styles in the Blazor project. After the mentioned release, Microsoft added support for the CSS styles that are scoped to a specific component. This means that we can use CSS isolation in Blazor WebAssembly to attach the CSS file only for the specific component in our applications and not use it globally. That said, in this article, we are going to learn how to implement CSS isolation in Blazor WebAssembly applications. Also, we will learn about the integration with a preprocessor like SAAS and how the Blazor application includes isolated styles from a lazy-loaded project.
If you want to learn more about Blazor WebAssembly, we strongly suggest visiting our Blazor WebAssembly series of articles, where you can read about Blazor WebAssembly development, authentication, authorization, JSInterop, and other topics as well.
Let’s start.
Project Preparation
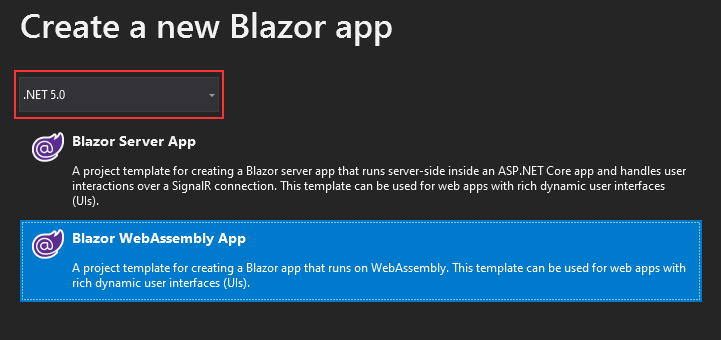
We are going to start by creating a new Blazor WebAssembly project using the .NET 5 framework:
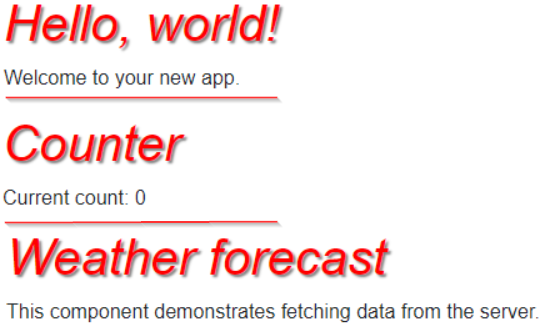
Our project comes with three already prepared pages: Index, Counter, and FetchData that we can use for our example. All of these pages have the h1 element, and we can use the wwwroot/css/app.css file to modify all of them:
h1 {
    color: red;
    font-style: italic;
    text-shadow: 2px 2px 2px gray;
}
If we start our application now and inspect all the pages, we are going to see that all the h1 elements are modified:
This is a good solution if we want to apply our styles to all the components in our project. But what if we want separate styles for specific components? Well for that, we can isolate the CSS file for a specific component and apply the styles from that file only to a related component.
Let’s see how to do that.
Implementing CSS Isolation in Blazor WebAsssembly
We are going to implement the changes only for the Index component since it will be enough to explain the topic.
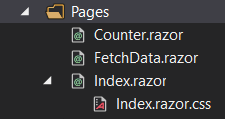
That said, let’s start by creating a new Index.razor.css file in the Pages folder:
We can see this file as a part of the Index.razor file, which is the same behavior as with the partial classes in the Blazor WebAssembly application.
Now we can add a new element selector in the CSS file:
h1 {
    color: blue;
    font-style: italic;
    text-shadow: 2px 2px 2px gray;
}
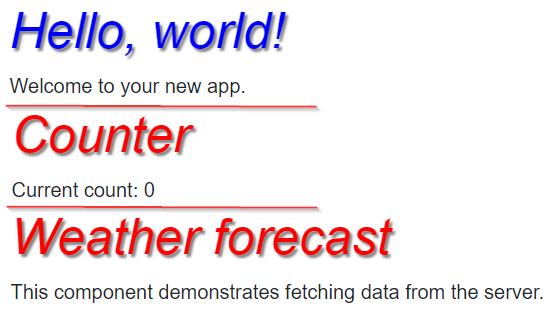
We just change the color, to be able to see the difference from the h1 elements on other pages.
And that’s all it takes.
If we start our app now, we are going to see that only the h1 element on the Index page has a different color:
Excellent.
But how this really works?
If we open the Developer Tools window of our browser and inspect the h1 element on the Index page, we are going to see a new attribute attached to it:
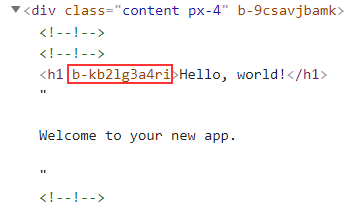
With a help of this attribute, Blazor binds the isolated styles to the specific element. What Blazor does is combining all the isolated styles into a single file named CssIsolationExample.styles.css(you will have the name of your project as a first part of the file name). To confirm that, we can first inspect the head element of the index.html page:
<head>
    <meta charset="utf-8" />
    <meta name="viewport" content="width=device-width, initial-scale=1.0, maximum-scale=1.0, user-scalable=no" />
    <title>CSSISolationExample</title>
    <base href="/" />
    <link href="css/bootstrap/bootstrap.min.css" rel="stylesheet" />
    <link href="css/app.css" rel="stylesheet" />
    <link href="CSSISolationExample.styles.css" rel="stylesheet" />
</head>
We can see the file reference here.
Also, let’s inspect the Sources tab of our Developer Tools window:
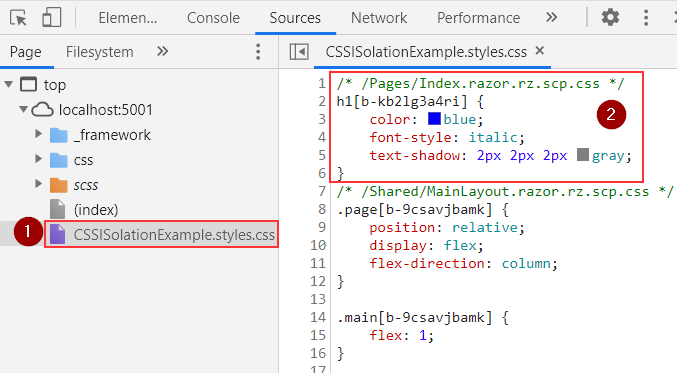
We can see the file on the left, and its content on the right. Additionally, we can confirm that the h1 element has the attribute attached, and all our styles implemented. We can also see a nice comment above the element reference that points to the component that we implement the styles on.
Css Isolation with Child Components
Since we know all the theory behind the isolation process, we can test this solution with a child component. For that, we are going to stick to the Index.razor page because it already uses a child component to display some additional content.
Let’s open the Shared/SurveyPropmt.razor file and modify it a bit:
<div class="alert alert-secondary mt-4" role="alert">
    <span class="oi oi-pencil mr-2" aria-hidden="true"></span>
    <h1>@Title</h1>

    <span class="text-nowrap">
        Please take our
        <a target="_blank" class="font-weight-bold" href="https://go.microsoft.com/fwlink/?linkid=2137916">brief survey</a>
    </span>
    and tell us what you think.
</div>

@code {
    // Demonstrates how a parent component can supply parameters
    [Parameter]
    public string Title { get; set; }
}
As you can see, we just modify the <strong> element to the <h1> element. And that’s all. Since the h1 element of the parent component already has new styles, we expect them to be implemented on this component as well. So, let’s start the app and check it:

But, as we can see, the global styles are applied to the child component and not the isolated ones.
To make this work, we have to implement the ::deep combinator in the Index.razor.css file:
::deep h1 {
    color: blue;
    font-style: italic;
    text-shadow: 2px 2px 2px gray;
}
In our case, just doing this is not enough. If we start the app, we are going to see the global styles implemented on both h1 elements.
So, let’s check the Developer Tools again, to see what is going on:
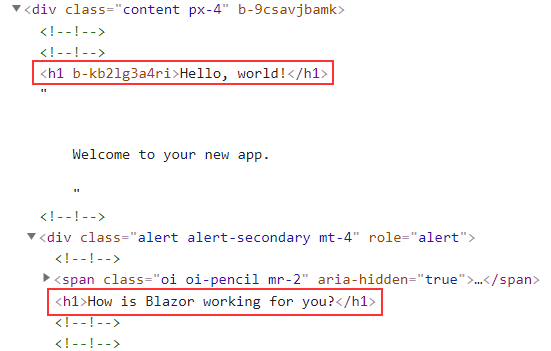
We can see the parent’s h1 element has that attribute but the child’s don’t.
In this markup – as it is right now – Blazor has a problem to determine the relationship between the two components. So, we have to help it a bit.
To do that, let’s wrap the content of the Index.razor file inside the div element:
@page "/"

<div>
    <h1>Hello, world!</h1>

    Welcome to your new app.

    <SurveyPrompt Title="How is Blazor working for you?" />
</div>
Now if we start the app, everything should work:

This works because Blazor now knows that these two h1 elements are inside a parent element that has the custom generated attribute:

Excellent.
Adding a Preprocessor to Our Application
The CSS isolation topic always raises a question about the preprocessor implementation and is it supported. Well, the answer is yes. To be more precise, Blazor CSS isolation doesn’t offer a preprocessor functionality but it supports it. All we have to do is to enable the preprocessor to compile styles to the css file before we build the Blazor app. To do that, we can use the Delegate.SassBuilder package (of course, you can use the one you prefer).
So, let’s install the package first:
PM> Install-Package Delegate.SassBuilder -Version 1.4.0
Then, let’s create the Index.razor.scss file:
$color: blue;
$fontStyle: italic;
$textShadow: 2px 2px 2px gray;

::deep h1 {
    color: $color;
    font-style: $fontStyle;
    text-shadow: $textShadow;
}
Now, all we have to do is to rebuild our solution and check the Output window:
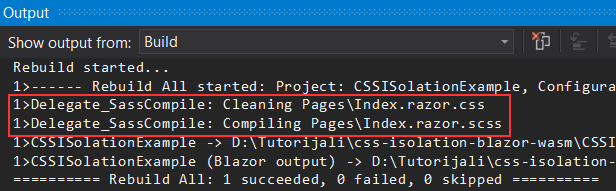
We can see that the package generates a new Index.razor.css file. We can check that file to verify the content:
::deep h1{color:blue;font-style:italic;text-shadow:2px 2px 2px gray;}
Great.
If we start our app, everything should work as it did.
Css Isolation with Lazy Loaded Projects
Blazor supports lazy loading which means that it loads the resources only when users require them. In other words, if the user visits only the Index page, the resources for the FetchData page (if it is configured to load in a lazy manner) won’t be loaded at all. To learn more about this feature, you can read our Lazy Loading in Blazor WebAssembly article.
We might wonder, if our lazy-loaded project contains the isolated css files, how are they included in the main project.
Well, let’s check that.
We are going to open the project from our Lazy Loading in Blazor WebAssembly article and modify it a bit. In this project, we have two projects, the BlazorWasmLazyLoading, which is the main one, and the Weather, which is the project that we load in a lazy manner:
Now, let’s create a new FetchData.razor.css file in the Weather project:
h1 {
    color: red;
    font-style: italic;
    text-shadow: 2px 2px 2px gray;
}
So, nothing we didn’t already see.
Now, let’s start the app and inspect the Developer Tools window:
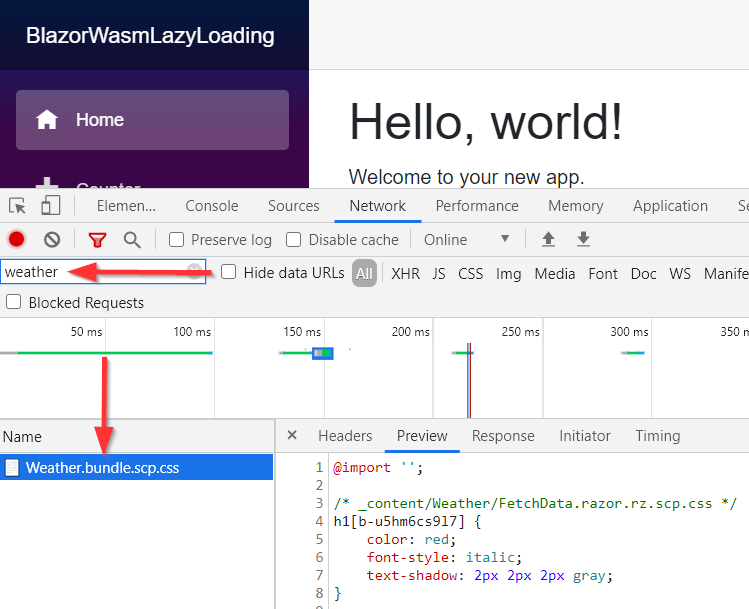
We can see that even though our Weather project is not loaded yet, the bundle.scp.css is loaded with the required styles. So this tells us that the CSS bundling is executed for the separate project before we even load it.
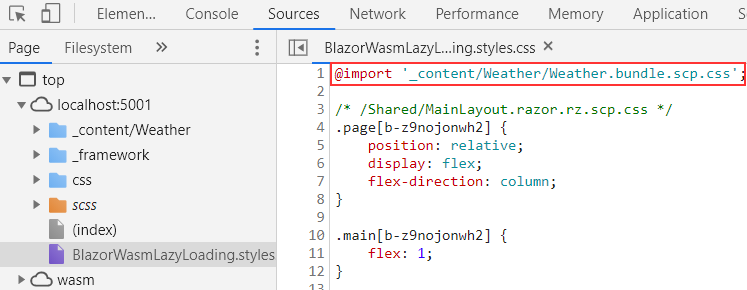
Also, if we check the Sources tab, we are going to see the import statement for this bundle file:
Of course, if you navigate to the FetchData menu item, you are going to see the weather.dll file loaded.
Conclusion
Now we know how to isolate our CSS files for specific components and how this isolation process works. We also know more about preprocessing and how CSS isolation in Blazor works with lazy-loaded projects.
Until the next article.
All the best.
