

In this article, we’ll keep exploring the iText library, but this time, we’ll focus on how to insert text into an existing PDF document and modify it as well.
In a previous article about iText, we got into creating fresh PDFs in an article called ‘Introduction to PDF Manipulation With iText (Formerly iTextSharp).’
We also covered the idea of sticking headers and footers in ‘Adding Header and Footer to a PDF Using the iText Library.’
The last article in this series was all about mashing up existing files into new PDFs, ‘Merging Multiple PDFs Using the iText Library.’
Now that we’ve got this info in our toolkit, we’re set to dive into tinkering with existing PDFs.
Let’s begin.
Adding iText Library 8.x
Up until now, we have used the iText 7.x library. Let’s transition from iText 7.x to the latest version, 8.x, in our .NET project.
Preparing a Project
For testing, we’ll opt for a command-line project. In Visual Studio, create a new Console App, or via the command line, run:
dotnet new console
Since we’re incorporating the iText library, we need to add the corresponding NuGet package. In Visual Studio, navigate to Tools/Manage NuGet Package for Solution…, search for ‘itext,’ and add it. Alternatively, from the command line, execute:
dotnet add package itext
Without specifying a version, the current (as of December 2023) installation will fetch version 8.x of the iText library.
Expanding Beyond the Basics
If we proceed with the current setup, attempting to use the PdfWriter object or certain other iText library components will result in a runtime error. The error might look something like this:
iText.Kernel.Exceptions.PdfException
  HResult=0x80131500
  Message=Unknown PdfException.
  Source=itext.kernel
  StackTrace:

....

Inner Exception 1:
NotSupportedException: Either com.itextpdf:bouncy-castle-adapter or com.itextpdf:bouncy-castle-fips-adapter dependency must be added in order to use BouncyCastleFactoryCreato
The hitch here involves a component named ‘bouncy-castle-adapter.’ The snag is straightforward – iText version 8.x utilizes BouncyCastle adapters for handling encrypted files, and these adapters require implementation. Therefore, to effectively use iText in version 8.x, we need an additional library:
dotnet add package itext.bouncy-castle-adapter
In summary, to employ the iText library in version 8.x, we must include two dependencies: itext and itext.bouncy-castle-adapter.
The purpose of the bouncy castle adapter is spelled out for us on the iText web page: ‘We’ve introduced algorithm-agnostic signing/validation, so if you wish, you can now use algorithms not directly supported by iText, but supported by the underlying Bouncy Castle cryptographic library.’
Other Changes from Version 7.x to 8.x
Let’s briefly highlight some notable changes as we shift our focus to version 8. While a comprehensive overview can be found on their website, here are a few key points:
- Support for Latest Cryptographic-Related Extension: Version 8 introduces compatibility with the latest cryptographic-related extension, necessitating the new dependency we discussed earlier.
- Enhancements in the Sign Module: There are notable updates in the sign module, particularly in the context of signing PDF documents.
- Improved Forms Creation: Version 8 brings improvements to the creation of forms.
- Bug Resolution: Perhaps the most welcome change for everyday programmers is the bug resolution that plagued us in previous versions, as discussed in ‘Introduction to PDF Manipulation With iText (Formerly iTextSharp).’
Insert Text into an Existing PDF Document
After our tour through the recent iText changes, let’s dive into the practical aspect of inserting text into existing documents. Surprisingly, we already possess sufficient knowledge to append text to existing PDF files without introducing any new iText classes.
Use BasicTextAdder to Insert Text into an Existing PDF Document
Let’s consider a straightforward approach with a method named Add() in the BasicTextAdder class, leveraging the insights from our earlier articles:
public static void Add(string inputFile, string outputFile, string textToAdd)
{
    using var writer = new PdfWriter(outputFile);
    using var outputDocument = new PdfDocument(writer);

    using var reader = new PdfReader(inputFile);
    using var inputDocument = new PdfDocument(reader);

    using var workingDocument = new Document(outputDocument);

    var numberOfPages = inputDocument.GetNumberOfPages();
    for (var i = 1; i <= numberOfPages; i++)
    {
        var page = inputDocument.GetPage(i);

        var newPage = page.CopyTo(outputDocument);
        outputDocument.AddPage(newPage);

        var copyText = new Paragraph(textToAdd);
        workingDocument.ShowTextAligned(
            p: copyText,
            x: UnitConverter.mm2uu(10), y: UnitConverter.mm2uu(10),
            pageNumber: i,
            textAlign: TextAlignment.LEFT, vertAlign: VerticalAlignment.TOP,
            radAngle: 0);
    }
}
Having familiarized ourselves with the PdfWriter and PdfReader classes in our initial article, ‘Introduction to PDF Manipulation With iText (Formerly iTextSharp),’ we can now open the input and output documents in lines 3 to 7.
Recalling the Document class introduced in the same article, which provides a high-level abstraction for writing text to PDFs, we instantiate an object named ‘workingDocument‘ in line 9.
Subsequently, in lines 11 and 12, we inquire about the number of pages in the source document and iterate through them using a for loop, mirroring the approach discussed in the earlier article, ‘Merging Multiple PDFs Using the iText Library.’
The core of the method unfolds between lines 14 and 25.
From lines 14 to 17, we extract the source page from the source document and duplicate it into the destination document, creating an identical copy of the page. Now, we’re ready to incorporate new text onto this page.
Inserting new text to the freshly duplicated page occurs in lines 19 to 25. To achieve this, we employ the Paragraph class introduced in our initial article. Once we have our paragraph, it’s added to the page using the ShowTextAligned() method, as discussed in the article ‘Adding Header and Footer to a PDF Using the iText Library’
This method appends text to a page, positioning it 10 millimeters from the bottom and 10 millimeters from the left, effectively adding a footer.
The iText Library ShowTextAligned() Method
The ShowTextAligned() method from the iText library is a crucial tool for precisely placing text on a page. Let’s briefly revisit this method.
The method takes seven parameters, allowing us to display text at a specific position on a page. Here’s the breakdown of each parameter:
p: The paragraph we want to print on a page.x, y: The position of the text on the page, representing horizontal and vertical coordinates, respectively.pageNumber: The page number where the text should be displayed.textAlign: The horizontal alignment of the text concerning the specified point.verticalAlign: The vertical alignment of the text concerning the specified point.rotation: The rotation of the text. This parameter enables us to rotate the text if needed.
In a previous article, we illustrated how textAlign and verticalAlign precisely influence the text’s position based on a (x, y) point.
Use the TextAdder Class to Insert Text into an Existing PDF Document
Now that we’ve crafted a fundamental method, let’s explore how we can enhance our approach.
Initially, recognizing that we consistently handle two documents – the source and destination documents – we can create a class encapsulating these elements:
public class TextAdder
{
    public string InputFile { get; }
    public string OutputFile { get; }

    public TextAdder(string inputFile, string outputFile)
    {
        InputFile = inputFile;
        OutputFile = outputFile;
    }
}
This class introduces two properties, InputFile and OutputFile, aligning with the source document and the destination document, respectively.
Add Text to a Document
Now, let’s refine ourAdd() method to include text in a PDF document:
public void Add(string textToAdd)
{
    using var outputDocument = new PdfDocument(new PdfReader(InputFile), new PdfWriter(OutputFile));
    using var workingDocument = new Document(outputDocument);

    var numberOfPages = outputDocument.GetNumberOfPages();
    for (var i = 1; i <= numberOfPages; i++)
    {
        var copyText = new Paragraph(textToAdd);
        workingDocument.ShowTextAligned(
            p: copyText,
            x: UnitConverter.mm2uu(10), y: UnitConverter.mm2uu(10),
            pageNumber: i,
            textAlign: TextAlignment.LEFT, vertAlign: VerticalAlignment.TOP,
            radAngle: 0);
    }
}
This method now requires only one argument, textToAdd, a string to be appended to the document. Other necessary arguments are already encapsulated in the object through the constructor.
An essential improvement is the introduction of a new version of the PdfDocument constructor that accepts both source and destination documents. This constructor eliminates the need for four lines of code in the previous example (lines 3, 4, 6, and 7). Its purpose is to facilitate PDF document changes, accepting precisely what’s needed for text addition.
In line 4, we instantiate a new object, workingDocument, mirroring the previous approach in line 9. Notably, in this method, the for loop navigates through pages in the new document, not the old one. The reason is that this method doesn’t require manual page copying; the new constructor of the PdfDocument class handles this task. It not only accepts both source and destination documents but also automatically copies all pages from the source to the destination document.
In the for loop, we only need to add text using the ShowTextAligned() method, precisely as before. Leveraging this specialized constructor and encapsulating file manipulation within a class results in a more concise Add() method—just 14 lines compared to the previous 24-line method—with the same outcome.
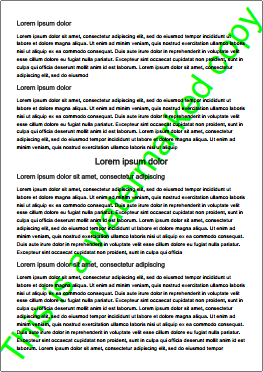
Add Centered Text to PDF Documents
Let’s create a method to easily add centered text to our PDF documents, which is a common task when modifying them. Often, we want messages like ‘Copyrighted by …’ or ‘Confidential’ displayed diagonally from the lower left to the upper right corner, like so:
So let’s write a method to accomplish that:
public void AddCenterText(string textToAdd, int fontSize, float angle, Color color)
{
    using var outputDocument = new PdfDocument(new PdfReader(InputFile), new PdfWriter(OutputFile));
    using var workingDocument = new Document(outputDocument);

    var numberOfPages = outputDocument.GetNumberOfPages();
    for (var i = 1; i <= numberOfPages; i++)
    {
        var page = outputDocument.GetPage(i);
        var pageSize = page.GetPageSize();
        var (pageWidth, pageHeight) = (pageSize.GetWidth(), pageSize.GetHeight());

        var copyText = new Paragraph(textToAdd)
            .SetFontSize(fontSize)
            .SetFontColor(color);

        workingDocument.ShowTextAligned(
            p: copyText,
            x: pageWidth / 2, y: pageHeight / 2,
            pageNumber: i,
            textAlign: TextAlignment.CENTER, vertAlign: VerticalAlignment.MIDDLE,
            radAngle: angle);
    }
}
To enable the addition of custom text, we use the parameter textToAdd. Additionally, we require fontSize and color parameters to allow for text in different sizes and colors. Since we want to display the text diagonally, we also need an angle parameter to specify the rotation angle in degrees.
The document preparation and the for loop remain consistent with our previous methods. However, the key difference lies in the loop body.
Initially, we calculate the center of the page, aligning with where we want to position our newly added text. This is easily achieved by retrieving the page width and height from the iText library.
Following that, we create a paragraph with the specified text, font size, and color, mirroring what we learned in our initial article.
The final step involves using the ShowTextAligned() method to write the text to the center of the page at the specified angle.
Add Watermarks
Let’s discuss a method to add watermarks to our PDF documents:
Building upon the previously developed AddCenterText() method, we aim to place new text behind existing content, creating a watermark effect:
public void AddWatermark(string textToAdd, int fontSize, float angle, Color color)
{
    using var outputDocument = new PdfDocument(new PdfReader(InputFile), new PdfWriter(OutputFile));
    using var workingDocument = new Document(outputDocument);

    var numberOfPages = outputDocument.GetNumberOfPages();
    for (var i = 1; i <= numberOfPages; i++)
    {
        var page = outputDocument.GetPage(i);
        var pageSize = page.GetPageSize();
        var (pageWidth, pageHeight) = (pageSize.GetWidth(), pageSize.GetHeight());

        var paragraph = new Paragraph(textToAdd)
                .SetFontSize(fontSize)
                .SetFontColor(color);

        var under = new PdfCanvas(page.NewContentStreamBefore(), new PdfResources(), outputDocument);
        using var _ = new Canvas(under, page.GetPageSize())
            .ShowTextAligned(
                p: paragraph,
                x: pageWidth / 2, y: pageHeight / 2,
                pageNumber: i,
                textAlign: TextAlignment.CENTER, vertAlign: VerticalAlignment.MIDDLE,
                radAngle: angle);
    }
}
The overall structure of the method remains the same as before. The only variation occurs in lines 17 to 24.
Here, we begin by creating a PdfCanvas object, which allows us to write new text beneath the existing content.
The PdfCanvas constructor accepts three arguments. The first one is the content stream, the second one is a type of dictionary with PDF instructions, and the last one is the document we want to modify.
Content streams act like layers on the page, where the document is constructed from the bottom layer to the top layer. To access the bottom layer, or the content beneath the current page content, we use the method NewContentStreamBefore(). This gives us the capability to write beneath the existing text.
The second parameter is a dictionary of PDF resources, for which we simply provide an empty constructor as we don’t need additional resources.
The last parameter is the destination document, which is our outputDocument object.
Similar to the relationship between the PdfDocument class and Document class, we have a parallel relationship with PdfCanvas and Canvas classes/objects. The former is a low-level, more powerful object, while the latter is a higher-level, more user-friendly object. That is why we are creating this high-level object using an object under of a type PdfCanvas.
It is just as easy to add text to this high-level-class Canvas as it is easy to add text to a high-level-class Document.
Watermarks Are Not Always Visible
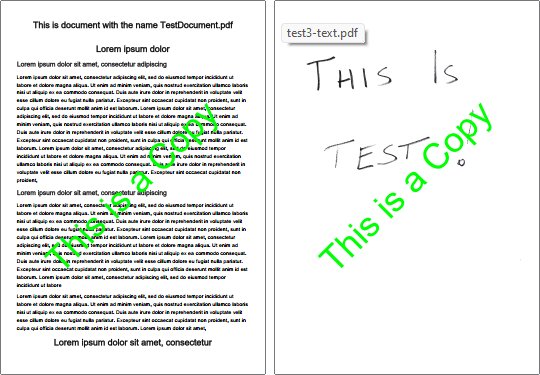
In the provided code example for this article, we have two sample documents. The first one, named ‘TextDocument.pdf,’ contains generated text using PDF generation software. The second one, named ‘PictureDocument.pdf,’ also has text, but it’s handwritten and scanned using a scanner. The deliberate choice of name for the second document emphasizes that it essentially functions as a picture within the PDF.
This distinction is crucial because the second document has a scanned page as one layer. Despite having substantial white space, this layer is not transparent. Consequently, when we add watermark text to such a document, it exists but remains invisible due to its position beneath the picture on the page:

It’s essential to understand this when reviewing the documents, especially if there’s a question about why the added text is not visible on the page. It does indeed exist in the lower layer of the page, but its visibility is obstructed by the non-transparent top layer and its white background.
Adding Headers
Let’s explore adding headers to pre-existing PDF documents as our final example. We’ll add a header that displays the document name in the center of the page and the page number on the right edge, following the customary format:
public void AddHeaders()
{
    using var outputDocument = new PdfDocument(new PdfReader(InputFile), new PdfWriter(OutputFile));
    using var workingDocument = new Document(outputDocument);
    var documentName = Path.GetFileName(OutputFile);

    var numberOfPages = outputDocument.GetNumberOfPages();
    for (var i = 1; i <= numberOfPages; i++)
    {
        var page = outputDocument.GetPage(i);
        var pageSize = page.GetPageSize();
        var (pageWidth, pageHeight) = (pageSize.GetWidth(), pageSize.GetHeight());

        var topRow = pageHeight - UnitConverter.mm2uu(7);
        var rightMargin = pageWidth - UnitConverter.mm2uu(10);
        var centerOfPage = pageWidth / 2;

        var caption = new Paragraph(documentName);
        workingDocument.ShowTextAligned(caption, centerOfPage, topRow, i,
            TextAlignment.CENTER, VerticalAlignment.TOP, 0);

        var pageNumber = new Paragraph($"Page {i} of {numberOfPages}");
        workingDocument.ShowTextAligned(pageNumber, rightMargin, topRow, i,
            TextAlignment.RIGHT, VerticalAlignment.TOP, 0);
    }
}
This method follows a structure similar to the previous examples. We prepare the output PDF file and iterate through pages.
However, in this case, we add text in the header. As we know, the iText library uses the bottom right corner as a starting point for coordinates. Therefore, we calculate the page height to position the header 10mm below the edge. For page numbering, we need the right edge of the page, so we also calculate the width of the page.
Once we have calculated all necessary elements (topRow, rightMargin, and centerOfPage), we use the ShowTextAligned() method to place the text in the correct positions.
Conclusion
In this article, we learned how to insert text into an existing PDF document using the iText library. Leveraging the special constructor of the PdfDocument class that accepts two file names proves to be advantageous. The first filename denotes the source file, and the second is the destination file. This constructor efficiently copies the content from the source file to the destination, preparing it for appending or insertion.
Adding text to the destination file follows the same process as adding text to a new, empty PDF file, with the distinction that the destination file already contains pages.
Precise calculation of the text position is crucial for inserting text using the iText library. It is imperative to ensure that the text falls within the specified margin boundaries, as iText does not automatically adjust positioning to fit within the margins. In iText, the page orientation originates from the bottom-left corner by default. Therefore, when specifying text positions, accounting for the coordinate system is essential.
Utilizing the ShowTextAligned() method in iText is instrumental in our text insertion exercise. This method allows us to define the paragraph to be displayed, and specify the text position, alignment, and rotation, streamlining the process of adding text to PDF documents.
