

In this article, we are going to learn how to create Serverless Applications on the cloud using Azure Functions.
Serverless is a cloud computing model in which a cloud provider dynamically allocates the resources required to run a particular piece of code. Here the advantage is that the users are charged only for the resources that the application consumes while it is running. Despite the name Serverless, there are still servers involved, but the cloud provider is responsible for provisioning and maintaining them.
To read more about Azure, you can visit our Azure with ASP.NET Core page, where you can find all the articles from the series.
So, let’s start.
Introduction to Azure Functions
Azure Functions enable us to run functions, which are nothing but small pieces of code, without worrying about the underlying infrastructure. When we use Azure Functions, the cloud infrastructure provides the complete resources that the application needs to run and scale as needed.
It is possible to trigger an Azure Function with different types of events. For instance, we can trigger it by changing data, by sending a message to a queue, or directly via an HTTP request. We can even schedule a Function to run at specific times. In this article, we are going to create an Azure Function App and execute it using an HTTP Trigger.
Azure Functions – Use Cases
Before getting into implementation details, let’s discuss a few scenarios where Azure Functions comes in handy. Generally speaking, Azure Functions are a great choice when we want to build applications that require a lot of resources to run but only for shorter periods. While using Azure Functions, we have to pay only for the time it is running and not for idle time.
Functions work great for the following scenarios:
- Processing bulk data
- Integrating multiple systems using messages, events, etc.
- Implementing complex task orchestration and workflows
- Building application that needs to scale dynamically when the demand arises and can be idle at other times
Even though it is possible to use Azure Functions for many other scenarios, it is generally not recommended to use it for purposes outside of these. For instance, it is possible to build full-blown APIs using Functions, but we should never do it. Instead, we should use ASP.NET Web API for that purpose.
Azure Functions vs WebJobs
We have learned how to create background jobs using Azure WebJobs in our Using Azure WebJobs in .NET Applications article. Microsoft has built Azure Functions on top of the WebJobs SDK and hence they share most of the programming models like the events, triggers, and connectivity to other Azure services.
Azure Functions offers more flexibility and productivity for developers compared to WebJobs. It supports more programming languages, development environments, and integrates with more Azure services.
That said, there are still a few scenarios in which WebJobs would make more sense. For instance, if we need to have more control over the code that listens to events, WebJobs provide many customization options that Azure Function lacks. Similarly, if we have an App Service and its related background job, and we want to manage them together, WebJobs provide an excellent option for that.
For most of the other scenarios where we want to run some code snippets and integrate with other Azure or third-party services, Azure Functions offer a better choice than WebJobs. So we should consider all these factors while choosing the right components for our application.
Creating Azure Functions
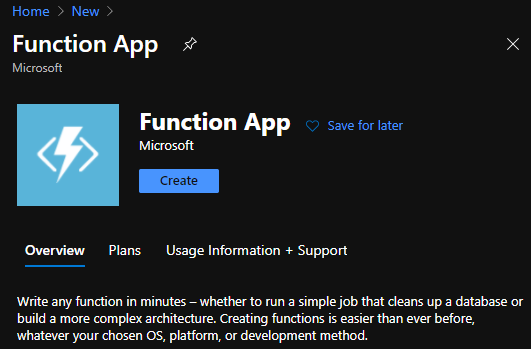
One option to create an Azure Function is from the Azure Portal by choosing Function App from the Marketplace:
Another option is to create an Azure Function project in Visual Studio. In this article, we are going to explore that option.
Creating an Azure Functions project in Visual Studio
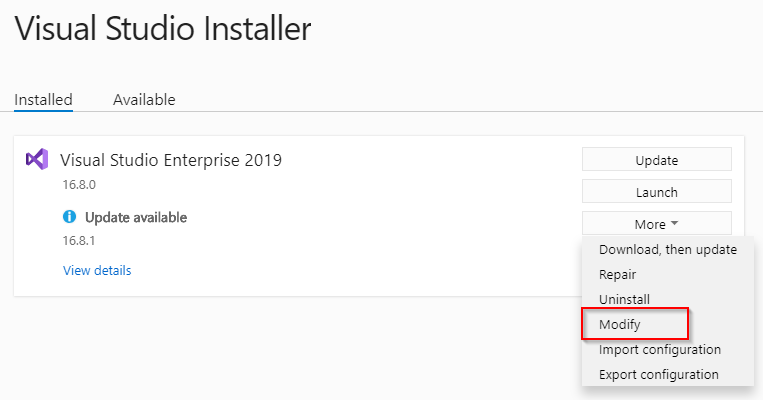
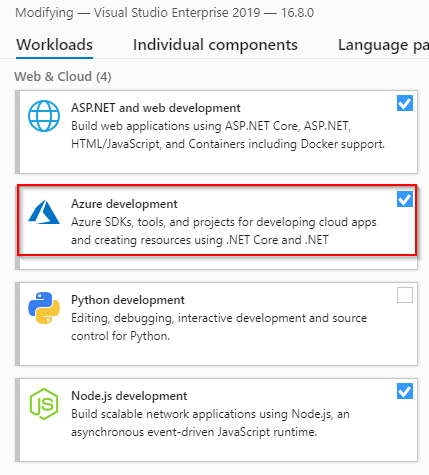
The Azure Function project template will be available only if we select the Azure development workload during Visual Studio installation. It is possible to modify the selections later if that was not selected during the installation. We can do that by launching the Visual Studio Installer and then clicking on the Modify option inside the More dropdown of the Visual Studio Installation:
After that, we can select the Azure development workload:
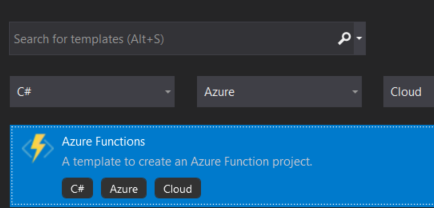
We can create a new Azure Function App from Visual Studio by choosing the Azure Function project template while creating a new project:
After giving the project name and location, we’ll reach the Create a new Azure Functions application screen where we can configure the project:

- First, let’s choose the Functions Runtime as the latest available version Azure Functions v3(.NET Core)
- Then, let’s choose the Function Template as HTTP Trigger. This will enable triggering our function app by an HTTP request
- After that, we need to choose a Storage Account. Azure Function requires a Storage Account to work. We can choose the default Storage Emulator option
- Finally, let’s set the Authorization Level to Anonymous. If we choose other values, we’ll have to implement an authorization mechanism, which is outside the scope of this example
After providing these values, we can create a function project by clicking on the Create button.
Configuring the Azure Function Code
Visual Studio creates a function app project with a class that contains the boilerplate code for the HTTP Trigger function. The function returns a personalized HTTP response by reading a value from the request body or query string. The HttpTrigger attribute indicates that the function is triggered by an HTTP request.
As there is no way to specify the Function name while creating it, we will have to rename it later on. It would be nice to rename the default class name as well as the FunctionName attribute to something more meaningful:
public static class CodeMazeHTTPTriggerFunction
{
    [FunctionName("HTTPTriggerFunction")]
    public static async Task<IActionResult> Run(
        [HttpTrigger(AuthorizationLevel.Anonymous, "get", "post", Route = null)] HttpRequest req,
        ILogger log)
    {
        log.LogInformation("C# HTTP trigger function processed a request.");

        string name = req.Query["name"];

        string requestBody = await new StreamReader(req.Body).ReadToEndAsync();
        dynamic data = JsonConvert.DeserializeObject(requestBody);
        name = name ?? data?.name;

        string responseMessage = string.IsNullOrEmpty(name)
            ? "This HTTP triggered function executed successfully. Pass a name in the query string or in the request body for a personalized response."
            : $"Hello, {name}. This HTTP triggered function executed successfully.";

        return new OkObjectResult(responseMessage);
    }
}
We have renamed our class to CodeMazeHTTPTriggerFunction and specified our function name as HTTPTriggerFunction.
That’s it!
Our HTTP Trigger Function is ready and without any delay let’s proceed with testing it on our local system.
Testing Azure Functions Locally
For testing the Function app locally, we can run the project in Visual Studio by pressing CTRL + F5:
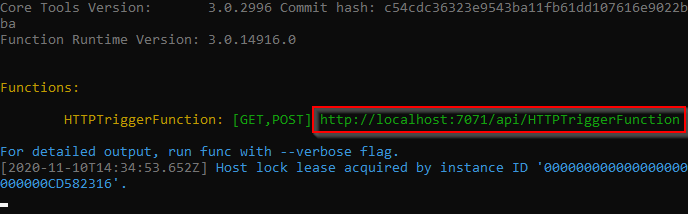
The function app runs and displays the output in the console. It shows the URL of the function. We can use this URL to invoke the function using the HTTP trigger. While doing that, let’s append a name query string to the URL : http://localhost:7071/api/HTTPTriggerFunction?name=John

We can see that the HTTP trigger invokes the Function and shows a personalized message using the name that we appended to the URL in the browser.
Cool!
Now that we’ve verified that the Function runs correctly on our local system, it’s time to publish the project to Azure.
Deploying Azure Functions
We can deploy an Azure Function using Visual Studio the same way we do an ASP.NET Core application. We have explained the detailed steps in our Publishing an ASP.NET Core App to Azure App Service Using Visual Studio article.
Publishing Azure Function App using Visual Studio
After selecting the Target as Azure, we need to choose the Specific target on the next screen. This being a Function App, it shows only the related options:
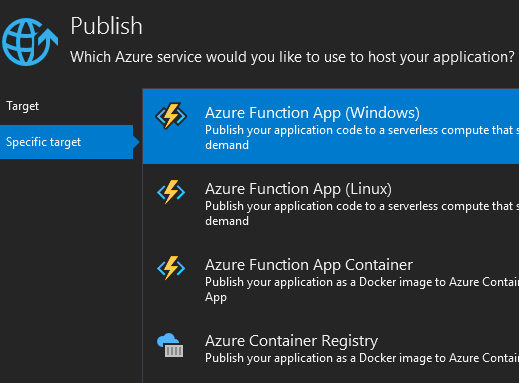
We can choose Azure Function App (Windows) and click Next.
On the next screen, since no Function App is available in our subscription yet, let’s proceed to create one.
Creating new Azure Function
We can create a new Azure Function by clicking the Create a new Azure Function link:

This will take us to the Create new Function App screen and there we need to specify the details of the Function App that we are going to create:
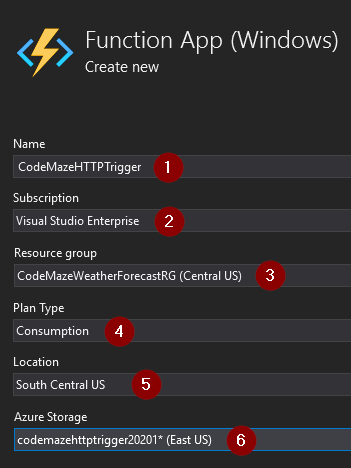
- First, we need to specify a Name
- Then, we need to choose a Subscription
- After that, we need to either choose an existing Resource Group or create a new one
- When we use the Consumption Plan for our Function App, we have to pay only for its executions. Other hosting plans incur higher costs and hence let’s select that option
- After that, let’s choose a Location, which should ideally be the closest region to our customers
- Since Azure Functions require an Azure Storage account to work, we need to either create new storage or specify an existing one
After giving these values, we can create an Azure Function App by clicking the Create button.
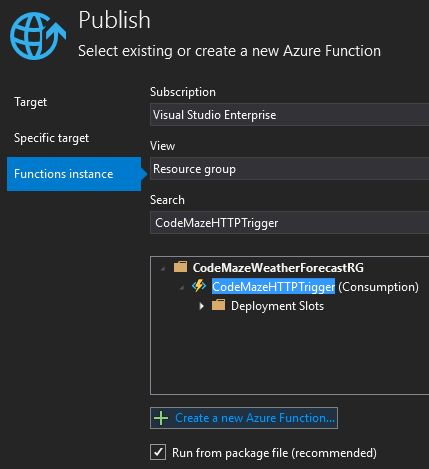
Finalizing the Publish
The next step is finishing the process by selecting the newly created Function Instance for publishing:
Finally, after reviewing the details we can publish our Function App into Azure by clicking on the Publish button:

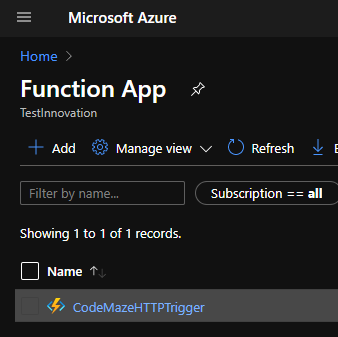
Once the publishing is completed, we can find our Function App listed in the portal:
Great!
We have successfully deployed our Function App to Azure. Without any further ado, let’s proceed to test it.
Testing Azure Functions
Now it’s time to do some testing of our Azure Function App.
First, let’s navigate to our Function App URL:
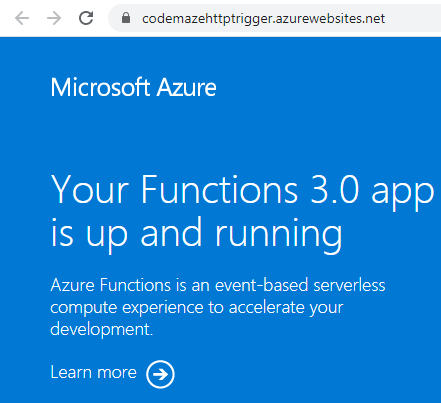
What we see here is the default page of the Function App. This means our app is up and running.
Once we navigate to the Functions section, we can see our functions listed there:
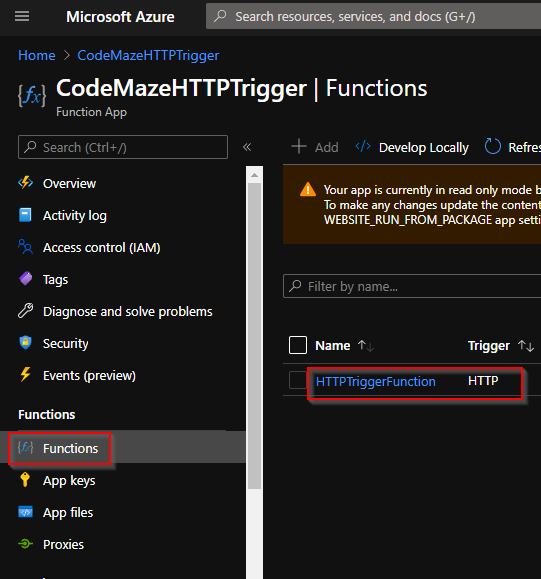
In this example, we have created just one function named HTTPTriggerFunction which has the HTTP Trigger. By clicking on its name, we can navigate into it:
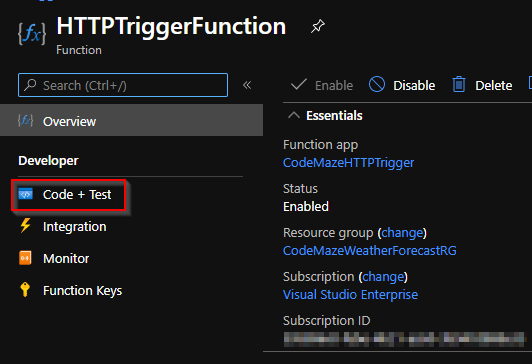
Inside the function, we can see the option Code + Test. This option enables us to test our Function App from the portal.
On clicking the Test/Run option, we will reach a screen that has multiple sections. On the right-hand side, we can see a pane where we can do the testing. We can run the function after building an input HTTP request by providing the values. There is an option to view the output as well.
Towards the bottom of the left pane, we can see a section to view the Logs:
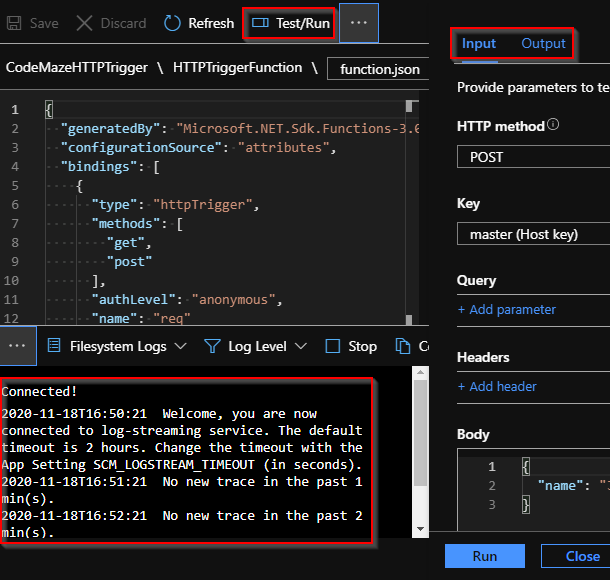
Let’s run the function by building an HTTP request using this tool. Make sure to personalize the request by providing either a Query parameter or body value called name.
Running the function will show a personalized message as output and we can see the function execution details in the Logs section:
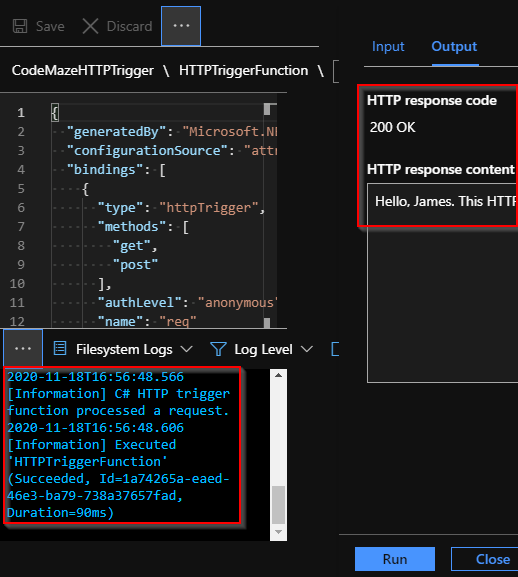
Since this is an HTTP Triggered function, It is also possible to invoke it via the browser the same way we tested it locally. We just need to replace the base URL of the App: https://codemazehttptrigger.azurewebsites.net/api/HTTPTriggerFunction?name=Alice

Excellent!
We have learned how to test our Azure Function App using the inbuilt testing tool and by directly invoking it via URL.
Conclusion
In this article, we have learned the following topics:
- Introduction to Azure Functions
- Some use cases for Azure Functions.
- Comparison between Azure Functions and WebJobs and when to use each of them.
- Creating Azure Functions
- Testing Azure Functions locally
- Deploying Azure Functions
- Testing Functions from Azure Portal.

