

Updated on
It is a very common requirement for web applications to be able to run background tasks. Scheduling tasks to run at specific times or intervals, triggering jobs to run based on certain events, etc are common scenarios that we encounter while developing applications. In this article, we are going to learn about Azure WebJobs which provides an excellent way of accomplishing this in a cloud environment.
We’ll start by learning what an Azure WebJob is. Then we’ll look at different types of WebJobs. After that, we’ll learn how to use the Azure WebJobs SDK to create a triggered background job that runs when a new message arrives in the Azure Storage Queue. We’ll test it locally by creating a queue and adding a message. Finally, we’ll deploy it to Azure and test it.
To read more about Azure, you can visit our Azure with ASP.NET Core page, where you can find all the articles from the series.
Let’s start.
Azure WebJobs Introduction
WebJobs is a feature of Azure App Service which we can use to run a program or script from within our Web App, API App, or Mobile App. There are no additional costs for using the WebJobs as it uses the same App Service Plan. Additionally, we can use the Azure WebJobs SDK to simplify many programming tasks with WebJobs.
Azure Functions provides another way to run programs and scripts in a standalone mode. They are built on top of the Azure Web Jobs foundation and they are the logical successors to WebJobs. We’ll learn about Azure Functions in detail in our Azure Functions article.
The issue with running these kinds of background tasks on the IIS, or any other web server for that matter, is that it consumes the resources that are dedicated to serving the web application. Additionally, these tasks may be interrupted when an app pool recycle occurs. There are, of course, some tricks to push off the app pool recycles until our task has completed, but ideally, we’d like to offload these kinds of tasks outside of the webserver. Azure WebJobs solves this problem. By using a WebJob, we can run a background task without affecting our web application.
Different Types of Azure WebJobs
There are two types of WebJobs:
- Continuous WebJobs – A continuous WebJob will run continually until someone stops it. When we create this type of WebJob, It starts immediately and keeps on running in the background.
- Triggered WebJobs – A Triggered WebJob will run only when someone triggers it. They expose a webhook and different services can call it.
A Triggered WebJob is further divided into two types:
- Scheduled – We can execute a Scheduled WebJob by writing a CRON Expression. CRON Expressions define the schedule on which we need the WebJob to run.
- Manual – We can of course trigger a WebJob manually by calling the webhook. Several Azure services can communicate with the WebJobs using the webhook triggers. In this article, we are going to implement this type of WebJob using an Azure Storage Queue trigger.
Azure WebJobs SDK
The Azure WebJobs SDK simplifies the task of creating background jobs that can run in Azure WebJobs. It has a declarative binding syntax that makes it easier to read from and write data into various Azure services. Additionally, it has a trigger system that automatically invokes a function in the WebJob whenever some changes happen in other Azure services. This also provides an integrated Dashboard that we can use to monitor and view diagnostics information about our WebJob runs.
In the next section, we are going to create a .NET Core console application and integrate Azure WebJobs SDK into it. Then, we’ll bind it with an Azure Storage Queue so that whenever a new message arrives in the queue, it triggers our WebJob function.
Integrating a .NET Core Application with Azure WebJobs SDK
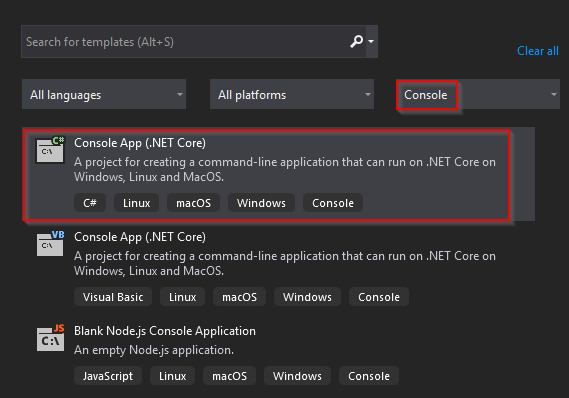
First, let’s create a .NET Core Console Application. We can do that by using the Console App (.NET Core) template while creating a new project in Visual Studio:
Let’s name the project QueueProcessor.
After that, let’s install the latest stable version of Microsoft.Azure.WebJobs.Extensions NuGet package:
PM> Install-Package Microsoft.Azure.WebJobs.Extensions -version 4.0.1
Cool!
We have created a .NET Core console application that is integrated with the Azure WebJobs SDK.
Configuring the Host
The next step is building a host configuration for our WebJob functions. We need to add the code for that in the Main method inside the Program class:
static async Task Main(string[] args)
{
    var builder = new HostBuilder();
    builder.ConfigureWebJobs(b =>
    {
        b.AddAzureStorageCoreServices();
    });

    var host = builder.Build();

    using (host)
    {
        await host.RunAsync();
    }
}
The ConfigureWebJobs extension method initializes the WebJobs host. While calling the ConfigureWebJobs method, we can initialize specific WebJobs extensions and set properties for those. For instance, we have initialized the Azure Storage Core Services in this example.
Enabling Console Logging
Now we are going to set up the console logging using the ASP.NET Core logging framework.
First, we need to add the Microsoft.Extensions.Logging.Console package:
PM> Install-Package Microsoft.Extensions.Logging.Console -version 3.1.9
Then, we are going to call the ConfigureLogging method inside our Main method:
static async Task Main(string[] args)
{
    var builder = new HostBuilder();
    builder.ConfigureWebJobs(b =>
    {
        b.AddAzureStorageCoreServices();
    });

    builder.ConfigureLogging((context, b) =>
    {
        b.AddConsole();
    });

    var host = builder.Build();
    using (host)
    {
        await host.RunAsync();
    }
}
This adds the console logging capability for our application.
Configuring Storage Binding
The next step is installing the storage binding extension. Let’s start with the Microsoft.Azure.WebJobs.Extensions.Storage package installation:
PM> Install-Package Microsoft.Azure.WebJobs.Extensions.Storage -version 4.0.3
Then we need to initialize the Storage extension by modifying the call to the ConfigureWebJobs method inside the Main method:
builder.ConfigureWebJobs(b =>
{
    b.AddAzureStorageCoreServices();
    b.AddAzureStorage();
});
Creating a Function
The final step is creating a function that will be triggered when a new message arrives in the Azure Storage Queue. Let’s create a class Functions and add a function called ProcessQueueMessage:
public static void ProcessQueueMessage([QueueTrigger("webjobqueue")] string message, ILogger logger)
{
    logger.LogInformation(message);
}
The QueueTrigger attribute enables the runtime to call this function when a new message arrives on an Azure Storage Queue called webjobqueue. The queue message is provided to the function as the message parameter. That way, we can process the message data inside the function. In this example, we are just logging the queue message.
Preparing the Azure Storage Account
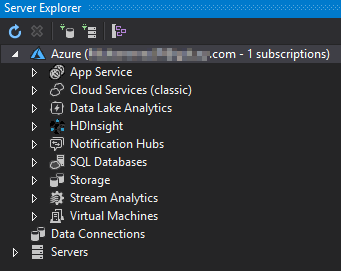
Now we are going to configure an Azure Storage Account for the demo. For that, first, we need to ensure that we sign in to Visual Studio using an account that has an active Azure subscription. Then we can connect to our Azure subscription in the Server Explorer and it will list out various services:
In case the Server Explorer does not automatically connect with our Azure Subscription, we can manually connect by right-clicking on the Azure node and clicking on the Connect to Microsoft Azure Subscription option.
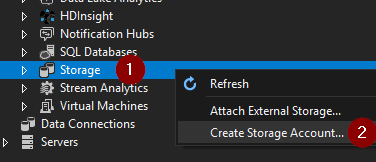
Now we can create an Azure Storage Account by right-clicking on the Storage node and selecting the Create Storage Account option:
Then, we need to provide some information in the Create Storage Account screen:
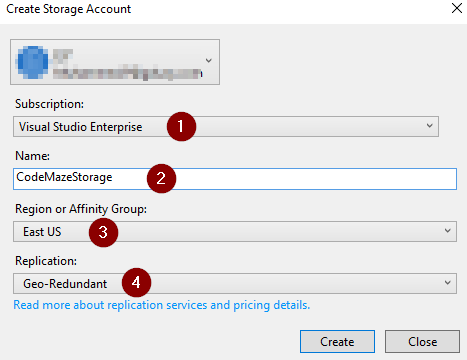
- First, we need to choose a Subscription
- Then we need to provide a Name for the storage account
- After that, we need to choose a Region
- Finally, we need to choose a Replication option. For now, let’s just choose the default option
After giving these options, we can create the storage account by clicking on the Create button. We’ll learn about different types of Azure Storages and their usages in detail in the Azure Storage article.
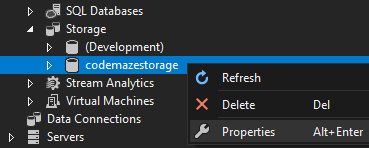
Once the storage account is created, we can see that it is listed under the Storage node. We can check the properties by right-clicking on the storage account and clicking on Properties:
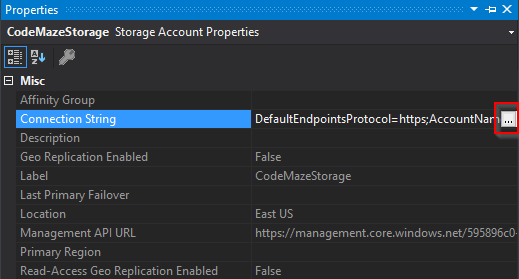
On the properties window, we can see the connection string for the storage account:
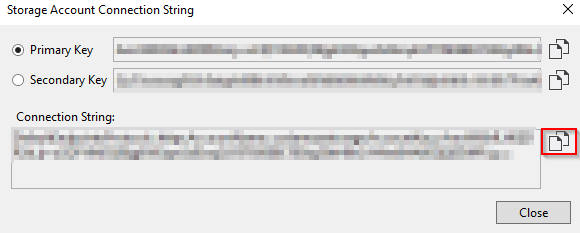
Clicking the ellipsis towards the right side of the connecting string value will open a dialog with the storage account connection string. Since we’ll require this later, let’s copy the value and keep it somewhere:
Great!
Our storage account is now ready and we have captured the connection string.
Testing Azure WebJobs Locally
Now we are going to run the WebJob application locally and test it. While running locally, the WebJobs SDK looks for the storage connection string in the configuration file. So we need to add an appsettings.json configuration file and place the connection string in it:
{
    "AzureWebJobsStorage": "paste the storage connection string value here"
}
Make sure to replace the placeholder with the connection string value that we copied earlier.
After that, we need to change the Copy to Output Directory property of the appsettings.json file to Copy if newer from the Solution Explorer:
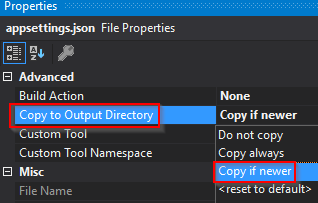
This will make sure to copy the appsetting.json file to the output directory when we run the project.
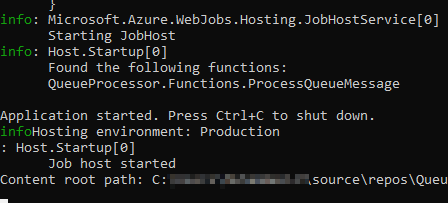
Now let’s build and run the project locally. We can see that the runtime finds our function but does not execute it as there are no triggers yet:
Now we need to create a storage queue and add a message into it to trigger the function. But before that, we need to stop the project.
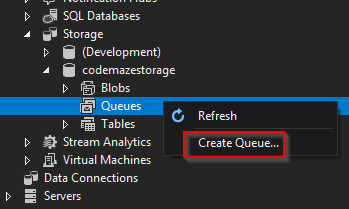
Creating the Storage Queue
First, let’s create a queue inside our storage by right-clicking on Queues and selecting the Create Queue option:
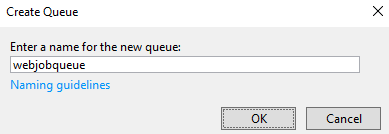
On the Create Queue dialog, we need to enter the same queue name that we have used as the WebJob function’s QueueTrigger:
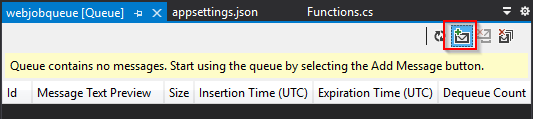
Once the Queue is created, we can view it by right-clicking and selecting the View Queue option:
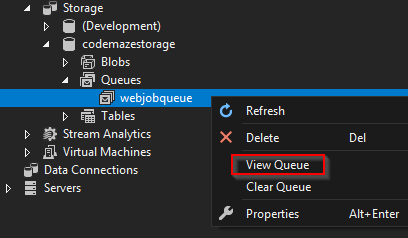
Of course, the queue will be empty initially.
Adding Messages to the Queue
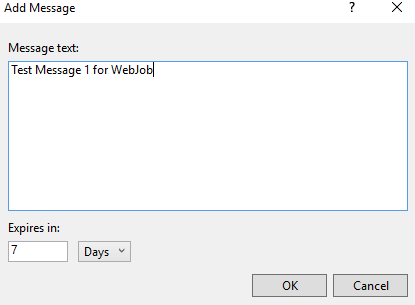
We can add a new message into the queue by clicking on the Add Message button:
Let’s add a message to the queue:
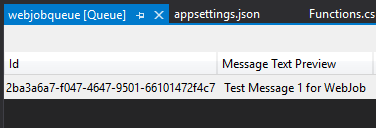
After that, we can see that the message appears in the Queue:
Let’s run our WebJob application once again. This time, we can see that the runtime detects a new message in the queue and triggers the function. We can see the details of the execution and the message in the console:
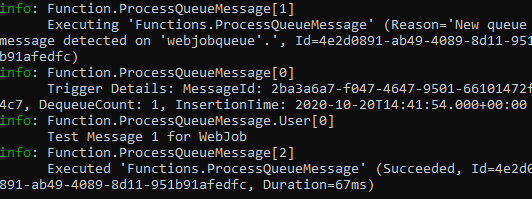
Cool!
We have created a queue message and triggered the WebJob function.
Deploying Azure WebJobs
We can deploy a WebJob using Visual Studio in the same way that we deploy an ASP.NET Core application. We have explained the process in detail in our Publishing an ASP.NET Core App to Azure App Service Using Visual Studio article. While deploying a WebJob, we just need to create an app service instance for running it.
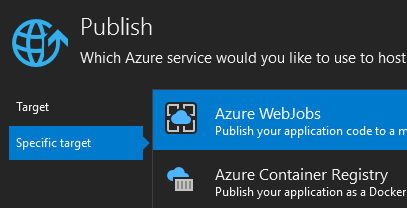
When we choose to publish a .NET Core console app to Azure, it automatically shows the Azure WebJobs option:
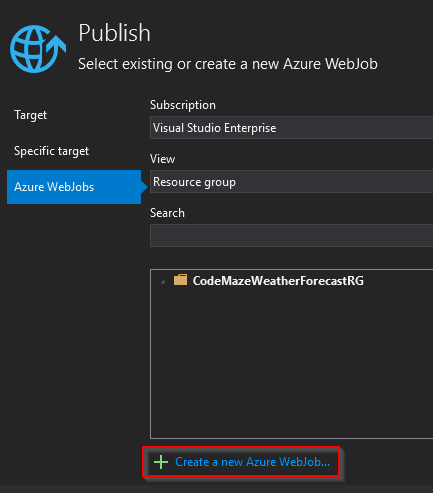
In the next screen, we can create a new Azure WebJob by clicking the Create a new Azure WebJob link:
On the Create a new Azure App Service window, we need to provide some information about the App Service that we are going to create for hosting the WebJob:
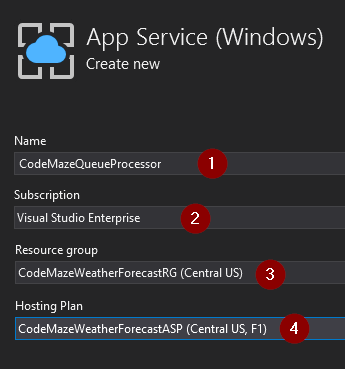
- First, we need to give a Name for the App Service
- Then, we need to select an existing Subscription
- After that, we need to choose an existing Resource Group or create a new one
- Finally, we need to choose an existing Hosting Plan or create a new one
We have explained this step in detail in the Deploying the ASP.NET Core App section of our Publishing an ASP.NET Core App to Azure App Service Using Visual Studio article.
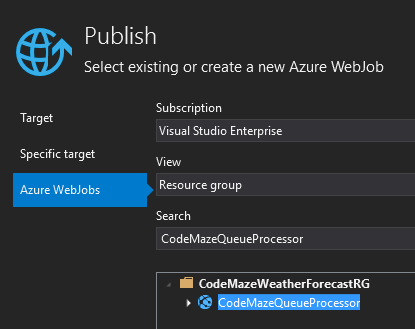
The above step creates an Azure WebJob in the App Service with the details that we have provided. Now we can select the WebJob for publishing and click the Finish button:
Finally, we reach the confirmation screen for publishing and after verifying the details, we can proceed by clicking the Publish button:
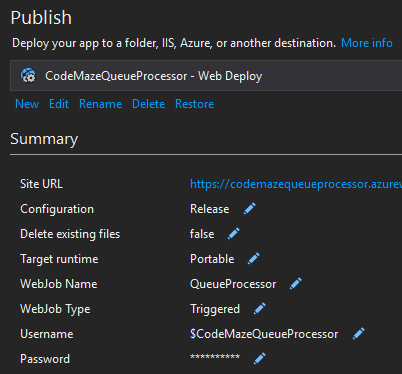
This will publish our .NET Core console application into Azure WebJobs.
Testing Azure WebJobs
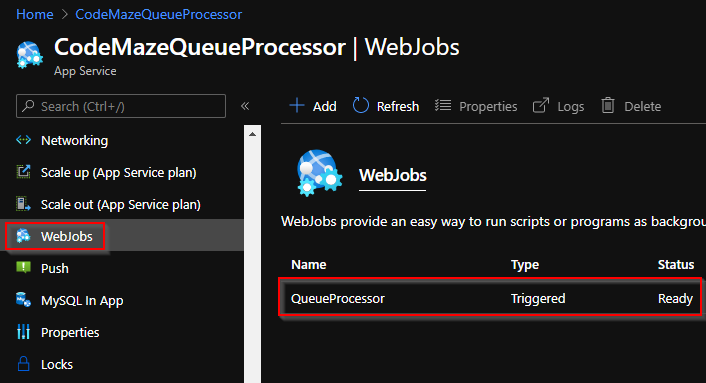
We can verify that our WebJob is created by navigating to the WebJobs section of the App Service that we just created:
On selecting the WebJob, we can see the options for running it and viewing the logs. We can run the job by clicking the Run button and then view the logs by clicking on the Logs option:
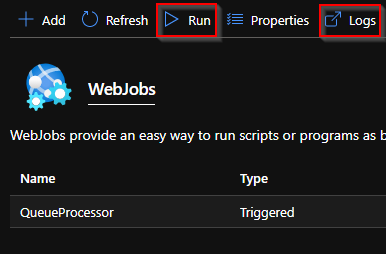
Clicking on the Logs button will open the Azure WebJobs Dashboard in a new window. The dashboard will show the WebJob run details.
For testing the Azure WebJob, let’s add another message in the storage queue. We need to make sure that our application is not running locally as it may detect new messages in the queue and process it.
Once we create a new message in the queue, it will trigger the function in Azure WebJob. We can see the detailed logs in the WebJobs dashboard:
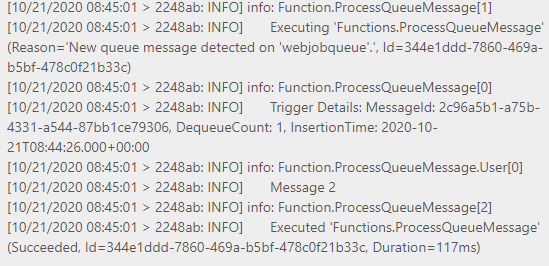
Cool!
We have verified that the Azure WebJob works fine and is triggered when new messages arrive in the queue.
The architecture that we implemented in this article can be summarized in the below diagram:
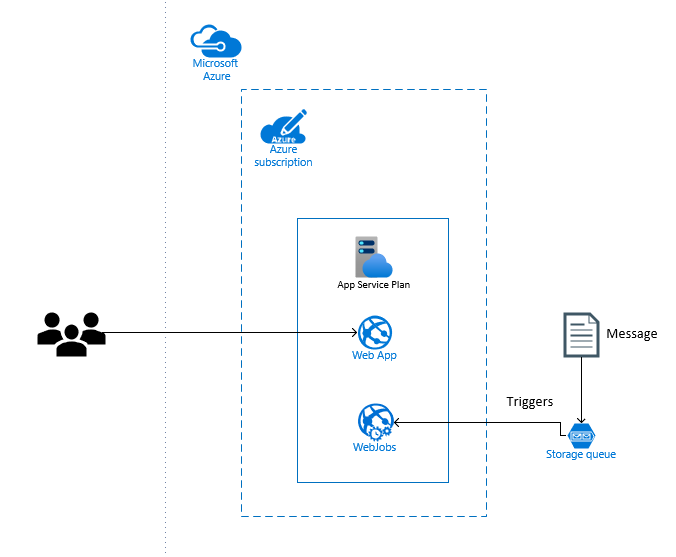
Whenever a new message arrives in the Storage Queue, it triggers the WebJob in the background. The WebJob and Web App reside in the same App Service Plan. Our users can continue using the Web App without knowing the background activities.
Conclusion
We have learned the following topics in this article:
- What is an Azure WebJob?
- Different types of Azure WebJobs.
- An overview of the Azure WebJobs SDK.
- Integrating Azure WebJobs SDK into a .NET Core console application.
- How to trigger a function in WebJob when a new message arrives in Azure Storage Queue
- Creating an Azure Storage Queue and adding messages into it.
- Testing the WebJobs locally.
- Deploying WebJobs into Azure.
- Testing the Azure WebJob and inspecting the run details in the dashboard.

Great Article, was working for me!
Do you have a Git of this ? I have follow your steps and get tons of errors. Perhaps I’m missing something silly.
Hello Evan. The source code is here: https://github.com/CodeMazeBlog/aspnetcore-azure-series/tree/azure-web-jobs. You could’ve found it at the beginning of the article in the red box.