

In this article, we will look at how to handle unexpected errors in Blazor WebAssembly using Error Boundaries.
Let’s dive in.
Exception Handling in Blazor WebAssembly
Blazor WebAssembly is a single-page application (SPA) client-side framework. Unlike Blazor Server, which has a middleware pipeline that can be used for global error handling, Blazor WebAssembly doesn’t have this middleware pipeline.
Fortunately, we do have an error processing component available to use, the ErrorBoundary component, which allows us to conveniently handle exceptions client-side.
Let’s have a look at the features of the ErrorBoundary component next.
Error Boundaries
The ErrorBoundary component enables us to render child content when there is no error, and subsequently render an error UI when an unhandled exception is thrown.
We can define an ErrorBoundary very simply:
<ErrorBoundary>
    <ChildComponent />
<ErrorBoundary>
We wrap ChildComponent in the ErrorBoundary component, and any unhandled exceptions that are thrown from ChildComponent will be handled by ErrorBoundary and a default error UI will be shown.
If we want to override the default error UI, we set the ErrorContent property:
<ErrorBoundary>
    <ChildContent>
        <ChildComponent />
    </ChildContent>
    <ErrorContent>
        <p>Uh oh! An error has occurred, sorry!</p>
    </ErrorContent>
</ErrorBoundary>
This time, we place ChildComponent in the ChildContent property and then display a custom error message that will render when an unhandled exception occurs.
In order to recover from an exception, we call the Recover method:
<ErrorBoundary @ref="errorBoundary">
    <ChildComponent />
</ErrorBoundary>

@code {
    private ErrorBoundary? errorBoundary;

    protected override void OnParametersSet()
    {
        errorBoundary?.Recover();
    }
}
First, we create a reference to the ErrorBoundary in our @code block, using the @ref property to set it.
In the OnParametersSet() method, we call the Recover() method, which will reset the ErrorBoundary back to a non-errored state.
Now that we understand the basics of Error Boundaries in Blazor WebAssembly, let’s implement them in a project.
Implementing Error Boundaries
We’ll start by creating a new Blazor WebAssembly project, either selecting it from the Visual Studio New Project wizard or by running the dotnet new blazorwasm -n BlazorErrorBoundaries command. We can re-use the existing Counter component the template project provides for us to test Error Boundaries.
Global ErrorBoundary
The first and simplest way to add Error Boundaries to our application is to add them globally to MainLayout.razor:
<ErrorBoundary>
    @Body
</ErrorBoundary>
We wrap @Body in an ErrorBoundary component, which will catch any unhandled exception in the application and display an error.
Let’s throw an unhandled exception in the Counter component if the currentCount exceeds 4:
private void IncrementCount()
{
    currentCount++;

    if (currentCount > 4)
    {
        throw new InvalidOperationException("Count cannot be greater than 4");
    }
}
Running the application, navigating to /counter and attempting to increment the count beyond 4, we will receive an error message:

Also, we can see the exception thrown along with the message in the browser console:
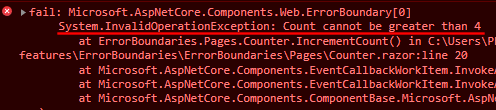
If we attempt to navigate to / or /fetchdata, we will still see this error message.
This is a start, but there are disadvantages to this method of using Error Boundaries, which we’ll now explore.
Disadvantages of Global Error Boundaries
Handling errors globally isn’t the best practice for 2 main reasons.
Firstly, as we’ve defined the Error Boundary in the layout page when an unhandled exception occurs, the error UI is seen regardless of which page the user navigates to. This is not ideal, as we don’t want an exception thrown on the counter page to affect the user’s experience on other pages.
In addition, it’s better to have a fine-grained error handling mechanism at the component level. This allows us to provide more specific error messages and recovery strategies depending on the exception that is thrown.
For these reasons, let’s implement best practices and handle errors at the component level instead of globally.
Handling Exceptions at the Component Level
Once again, let’s use the Counter component to demonstrate component-level error handling.
First, we need to remove the global ErrorBoundary component we previously added to MainLayout.razor.
With this done, let’s add an ErrorBoundary with the Counter component to Index.razor:
<ErrorBoundary @ref="errorBoundary">
    <Counter />
</ErrorBoundary>

@code {
    private ErrorBoundary? errorBoundary;

    protected override void OnParametersSet()
    {
        errorBoundary?.Recover();
    }
}
We define an ErrorBoundary property in the @code block, setting it using the @ref property.
Overriding the OnParametersSet() method, we call the Recover() method on errorBoundary, which will reset the ErrorBoundary to a non-errored state.
Running our application, we see the counter on the Home page:

Incrementing the count past 4 will result in the same result. However, now that we have scoped the Error Boundary to Index.razor, when we navigate to /counter or /fetchdata, the error state will reset and we will see each of the components as expected, which we didn’t see when handling errors globally.
Now that we are handling errors at the component level, let’s add some custom UI.
Creating Custom ErrorContent
Previously, we looked at adding a custom error UI to Error Boundaries, so let’s implement it in Index.razor:
<ErrorBoundary @ref="errorBoundary">
    <ChildContent>
        <Counter />
    </ChildContent>
    <ErrorContent>
        <p class="error-message">Uh oh! Something went wrong</p>
    </ErrorContent>
</ErrorBoundary>
As we are now defining the ErrorContent property, we must also add the ChildContent property which wraps the Counter component.
Also, we need to add the CSS class to app.css:
.error-message {
    background-color: darkred;
    color: white;
    padding: 10px;
    border-radius: 5px;
    display: inline-block;
}
Running the application and attempting to set the count greater than 4, we see our custom error message:
![]()
We can further customize the error message by adding a button that will allow the user to reset the error state:
<ErrorBoundary @ref="errorBoundary">
    <ChildContent>
        <Counter />
    </ChildContent>
    <ErrorContent>
        <p class="error-message">Uh oh! Something went wrong</p>
        <button class="btn btn-warning" @onclick="ResetError">Reset</button>
    </ErrorContent>
</ErrorBoundary>

@code {

    private void ResetError()
    {
        errorBoundary?.Recover();
    }
}
In the ErrorContent property, we provide a button element that will execute the ResetError() method when clicked, which calls the Recover() method on the errorBoundary, resetting to a non-errored state.
Now when we increment our count past 4, we see the Reset button, which a user can click to reset the component back to normal:
![]()
Conclusion
In this article, we’ve learned what Error Boundaries are in Blazor WebAssembly and how to implement them. To follow best practices, we’ve learned to define Error Boundaries at the component level instead of globally, as it provides us greater control over exception handling.

