

One important part of the user registration functionality is an email confirmation. With it, we allow our users to confirm their emails and prove that they are the owners of the provided email accounts. That said, in this article, we are going to learn how to implement Angular Email Confirmation functionality with ASP.NET Core Identity.
For complete navigation through the entire series, you can visit the Angular with ASP.NET Core Identity page.
Time to start.
Enabling Email Confirmation in the Web API Project
Right now, after we check the EmailConfirmed column in the AspNetUsers table, we can see that our users don’t have emails confirmed:

To support the email verification process, we have to modify the Login action:
[HttpPost("Login")]
public async Task<IActionResult> Login([FromBody] UserForAuthenticationDto userForAuthentication)
{
    var user = await _userManager.FindByNameAsync(userForAuthentication.Email);
    if (user == null)
        return BadRequest("Invalid Request");

    if (!await _userManager.IsEmailConfirmedAsync(user))
        return Unauthorized(new AuthResponseDto { ErrorMessage = "Email is not confirmed" });

    if (!await _userManager.CheckPasswordAsync(user, userForAuthentication.Password))
        return Unauthorized(new AuthResponseDto { ErrorMessage = "Invalid Authentication" });

    var signingCredentials = _jwtHandler.GetSigningCredentials();
    var claims = await _jwtHandler.GetClaims(user);
    var tokenOptions = _jwtHandler.GenerateTokenOptions(signingCredentials, claims);
    var token = new JwtSecurityTokenHandler().WriteToken(tokenOptions);

    return Ok(new AuthResponseDto { IsAuthSuccessful = true, Token = token });
}
Here, we use the IsEmailConfirmedAsync method to check whether the user has an email confirmed. As you can see, we are not using the SigninManager class and the PasswordSignInAsync method that automatically checks this for us. The reason for that is that the PasswordSignInAsync method creates an Identity cookie for authentication purposes. But since we are using JWT for the authentication, we don’t require any cookies for now. Of course, if you’ve read our ASP.NET Core Identity series that we created with the MVC application, you could’ve seen us using the PasswordSignInAsync method throughout the entire series.
If we try to log in now with the Angular application, we are going to get the “Wrong Username or Password” message. Well, this is not what we expect. Since the email confirmation is now required, we want to display a different message.
To fix this, all we have to do is to modify the error-handler.service.ts file:
private handleUnauthorized = (error: HttpErrorResponse) => {
  if(this._router.url === '/authentication/login') {
    return error.error.errorMessage;
  }
  else {
    this._router.navigate(['/authentication/login'], { queryParams: { returnUrl: this._router.url }});
    return error.message;
  }
}
Now, if we try to log in again, we are going to get the correct message:

Excellent.
Modifying the Registration Action
Before we start with the action modification, let’s add one more property to the UserForRegistrationDto class:
public class UserForRegistrationDto
{
    //other properties

    public string? ConfirmPassword { get; set; }

    public string? ClientURI { get; set; }
}
Now, we can modify the Registration action to support email confirmation:
[HttpPost("Registration")]
public async Task<IActionResult> RegisterUser([FromBody] UserForRegistrationDto userForRegistration)
{
    if (userForRegistration == null || !ModelState.IsValid)
        return BadRequest();

    var user = _mapper.Map<User>(userForRegistration);

    var result = await _userManager.CreateAsync(user, userForRegistration.Password);
    if (!result.Succeeded)
    {
        var errors = result.Errors.Select(e => e.Description);

        return BadRequest(new RegistrationResponseDto { Errors = errors });
    }

    var token = await _userManager.GenerateEmailConfirmationTokenAsync(user);
    var param = new Dictionary<string, string?>
    {
        {"token", token },
        {"email", user.Email }
    };

    var callback = QueryHelpers.AddQueryString(userForRegistration.ClientURI, param);

    var message = new Message(new string[] { user.Email }, "Email Confirmation token", callback, null);
    await _emailSender.SendEmailAsync(message);

    await _userManager.AddToRoleAsync(user, "Viewer");

    return StatusCode(201);
}
Here, we do a similar thing as we did with the ForgotPassword action. Just, here we use the GenerateEmailConfirmationTokenAsync method to generate an email token.
Client Modification to Support Angular Email Confirmation
The first thing we have to modify on the Angular side is the userForRegistrationDto interface:
export interface UserForRegistrationDto {
    firstName: string;
    lastName: string;
    email: string;
    password: string;
    confirmPassword: string;
    clientURI: string;
}
Then, we have to modify the registerUser function in the register-user.component.ts file:
const user: UserForRegistrationDto = {
  firstName: formValues.firstName,
  lastName: formValues.lastName,
  email: formValues.email,
  password: formValues.password,
  confirmPassword: formValues.confirm,
  clientURI: 'http://localhost:4200/authentication/emailconfirmation'
};
We just have to add this new property to the user object and nothing more than that.
Now, we can remove the Code Maze user from the database and start both applications.
After we populate the registration form and click Register, the application navigates us to the login form. Furthermore, if we check our email, we are going to find a new email message with the email confirmation token:
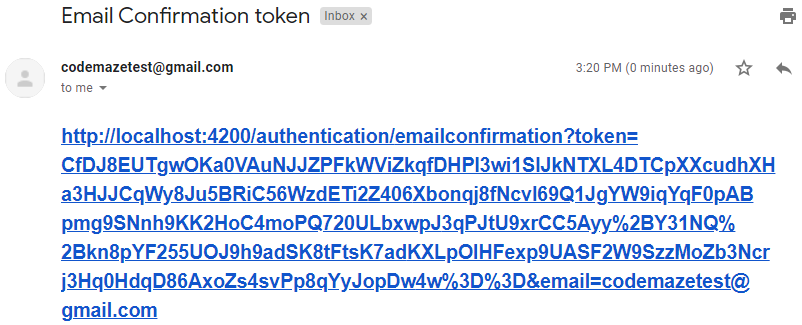
This means that our user is registered in the database, but we need to provide the email confirmation logic on both the API and Angular side.
Let’s continue with the API implementation first.
Web API Email Confirmation Logic
To implement the required logic, we have to add a new action to the AccountsController:
[HttpGet("EmailConfirmation")]
public async Task<IActionResult> EmailConfirmation([FromQuery] string email, [FromQuery] string token)
{
    var user = await _userManager.FindByEmailAsync(email);
    if (user == null)
        return BadRequest("Invalid Email Confirmation Request");

    var confirmResult = await _userManager.ConfirmEmailAsync(user, token);
    if (!confirmResult.Succeeded)
        return BadRequest("Invalid Email Confirmation Request");

    return Ok();
}
In this action, we accept two parameters from the query. These parameters are the same ones we emailed to the user. Next, we try to fetch the user from the database. If we can’t find one, we just return a bad request. Otherwise, we use the ConfirmEmailAsync method to update the user’s data in the database. If this succeeds, the EmailConfirmed column in the AspNetUsers table will be set to true. If it fails, we return a bad request.
And, that’s all.
We can continue with the Angular email confirmation logic.
Creating Angular Email Confirmation Component
The first thing we are going to do is to create a new email confirmation component:
ng g c authentication/email-confirmation --skip-tests
Once we click the email link, we are going to be navigated to this component. Then, we will extract parameters from the URI, send the GET request to the API, and show the response.
But before we do all of that, let’s just create a route for this component:
RouterModule.forChild([
  { path: 'register', component: RegisterUserComponent },
  { path: 'login', component: LoginComponent },
  { path: 'forgotpassword', component: ForgotPasswordComponent },
  { path: 'resetpassword', component: ResetPasswordComponent },
  { path: 'emailconfirmation', component: EmailConfirmationComponent }
])
Good.
After this, we are going to create a custom encoder class in the shared folder, to help us encode our token (which contains some special characters):
import { HttpParameterCodec } from "@angular/common/http";

export class CustomEncoder implements HttpParameterCodec {
  encodeKey(key: string): string {
    return encodeURIComponent(key);
  }

  encodeValue(value: string): string {
    return encodeURIComponent(value);
  }

  decodeKey(key: string): string {
    return decodeURIComponent(key);
  }

  decodeValue(value: string): string {
    return decodeURIComponent(value);
  }
}
Now, what we need is to modify the authentication service file to create the GET request to the API:
public confirmEmail = (route: string, token: string, email: string) => {
  let params = new HttpParams({ encoder: new CustomEncoder() })
  params = params.append('token', token);
  params = params.append('email', email);

  return this.http.get(this.createCompleteRoute(route, this.envUrl.urlAddress), { params: params });
}
So, we create the params object of the HttpParams type and set the encoder to our custom encoder. Then, we just send the HTTP GET request to the API.
After this implementation, we can modify the email confirmation component file:
import { HttpErrorResponse } from '@angular/common/http';
import { AuthenticationService } from './../../shared/services/authentication.service';
import { Component, OnInit } from '@angular/core';
import { ActivatedRoute } from '@angular/router';
@Component({
  selector: 'app-email-confirmation',
  templateUrl: './email-confirmation.component.html',
  styleUrls: ['./email-confirmation.component.css']
})
export class EmailConfirmationComponent implements OnInit {
  showSuccess: boolean;
  showError: boolean;
  errorMessage: string;

  constructor(private _authService: AuthenticationService, private _route: ActivatedRoute) { }

  ngOnInit(): void {
    this.confirmEmail();
  }

  private confirmEmail = () => {
    this.showError = this.showSuccess = false;

    const token = this._route.snapshot.queryParams['token'];
    const email = this._route.snapshot.queryParams['email'];

    this._authService.confirmEmail('api/accounts/emailconfirmation', token, email)
    .subscribe({
      next: (_) => this.showSuccess = true,
      error: (err: HttpErrorResponse) => {
        this.showError = true;
        this.errorMessage = err.message;
      }
    })
  }
}
All of these are pretty familiar to us. As soon as our component initializes, we call the confirmEmail function. Inside it, we extract the query parameters and call the confirmEmail function from the authentication service. If the response is successful, we show the success message. Otherwise, we show an error message.
Finally, let’s modify the .html file:
<div class="card">
    <div class="card-body">
        <h1 class="card-title">Email Confirmation</h1>

        <div *ngIf="showError" class="alert alert-danger" role="alert">
            {{errorMessage}}
        </div>

        <div *ngIf="showSuccess" class="alert alert-success" role="alert">
            Your email has been successfully confirmed. Please <a [routerLink]="['/authentication/login']"> click here to log in. </a>
        </div>
    </div>
</div>
And that’s all it takes.
We can test this now.
Testing the Angular Email Confirmation Functionality
Let’s remove one more time our CodeMaze user from the database. Then, let’s create a new user via the Register form. After the successful registration, we can check our email and click the received link. This will navigate us to the email confirmation component and we are going to see our result:

Now, we can click on this link, or close this tab and return to the previous (your choice) and enter valid credentials. As you can see, we can log in successfully.
Also, if you check the database, you will see the EmailConfirmed column set to true:

Excellent.
The lifespan of this token and the password reset token shouldn’t be the same. This token should last longer than the password token. We already have a complete implementation of this feature in our Email Confirmation with ASP.NET Core Identity article, so just read the linked part and everything will be easy to implement.
Conclusion
There we go. We have implemented the email confirmation functionality with the Angular and ASP.NET Core Web API applications. Of course, don’t forget to read the linked article to learn how to expand the lifespan of the email confirmation token.
In the next part, we are going to learn about the User Lockout functionality with Angular and Web API.
See you there.

The error -response Unauthorized was not working in my program. So I changed to
private handleUnauthorized = (error: HttpErrorResponse) => {

  if (this.router.url === '/authentication/login') {
    error.error.errorMessage == undefined
      ? (this.errorMessage = 'Email or password are wrong')
      : (this.errorMessage = error.error.errorMessage);

    return error.error.errorMessage;
  } else {
    this.router.navigate(['/authentication/login'], {
      queryParams: { returnUrl: this.router.url },
    });

    return error.message;
  }
};
now it is much better.
Hi Alex. Well, I honestly don’t know what to say to that. Have you tried downloading our source code and comparing it with yours. This article was recently updated and everything has to work as it is in the article, have you done any changes to your projects?
Hi,
I can’t confirm mail through angular side but if I enter token and email in swagger I am able to confirm. can you help me out with this error
Have you implemented correctly the Encoder part? I had the same issue with Angular until I’ve implemented that Encoder part. Without encoding, your token is not the same once it reaches the API side. At least, that was the case for me. You can always download our source code to inspect the project.
if I use new CustomEncoder() this in anular side i am getting error
You can always debug your Angular code to see why you are getting that error. It could be related to a new Angular version because ours is 9. I don’t know and I can’t know just like that.
what to use in angular side for encoding?? can you suggest ?? sorry for bothering you
You are not bothering me, just I am not sure what to use if this doesn’t work. Have you tried without encoding if you are using the newest Angular framework? Or as I said, have you tried to debug your app and to see what token your receive on angular and what token you send with Angular to API. In my case, I was receiving a good token, but once I had to send it with Angular it was modified because it contains special characters. Try to debug your app and see where the real problem is, maybe you just need to tweak some small thing there.
Sorry for bothering you, I assume you are very bussy, but when I try to register, I keep getting this error – username and password not accepted. I allowed access for less secure apps on google…kindest regards.
Hello Petar. Well, I am not sure why you are getting this error, but I am pretty sure that it has nothing to do with your email action. Have you tried downloading our source code and comparing it to yours? Or try debugging your both apps to see where the problem occurs, that could help as well.
ok tnx!
Amazing job you guys are doing…Have you maybe planned to publish some course which would include among other things this on udemy or something similar? – I am sure you would have many students. Best regards from Zagreb.
Hello Petar. First of all, thank you very much for the kind words. We have a lot of plans to create a video course on Web API + Angular, but once we do that, it will be hosted on our site, as our Blazor Video Course. We won’t host our products on Udemy. You can see the Blazor course here: https://code-maze.com/blazor-webassembly-course/?source=nav or the Book package here: https://code-maze.com/ultimate-aspnetcore-webapi-second-edition/?source=nav
Best regards from Novi Sad 🙂
Hello Sir, I also plead with you for a complete video tutorial demonstration of this Angular security with asp.net core, Just like you did for the blazor- webassembly. Sir I will be a million times grateful if the video for this Angular security with asp.net core course id done soon, because most of us using angular with .NET core are. So when are we hoping for the video series.
Hi Marinko,
Great tutorial – excellent work as always. I do however, strongly agree with Zoltan about using the user email in the Registration instead of the hardcoded value currently there – especially given you use the needed email value 4 lines earlier in the code. I figured the ‘codemazetest@’ was the ‘from’ address and sent an email to the wrong place 😉 oh well.
Also, I was getting a
Failed to load resource: the server responded with a status of 415 ()error with the [FromBody] param in the EmailConfirmation action in the AccountsController. Changing the param to [FromQuery] (same as the token) worked. This may be because I am using an EmailService that usesSystem.Net.Mail.MailMessageinstead ofMimekit.MimeMessageFinally, if I can make a suggestion: a popup or dialog indicating initial success and the sending of the confirmation email after registration would make a great addition.
Thanks again, I am really enjoying this series.
Thank you for the suggestions. I am glad you are enjoying this series. I’ve fixed in the article the hardcoded email thingy 🙂
Hello, Great Article.
One thing that I think it should be mentioned more and explained. Which is the Encoded and Decoded the token on both side API and Client.
If I didn’t used “QueryHelpers.AddQueryString” on API side and also the class CustomEncoder() on the client side, the token is corrupted and you cannot confirm the email.
But still Thank you.
Hi Silviu Mihai.
You have to use the QueryHelpers class to be able to add a query string to the URI. Also as you said, and I mentioned in the article, the token contains some special characters and thus it can’t be encoded. So, we have to create a custom encoder class. Anyhow, thatnks for the suggestions and I am glad you liked the article.
Thank you for the article. One hint, in the RegisterUser method, the new Message () should contain the email of the user, not necessarily “[email protected]” but UserForRegistrationDto.Email (for the generic case).
Yes Zoltan, you are right. And that’s the way for this to be done. This is just an example, since we have only one user in our app. Basically, you can always use the user object to extract the Email property as you suggested.