

Updated on
One of every web application’s main features is navigation, and to enable it in our project, we need to use routing. The Angular Router enables navigation from one view to the next as users perform application tasks.
In our navigation menu, we are going to have three menu options: one for the home screen, another one for the owner operations, and the last one for the account operations. Hopefully, this will help you realize the advantages of using multiple modules inside a project and how the lazy content loading helps our application perform better.
For the complete navigation and all the basic instructions of the Angular series, check out: Introduction of the Angular series.
So, let’s start.
Create a Navigation Menu
So, let’s start by creating a new Menu component:
ng g component menu --skip-tests
We are going to use Bootstrap classes to implement the navigation menu within the menu.component.html file:
<div class="row">
  <div class="col">
    <nav class="navbar navbar-expand-lg navbar-dark bg-dark">
      <div class="container-fluid">
        <a class="navbar-brand" href="#">Account-Owner Home</a>
        <button class="navbar-toggler" type="button" data-bs-toggle="collapse" data-bs-target="#collapseNav"
          aria-controls="collapseNav" aria-expanded="false" aria-label="Toggle navigation">
          <span class="navbar-toggler-icon"></span>
        </button>

        <div class="collapse navbar-collapse" id="collapseNav">
          <ul class="navbar-nav me-auto mb-2 mb-lg-0">
            <li class="nav-item">
              <a class="nav-link" href="#">Owner Actions </a>
            </li>
            <li class="nav-item">
              <a class="nav-link" href="#">Account Actions </a>
            </li>
          </ul>
        </div>
      </div>
    </nav>
  </div>
</div>
Currently, we are not going to modify the menu.component.ts file.
But, we are going to change our app.component.html file:
<div class="container">
  <div class="row">
    <div class="col">
      <app-menu></app-menu>
    </div>
  </div>
  <div class="row">
    <div class="col">
      <app-home></app-home>
    </div>
  </div>
</div>
Now, we can start our angular project by typing with ng serve -o.
As soon as the project runs, we are going to see our menu on the screen:

There it is.
Add Collapse Functionality to the NavBar
Right now, if we shrink our screen, we will be able to see the hamburger button, which once we click on it, should show our menu items. But it doesn’t because we didn’t install all the JavaScript parts for Bootstrap. And we don’t want to.
What we want is to use ngx-bootstrap as much as we can with all the components it provides for us.
That said, we are going to use the Collapse component from ngx-bootstrap to enable our collapsable menu.
So, let’s first import the component into the app.module file:
import { CollapseModule } from 'ngx-bootstrap/collapse';

...

@NgModule({
  declarations: [
    AppComponent,
    HomeComponent,
    MenuComponent
  ],
  imports: [
    BrowserModule,
    AppRoutingModule,
    BrowserAnimationsModule,
    CollapseModule.forRoot()
  ],
In this file, we can also notice a MenuComponent inside the declarations array. It was imported earlier during the creation of the navigation component.
Then, we are going to add one property inside the menu.component.ts file:
export class MenuComponent implements OnInit {
  isCollapsed: boolean = false;

  constructor() { }

  ngOnInit(): void {
  }

}
And finally, we are going to modify our NavBar HTML code:
<div class="row">
  <div class="col">
    <nav class="navbar navbar-expand-lg navbar-dark bg-dark">
      <div class="container-fluid">
        <a class="navbar-brand" href="#">Account-Owner Home</a>
        <button class="navbar-toggler" type="button" (click)="isCollapsed = !isCollapsed"
          [attr.aria-expanded]="!isCollapsed" aria-controls="collapseNav">
          <span class="navbar-toggler-icon"></span>
        </button>

        <div class="collapse navbar-collapse" id="collapseNav" [collapse]="!isCollapsed" [isAnimated]="true">
          <ul class="navbar-nav me-auto mb-2 mb-lg-0">
            <li class="nav-item">
              <a class="nav-link" href="#">Owner Actions </a>
            </li>
            <li class="nav-item">
              <a class="nav-link" href="#">Account Actions </a>
            </li>
          </ul>
        </div>
      </div>
    </nav>
  </div>
</div>
Here we add the (click) event, which will change the isCollapsed property state each time we click the hamburger button. Also, pay attention that the aria-controls attribute must have the same id value as our div below it. Additionally, in the mentioned div, we set the value for the [collapse] selector to indicate the visibility of our content and set the animation to true by using the [isAnimated] input.
That is all. Now we can shrink the screen and once the hamburger button appears, we can click on it and see our menu items.
Configure Angular Routing
To enable navigation between all the pages inside this project, we need to configure the Angular routing. The routing module is already created for us since we asked for it during the project creation.
We can see that in the app.module.ts file:
import { AppRoutingModule } from './app-routing.module';

...

imports: [
    BrowserModule,
    AppRoutingModule,
    BrowserAnimationsModule,
    CollapseModule.forRoot()
  ],
The AppRoutingModlue is the module responsible for the Angular routing.
Now, all we have to do is to modify the app-routing.module.ts file:
import { HomeComponent } from './home/home.component';

import { NgModule } from '@angular/core';
import { RouterModule, Routes } from '@angular/router';

const routes: Routes = [
  { path: 'home', component: HomeComponent },
  { path: '', redirectTo: '/home', pathMatch: 'full' }
];

@NgModule({
  imports: [RouterModule.forRoot(routes)],
  exports: [RouterModule]
})
export class AppRoutingModule { }
So, we add two routes inside the routes array. This routes array is already provided inside the RouterModule.forRoot function to define routes for our application.
When we create more than one module inside the application, we can use the forRoot() function provided by the RouterModule, only in the main(root) module. In all other modules, we must use the forChild() function. The forRoot() function accepts an array of objects as a parameter. Every element of that array consists of the path and the target component for that path. So, the path: home means that on the http://localhost:4200/home address, we are going to serve the HomeComponent. The other line inside the routes array is the default redirection to the home page.
Now, to enable content from the routes, we have to modify the app.component.html:
<div class="container">
  <div class="row">
    <div class="col">
      <app-menu></app-menu>
    </div>
  </div>
  <div class="row">
    <div class="col">
      <router-outlet></router-outlet>
    </div>
  </div>
</div>
The router-outlet is a container for the routing content. So basically, all the content that exists on the address we are routing to is going to be presented inside that container.
Now if we navigate to the localhost:4200 we should be able to see the same result as before, but this time, we are providing our home component through the <router-outlet> and not <app-home> selector.
Additionally, if we click on any other menu item, we will be automatically redirected to the home page.
Styling Links
If we want to style your active link in the menu, we have to change our <a> tag:
<a class="navbar-brand" [routerLink]="['/home']" routerLinkActive="active"
          [routerLinkActiveOptions]="{exact: true}">Account-Owner Home</a>
With the routerLinkActive, we are setting up the CSS class name we want to use to style the active link. Furthermore, the routerLinkActiveOptions is going to allow us to add a class only if there is an exact match of the link and the URL. Lastly, we are not using the href attribute anymore for navigation. Instead, we are using the [routerLink] directive to navigate to our routing path.
Now in the menu.component.css file, we are going to add the .active class:
.active{
  font-weight: bold;
  font-style: italic;
  color: #fff;
}
Excellent. If we inspect our application, we are going to see that the Account-Owner Home link is now white and bold.
Create the Not-Found Component
We have working navigation.
To complete the Angular routing part of this post, we are going to create a component with the name not-found. The application is going to redirect a user to this component when they type a none existing route in the URL.
To do that, let’s execute the familiar command:
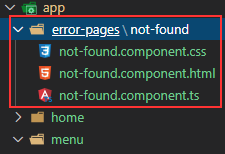
ng g component error-pages/not-found --skip-tests
This is the folder structure:
Let’s modify the not-found.component.ts file:
import { Component, OnInit } from '@angular/core';

@Component({
  selector: 'app-not-found',
  templateUrl: './not-found.component.html',
  styleUrls: ['./not-found.component.css']
})
export class NotFoundComponent implements OnInit {
  notFoundText: string = `404 SORRY COULDN'T FIND IT!!!`;

  constructor() { }

  ngOnInit(): void {
  }

}
We have to pay attention to the string value of the notFoundText property. We are not using apostrophes but backticks (`). All the content inside the backticks will be considered as a string, even the apostrophe sign in the string.
To continue, let’s modify the not-found.component.html file:
<p>
  {{notFoundText}}
</p>
Also, we need to modify not-found.component.css file:
p {
  font-weight: bold;
  font-size: 50px;
  text-align: center;
  color: #f10b0b;
}
Finally, we are going to change the content inside the routes array:
const routes: Routes = [
  { path: 'home', component: HomeComponent },
  { path: '404', component: NotFoundComponent },
  { path: '', redirectTo: '/home', pathMatch: 'full' },
  { path: '**', redirectTo: '/404', pathMatch: 'full' }
];
There are two changes here. With the first change, we declare the 404 path and assign the NotFoundComponentcomponent to that path. Now our component is going to be visible on the localhost:4200/404. The second change means that whenever we search for any route that doesn’t match any of our defined routes, the application redirects us to the 404 page.
Typing localhost:4200/whatever should return the not found page. Also, we may try to navigate to localhost:4200/404, and the app will navigate us to the same page.
Conclusion
As you might have noticed, creating the menu and using the routing in the angular project is pretty straightforward. Although we are not creating a large project, it is quite big enough to demonstrate the usage, configuration, and routing of all the pages we currently have. Of course, we are going to create routes for all new pages that we introduce to our project.
In the next part of the series, we are going to show you how to fetch the data and consume the API with HTTP and Observables.

Unfortunately, the menu CSS doesn’t load. do we have to point the styleUrls in menu.component.ts to the main styles.css file? I tried a few ways but it always complains that the path to the styles.css file is not found.
Also, after adding the changes to collapse the menu, the only content that displays on the page is “Account-Owner Home” with an empty square next to it.
Have you tried downloading our source code. With the Angular and ngxbootstrap versions that I used for this series everything works. So just check with the source code and compare to yours. If nothing is changed in new angular or ngxbootsrap versions, everything should still work.
I am not sure about this one. As long as you use ng g c command, you should be good to go because everything will be linked automatically.
Hi Great thanks for tutorial. I have query related to routing. I have url like this http://localhost:4200/dashboard. Can I append some key dynamically like this for my route http://localhost:4200/SomeDynamicKey/dashboard against each route of app . Thanks in advance
Well the first thing that comes to my mind is to register a route like that with a placeholder for that key /:key/… as you would for the Id parameter, and then just use it in your code with the Router injected.
Hello Marinko.
Thank you for the tutorials, they are great help to learn programming.
Is it possible to pass a parameter in the URL string when opening the start page? If I pass the ID to the URL: mysite.com/userid, and the app will read and remember this ID for future reference ?
Hello Vasily. You can probably do something like that if you create your route in routing file to accept a single parameter. But I wouldn’t recommend doing that. If you want some parameters to be stored on the client side as soon as your app starts, you can always send a request from the app.component file and retreive all that you need to store, and then store it in a service or cookie or wherever you want.
Thank you, Marinko.
The idea was to read the QR-code, which contains the path with ID of the product and go directly to the site to this product section. Therefore, the parameter will be different
Another great article, just a little tip. In section describing creating Menu component, you could’ve mentioned “ng g component menu” command, for the lazy people! (I know you mention it a little later in article – creating not-found component, but still).
Hello mate. Thank you for that suggestion. You are probably right, I should have done that. I am going to fix it.
Thank you very much, irrelavant. I am really glad that you find these articles helpful, it is always a great news for a writer 😀
Sure thing man, I’m glad I found this series, as it has all I am currently exploring, being self-taugh aspiring coder, backend (.net core) that I’m learning + front end that lets me experience how someone would use back-end that I would create.
After I’m done with these tutorials I’ll surely check out other posts at this blog, so thanks for your work.
Love this series, hungrily awaiting the next part. Awesome!
Hello ddarkeh x. Thank you very much for reading. I am glad that you are finding this useful. New parts are live every Monday, but if you want you could subscribe and be notified every time new article is out. Thank you one more time, it means a lot.