

In this article, we will learn how to publish a Blazor WebAssembly application on IIS.
Let’s dive in.
Setting up the App
Blazor has three hosting models: server, hybrid, and client side. We won’t discuss hybrid in this article, since it is the approach to develop native mobile applications. The main difference between server and client-side hosting is where the components execute. To have a more in-depth comparison, check out our article on Blazor Server vs Blazor WebAssembly.
Creating From the Template
In this article we will be using the client-side hosting model, so let’s start by creating a Blazor WebAssembly Standalone App from the template:
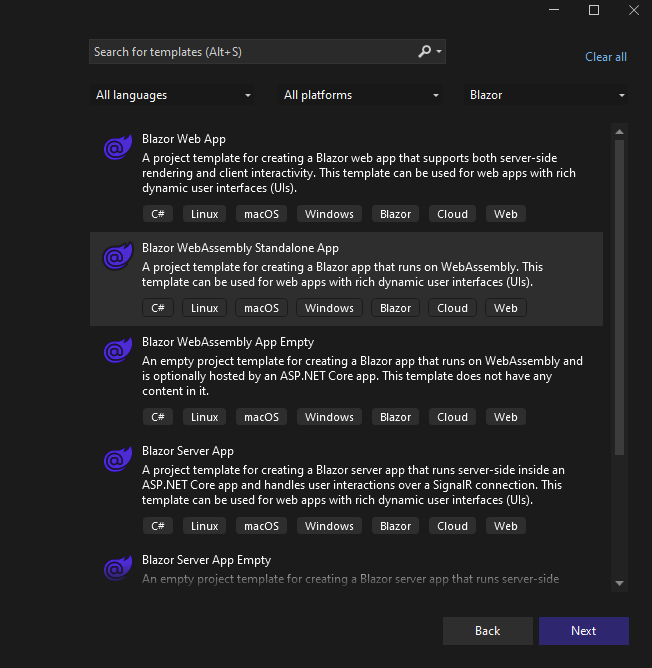
We can use the template with its default settings, so just press Next, and then Create.
Adding Environment-Specific Configuration
Now, to be able to utilize environment-specific settings, let’s create two files called appsettings.Development.json and appsettings.Production.json under the wwwroot folder and add an Enviroment property to them with the respective environment name as the value:
{
  "Environment": "Development"
}
Blazor WebAssembly will load these configurations for us automatically if we follow the naming structure appsettings.<env>.json.
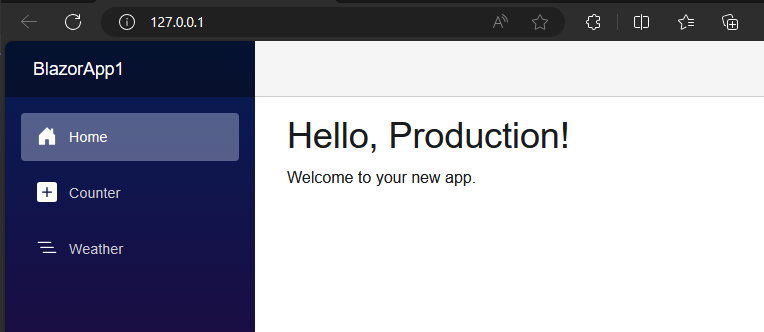
Let’s modify the home page to show us our Environment property’s value:
@page "/"
@inject IConfiguration Configuration

<PageTitle>Home</PageTitle>

<h1>Hello, @Configuration["Environment"]!</h1>

Welcome to your new app.
Furthermore, let’s run the application from Visual Studio to verify it’s working:

Blazor WebAssembly successfully reads the environment setting from the JSON file. However, it’s important to note that we should never add sensitive information to the client-side appsettings.json file, because this file will be served to everybody accessing our site.
Adding a Publish Profile
Since Blazor WebAssembly is a fully client-side framework, it will need a web server to host it.
Let’s publish our application to this folder. First, let’s add a Folder publish profile, by right-clicking the project, selecting Publish..., then Folder, then Next, and Finish. Finally, the profile should look like this:

Note the Configuration setting, which is set to Release. This will not affect which appsettings.json will be loaded, it will only tell the compiler to build the project in Release mode, thus making as many optimizations as possible. The hosting environment can be controlled using the ASPNETCORE_ENVIRONMENT environment variable.
Let’s publish the application by clicking on the Publish button. Once the application is published, let’s go on and configure IIS.
Configuring IIS
IIS is a general-purpose webserver for Windows-based systems, developed by Microsoft. It’s easy to get started with because it is part of every Windows version from Home to Server editions.
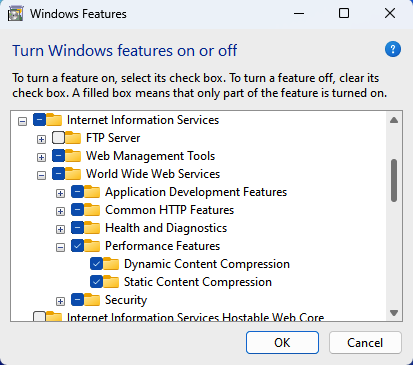
Let’s enable it in the Windows features menu:
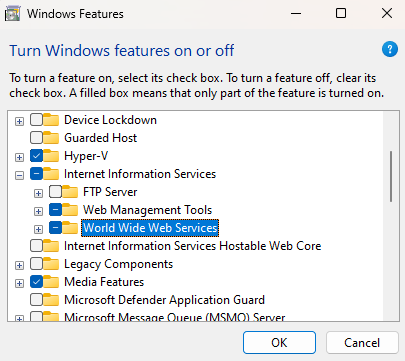
We only need Web Management Tools and World Wide Web Services, FTP Server is unnecessary for hosting Blazor applications.
After Windows finished installing the necessary components let’s install the URL Rewrite module for IIS. Unfortunately, this module is not part of the core IIS installation, however, it is necessary for Blazor WebAssembly’s client-side routing to work.
Now we’re ready to create our first site in IIS Manager.
Creating the Site
In IIS Manager we have a default website, but let’s remove it:

Then create a new site, by right-clicking on Sites and selecting Add Website:

In the Physical path input, let’s select the folder where we published our app.
It should be <project folder>\bin\Release\net8.0\browser-wasm\publish.
Once we create the site, let’s configure IIS to access the published folder.
Setting up Access Rights
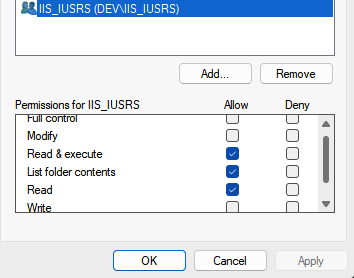
IIS runs our website in an application pool, which has an identity. All application pool identities are part of the IIS_IUSRS group, so let’s allow full read and execute access for that group on the publish folder:
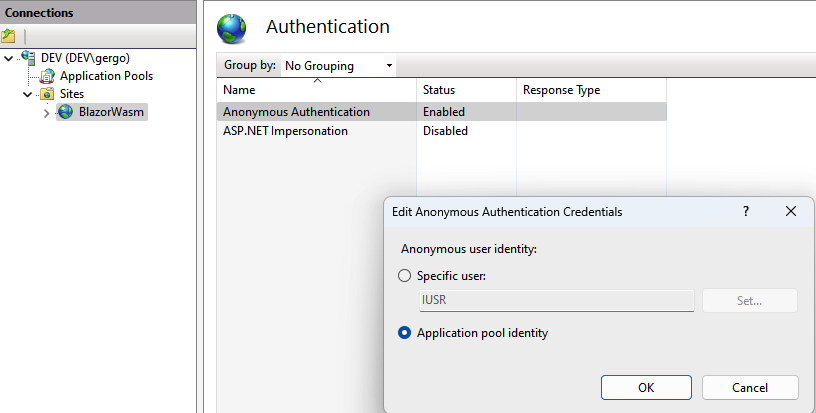
Then the last step to allow access for IIS is to set the anonymous authentication credentials to the application pool user. Let’s select our site in IIS, select the Authentication component, then edit the Anonymous Authentication and select the Application pool identity:
And our site is fully functional. Let’s navigate to http://127.0.0.1 and check if everything is working fine, and what our environment is:
Enabling Compression While Publishing a Blazor WebAssembly Application on IIS
In the published folder we can notice that the compiler created .br and .gz files for us. These are compressed files, hence their size is reduced, and due to the smaller size the application loads faster, especially on slower networks. However, by default, IIS will serve the non-compressed variant of the application. We can configure this behavior in the web.config file. It contains settings for MIME types, compression, and URL rewrite rules for IIS. Let’s add compression-related settings to the web.config file in the root of the publish folder.
First, let’s add the mimeMaps of compressed files under configuration/system.webServer/staticContent:
<mimeMap fileExtension=".js.gz" mimeType="application/javascript" />
<mimeMap fileExtension=".dat.gz" mimeType="application/octet-stream" />
<mimeMap fileExtension=".dll.gz" mimeType="application/octet-stream" />
<mimeMap fileExtension=".json.gz" mimeType="application/json" />
<mimeMap fileExtension=".wasm.gz" mimeType="application/wasm" />
<mimeMap fileExtension=".blat.gz" mimeType="application/octet-stream" />
<mimeMap fileExtension=".html.gz" mimeType="text/html" />
<mimeMap fileExtension=".css.gz" mimeType="text/css" />
<mimeMap fileExtension=".ico.gz" mimeType="image/x-icon" />
<mimeMap fileExtension=".svg.gz" mimeType="image/svg+xml" />
<mimeMap fileExtension=".js.br" mimeType="application/javascript" />
<mimeMap fileExtension=".dat.br" mimeType="application/octet-stream" />
<mimeMap fileExtension=".dll.br" mimeType="application/octet-stream" />
<mimeMap fileExtension=".json.br" mimeType="application/json" />
<mimeMap fileExtension=".wasm.br" mimeType="application/wasm" />
<mimeMap fileExtension=".blat.br" mimeType="application/octet-stream" />
<mimeMap fileExtension=".html.br" mimeType="text/html" />
<mimeMap fileExtension=".css.br" mimeType="text/css" />
<mimeMap fileExtension=".ico.br" mimeType="image/x-icon" />
<mimeMap fileExtension=".svg.br" mimeType="image/svg+xml" />
The mimeMap tag helps IIS recognize the compressed file’s MIME type and can appropriately serve them to the browser.
Next, let’s replace configuration/system.webServer/httpCompression‘s contents:
<dynamicTypes>
  <remove mimeType="text/*" />
  <remove mimeType="application/javascript" />
  <remove mimeType="image/svg+xml" />
</dynamicTypes>
<staticTypes>
  <remove mimeType="text/*" />
  <remove mimeType="application/javascript" />
  <remove mimeType="image/svg+xml" />
</staticTypes>
When using the default web.config, IIS would attempt to compress the already compressed file once more. To prevent this, we remove types that do not require further compression and avoid adding types that are already compressed during the building of the Blazor WebAssembly project.
Now, under the configuration/system.webServer/rewrite, let’s add these rules:
<outboundRules rewriteBeforeCache="true">
  <rule name="Add Vary Accept-Encoding" preCondition="PreCompressedFile" enabled="true">
    <match serverVariable="RESPONSE_Vary" pattern=".*" />
    <action type="Rewrite" value="Accept-Encoding" />
  </rule>
  <rule name="Add Encoding Brotli" preCondition="PreCompressedBrotli" enabled="true" stopProcessing="true">
    <match serverVariable="RESPONSE_Content_Encoding" pattern=".*" />
    <action type="Rewrite" value="br" />
  </rule>
  <rule name="Add Encoding Gzip" preCondition="PreCompressedGzip" enabled="true" stopProcessing="true">
    <match serverVariable="RESPONSE_Content_Encoding" pattern=".*" />
    <action type="Rewrite" value="gzip" />
  </rule>
  <preConditions>
    <preCondition name="PreCompressedFile">
      <add input="{HTTP_URL}" pattern="\.(gz|br)$" />
    </preCondition>
      <preCondition name="PreCompressedBrotli">
      <add input="{HTTP_URL}" pattern="\.br$" />
    </preCondition>
    <preCondition name="PreCompressedGzip">
      <add input="{HTTP_URL}" pattern="\.gz$" />
    </preCondition>
  </preConditions>
</outboundRules>
These rules outline the headers to include in responses. For each compressed file, we include the Vary: Accept-Encoding header to notify caches that the content varies by encoding. If the file undergoes Brotli compression, we assign br to the Content-Encoding header and for gzip compression, we specify gzip as the header value. The preconditions guarantee that these rules exclusively pertain to compressed files.
Lastly, let’s add the following rules under configuration/system.webServer/rewrite/rules:
<rule name="Rewrite brotli file" stopProcessing="true">
  <match url="(.*)"/>
  <conditions>
    <add input="{HTTP_ACCEPT_ENCODING}" pattern="br" />
    <add input="{REQUEST_FILENAME}" pattern="\.(js|dat|dll|json|wasm|blat|htm|html|css|ico|svg)$" />
    <add input="{REQUEST_FILENAME}.br" matchType="IsFile" />
  </conditions>
  <action type="Rewrite" url="{R:1}.br" />
</rule>
<rule name="Rewrite gzip file" stopProcessing="true">
  <match url="(.*)"/>
  <conditions>
    <add input="{HTTP_ACCEPT_ENCODING}" pattern="gzip" />
    <add input="{REQUEST_FILENAME}" pattern="\.(js|dat|dll|json|wasm|blat|htm|html|css|ico|svg)$" />
    <add input="{REQUEST_FILENAME}.gz" matchType="IsFile" />
  </conditions>
  <action type="Rewrite" url="{R:1}.gz" />
</rule>
These rules rewrite URLs of plain files to their compressed versions, based on which compression the client supports.
Further, let’s enable static and dynamic response compression Windows features:
After rebooting the computer, let’s open http://127.0.0.1, and check the Content-Encoding header value for the wasm files:
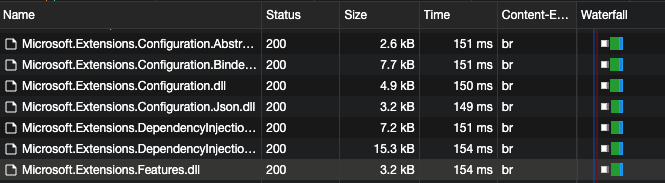
However, it’s important to note that browsers cache these files heavily, so it’s a good idea to clear all site data or use an incognito tab before checking the results.
Enabling compression can result in significant first-load time improvements. Now let’s finish our IIS deployment by enabling HTTPS.
Setting Up HTTPS
HTTPS encrypts communication between the server and the client so that no listener can decode the communication. This is crucial in the case of web applications, so let’s turn it on.
In IIS Manager, select our site, then in the right side menu click on Bindings..., and then add. Let’s fill out the form for our new HTTPS binding with the development certificate:
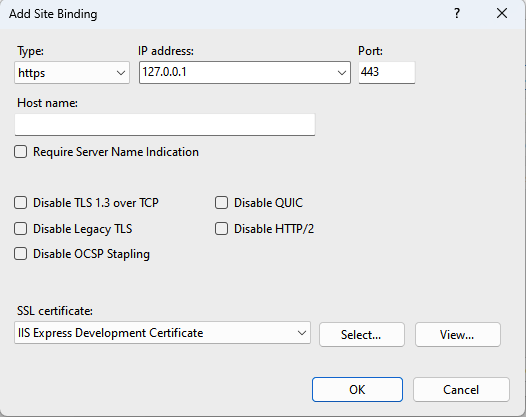
The server uses the SSL certificate to authenticate itself and encrypt traffic. In a real-world scenario, we should purchase an SSL certificate from a root certificate authority trusted by all computers worldwide. Our own machine issues the development certificate when we initially start a development server, and only our computer trusts it. If someone else were accessing our site, they would see a not secure warning:
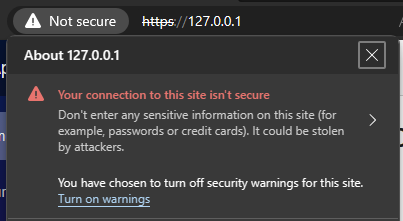
On our development machine, this is not a problem, however, if we were to host a real application, we should get a certificate from a trusted root certificate authority instead of creating our own.
Conclusion
We successfully set up a Blazor WebAssembly application hosted on IIS. Enabling compression made our first load faster, and we secured the communication between the client and server by using HTTPS. Lastly, we added appsettings.json and discussed how environment variables can be accessed from Blazor WebAssembly, and how to set different values for them in different environments.
