

In this article, we will learn how to set up two-factor authentication using SMS in ASP.NET Core.
We have previously covered Two-Step Verification with ASP.NET Core Identity using Email. This article is a continuation that uses generated code provided by ASP.NET Core Identity.
This article uses Twilio as the SMS provider for the 2FA.
With that, let’s make a start.
What is Two-Factor Authentication (2FA)?
Two-factor authentication (2FA) is a security mechanism that involves user authentication using two different factors. These factors may include a knowledge factor (something the user knows), a possession factor (something the user owns), a biometric factor (something inherent in the user’s physical self, such as fingerprints), a location factor (thus limiting the locations from where one can attempt to log in), or a time factor (thus restricting the user to login within a time window). Hence, it secures the user credentials, as well as the resources the user can access.
How Two-Factor Authentication Works
Two-factor authentication is a type of multi-factor authentication (MFA). Depending on the requirements, the factors included may vary, however, any multi-factor authentication follows the same flow:
- The user tries to log in using their credentials
- The application then prompts the user to initiate the second login step where they verify themselves with something they possess such as biometrics, a security token, a one-time password (OTP), etc
- After authenticating both factors, the application grants access to the user
Setting up an SMS Account
Before we begin with our application, let’s create an SMS account that will send the OTP. We will use Twilio for creating the SMS account, however, any other SMS provider will also work.
We can create a trial account for testing two-factor authentication. While creating the account, we need to verify our email and phone number. The phone number we use at this step is important as that’s where we will receive the OTPs when we set up the application.
There are some limitations with the trial account. However, we have a small trial balance that we can use to provision phone numbers for sending the one-time passwords.
After creating the account, we will need the authentication credentials, and a sender phone number to use this service for the two-factor authentication.
SMS Provider Credentials
For the SMS provider credentials, we can copy the Account SID and Auth Token from the dashboard to use as user id and password respectively:

SMS Sender Phone Number
We don’t receive a phone number by default. From the dashboard, we can go to the Active Numbers option in Develop > Phone Numbers > Manage tab and buy a number from the list available using our account balance.
This number would then appear on the Active Numbers screen as well as the dashboard under the label “My Twilio phone number”. We will use this phone number as the SMS sender phone number in the application.
Now that we are done with setting up the SMS provider, let’s start creating our application.
Code Preparation for the Two-Factor Authentication
Before we continue with setting up our application to use SMS for 2FA, we need to make sure that our user has the TwoFactorEnabled column set to 1 and a valid phone number:
![]()
The SMS provider will send the OTP to this phone number.
As an additional prerequisite for Twilio, the user phone number should be one of the “Verified Caller IDs”. We can check for all the verified caller ids by going to Develop > Phone Numbers > Manage > Verified Caller IDs.
By default, the phone number we used to sign up is included in this list.
Providing Credentials for the SMS Service
Now that we have our user configured, let’s take a look at how to connect our application to the SMS service provider.
Let’s create a SMSOptions class to fetch the secure SMS key:
public class SMSOptions
{
    public string SMSAccountIdentification { get; set; }
    public string SMSAccountPassword { get; set; }
    public string SMSAccountFrom { get; set; }
}
Here, we can use the secret manager tool to set the values of SMSAccountIdentification, SMSAccountPassword, and SMSAccountFrom properties.
Secret Manager Tool
The secret manager tool works on project-specific configuration. Before we can set any secrets, we need to initialize the secret manager tool.
We can use the init command in the project directory to do so:
dotnet user-secrets init
Then, we can set the value of properties from the SMSOptions class:
dotnet user-secrets set SMSAccountIdentification <Account SID here>
This creates a secrets.json file with all the secrets and their values stored as key-value pairs. We can access this file by right-clicking on the solution and selecting “Manage User Secrets” from the context menu.
Enabling SMS Service
The first step to enabling the SMS service in our application is to add the NuGet package for the SMS provider. We can install the package for Twilio from the Package Manager Console:
Install-Package Twilio
Once we have our SMS provider package installed, let’s create an interface ISmsSender to send SMS using a number and a message as parameters:
public interface ISmsSender
{
    Task SendSmsAsync(string number, string message);
}
Let’s also implement this interface in another service class MessageSender to enable SMS:
public class MessageSender : ISmsSender
{
    public SMSOptions Options { get; }
    public MessageSender(IOptions<SMSOptions> optionsAccessor)
    {
        Options = optionsAccessor.Value;
    }

    public Task SendSmsAsync(string number, string message)
    {
        var accountSid = Options.SMSAccountIdentification;
        var authToken = Options.SMSAccountPassword;

        TwilioClient.Init(accountSid, authToken);

        return MessageResource.CreateAsync(
            to: new PhoneNumber(number),
            from: new PhoneNumber(Options.SMSAccountFrom),
            body: message);
    }
}
To implement the Twilio client for sending SMS, we need to add the Twilio.Rest.Api.V2010.Account and Twilio.Types namespaces. We use the Options property to provide us with authentication credentials needed in the TwilioClient.Init() method, and the sender’s phone number to set the from argument while creating a MessageResource.
As a last step of configuration, we need to add SMSOptions to the service container in the Program.cs class:
builder.Services.AddTransient<ISmsSender, MessageSender>();
builder.Services.Configure<SMSOptions>(builder.Configuration);
Implementing Login With Two-Factor Authentication
Now that we have enabled the two-factor authentication when trying to log in from the Login page we are redirected to LoginWith2fa:
public async Task<IActionResult> OnPostAsync(string returnUrl = null)
{
    //code removed for clarity
    var result = await _signInManager.PasswordSignInAsync(Input.Email.Split('@')[0],
                Input.Password,
                Input.RememberMe,
                lockoutOnFailure: false);

    if (result.Succeeded)
    {
        _logger.LogInformation("User logged in.");
        return LocalRedirect(returnUrl);
    }
    if (result.RequiresTwoFactor)
    {
        return RedirectToPage("./LoginWith2fa",
            new { ReturnUrl = returnUrl, RememberMe = Input.RememberMe });
    }
    //code removed for clarity
}
The result variable has the property RequiresTwoFactor set to true because the TwoFactorEnabled column is set to 1 for the current user. This causes the Succeeded property to be set false. Hence, the user needs to complete the second step of the login process (thus providing the second factor of authentication).
Two-Factor Authentication Login Page
Let’s modify the LoginWith2fa page to be able to receive and verify SMS one-time passwords. We will make some modifications to the existing UI to include a text box where we enter the received OTP:
@page
@model LoginWith2faModel
@{
    ViewData["Title"] = "Two-factor authentication";
}

<div class="row">
    <div class="col-md-4">
        <form method="post" asp-route-returnUrl="@Model.ReturnUrl">
            <input asp-for="RememberMe" type="hidden" />
            <div asp-validation-summary="ModelOnly" class="text-danger"></div>
            <div class="form-floating m-3">
                <input asp-for="Input.TwoFactorCode"
                    class="form-control"
                    autocomplete="off"
                    placeholder="Enter the OTP" />
                <span asp-validation-for="Input.TwoFactorCode" class="text-danger"></span>
            </div>
            <div class="form-check">
                <label asp-for="Input.RememberMachine" class="form-label">
                    <input asp-for="Input.RememberMachine" />
                    @Html.DisplayNameFor(m => m.Input.RememberMachine)
                </label>
            </div>
            <div class="row m-3">
                <button type="submit" class="btn btn-lg btn-primary">Log in</button>
            </div>
        </form>
    </div>
</div>

@section Scripts {
    <partial name="_ValidationScriptsPartial" />
}
Two-Factor Authentication Login GET
Now coming to the page model class for this page, let’s start with the OnGetAsync() method:
public async Task<IActionResult> OnGetAsync(bool rememberMe, string returnUrl = null)
{
    // Ensure the user has gone through the username & password screen first
    var user = await _signInManager.GetTwoFactorAuthenticationUserAsync();

    if (user == null)
    {
        throw new InvalidOperationException("Unable to load two-factor authentication user.");
    }

    ReturnUrl = returnUrl;
    RememberMe = rememberMe;

    var code = await _userManager.GenerateTwoFactorTokenAsync(user, "Phone");
    var message = "Your security code is: " + code;
    await _smsSender.SendSmsAsync(await _userManager.GetPhoneNumberAsync(user), message);

    return Page();
}
First of all, we check if the user has gone through the username and password screen to be authenticated. They should only be able to land on the second step of authentication after passing the first one. Once verified, we create an authentication code using the GenerateTwoFactorTokenAsync() method and send an SMS with this code as an OTP to the phone number associated with the user.
Two-Factor Authentication Login POST
Now that we have the OTP, we need to post it and verify its authenticity. So finally, let’s modify the OnPostAsync() method:
public async Task<IActionResult> OnPostAsync(bool rememberMe, string returnUrl = null)
{
    if (!ModelState.IsValid)
    {
        return Page();
    }

    returnUrl = returnUrl ?? Url.Content("~/");

    var user = await _signInManager.GetTwoFactorAuthenticationUserAsync();
    if (user == null)
    {
        throw new InvalidOperationException($"Unable to load two-factor authentication user.");
    }

    var code = Input.TwoFactorCode.Replace(" ", string.Empty).Replace("-", string.Empty);
    var result = await _signInManager.TwoFactorSignInAsync("Phone", code, rememberMe, Input.RememberMachine);

    if (result.Succeeded)
    {
        _logger.LogInformation("User with ID '{UserId}' logged in with 2fa.", user.Id);
        return LocalRedirect(returnUrl);
    }
    else if (result.IsLockedOut)
    {
        _logger.LogWarning("User with ID '{UserId}' account locked out.", user.Id);
        return RedirectToPage("./Lockout");
    }
    else
    {
        _logger.LogWarning("Invalid authenticator code entered for user with ID '{UserId}'.", user.Id);
        ModelState.AddModelError(string.Empty, "Invalid authenticator code.");
        return Page();
    }
}
Here, we first check if the ModelState is valid. If it’s valid, we yet again verify the authenticity of the user, i.e. whether the user has completed the first step of the authentication process. Finally, we use the TwoFactorSignInAsync() method to authenticate the user using the code we entered on the last screen.
If successful, we redirect the user to returnUrl.
Testing the Two-Factor Authentication Process
Now that we have set everything up, let’s test the complete flow.
On entering valid credentials, we see the two-factor authentication page:
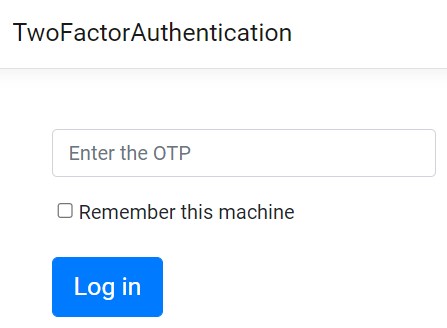
And we receive an SMS notification on the associated phone number that contains the OTP:

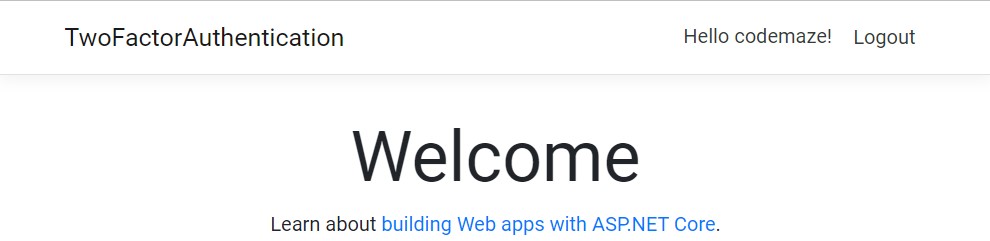
If we enter this OTP in the input field, we are going to be redirected to the home view:
Conclusion
In this article, we learned about two-factor authentication using SMS. This provides us a way to secure users against unauthorized access and with the easy availability of phones with networks, is quite intuitive to implement.
However, SMS is not always the best approach to take when implementing 2FA. The preferred approach is Time-based one-time passwords (TOTP) as they are more secure and more difficult to compromise than SMS 2FA.
