In this article, we are going to learn how to use query strings in Blazor WebAssembly. We are going to show you how to send query strings to the Blazor component and also how to read them inside the component.
So, let’s start.
Project Preparation
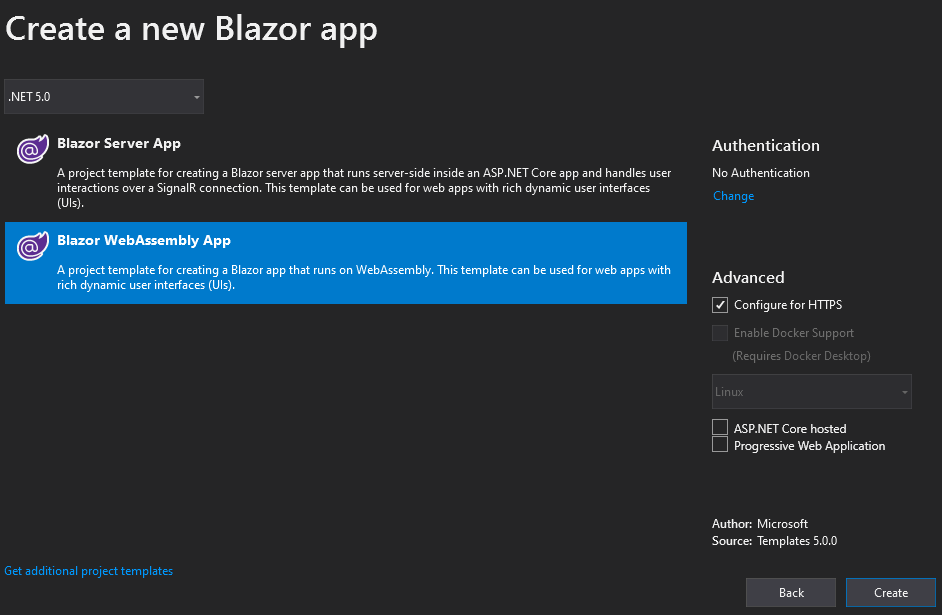
We are going to create a new Blazor WebAssembly project:
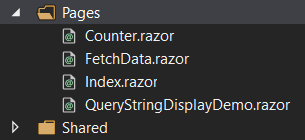
As soon as we create this project, we are going to create a new QueryStringDisplayDemo component under the Pages folder:
For now, we are just going to add a route to this component:
@page "/query-string-display"

<h3>QueryStringDisplayDemo</h3>

@code {

}
We are going to use this component to show you how to read and display query strings in Blazor WebAssembly.
But first, we have to send the query string parameters to it.
Sending Query Strings in Blazor WebAssembly
We can send query string parameters in multiple ways in Blazor WebAssembly.
The first way is the common one we use in any HTML page with an anchor element. To show it, let’s modify the Index.razor component:
@page "/"

<h1>Hello, world!</h1>

Welcome to your new app.

<p>
    Click <a href="query-string-display?name=John">here</a>
    to send a query string parameter to the component.
</p>
Basically, we use the anchor element with the href attribute to navigate to the QueryStringDisplayDemo component and pass a single query string parameter to it. If we start the app, we are going to see a link on the Home page:
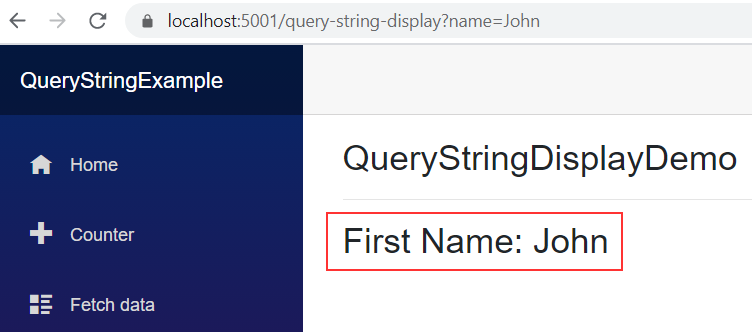
As soon as we click the link, the app redirects us to the QueryStringDisplayDemo component with the query parameter applied to the URI:
Good.
Now, this is a manual way of passing query string parameters to a component. But sometimes we have to execute some sort of business logic and then create our URI with query parameters. In these situations, it is obvious that we can’t hardcode query strings inside the URI. What we can do is use the NavigationManager service.
Let’s see how to do that.
Using WebUtilities and NavigationManager
Before we start, we have to install the Microsoft.AspNetCore.WebUtilities package:
PM> Install-Package Microsoft.AspNetCore.WebUtilities -Version 2.2.0
This is a great library that helps us working with forms, multipart messages, and query strings.
After the installation, we can modify the Index.razor file:
@page "/"
@using Microsoft.AspNetCore.WebUtilities
@inject NavigationManager NavManager

<h1>Hello, world!</h1>

Welcome to your new app.

<p>
    Click <a href="query-string-display?name=John">here</a>
    to send a query string parameter to the component.
</p>

<p>
    Click the button to send a query string parameter with NavigationManager
    <button type="button" class="btn btn-info" @onclick="Navigate">Send</button>
</p>

@code {
    private void Navigate()
    {
        var queryParams = new Dictionary<string, string>
        {
            ["name"] = "John"
        };

        NavManager.NavigateTo(QueryHelpers.AddQueryString("query-string-display", queryParams));
    }
}
In the HTML part, we add a using directive for the WebUtilities namespace and inject the NavigationManager service. Also, we create an HTML markup with a single button with a @onclick event. Then in the code part, we create a Navigate method. Inside we create a single dictionary and populate it with our query parameter. Finally, we use the NavigationManager’s NavigateTo method to navigate the user to the required location. The QueryHelpers.AddQueryString method, which comes from the WebUtilities package, helps us adding the query string parameter to the URI.
Microsoft.AspNetCore.WebUtilities package to send query string to the server as we did in our Paging, Sorting, and Searching articles in Blazor WebAssembly.Now, if we start our app, and click the button, we are going to see the same result as we did with the previous example:
Excellent.
Now it’s time to learn how to read query strings in Blazor WebAssembly.
Reading Query Strings in Blazor WebAssembly
To show you how to read query strings in Blazor WebAssembly, we are going to modify the QueryStringDisplayDemo component:
@page "/query-string-display"
@using Microsoft.AspNetCore.WebUtilities
@inject NavigationManager NavManager

<h3>QueryStringDisplayDemo</h3>
<hr />

<h3>First Name: @_name</h3>

@code {
    private string _name;

    protected override void OnInitialized()
    {
        var uri = NavManager.ToAbsoluteUri(NavManager.Uri);

        var queryStrings = QueryHelpers.ParseQuery(uri.Query);
        if(queryStrings.TryGetValue("name", out var name))
        {
            _name = name;
        }
    }
}
Here we use the same namespace and inject the same service as we did in a previous example. Also, we display the value of the _name field on the page. In the code part, we create a private _name field and also convert the NavManager.Uri property of the string type to the Uri object with the ToAbsoluteUri method. The Uri class provides an object representation of URI and enables us to use all kinds of properties like Query, PathAndQuery, IsAbsoluteUri, etc.
After the conversion, we extract the query parameter with the QueryHelpers.ParseQuery method where we pass the uri.Query property as an argument. This expression returns Dicrtionary<string, StringValues> as a result. Then we use the TryGetValue method to extract the value of the query string to the name local variable and return a boolean result if extraction succeeded or not. If extraction succeeds, we just assign the value of the name local variable to the _name field.
Now, if we start the app, and click the link or button, we are going to see the extracted value on the screen:
Using Multiple Query String Parameters
Of course, this works with multiple parameters as well.
To test this, let’s modify the Index component first:
@page "/"
@using Microsoft.AspNetCore.WebUtilities
@inject NavigationManager NavManager

<h1>Hello, world!</h1>

Welcome to your new app.

<p>
    Click <a href="query-string-display?name=John&age=26">here</a>
    to send a query string parameter to the component.
</p>

<p>
    Click the button to send a query string parameter with NavigationManager
    <button type="button" class="btn btn-info" @onclick="Navigate">Here</button>
</p>

@code {
    private void Navigate()
    {
        var queryParams = new Dictionary<string, string>
        {
            ["name"] = "John",
            ["age"] = "26"
        };

        NavManager.NavigateTo(QueryHelpers.AddQueryString("query-string-display", queryParams));
    }
}
And also the QueryStringDisplayDemo file:
@page "/query-string-display"
@using Microsoft.AspNetCore.WebUtilities
@inject NavigationManager NavManager

<h3>QueryStringDisplayDemo</h3>
<hr />

<h3>First Name: @_name</h3>
<h3>Age: @_age</h3>

@code {
    private string _name;
    private int _age;

    protected override void OnInitialized()
    {
        var uri = NavManager.ToAbsoluteUri(NavManager.Uri);

        var queryStrings = QueryHelpers.ParseQuery(uri.Query);
        if (queryStrings.TryGetValue("name", out var name))
        {
            _name = name;
        }

        if(queryStrings.TryGetValue("age", out var age))
        {
            _age = Convert.ToInt32(age);
        }
    }
}
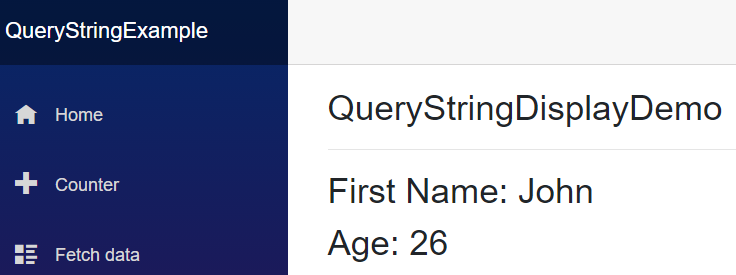
Now we can start the application and press the link or button:
We can see both parameters displayed on the page. But let’s improve this solution a bit.
Improving the Solution
Right now, we have only two query string parameters and the code for reading them isn’t that long. But what if we had more query parameters? Our code would become repetitive and consequently harder to maintain. To avoid that, we can make a cleaner solution by introducing extension methods.
Let’s see how to do that.
First, we are going to create a new Extensions folder and inside it a new NavigationManagerExtension class:
public static class NavigationManagerExtension
{
    public static T ExtractQueryStringByKey<T>(this NavigationManager navManager, string key)
    {
        var uri = navManager.ToAbsoluteUri(navManager.Uri);
        QueryHelpers.ParseQuery(uri.Query)
            .TryGetValue(key, out var queryValue);

        if (typeof(T).Equals(typeof(int)))
        {
            int.TryParse(queryValue, out int result);
            return (T)(object)result;
        }

        if (typeof(T).Equals(typeof(string)))
            return (T)(object)queryValue.ToString();

        return default;
    }
}
We extend the NavigationManager type and pass a key for the query string parameter we want to extract. Then, we repeat the same logic as we have in our component and also parse the query parameters based on the type we provide for this generic method. Of course, we have only two type checks here because we only have a string and int query parameters, but you can extend this easily.
Now, we can return to the QueryStringDisplayDemo component, and modify the @code part:
@code {
    private string _name;
    private int _age;

    protected override void OnInitialized()
    {
        _name = NavManager.ExtractQueryStringByKey<string>("name");
        _age = NavManager.ExtractQueryStringByKey<int>("age");
    }
}
As you can see, this is a much better and cleaner solution.
If we test it, we are going to get the same result:
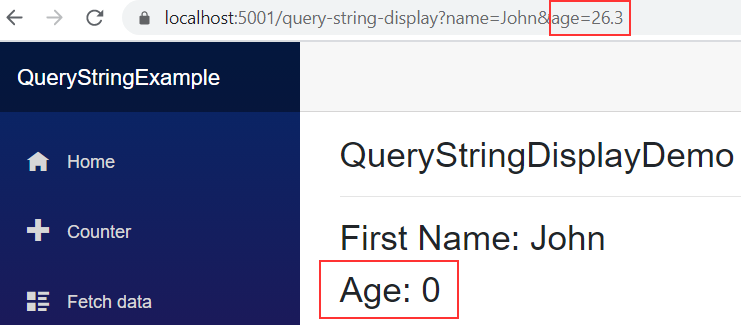
Also, if we pass a decimal or boolean value instead of int, we will get a default int value for the Age part:
So, the code is safe as well.
Excellent.
Conclusion
In this article, we have learned:
- How to send query string parameters from one component to other
- The way to read these query string parameters from the destination component
- How to extract the read logic into the extension method
So, that’s all for this one.
Until the next one.
Best regards.


