

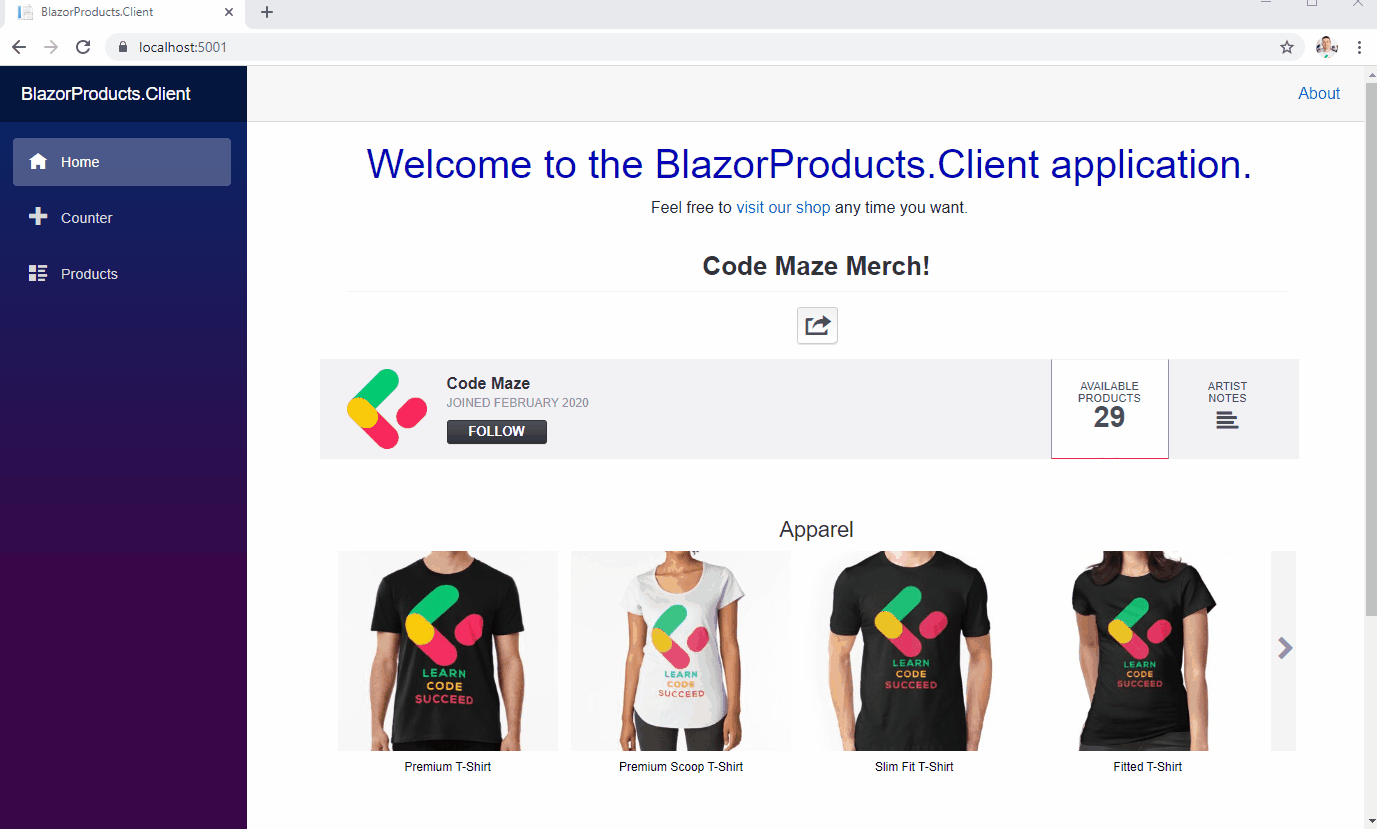
In this article, we are going to learn how to create a Blazor WebAssembly Pagination by consuming data from our Web API server project. We already have the server-side logic to provide the data to the client, but now, we are going to modify it to fit the pagination purpose. After the server-side modification, we are going to create a client side pagination and use the data from the server.
For the complete navigation for this series, you can visit the Blazor Series page.
Creating the Server-Side Pagination
That said, we are going to implement the pagination logic in our Web API project but without detailed explanations, but should you find yourself lost, please read the article about pagination.
Now, let’s start with the implementation.
We are going to create a new folder RequestFeatures in the Entities project and inside that folder a new ProductParameters class:
public class ProductParameters
{
    const int maxPageSize = 50;
    public int PageNumber { get; set; } = 1;
    private int _pageSize = 4;
    public int PageSize
    {
        get
        {
            return _pageSize;
        }
        set
        {
            _pageSize = (value > maxPageSize) ? maxPageSize : value;
        }
    }
}
Next, in the same folder, we are going to create the MetaData class:
public class MetaData
{
    public int CurrentPage { get; set; }
    public int TotalPages { get; set; }
    public int PageSize { get; set; }
    public int TotalCount { get; set; }

    public bool HasPrevious => CurrentPage > 1;
    public bool HasNext => CurrentPage < TotalPages;
}
In this class, we just create the required properties for our client-side pagination.
Then, let’s create a new folder Paging in the BlazorProduct.Server project and a new PagedList class inside that folder:
public class PagedList<T> : List<T>
{
    public MetaData MetaData { get; set; }

    public PagedList(List<T> items, int count, int pageNumber, int pageSize)
    {
        MetaData = new MetaData
        {
            TotalCount = count,
            PageSize = pageSize,
            CurrentPage = pageNumber,
            TotalPages = (int)Math.Ceiling(count / (double)pageSize)
        };

        AddRange(items);
    }

    public static PagedList<T> ToPagedList(IEnumerable<T> source, int pageNumber, int pageSize)
    {
        var count = source.Count();
        var items = source
          .Skip((pageNumber - 1) * pageSize)
          .Take(pageSize).ToList();

        return new PagedList<T>(items, count, pageNumber, pageSize);
    }
}
In this class, we prepare all the pagination data and populate the MetaData property. Additionally, we have to include the Entities.RequestFeatures using statement to recognize the MetaData property.
With this in place, we can start the repository modification.
Modifying Repository Files
Let’s start with the IProductRepository modification:
public interface IProductRepository
{
    Task<PagedList<Product>> GetProducts(ProductParameters productParameters);
}
And of course, we have to modify the ProductRepository class:
public async Task<PagedList<Product>> GetProducts(ProductParameters productParameters)
{
    var products = await _context.Products.ToListAsync();

    return PagedList<Product>
        .ToPagedList(products, productParameters.PageNumber, productParameters.PageSize);
}
Finally, let’s modify the Get action in the ProductController:
[HttpGet]
public async Task<IActionResult> Get([FromQuery] ProductParameters productParameters)
{
    var products = await _repo.GetProducts(productParameters);

    Response.Headers.Add("X-Pagination", JsonConvert.SerializeObject(products.MetaData));

    return Ok(products);
}
So, we just fetch the data with the parameters and extract the MetaData to the response header.
And that’s it. We can test this with the Postman:

We can see we only have three products in the result, and that is correct because we requested three products per page. If we navigate to the Headers tab:

We can see the X-Pagination header with all the required data.
Excellent.
The last thing we have to do is to expose this custom header to the client application:
services.AddCors(policy =>
{
    policy.AddPolicy("CorsPolicy", opt => opt
    .AllowAnyOrigin()
    .AllowAnyHeader()
    .AllowAnyMethod()
    .WithExposedHeaders("X-Pagination"));
});
Now we can move to the Blazor WebAssembly Pagination logic.
The Client Code Modification
Before we start with the Pagination actions, we have to make a couple of changes in our client code.
Let’s start by creating a new Features folder in the Client project and a new PagingResponse class inside it:
public class PagingResponse<T> where T : class
{
    public List<T> Items { get; set; }
    public MetaData MetaData { get; set; }
}
Now, we have to modify the IProductHttpRepository interface:
public interface IProductHttpRepository
{
    Task<PagingResponse<Product>> GetProducts(ProductParameters productParameters);
}
And the repository class as well:
public async Task<PagingResponse<Product>> GetProducts(ProductParameters productParameters)
{
    var queryStringParam = new Dictionary<string, string>
    {
        ["pageNumber"] = productParameters.PageNumber.ToString()
    };
    var response = await _client.GetAsync(QueryHelpers.AddQueryString("products", queryStringParam));
    var content = await response.Content.ReadAsStringAsync();
    if (!response.IsSuccessStatusCode)
    {
        throw new ApplicationException(content);
    }
    var pagingResponse = new PagingResponse<Product>
    {
        Items = JsonSerializer.Deserialize<List<Product>>(content, _options),
        MetaData = JsonSerializer.Deserialize<MetaData>(response.Headers.GetValues("X-Pagination").First(), _options)
    };

    return pagingResponse;
}
So, we create our query parameter dictionary with the pageNumber key. Then in the response, we use the QueryHelpers.AddQueryString expression to add query string parameters in the request. For this, we have to install the Microsoft.AspNetCore.WebUtilities library. After that, we just create a new pagingResponse object, where we populate the Items and MetaData properties and return it as a result.
Finally, we have to modify the Products.razor.cs class:
public partial class Products
{
    public List<Product> ProductList { get; set; } = new List<Product>();
    public MetaData MetaData { get; set; } = new MetaData();
    private ProductParameters _productParameters = new ProductParameters();

    [Inject]
    public IProductHttpRepository ProductRepo { get; set; }

    protected async override Task OnInitializedAsync()
    {
        var pagingResponse = await ProductRepo.GetProducts(_productParameters);
        ProductList = pagingResponse.Items;
        MetaData = pagingResponse.MetaData;
    }
}
Now, if we start our application and navigate to the Products menu, we are going to find four products. This proves that our pagination logic works because by default we ask for four products on the page:
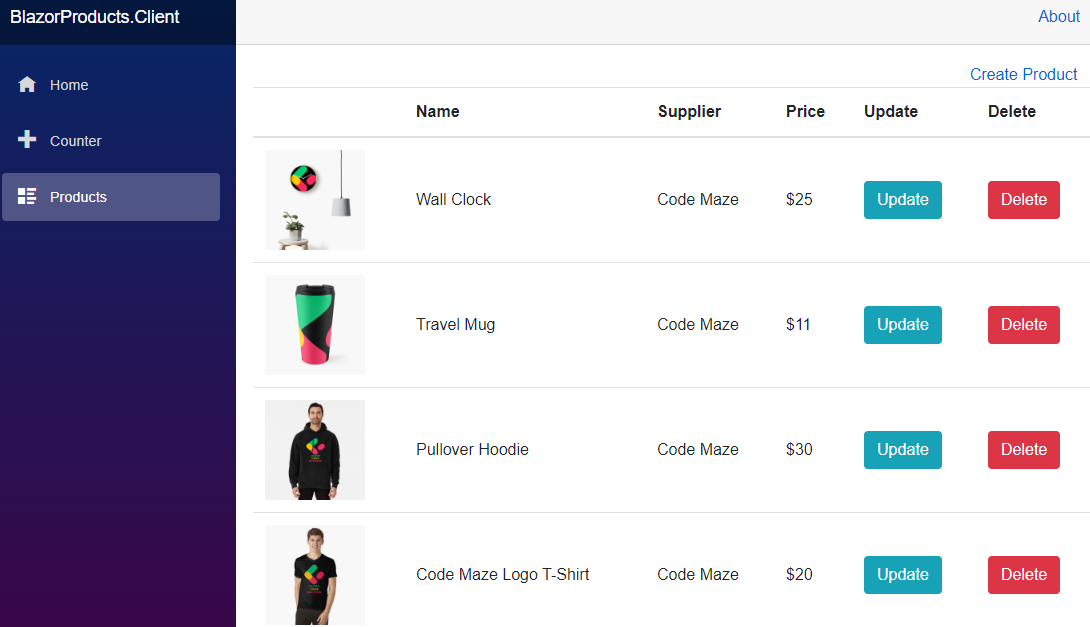
Excellent.
Now let’s jump right to the paging implementation.
Blazor WebAssembly Pagination Implementation
Let’s start by creating new Pagination.razor and Pagination.razor.cs files in the Components folder. After creation, we are going to modify the .cs file:
public partial class Pagination
{
    [Parameter]
    public MetaData MetaData { get; set; }
    [Parameter]
    public int Spread { get; set; }
    [Parameter]
    public EventCallback<int> SelectedPage { get; set; }
}
So, we have three parameters, the MetaData, the Spread, and the SelectedPage. The MetaData property is familiar to us. With the Spread property, we are going to configure the number of page buttons (links) that will show before and after the currently selected page in the pagination component. The last property is of type EventCallback. In Blazor, we use EventCallbacks to run the methods from the parent component inside the child component. In our case, every time we select a new page in the pagination component, we are going to fire the SelectedPage event callback which will execute the method from the parent (Products) component.
Now, let’s create a new PagingLink class in the Features folder:
public class PagingLink
{
    public string Text { get; set; }
    public int Page { get; set; }
    public bool Enabled { get; set; }
    public bool Active { get; set; }

    public PagingLink(int page, bool enabled, string text)
    {
        Page = page;
        Enabled = enabled;
        Text = text;
    }
}
In this class, we have four properties. We are going to use the Text property for every button text in the pagination component (Previous, Next, 1,2,3…). The Page property will hold the value of the current page. Finally, we are going to use the Enabled and Active properties to decide whether to add the enabled and active classes to the pagination button.
Generating Links for the Pagination
Now, let’s get back to the Pagination class:
public partial class Pagination
{
    [Parameter]
    public MetaData MetaData { get; set; }
    [Parameter]
    public int Spread { get; set; }
    [Parameter]
    public EventCallback<int> SelectedPage { get; set; }

    private List<PagingLink> _links;

    protected override void OnParametersSet()
    {
        CreatePaginationLinks();
    }

    private void CreatePaginationLinks()
    {
        _links = new List<PagingLink>();

        _links.Add(new PagingLink(MetaData.CurrentPage - 1, MetaData.HasPrevious, "Previous"));

        for (int i = 1; i <= MetaData.TotalPages; i++)
        {
            if(i >= MetaData.CurrentPage - Spread && i <= MetaData.CurrentPage + Spread)
            {
                _links.Add(new PagingLink(i, true, i.ToString()) { Active = MetaData.CurrentPage == i });
            }
        }

        _links.Add(new PagingLink(MetaData.CurrentPage + 1, MetaData.HasNext, "Next"));
    }

    private async Task OnSelectedPage(PagingLink link)
    {
        if (link.Page == MetaData.CurrentPage || !link.Enabled)
            return;

        MetaData.CurrentPage = link.Page;
        await SelectedPage.InvokeAsync(link.Page);
    }
}
Here, we create a new _links variable that will hold all the links for our pagination component. As soon as our parameters get their values, the OnParameterSet lifecycle method will run and call the CreatePaginationLinks method. In that method, we create the Previous link, the page number links with the Active property set to true for the current page and the Next link. Additionally, we have the OnSelectedPage method.
This method will run as soon as the user clicks any link in the pagination component. Of course, if that link is the currently selected or disabled link, we do nothing. On the other side, we set the CurrentPage to the selected page and invoke our EventCallback property.
After these changes, we can modify the Pagination.razor component:
<nav aria-label="Page navigation example">
    <ul class="pagination justify-content-center">
        @foreach (var link in _links)
        {
            <li @onclick="() => OnSelectedPage(link)" style="cursor: pointer;" class="page-item @(link.Enabled ? null : "disabled") @(link.Active ? "active" : null)">
                <span class="page-link" href="#">@link.Text</span>
            </li>
        }
    </ul>
</nav>
This is a simple pagination HTML code, where we iterate through each link in the _links field, set disabled and active classes conditionally, and run our OnSelectedPage local method.
And that’s it regarding the pagination component. We can now modify the Products.razor page:
<div class="row">
    <div class="col-md-10">
        @*Place for search and sort*@
    </div>
    <div class="col-md-2">
        <a href="/createProduct">Create Product</a>
    </div>
</div>
<div class="row">
    <div class="col">
        <ProductTable Products="ProductList" />
    </div>
</div>
<div class="row">
    <div class="col">
        <Pagination MetaData="MetaData" Spread="2" SelectedPage="SelectedPage" />
    </div>
</div>
We can see that we call the Pagination component and pass the values for the MetaData and the Spread properties. Furthermore, we send our local SelectedPage function to the SelectedPage EventCallback property in the Pagination component. Of course, we have to create our local SelectedPage method in the Products.razor.cs class:
public partial class Products
{
    public List<Product> ProductList { get; set; } = new List<Product>();
    public MetaData MetaData { get; set; } = new MetaData();

    private ProductParameters _productParameters = new ProductParameters();

    [Inject]
    public IProductHttpRepository ProductRepo { get; set; }

    protected async override Task OnInitializedAsync()
    {
        await GetProducts();
    }

    private async Task SelectedPage(int page)
    {
        _productParameters.PageNumber = page;
        await GetProducts();
    }

    private async Task GetProducts()
    {
        var pagingResponse = await ProductRepo.GetProducts(_productParameters);
        ProductList = pagingResponse.Items;
        MetaData = pagingResponse.MetaData;
    }
}
As you can see, the logic for calling the repository method and populating the ProductList and MetaData properties are inside the GetProducts method. Additionally, we create the SelectedPage method, where we populate the PageNumber property inside the _productParameters object (which we use for the query string creation) and call the GetProducts method.
Testing Our Blazor WebAssembly Pagination
Now, let’s start both the server and client applications, and inspect the result:
And there we go, we can see that everything works as we want it to.
Again, if you want to learn in more detail about Pagination in the Web API project, you can visit our Pagination in Web API article or visit the entire ASP.NET Core Web API series to learn in great detail about creating Web API projects.
Conclusion
That’s all for this article.
We have learned how to create pagination in the server-side application and how to implement that result in our client-side application to generate the Blazor WebAssembly Pagination component.
In the next article, we are going to cover the Search functionality in our application.
So, see you there.

