

Microsoft Azure provides many services for hosting web applications, and Azure App Service is a major type. It is an HTTP-based service that we can use to host web applications, REST APIs, and mobile apps.
Additionally, It supports a wide range of programming languages and technologies like .NET Core, .NET, Java, Ruby, Node.js, PHP, Python, etc. Applications hosted on Azure App Service can run and scale seamlessly on both Windows and Linux-based environments. In this article, we are going to look at how to create an Azure App Service and deploy an ASP.NET Core web application into it using Visual Studio.
To read more about Azure, you can visit our Azure with ASP.NET Core page, where you can find all the articles from the series.

Signing up with the Azure Portal
We need to have an active Azure subscription to start using the Azure services. However, we can sign up for a free account after navigating to the Azure Portal (https://portal.azure.com/) if we do not have an account. A free account will come with an essential subscription, which gives us access to many services. Some of the Azure services are free for life, while some others are free for a limited time.
The Azure portal is a web-based, unified console using which we can build, manage, and monitor the Azure resources. Once we log into the Azure portal, we reach the Home page:
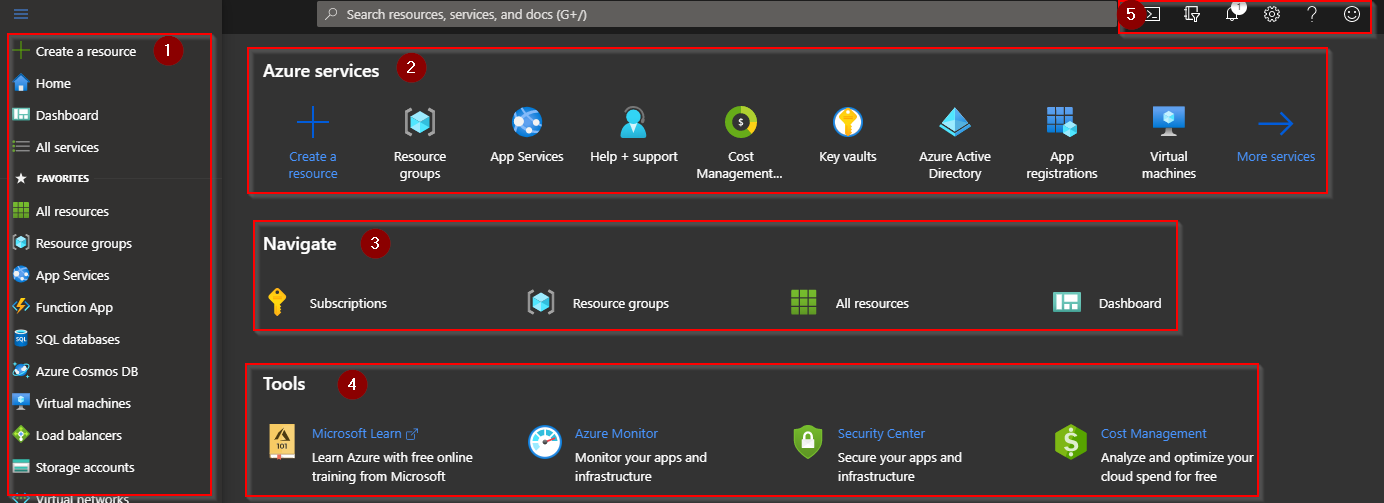
Click to enlarge the image
- We can use the left pane to access Home, Dashboard, and All Services. Additionally, this has the Resources menu using which we can access all the services and create new resources. We can access Security Center, Cost Management and Billing, Help, Support, etc. from this section.
- There is a dedicated section for accessing all Azure Services that we can use to create new resources.
- We can use the Navigate section to access recently accessed services and segments in the portal.
- Then, there is a Tools section that has links to Documentation, Monitoring Services, Security settings, and Cost management.
- In the top right, we have the global controls, which include a Cloud Shell, Directory and Subscription filter, Notifications, Portal Settings, Help and Support, and a Send Feedback option.
We’ll familiarize ourselves with the portal as we start working on different Azure Services. As we have signed up in the Azure portal, we can start creating and managing the Azure resources right away.
Creating an App Service
Azure allows us to create up to 10 Web, API, or mobile apps for free using the App Service. However, there would be some restrictions concerning scaling, assigning custom domain, etc. when we are using free services. We can always upgrade to a paid higher tier if we require advanced capabilities.
There are different types of App Services and we can choose the appropriate one based on our need. Web App is the best choice for hosting websites and web applications. We can use API App for hosting RESTful APIs. If we need to host mobile app back ends, we have Mobile App. In this article, we are going to explore the Web App App Service.
We can create an App Service from the Azure portal, or we can do it from Visual Studio while deploying our application. For creating an App Service from the Azure Portal, we can use the Create a resource option and then choose the service type Web app. Then, we have to select a few options related to geographical preference, hardware capabilities, etc. We’ll explain this process in detail in a later article when we discuss creating an App Service from Portal. However, in this article, we are going to learn how to create an App Service directly from Visual Studio while we publish a web application.
Setting up an ASP.NET Core Web App
The next step is to set up the ASP.NET Core web application that we want to host in an Azure App Service. For that, we are going to use the app from the Getting Started with ASP.NET Core MVC article. The completed source code for that article is available at Getting Started with ASP.NET Core MVC Source Code.
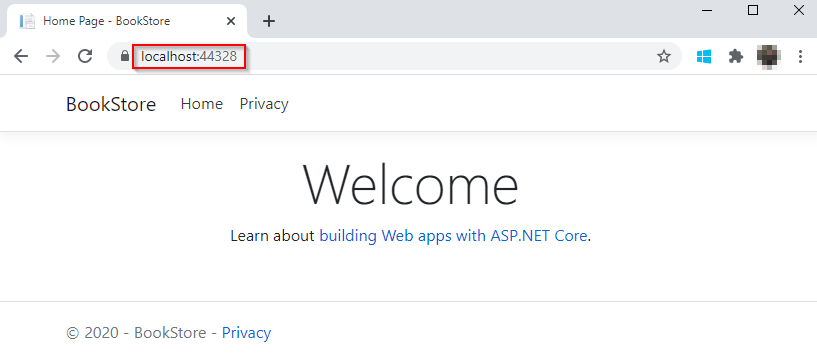
Let’s set up the code in our local machine and test it. Once we build and run the BookStore app, we can see it runs from the IIS Express on our local computer:
Great!
Now we are going to see how we can publish this app into an Azure App Service Web App using Visual Studio.
Deploying the ASP.NET Core App to Azure App Service Using Visual Studio
For accessing our Azure subscription from Visual Studio, we need to first sign into Visual Studio using the same Microsoft account linked with the Azure Portal.
Publishing the Web Project
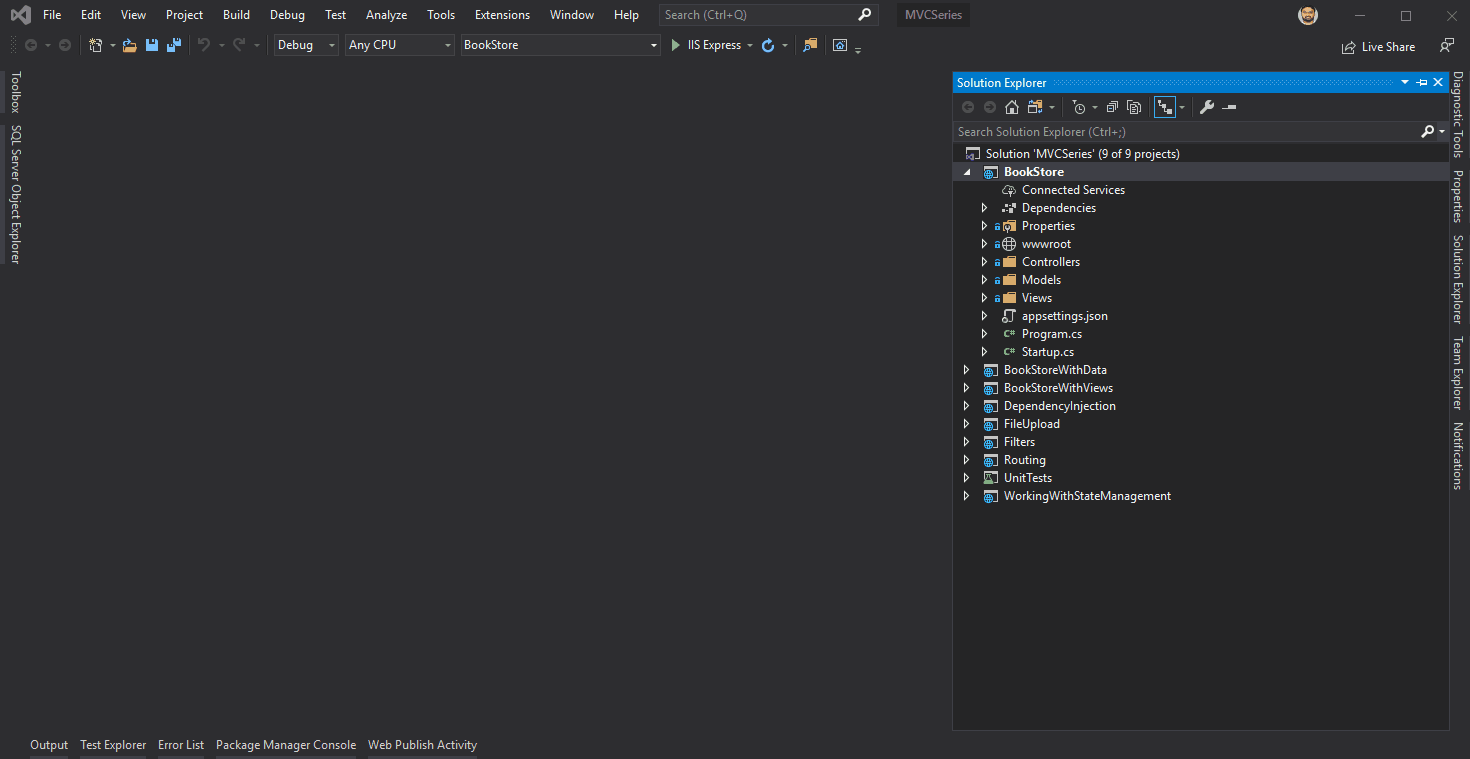
For deploying our app from Visual Studio, we can right-click on the project in Solution Explorer and select the Publish option. Since we are planning to deploy our app to Azure App Service, let’s choose Target as Azure. Next, in the Specific Target option, we need to decide whether we want to go with an Azure App Service in Windows, Linux, Container, Azure Virtual Machine, etc. For now, let’s choose the Azure App Service with Windows:
Click to enlarge the GIF
In the next section, we need to give details about the App Service. Since we are going to create a new App Service, let’s choose the Create a new Azure App Service option:
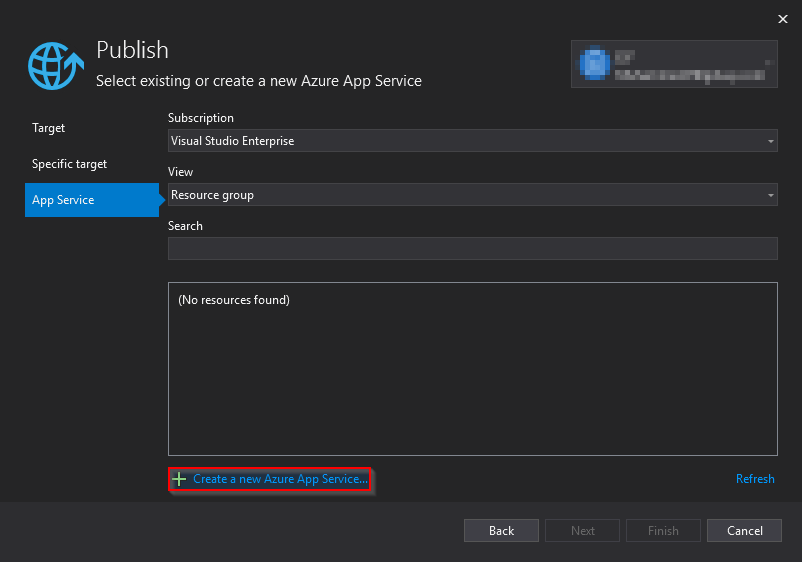
This will present us with another window where we can provide all information about the new App Service that we are going to create.
Creating a New App Service
In the Create new App Service window, we can give all the information regarding the new App Service that we are going to create:
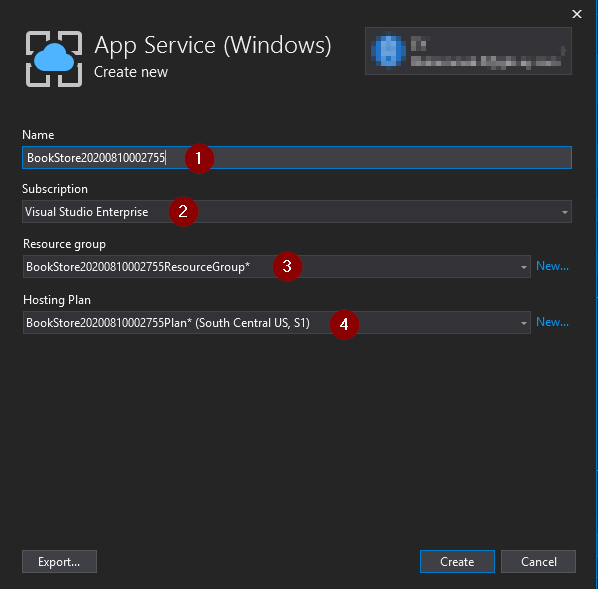
- First, let’s give a Name for our App Service, or we can simply go with the name that is auto-populated by Visual Studio.
- Then, we need to choose an available Subscription.
- After this, we need to select a Resource Group. Azure Resource Group is a logical container that holds related resources for an Azure solution.
- Finally, we need to specify a Hosting Plan. A Hosting Plan, also known as an App Service Plan, defines the underlying infrastructure that will host the Azure App Services. It has several tiers ranging from free basic to high-end premium ones. This identifies the physical location of servers, the hosting location of our app, the amount of storage, RAM, CPU, etc. that will be available for our app. For now, we can choose the most basic tier that’s available and proceed.
After giving these details, we can click the Create button.
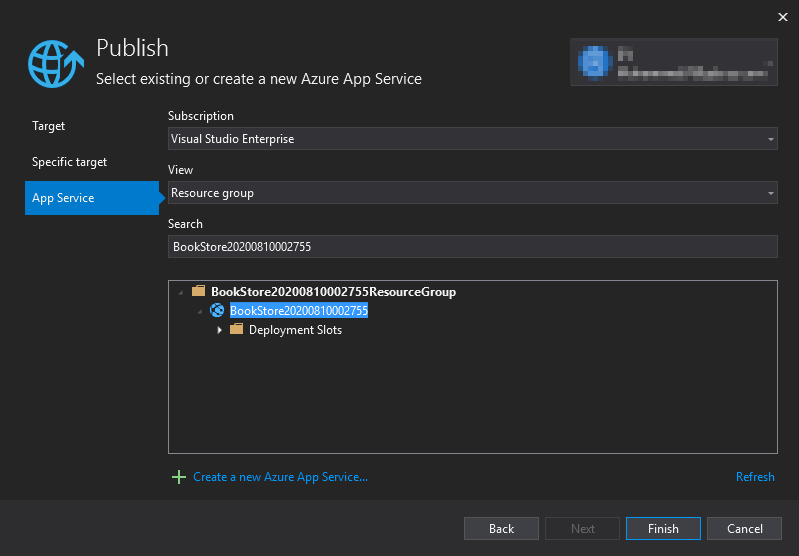
Finalizing the Publish
Great! Now we can see the App Service details populated in the Publish screen. We can click Finish to close this dialog:
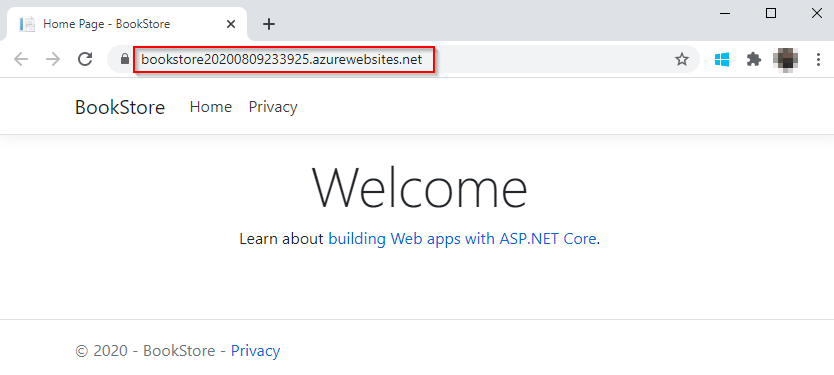
After we close the dialog, we are going to see the Publish Summary screen where we can verify all the publishing details. Note that the site URL is our App Service name with the Azure website’s standard naming pattern (https://[App Service Name].azurewebsites.net/). Once we deploy our app, users can access our application using this URL.
After reviewing the settings, let’s click Publish:

This will create a new Azure App Service and its dependencies like the Resource Group, App Service Plan, etc. based on the details that we provided. Then, Visual Studio will publish our app into the newly created App Service.
That’s it. We have published our BookStore app into an Azure App Service.
Testing the App Hosted in Azure App Service
Once we have our app deployed into an Azure App Service, users can access it from anywhere over the internet:
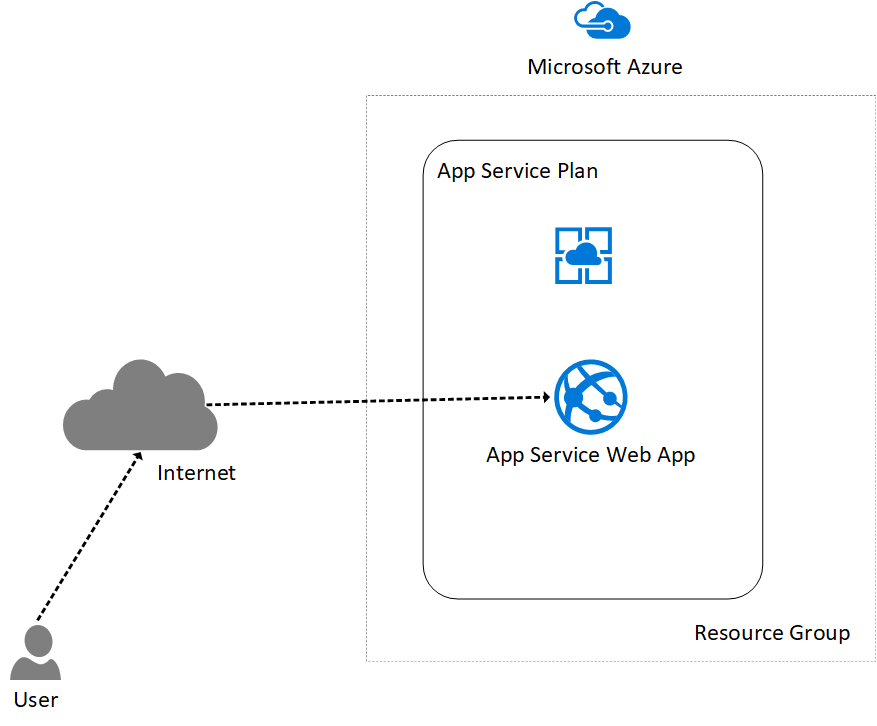
Remember that we had created a Resource Group as a container for our app. A Resource Group can contain multiple services that can be of different types. We had created an App Service Plan as well, which describes the hosting plan. Multiple Web Apps can reuse the same App Service plan if we are planning to host them with similar hardware configurations and in the same geographical location.
Now, let’s test it by navigating to the site URL that we specified during the deployment:
Excellent!
We can see that our BookStore app is now deployed in the Azure App Service, and anyone can access it via the internet.
Additionally, let’s go to the Azure Portal to examine the App Service that we created:
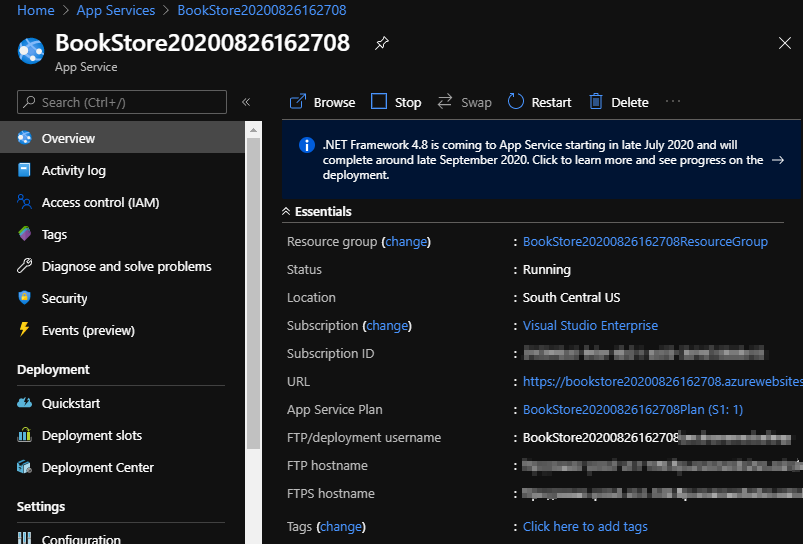
We can see information about our App Service and make configuration changes from the portal.
If we have already purchased a custom domain from an Internet Service Provider, we can map it with our App Service. However, basic free tiers don’t support this feature. So we’ll have to upgrade to a higher tier for doing this.
Conclusion
In this article, we discussed the following topics:
- What an Azure App Service is
- Familiarizing with Azure Portal
- Deploying our ASP.NET Core web app into an Azure App Service from Visual Studio
- Testing the App Service and examining it in the portal