

In this part of the series, we are going to learn how to secure our web application (a client application) by using the Hybrid flow. We are going to start by introducing our pre-created client application. Then, we are going to learn how to modify the in-memory configuration to support our new client application. Furthermore, we are going to talk about authentication using Hybrid flow and the way to sign out from our application. Finally, we are going to show you how to use /userinfo endpoint, to get additional claims in the token.
To navigate through the entire series, visit the IdentityServer4 series page.
So, let’s start.
Client Web Application Overview
We have already prepared a client application that you can download from our repository in the Start folder. If we open the Solution Explorer window, we are going to find a standard structure for the MVC project with an additional Services folder:
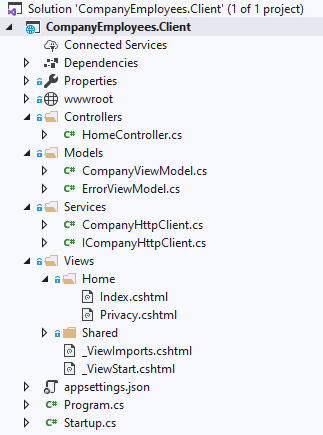
So, the Home controller contains two actions Index and Privacy and we can see views for those actions as well. In the Services folder, we can find the CompanyHttpClient class:
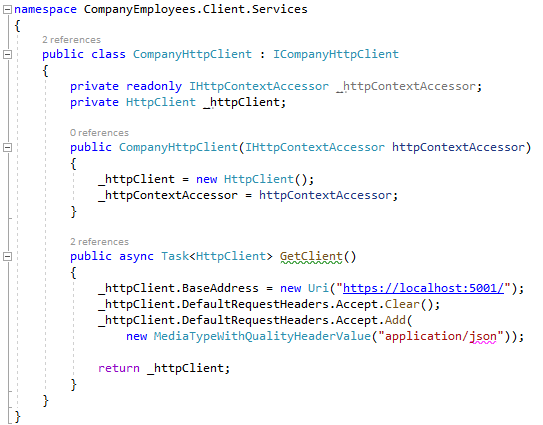
We have injected the IHttpContextAccessor interface, which we are going to use later in the series to access HttpContext, and created a new HttpClient object. There is a single GetClient method, where we create an Http object to communicate with our API project. It is created as async, even though we don’t have an await keyword. This will be resolved later on in the series.
Note: If you want, you can modify this code and register HttpClient service in the StartUp.cs class and then inject it where you need it.
If you inspect the launchSettings.json file, you will see our client runs on https://localhost:5010 address.
The last part we have to review is the ConfigureServices method in the Startup class:
public void ConfigureServices(IServiceCollection services)
{
    services.AddSingleton<IHttpContextAccessor, HttpContextAccessor>();
    services.AddScoped<ICompanyHttpClient, CompanyHttpClient>();

    services.AddControllersWithViews();
}
Here, we just registered the IHttpContextAccessor and ICompanyHttpClient as services in IOC.
Additional Note: Before we continue, let’s just comment out the [Authorize] attribute from the Web API’s GetCompanies action (project from the previous article) because for this article, we require free access to the resource. Later on in the series, we are going to protect our API using the Hybrid flow and we will uncomment this attribute.
So, that’s it for the client introduction part. We can move on to the configuration part.
About the Hybrid Flow
We are using the Hybrid Flow when we want to acquire our tokens over the front and back channels. When we receive a token via /authorization endpoint over URI or Form POST, we are talking about the front-channel. When we receive a token via /token endpoint, we are talking about the back-channel. The Hybrid flow uses both channels in the process.
There are three combinations for hybrid flow defined by the ResponseType property in the configuration:
- The first one is
code token - Then we have
code id_token - And finally,
code id_token token
Each of these combinations provides a slightly different way of getting a token from the authorization server.
Code Token
The client requests access_token and a code from the /authorization endpoint. The identity server issues them both. After the client validates the token, it sends the code to the /token endpoint and the identity server responds with the id_token, access_token and it can include the refresh_token if requested.
Code Id_Token
The request is issued to the /authorization endpoint with the request for the code and the id_token. The identity server issues them both. After successful validation of id_token, the code is sent to the /token endpoint and the identity server responds with the access_token, id_token and refresh_token if requested.
Code Id_Token Token
The client requests the code, id_token and access_token from the /authorization server. The identity server issues all three of them. After successful validation, the code is sent to the /token endpoint and the identity server responds with the access_token, id_token and refresh_token if requested.
Recommendation by RFC
The main recommendation for the clients is to avoid using a response type that causes an access_token to be returned from the /authorization endpoint. In other words, it is not recommended to return access_token via front-channel. Obviously, this means RFC recommends using flows that returns the access_token via back-channel (/token endpoint). For that, we can use the code response type (Authorization code flow) or we can use the code id_token response type (Hybrid flow). In this example, we are going to use the Hybrid Flow.
The Authorization Code flow is quite similar to the Hybrid flow (code id_token). The main difference is that the client requests only the code from the /authorization server and not both code and id_token as the Hybrid flow (code id_token) does. Additionally, for the code grant, we should include the PKCE. Now, as RFC recommends, we should use PKC for web applications and not only for mobile applications.
Identity Server Configuration to Support Hybrid Flow
After this theory, we can start with the IdentityServer configuration. The first thing we are going to do is to modify the InMemoryConfig class by adding additional client:
public static IEnumerable<Client> GetClients() =>
    new List<Client>
    {
        new Client
        {
            ClientId = "company-employee",
            ClientSecrets = new [] { new Secret("codemazesecret".Sha512()) },
            AllowedGrantTypes = GrantTypes.ResourceOwnerPasswordAndClientCredentials,
            AllowedScopes = { IdentityServerConstants.StandardScopes.OpenId, "companyApi" }
        },
        new Client
        {
            ClientName = "MVC Client",
            ClientId = "mvc-client",
            AllowedGrantTypes = GrantTypes.Hybrid,
            RedirectUris = new List<string>{ "https://localhost:5010/signin-oidc" },
            RequirePkce = false,
            AllowedScopes = { IdentityServerConstants.StandardScopes.OpenId, IdentityServerConstants.StandardScopes.Profile },
            ClientSecrets = { new Secret("MVCSecret".Sha512()) }
        }
    };
So, we register our client with the name and id (ClientName and ClientId properties). With the AllowedGrantTypes property, we define a flow we want to use. It’s obvious we use the Hybrid flow. The Hybrid flow is a redirection based flow (tokens are delivered to the browser in the URI via redirection) and therefore, we have to populate the RedirectUris property. This address is our client application’s address with the addition of /signin-oidc. Also, we have to state we don’t want to use PKCE. Then, we add allowed scopes, and these scopes are already supported in the GetIdentityResource method. Finally, we add a secret which is hashed with the Sha512 algorithm.
Authentication Process with the Hybrid Flow
We have to configure our client application as well.
So, let’s first modify the ConfigureServices method:
public void ConfigureServices(IServiceCollection services)
{
    services.AddSingleton<IHttpContextAccessor, HttpContextAccessor>();
    services.AddScoped<ICompanyHttpClient, CompanyHttpClient>();

    services.AddAuthentication(opt =>
    {
        opt.DefaultScheme = "Cookies";
        opt.DefaultChallengeScheme = "oidc";
    }).AddCookie("Cookies");

    services.AddControllersWithViews();
}
Here, we register authentication as a service and populate the DefaultScheme and DefaultCHallengeScheme properties. Finally, we call the AddCookie method with the name of the scheme, to register the cookie handler and the cookie-based authentication for our default scheme.
Next, we have to add the OpenID Connect support.
To do that, we have to install a new NuGet package:

Now, we can modify the code:
services.AddAuthentication(opt =>
{
    opt.DefaultScheme = "Cookies";
    opt.DefaultChallengeScheme = "oidc";
}).AddCookie("Cookies")
.AddOpenIdConnect("oidc", opt =>
{
    opt.SignInScheme = "Cookies";
    opt.Authority = "https://localhost:5005";
    opt.ClientId = "mvc-client";
    opt.ResponseType = "code id_token";
    opt.SaveTokens = true;
    opt.ClientSecret = "MVCSecret";
});
So, to register and configure the OIDC handler, we call the AddOpenIdConnect method. The SignInScheme property has the same value as our DefaultScheme. The Authority property has the value of our IdentityServer address. The ClientId and ClientSecret properties have to be the same as the id and secret from the InMemoryConfig class for this client. We set the SaveTokens property to true to store the token after successful authorization. Certainly, we can see the ResponseType property. We set it to the code id_token value and therefore, we expect the code and the id_token to be returned from the /authorization endpoint.
We have to add one more modification, but this time in the Configure class:
app.UseAuthentication();
app.UseAuthorization();
Finally, we want to protect our Home controller. To do that, we have to add the [Authorize] attribute on top of it:
[Authorize]
public class HomeController : Controller
{ …
Testing Our Functionality
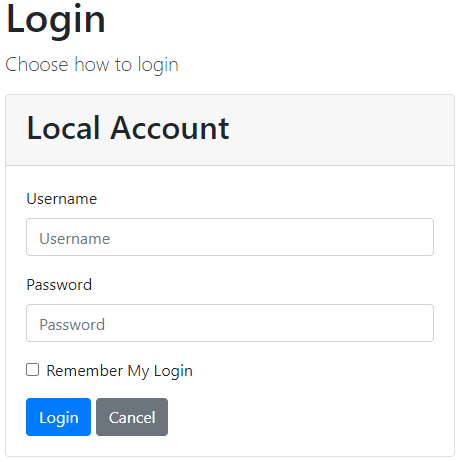
Now, let’s start the OAuth application, then the API application, and lastly the Client application. As soon as we start the Client application, we are going to be redirected to the authorization page because we have protected the Home controller with the [Authorize] attribute:
Now, let’s inspect our URI:

We can see the redirect_uri parameter and more important we can see the response_type set to code id_token. So, as we explained, the client sends the request to the /authorization endpoint for the code and id_token with the form_post response mode (Front Channel). We can confirm this with the console logs:

After we enter valid credentials, we are going to be directed to the consent page, we are going to see our requested data.
Let’s inspect the console logs:
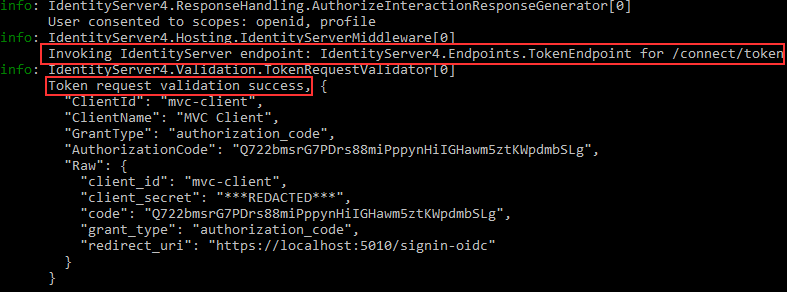
We can see that via back-channel, the request was sent to the /token endpoint and that validation was successful.
Excellent. We have seen the Hybrid flow in action, not just in theory.
Displaying Claims
Now, let’s turn of the client application and modify the Privacy view:
@using Microsoft.AspNetCore.Authentication

<h2>Claims</h2>

<dl>
    @foreach (var claim in User.Claims)
    {
        <dt>@claim.Type</dt>
        <dd>@claim.Value</dd>
    }
</dl>

<h2>Properties</h2>

<dl>
    @foreach (var prop in (await Context.AuthenticateAsync()).Properties.Items)
    {
        <dt>@prop.Key</dt>
        <dd>@prop.Value</dd>
    }
</dl>
We can start the application again and navigate to the Privacy menu:
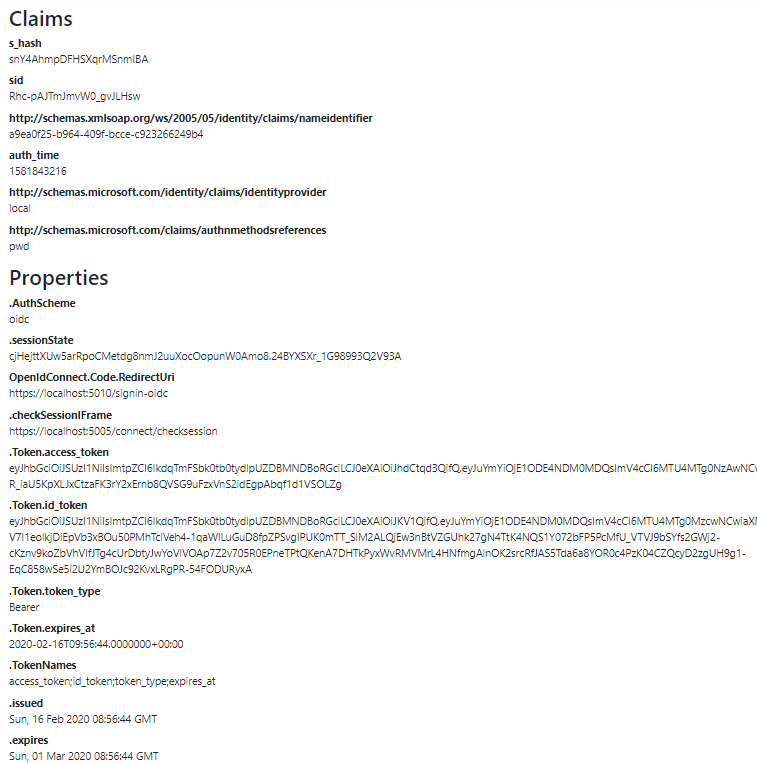
We can see all the different information about the Claims and Properties. There are also the access_token, id_token and token_type. Additionally, we can see the nameidentitier which stands for the sub claim, and the identityprovider and authmethodreferences which is password(pwd).
So, this all works as expected. But, once we are logged in, we can’t log out. Well, we are going to change that.
Logout from the Client and IdentityServer
The first thing we require is the Logout button. So, let’s modify the _Layout view in the Client application:
<li class="nav-item">
    <a class="nav-link text-dark" asp-area="" asp-controller="Home" asp-action="Privacy">Privacy</a>
        </li>
            @if (User.Identity.IsAuthenticated)
            {
                <li class="nav-item">
                    <a class="nav-link text-dark" asp-area="" asp-controller="Account" asp-action="Logout">Logout</a>
                </li>
            }
Once we have our button, we can create a new Authentication controller and a required action:
public class AccountController : Controller
{
    public async Task Logout()
    {
        await HttpContext.SignOutAsync("Cookies");
        await HttpContext.SignOutAsync("oidc");
    }
}
Now we can test this by clicking the Logout button:
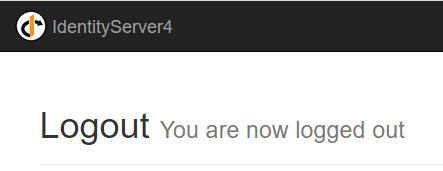
So, this works great, but we can make it better.
We can’t do anything from this screen. So, let’s fix this by modifying the client configuration in the InMemoryConfig class:
new Client
{
    ClientName = "MVC Client",
    ClientId = "mvc-client",
    AllowedGrantTypes = GrantTypes.Hybrid,
    RedirectUris = new List<string>{ "https://localhost:5010/signin-oidc" },
    AllowedScopes = { IdentityServerConstants.StandardScopes.OpenId, IdentityServerConstants.StandardScopes.Profile },
    ClientSecrets = { new Secret("MVCSecret".Sha512()) },
    PostLogoutRedirectUris = new List<string> { "https://localhost:5010/signout-callback-oidc" }
}
With this, we specify a redirect URI after the logout action. Now, let’s test this again:
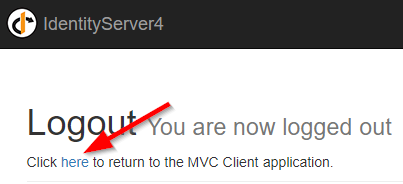
If we click on the „here“ link, we are going to be redirected to the Login page. But if we want, we can improve this even further. We don’t have to click the „here“ button. Let’s add one more modification to automatize this process for us.
In the IdentityServer project, we can find the AccountOptions class (QuickStart/Account). In this class, we can set automatic redirection to true:
public static bool AutomaticRedirectAfterSignOut = true;
Now, start the IdentityServer application and the Client application and log in. Once we click the Logout button, we are going to be redirected to the Login page.
About Additional User Info
If we look again at the Consent screen picture, we are going to see that we allowed for MVC Client to use the id and user profile information. But if we inspect the content in the Privacy page, we are going to see that we are missing the given_name and the family_name claims – from the Profile scope.
We can include these claims in the id_token but with too much information in the id_token, it can become quite large and cause the URI length restrictions. So, we are going to get these claims in another way.
Let’s modify the Client configuration a bit:
.AddOpenIdConnect("oidc", opt =>
{
    opt.SignInScheme = "Cookies";
    opt.Authority = "https://localhost:5005";
    opt.ClientId = "mvc-client";
    opt.ResponseType = "code id_token";
    opt.SaveTokens = true;
    opt.ClientSecret = "MVCSecret";
    opt.GetClaimsFromUserInfoEndpoint = true;
});
With this, we allow our middleware to communicate with the /userinfo endpoint to retrieve additional user data.
At this point, we can log in again and inspect the Privacy page:
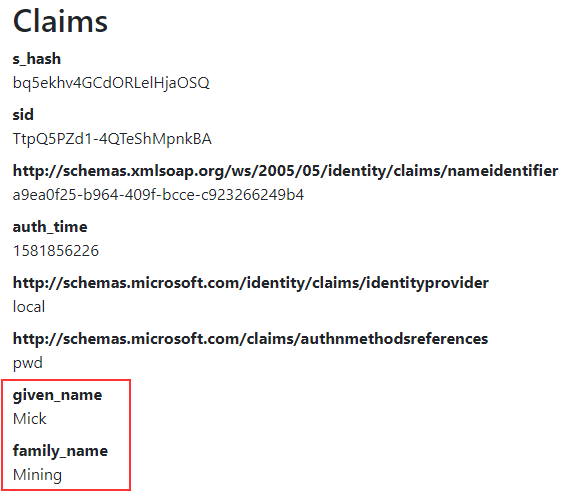
And, we can see additional claims.
We can inspect the console logs one more time:

We can see the call to the /connect/userinfo endpoint and the additional claim types returned from that endpoint.
Conclusion
In this article, we have learned:
- About the Hybrid Flow and how it works
- How to configure IdentityServer to support this flow
- The way to create Login and Logout functionalities
- How to retrieve additional claims from the /userinfo endpoint
In the next article, we are going to learn about Authorization and advanced actions with Claims.

