In this article, we are going to learn how to set up GraphQL in the ASP.NET Core application. We are going to use different third-party libraries to make this integration easier and will explain in detail how to use GraphQL elements (Type, Query, and Schema) to complete the integration process of GraphQL in ASP.NET Core.
To download the source code, visit the GraphQL in ASP.NET Core Project Source Code.
For the complete navigation of this tutorial visit GraphQL ASP.NET Core Tutorial.
About GraphQL and How it’s Different from REST
GraphQl is a query language. It executes queries by using type systems which we define for our data. GraphQL isn’t tied to any specific language or a database, just the opposite, it is adaptable to our code and our data as well.
Let’s talk a bit about how GraphQL differs from REST:
- GraphQL requires fewer roundtrips to the server and back to fetch all the required data for our view or template page. With REST, we have to visit several endpoints (
api/subjects,api/professors,api/students…) to get all the data we need for our page, but that’s not the case with GraphQL. When we use GraphQL, we create only one query which calls several resolvers (functions) on the server-side and returns all the data from different resources in a single request. - With REST, as our application grows, the number of endpoints grows as well, and that requires more and more time to maintain. But, with GraphQL we have only one endpoint
api/graphqland that is all. - By using GraphQL, we never face a problem of getting too much or too little data in our response. That’s because we are defining our queries with the fields which state what we need in return. That way, we are always getting what we have requested. So, if we send a query like this one:
query OwnersQuery {
  owners {
    name
    account {
      type
    }
  }
}
We are 100% sure that we will get this response back:
{
  "data": {
    "owners": [
     {
      "name": "John Doe",
      "accounts": [
        {
          "type": "Cash"
        },
        {
          "type": "Savings"
        }
      ]
     }
    ]
  }
}
With REST this is not the case. Sometimes we get more than we need and sometimes less, it depends on how actions on a certain endpoint are implemented.
These are the most important differences between REST and GraphQL. Now that we know that, let’s create a basic project to demonstrate how to set up GraphQL.
Introduction to a Starter ASP.NET Core Web API Project
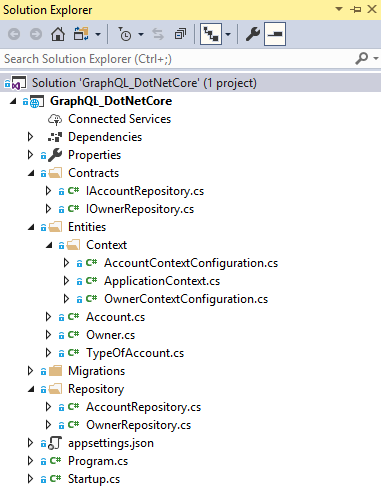
We have prepared a starter ASP.NET Core project, which you can download here GraphQL ASP.NET Core Starter Project. We strongly recommend you download this project, but if you want, you can create your own as well. The starter project has the following structure:
The Contracts folder contains interfaces required for our repository logic:
namespace GraphQLDotNetCore.Contracts
{
    public interface IOwnerRepository
    {
    }
}
namespace GraphQLDotNetCore.Contracts
{
    public interface IAccountRepository
    {
    }
}
In the Entities folder, we keep model classes with a context class and the seed configuration classes:
public class Owner
{
    [Key]
    public Guid Id { get; set; }
    [Required(ErrorMessage = "Name is required")]
    public string Name { get; set; }
    public string Address { get; set; }

    public ICollection<Account> Accounts { get; set; }
}
public class Account
{
    [Key]
    public Guid Id { get; set; }
    [Required(ErrorMessage = "Type is required")]
    public TypeOfAccount Type { get; set; }
    public string Description { get; set; }

    [ForeignKey("OwnerId")]
    public Guid OwnerId { get; set; }
    public Owner Owner { get; set; }
}
public enum TypeOfAccount
{
    Cash,
    Savings,
    Expense,
    Income
}
public class ApplicationContext : DbContext
{
    public ApplicationContext(DbContextOptions options)
        :base(options)
    {
    }

    protected override void OnModelCreating(ModelBuilder modelBuilder)
    {
        var ids = new Guid[] { Guid.NewGuid(), Guid.NewGuid() };

        modelBuilder.ApplyConfiguration(new OwnerContextConfiguration(ids));
        modelBuilder.ApplyConfiguration(new AccountContextConfiguration(ids));
    }

    public DbSet<Owner> Owners { get; set; }
    public DbSet<Account> Accounts { get; set; }
}
And in a Repository folder, we have classes related to the data fetching logic:
public class OwnerRepository : IOwnerRepository
{
    private readonly ApplicationContext _context;

    public OwnerRepository(ApplicationContext context)
    {
        _context = context;
    }
}
public class AccountRepository : IAccountRepository
{
    private readonly ApplicationContext _context;

    public AccountRepository(ApplicationContext context)
    {
        _context = context;
    }
}
This repository logic has the basic setup without any additional layers. But if you want to learn more about Repository Pattern in ASP.NET Core, we have a great article for you to read ASP.NET Core Web API – Repository Pattern.
The context class and repository classes are registered inside the Startup.cs class:
public void ConfigureServices(IServiceCollection services)
{
    services.AddDbContext<ApplicationContext>(opt =>
        opt.UseSqlServer(Configuration.GetConnectionString("sqlConString")));

    services.AddScoped<IOwnerRepository, OwnerRepository>();
    services.AddScoped<IAccountRepository, AccountRepository>();

    services.AddControllers()
        .AddNewtonsoftJson(o => o.SerializerSettings.ReferenceLoopHandling = Newtonsoft.Json.ReferenceLoopHandling.Ignore);
}
So, at this point, all you have to do is to modify the connection string (if you have to) in the appsettings.json file and to navigate to the Package Manager Console, and run the update-database command. Once you do that, we are ready to move on.
As you can see, we are using the Code-First approach in the starter project.
Integration of GraphQL in ASP.NET Core
Since the GraphQL support is not provided inside the ASP.NET Core applications, we have to install a few new libraries. So, the first library we are going to install is GraphQL and we can install it via NuGet package manager:
In addition, we can use the Package Manager Console: PM> Install-Package GraphQL -Version 3.1.5
The second library we want to install is GraphQL.Server.Transports.AspNetCore, which will help us to get GraphQL.NET as a dependency:
The Package Manager command: PM> Install-Package GraphQL.Server.Transports.AspNetCore -Version 4.3.1
We have to support serialization for GraphQL, and for that, we require another package:
PM> Install-Package GraphQL.Server.Transports.AspNetCore.SystemTextJson -Version 4.3.1
Finally, we are going to install GraphQL.Server.Ui.Playground library, which will help us send the GraphQL queries to the server:
The PM command: PM> Install-Package GraphQL.Server.Ui.Playground -Version 4.3.1
Once we are finished with the installations, we can move on to the integration logic.
Creating GraphQL Specific Objects (Type, Query, Schema)
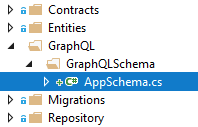
Let’s start by creating a new folder named GraphQL and inside a new one with the name GraphQLSchema with a single class AppSchema.cs:
public class AppSchema : Schema
{
    public AppSchema(IServiceProvider provider)
        :base(provider)
    {

    }
}
This class must inherit from the Schema class which resides in the GraphQL.Types namespace. Inside the constructor, we inject the IServiceProvider which is going to help us provide our Query, Mutation, or Subscription objects.
What’s important to know is that each of the schema properties (Query, Mutation, or Subscription) implements IObjectGraphType which means that the objects we are going to resolve must implement the same type as well. This also means that our GraphQL API can’t return our models directly as a result but GraphQL types that implement IObjectGraphType instead.
So, let’s leave this class for a moment and create a new folder GraphQLTypes with a single class OwnerType.cs inside the GraphQL folder:
public class OwnerType : ObjectGraphType<Owner>
{
    public OwnerType()
    {
        Field(x => x.Id, type: typeof(IdGraphType)).Description("Id property from the owner object.");
        Field(x => x.Name).Description("Name property from the owner object.");
        Field(x => x.Address).Description("Address property from the owner object.");
    }
}
This is the OwnerType class which we use as a replacement for the Owner model inside a GraphQL API. This class inherits from a generic ObjectGraphType<Owner> class which at some point (in the hierarchy) implements IObjectGraphType interface. With the Field method, we specify the fields which represent our properties from the Owner model class.
To continue on, let’s create another folder GraphQLQueries with a class AppQuery, inside the GraphQL folder.
But before we modify this class, let’s modify the IOwnerRepository interface:
public interface IOwnerRepository
{
    IEnumerable<Owner> GetAll();
}
And the OwnerRepository class:
public class OwnerRepository : IOwnerRepository
{
    private readonly ApplicationContext _context;

    public OwnerRepository(ApplicationContext context)
    {
        _context = context;
    }

    public IEnumerable<Owner> GetAll() => _context.Owners.ToList();
}
Now, we can modify the AppQuery class to reflect those changes:
public class AppQuery : ObjectGraphType
{
    public AppQuery(IOwnerRepository repository)
    {
        Field<ListGraphType<OwnerType>>(
           "owners",
           resolve: context => repository.GetAll()
       );
    }
}
AppQuery Explanation
As we can see, this class inherits from the ObjectGraphType as well, just the non-generic one. Moreover, we inject our repository object inside a constructor and create a field to return the result for the specific query.
In this class, we use the generic version of the Field method which accepts some „strange“ type as a generic parameter. Well, this is the GraphQL.NET representation for the normal .NET types. So, ListGraphType is the representation of the List type, and of course, we have IntGraphType or StringGraphType, etc… For the complete list visit SchemaTypes in GraphQL .NET.
The „owners“ parameter is a field name (query from the client must match this name) and the second parameter is the result itself.
Having done our preparations, we can now modify our AppSchema class:
public class AppSchema : Schema
{
    public AppSchema(IServiceProvider provider)
        :base(provider)
    {
        Query = provider.GetRequiredService<AppQuery>();
    }
}
Well done. Let’s proceed to schema registration.
Libraries and Schema Registration
In a Startup class, we need to register our installed libraries and the created schema class as well. So, let’s do that by modifying the ConfigureServices and Configure methods:
public void ConfigureServices(IServiceCollection services)
{
    services.AddDbContext<ApplicationContext>(opt =>
        opt.UseSqlServer(Configuration.GetConnectionString("sqlConString")));

    services.AddScoped<IOwnerRepository, OwnerRepository>();
    services.AddScoped<IAccountRepository, AccountRepository>();

    services.AddScoped<AppSchema>();

    services.AddGraphQL()
        .AddSystemTextJson()
        .AddGraphTypes(typeof(AppSchema), ServiceLifetime.Scoped);

    services.AddControllers()
        .AddNewtonsoftJson(o => o.SerializerSettings.ReferenceLoopHandling = Newtonsoft.Json.ReferenceLoopHandling.Ignore);

    services.Configure<KestrelServerOptions>(options =>
    {
        options.AllowSynchronousIO = true;
    });
}

// This method gets called by the runtime. Use this method to configure the HTTP request pipeline.
public void Configure(IApplicationBuilder app, IWebHostEnvironment env)
{
    if (env.IsDevelopment())
    {
        app.UseDeveloperExceptionPage();
    }

    app.UseHttpsRedirection();

    app.UseRouting();

    app.UseAuthorization();

    app.UseGraphQL<AppSchema>();
    app.UseGraphQLPlayground(options: new GraphQLPlaygroundOptions());

    app.UseEndpoints(endpoints =>
    {
        endpoints.MapControllers();
    });
}
In the ConfigureServices method, we register the DependencyResolver (for our queries) and the schema class as well. Furthermore, we register GraphQL with the AddGraphQL method and register all the GraphQL types (Query and Type classes) with the AddGraphTypes method. Without this method, we would have to register all the types and queries manually in our API.
Finally, in the Configure method, we are adding our schema to the request’s pipeline as well as the Playground UI tool which we are just about to use.
Sending the First Query
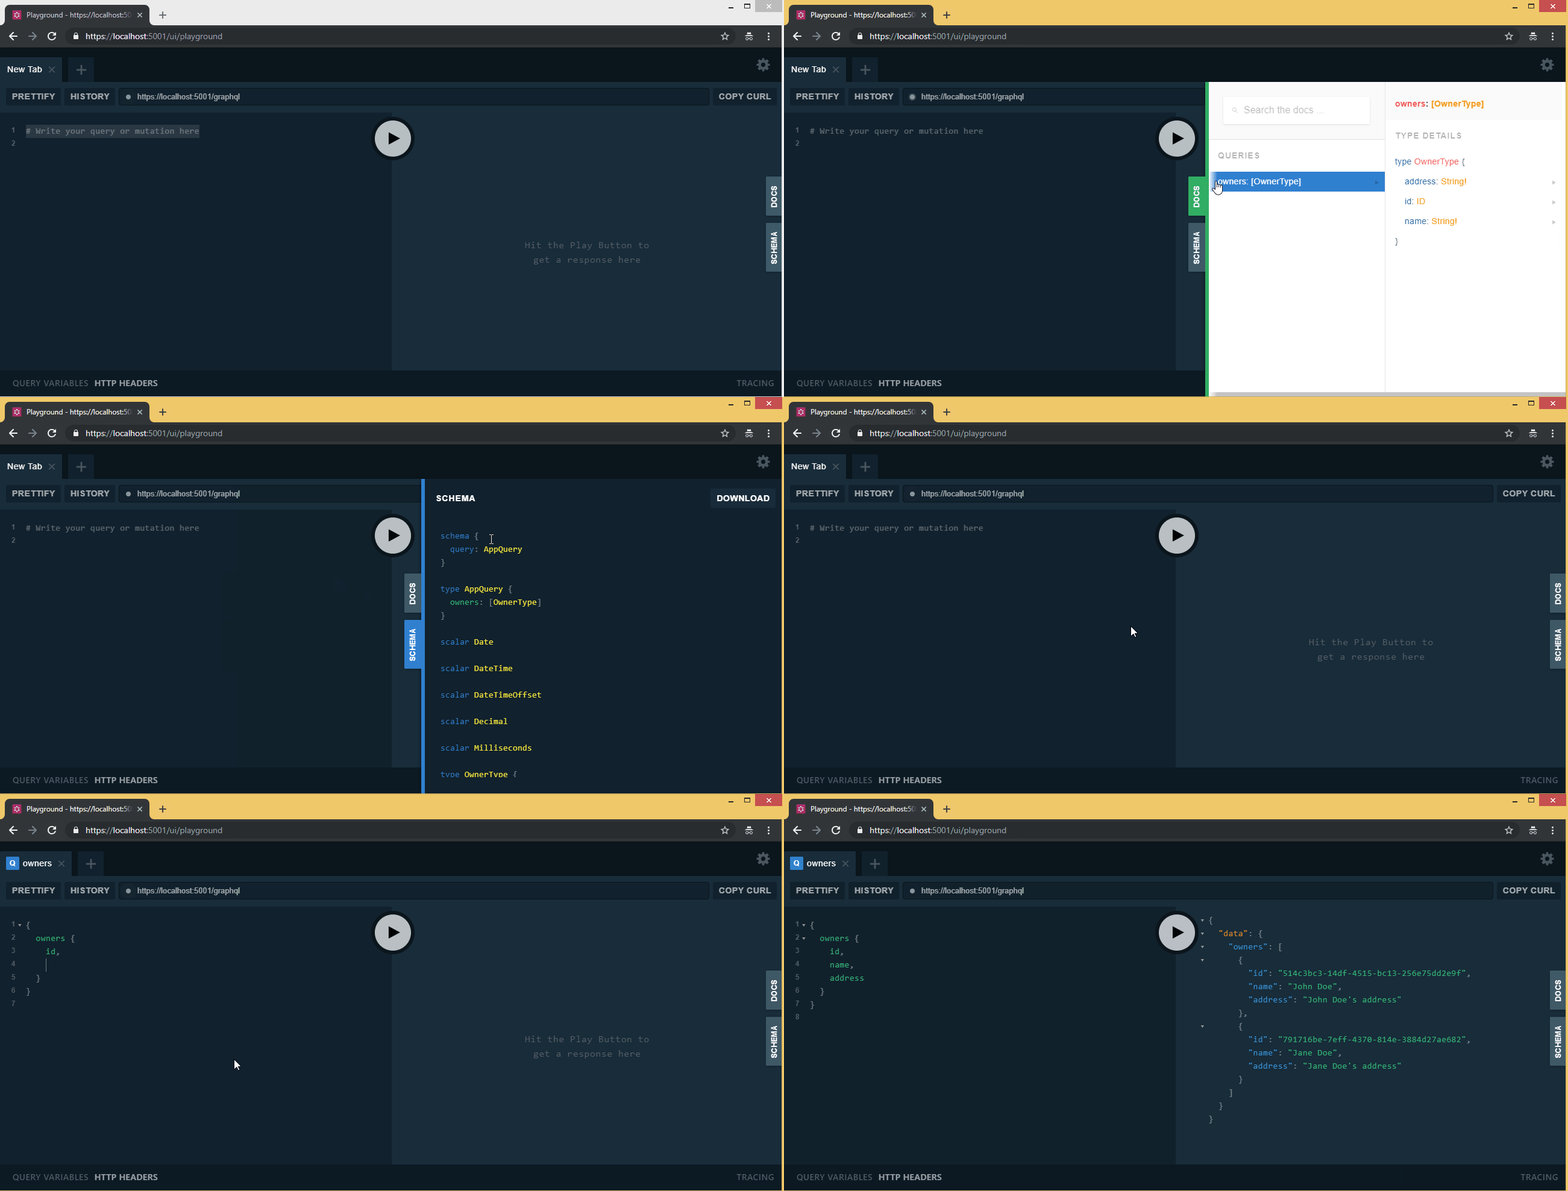
To test our GraphQL API, we are going to use the GraphQL.UI.Playground tool. So, let’s first start our server application and then navigate to the https://localhost:5001/ui/playground address:
Excellent, we see that everything is working just as it supposed to. As soon as we send our query, with the name „owners“ (which must match the query name we created in the AppQuery file), we get the required result.
Conclusion
Our integration is complete. We have seen how in few easy steps we can integrate GrapnQL in ASP.NET Core and how to retrieve required results with the query.
In the next article, we are going to learn about advanced GraphQL Queries, how to handle errors during queries, and how to use data loader to cache our results.


