

In this article, we are going to learn how to use Google Authentication with our Blazor WebAssembly Hosted application. We will show you, with a few simple steps, how to utilize Google as the external authentication provider.
If you want to learn more about Blazor WebAssembly, we strongly suggest visiting our Blazor WebAssembly series of articles, where you can read about Blazor WebAssembly development, authentication, authorization, JSInterop, and other topics as well.
So, without further ado, let’s start.
Creating Google Sign-In Credentials
The first thing we have to do is to navigate to the starting page for the Google Sign-In integration.
Then, we have to create credentials for our application on the Google Sign-In page. To do that, we can follow the instructions from our External Identity Provider article. Regardless of whether this is the first time you create credentials or not, the linked article will guide you step by step through the process. Of course, for this application, once you create your project and configure the consent screen, we are going to use a different client name. The rest is the same:
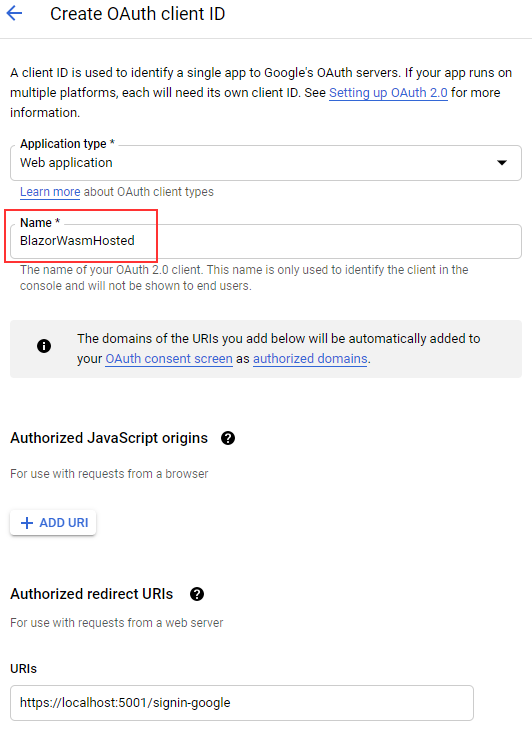
Once we click the Create button, we will get the ClientID and ClientSecret values.
Implementing Google Authentication in Blazor WebAssembly Hosted Apps
Now, let’s open the appsettings.json file and modify it by adding our Google credentials:
"Authentication": {
    "Google": {
        "ClientId": "883654869277-kmq16sfmrounjds8shu3nkbeirprrrav.apps.googleusercontent.com",
        "ClientSecret": "0wtwD5xPRI1dr_Iq7R6zFfbI"
    }
},
After that, we have to install a required library to support Google authentication in our Blazor application:

As we can see in the library’s description, it supports Google’s OpenId and OAuth2 authentication flows, which is exactly what we need here.
As soon as we finish the installation, we can modify the ConfigureServices method in the Startup class or the Program class in .NET 6 and above:
services.AddAuthentication()
    .AddIdentityServerJwt()
    .AddGoogle(o =>
    {
        o.ClientId = Configuration["Authentication:Google:ClientId"];
        o.ClientSecret = Configuration["Authentication:Google:ClientSecret"];
    });
That’s it. We just call the AddGoogle method and provide configuration options with our ClientId and ClientSecret from the appsettings file.
At this point, we can start our app and open the Register page. As a result, we are going to see a Google button:
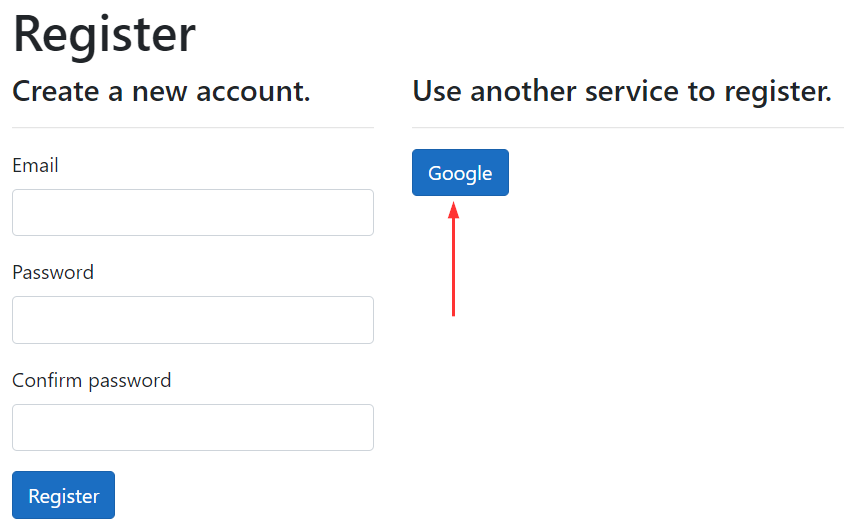
We are not going to click it yet. Let’s first see, how our app knows to place that button there.
If we open the Register.cshtml (Areas/Identity/Pages/Account) file, imported in a previous article, we are going to see the code responsible for this:
<div class="col-md-6 col-md-offset-2">
        <section>
            <h4>Use another service to register.</h4>
            <hr />
            @{
                if ((Model.ExternalLogins?.Count ?? 0) == 0)
                {
                    <div>
                        <p>
                            There are no external authentication services configured. See <a href="https://go.microsoft.com/fwlink/?LinkID=532715">this article</a>
                            for details on setting up this ASP.NET application to support logging in via external services.
                        </p>
                    </div>
                }
                else
                {
                    <form id="external-account" asp-page="./ExternalLogin" asp-route-returnUrl="@Model.ReturnUrl" method="post" class="form-horizontal">
                        <div>
                            <p>
                                @foreach (var provider in Model.ExternalLogins)
                                {
                                    <button type="submit" class="btn btn-primary" name="provider" value="@provider.Name" title="Log in using your @provider.DisplayName account">@provider.DisplayName</button>
                                }
                            </p>
                        </div>
                    </form>
                }
            }
Previously, we could see the “There are no external authentication services configured.” message. But now, since we have registered Google auth provider, our app iterates through all the providers and displays the button for each one. In this case, only the Google button.
We can find the same code in the Login.cshtml file.
So, as you can see, with these few steps, we have enabled Google as the authentication provider for our users. But, let’s improve the visual experience a bit.
Adding Google Social Login Button
What we want to do is to modify our Google sign-in button to provide a better visual experience for our users. There are already a lot of libraries that provide social sign-in buttons, but to avoid additional complexity, we are going to create our own here.
First, we are going to modify the _Layout.cshtml file in the Shared folder:
<link rel="stylesheet" href="https://cdnjs.cloudflare.com/ajax/libs/font-awesome/4.7.0/css/font-awesome.min.css">
<link rel="stylesheet" href="~/css/socialButtons.css" />
Here, we are linking to the font awesome css file and also to our socialButtons.css file. Of course, since we don’t have it yet, let’s create it in the wwwroot/css folder:
.fa {
    padding: 10px;
    font-size: 30px;
    border: 0;
    text-align: center;
    text-decoration: none;
    margin: 5px 2px;
    border-radius: 2px;
}

    .fa:hover {
        opacity: 0.7;
    }

.fa-google {
    background: #dd4b39;
    color: white;
}

.si-text {
    font-size: 18px;
    margin-left: 3px;
    position: relative;
    top: -5px;
}
So, these are just a few simple classes to help us style the button.
Finally, we have to modify the Register.cshtml file:
<form id="external-account" asp-page="./ExternalLogin" asp-route-returnUrl="@Model.ReturnUrl" method="post" class="form-horizontal">
    <div>
        <p>
            @foreach (var provider in Model.ExternalLogins)
            {
                if (provider.DisplayName.Equals("Google"))
                {
                    <button type="submit" class="fa fa-google" name="provider"
                        value="@provider.Name" title="Log in using your
                        @provider.DisplayName account">
                                <span class="si-text">Sign up with @provider.DisplayName</span>
                    </button>
                }
                else
                {
                    <button type="submit" class="btn btn-primary" name="provider"
                        value="@provider.Name" title="Log in using your
                        @provider.DisplayName account">
                        @provider.DisplayName
                    </button>
                }
            }
        </p>
    </div>
</form>
Here, we just check if our external provider is Google, and if it is, we create a button for it with our custom classes. Otherwise, we just show a default button.
We can have the same modification for the Login.cshtml page, just with different button text:
<button type="submit" class="fa fa-google" name="provider"
    value="@provider.Name" title="Log in using your
        @provider.DisplayName account">
    <span class="si-text">Log in with @provider.DisplayName</span>
</button>
Testing Google Authentication
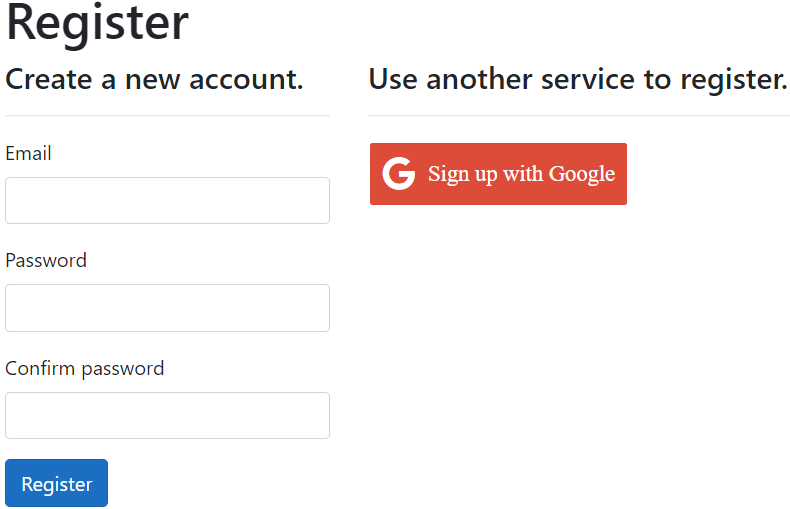
Now, let’s start our application and navigate to the Register page. As a result, we are going to see the Google register button:
Once we click on it, we can choose our Google account to sign in with:
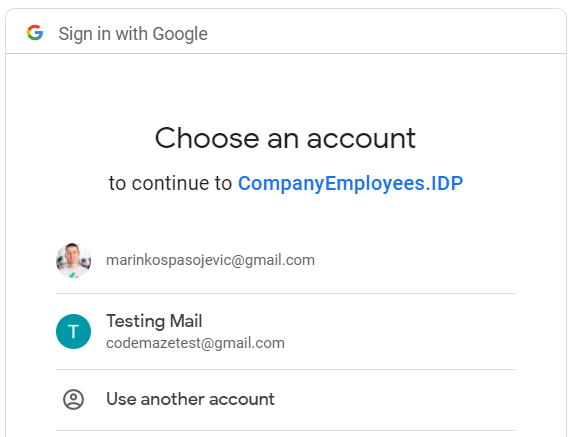
As soon as we finish the registration process, we are going to be logged in as well:
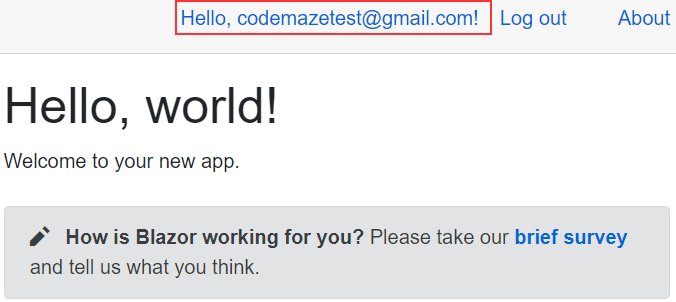
You can also check the Login page to verify that the social Google button is there as well.
We have to mention one more thing. With this method, we have a newly registered user in our database but without roles attached. If you want to add the role as soon as the user is registered, you have to scaffold the ExternalLogin page from Identity and add the same code as we did in a previous article with the Register page.
Conclusion
So, there we go.
We have a fully functional Google authentication enabled for our Blazor WebAssembly Hosted application.
In the next article, we are going to learn how to integrate Facebook authentication in the same application.
Until then.
All the best.
