

In this article, we are going to learn how to download files from Azure using ASP.NET Core Web API as the server-side project and Blazor WebAssembly as the client-side. This article is a continuation of a previous one where we learned about uploading files to Azure. In that article, we also created Azure storage, so if you don’t have one created, you can do it following the instructions from the mentioned article.
If you want to learn more about Blazor WebAssembly, we strongly suggest visiting our Blazor WebAssembly series of articles, where you can read about Blazor WebAssembly development, authentication, authorization, JSInterop, and other topics as well.
So, let’s start.
Connecting ASP.NET Core Web API Project with Azure
In this article, we are going to create new projects for both the server and the client. That said, let’s create a new ASP.NET Core Web API project named DownloadAzure.Server.
If we inspect our Azure storage created in the previous article, we are going to find a connection string that we require in our server app:
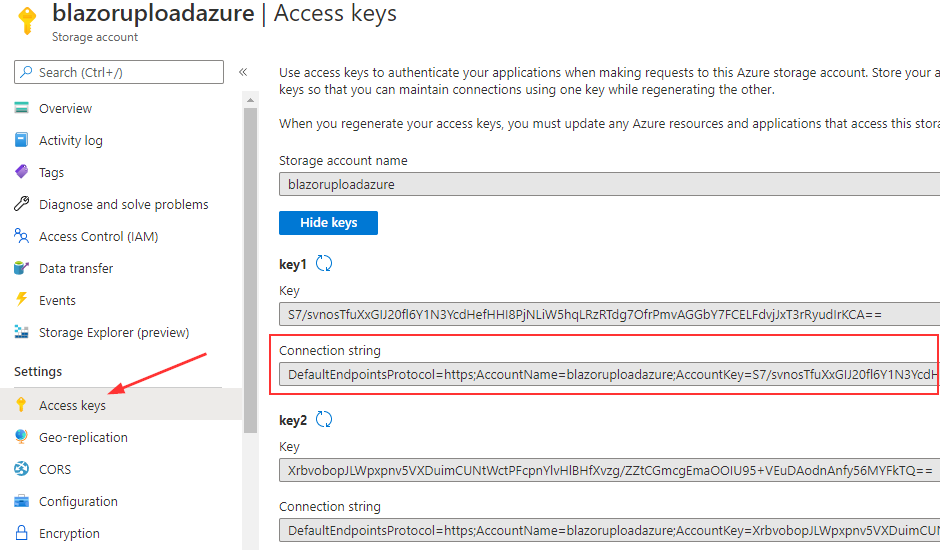
We are going to use it in our appsettings.json file:
{
  "Logging": {
    "LogLevel": {
      "Default": "Information",
      "Microsoft": "Warning",
      "Microsoft.Hosting.Lifetime": "Information"
    }
  },
  "ConnectionStrings": {
    "AzureConnectionString": "DefaultEndpointsProtocol=https;AccountName=blazoruploadazure;AccountKey=S7/svnosTfuXxGIJ20fl6Y1N3YcdHefHH...;EndpointSuffix=core.windows.net"
  },
  "AllowedHosts": "*"
}
Next, we have to install the Azure.Storage.Blobs library:

After these actions, we have everything we need to connect to our Azure storage.
Retrieving all the Files from the Azure Storage
Since we are going to have both the client-side and server-side applications, we will need a dto class to help us with the data transfer. So, let’s create a new class named BlobDto with the required properties:
public class BlobDto
{
    public string Name { get; set; }
    public string Uri { get; set; }
    public string ContentType { get; set; }
}
Of course, you can always expand the list of properties if you need more of them, but for our example, these three are quite enough.
Now, in the Controllers folder, we are going to create a new BlobsController and implement an action to retrieve all the blobs from the Azure blob storage:
[Route("api/blobs")]
[ApiController]
public class BlobsController : ControllerBase
{
    private readonly string _azureConnectionString;
    private readonly string _azureContainerName;

    public BlobsController(IConfiguration configuration)
    {
        _azureConnectionString = configuration.GetConnectionString("AzureConnectionString");
        _azureContainerName = "upload-container";
    }

    public async Task<IActionResult> Get()
    {
        var blobs = new List<BlobDto>();
        var container = new BlobContainerClient(_azureConnectionString, _azureContainerName);

        await foreach (var blobItem in container.GetBlobsAsync())
        {
            var uri = container.Uri.AbsoluteUri;
            var name = blobItem.Name;
            var fullUri = uri + "/" + name;

            blobs.Add(new BlobDto { Name = name, Uri = fullUri, ContentType = blobItem.Properties.ContentType });
        }

        return Ok(blobs);
    }
}
In the constructor, we assign values to our private fields. We extract the connection string from the appsettings.json file and hardcode the container name since we know its name from the previous article. Of course, if you want, you can move that value to the appsettings.json file as well. We would even suggest that.
Then, in the Get action, we create a new BlobDto list and create a reference to the Azure container using the connection string and the container name. Next, we iterate through all the blobs inside that container and extract required values into a new BlobDto object, which we store in a list.
Finally, we return that list as a response to the client app.
Testing
In the previous article, we have uploaded one file to the storage. But while preparing for this article, we have used the project from a previous one to upload two more files to our storage:
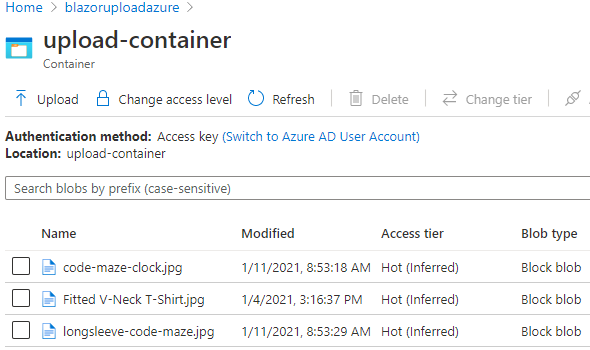
So, you can do the same. Just visit the previous article and you will find the link to the source code of the project you can use to upload files.
Now we can open Postman and send a single Get request to test our action:
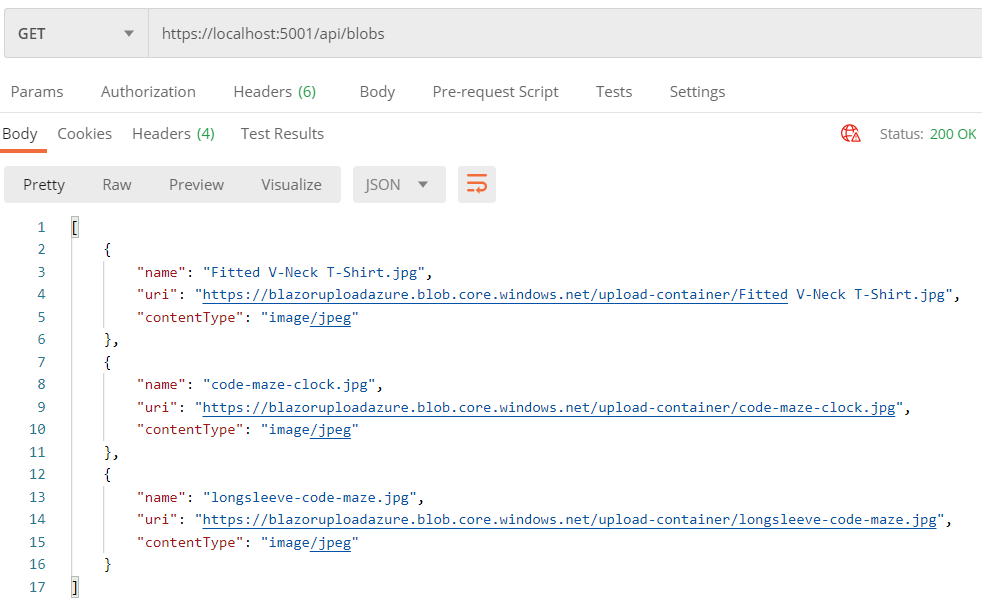
We can see our result returns three files with their names, URI, and ContentType properties. So, we have everything we need to display these files in our client application.
Listing all the Files in the Blazor WebAssembly Application
First, let’s create a new Blazor WebAssembly application (don’t use the ASP.NET Core hosted option) named DownloadAzure.Client.
After the creation, let’s modify the launchSettings.json file:
{
  "profiles": {
    "DownloadAzure.Client": {
      "commandName": "Project",
      "dotnetRunMessages": "true",
      "launchBrowser": true,
      "inspectUri": "{wsProtocol}://{url.hostname}:{url.port}/_framework/debug/ws-proxy?browser={browserInspectUri}",
      "applicationUrl": "https://localhost:5011;http://localhost:5012",
      "environmentVariables": {
        "ASPNETCORE_ENVIRONMENT": "Development"
      }
    }
  }
}
Then, we have to modify the HttpClient configuration in the Program class:
public static async Task Main(string[] args)
{
    var builder = WebAssemblyHostBuilder.CreateDefault(args);
    builder.RootComponents.Add<App>("#app");

    builder.Services.AddScoped(sp => new HttpClient
    {
        BaseAddress = new Uri("https://localhost:5001/api/")
    });

    await builder.Build().RunAsync();
}
Lastly, we are going to modify the FetchData component to list all our files from Azure Storage:
@page "/fetchdata"
@inject HttpClient Http

<h1>Weather forecast</h1>

<p>This component demonstrates fetching data from the server.</p>

@if (blobs == null)
{
    <p><em>Loading...</em></p>
}
else
{
    foreach (var blob in blobs)
    {
        <div style="border:1px solid gray; margin-bottom:10px; width: 202px;">
            <img src="@blob.Uri" alt="@blob.Name" width="200"/>
        </div>
    }
}

@code {
    private BlobDto[] blobs;

    protected override async Task OnInitializedAsync()
    {
        blobs = await Http.GetFromJsonAsync<BlobDto[]>("blobs");
    }

    public class BlobDto
    {
        public string Name { get; set; }
        public string Uri { get; set; }
        public string ContentType { get; set; }
    }
}
There is nothing complicated in this code. We just send the HTTP request as soon as our component initializes and once we get the response, we iterate through the list and display images on the page.
One thing to note – for the sake of simplicity, we create a BlobDto class inside the component file. Since we have only one DTO object, this is just fine for the example. Of course, in real-world applications, you should create a shared project and place your shared files in it. That way, you don’t have to duplicate the same code in both projects.
Before we test this, we have to enable CORS on the server-side project. So, let’s modify the ConfigureServices method in the Startup class:
public void ConfigureServices(IServiceCollection services)
{
    services.AddCors(policy =>
    {
        policy.AddPolicy("CorsPolicy", opt => opt
        .AllowAnyOrigin()
        .AllowAnyHeader()
        .AllowAnyMethod());
    });

    services.AddControllers();
}
And also, add a single code line to the Configure method:
app.UseHttpsRedirection();
app.UseCors("CorsPolicy");
Excellent.
Testing
Now, let’s start both apps, and navigate to the FetchData component:

There we go, we can see all our files from the Azure storage. Now, we can implement the logic to download files from Azure with both Web API and Blazor apps.
Download Files from Azure – Web API Part
Let’s start with a new DownloadController creation in the Controllers folder:
[Route("api/download")]
[ApiController]
public class DownloadController : ControllerBase
{
    private readonly string _azureConnectionString;
    private readonly string _azureContainerName;

    public DownloadController(IConfiguration configuration)
    {
        _azureConnectionString = configuration.GetConnectionString("AzureConnectionString");
        _azureContainerName = "upload-container";
    }
}
After the initial logic, we can create our Download action:
[HttpGet("{name}")]
public async Task<IActionResult> Download(string name)
{
    var container = new BlobContainerClient(_azureConnectionString, _azureContainerName);

    var blob = container.GetBlobClient(name);

    if (await blob.ExistsAsync())
    {
        var a = await blob.DownloadAsync();

        return File(a.Value.Content, a.Value.ContentType, name);
    }

    return BadRequest();
}
Here we start with the container reference. Then, we extract our blob by the name from that container. If the blob exists, we call the DownloadAsync method, which downloads the blob from the service including its metadata and properties. Next, we return the File to the client with the Content, ContentType, and the Name of the blob. If the blob doesn’t exist, we just return a bad request.
That’s all it takes on the server-side. We can move on to the client app.
Download Files from Azure – Blazor WebAssembly Logic
The first thing we are going to do is to modify the wwwroot folder by creating a new folder scripts and inside a new file downloadScript.js:
export function download(options) {
    var url = "data:" + options.contentType + ";base64," + options.byteArray

    var anchorElement = document.createElement('a');
    anchorElement.href = url;
    anchorElement.download = options.fileName;
    anchorElement.click();
    anchorElement.remove();
}
We create a JavaScript function that accepts a single options object parameter. The options object will contain three properties: returned byte array from the server, blob’s name, and the content type. We are going to use this function to start the download on the client-side app, once it receives a response from a server. One more thing, we use the export keyword for this function since we are going to isolate this JS file as a separate module. You can learn more about reading the JavaScript functions in Blazor WebAssembly and the advantage of this approach in our How to Call JavaScript Functions with C# in Blazor WebAssembly article.
Then, we have to modify the FetchData.razor file:
@page "/fetchdata"
@inject HttpClient Http

<h1>Weather forecast</h1>

<p>This component demonstrates fetching data from the server.</p>

@if (blobs == null)
{
    <p><em>Loading...</em></p>
}
else
{
    foreach (var blob in blobs)
    {
        <div style="border:1px solid gray; margin-bottom:10px; width: 202px;">
            <img src="@blob.Uri" alt="@blob.Name" @onclick="() => Download(blob.Name, blob.ContentType)"
                 class="imgClass"/>
        </div>
    }
}

@code {
    [Inject]
    public IJSRuntime JSRuntime { get; set; }

    private BlobDto[] blobs;
    private IJSObjectReference  _jsModule;

    protected override async Task OnInitializedAsync()
    {
        _jsModule = await JSRuntime.InvokeAsync<IJSObjectReference>("import", "./scripts/downloadScript.js");
        blobs = await Http.GetFromJsonAsync<BlobDto[]>("blobs");
    }

    private async Task Download(string name, string contentType)
    {
        var response = await Http.GetByteArrayAsync("download/" + name);

        await _jsModule.InvokeVoidAsync("download", new
        {
            ByteArray = response,
            FileName = name,
            ContentType = contentType
        });
    }

    public class BlobDto
    {
        public string Name { get; set; }
        public string Uri { get; set; }
        public string ContentType { get; set; }
    }
}
In the HTML part, we just modify our img element by adding the onclick event and adding a new class to extract additional styling.
The @code part contains the main changes.
Since we have JavaScript logic, which we want to import as a module, we have to inject the IJSRuntime interface and create a private IJSObjectReference variable. Then in the OnInitializedAsync method, we import our file and store it as a module in our private variable. Again, you can learn much more about this in our How to Call JavaScript Functions with C# in Blazor WebAssembly article.
Then in the Download method, we send an HTTP request that returns a byte array from the server. After getting the response, we call our download function from the js file and pass the required parameters as an object.
Finally, we have to create an additional FetchData.razor.css file for our image styles:
.imgClass {
    width: 200px;
}

    .imgClass:hover {
        cursor: pointer;
        opacity: 0.8;
    }
Testing
Let’s start both apps and navigate to the FetchData page. As soon as we hover over any picture, we are going to see the result of applied styles. Once we click on the picture, we are going to see the downloaded file:
Excellent.
Everything works as expected.
Conclusion
So, as you can see, with a few simple steps, we have achieved our goal for this article.
To sum up, we have learned:
- How to list all the files from the Azure storage on the Blazor WebAssembly application
- The way to download files from Azure using both ASP.NET Core Web API and Blazor WebAssembly applications
- How to use JavaScript functions to enable download action on the client-side
Until the next article.
All the best.

