In this article, we are going to learn about Azure Static Web Apps, which is a great solution for publishing static web applications into the cloud.
We’ll start by looking at what an Azure Static Web App is. Then we’ll learn how to build a Blazor WebAssembly Application that talks with a Serverless Function API in the back-end. After that, we’ll see how to create an Azure Static Web App from the portal. Along with that, we’ll also learn configuring GitHub Actions Workflow for integrating the Azure Static Web App with the repository. Finally, we’ll test our Azure Static Web Apps to make sure that everything works as expected.
To read more about Azure, you can visit our Azure with ASP.NET Core page, where you can find all the articles from the series.
Let’s start.
Introduction to Azure Static Web Apps
We can use Azure Static Web Apps to build and publish a static web application from a GitHub repository into Azure. By serving pre-rendered files from the cloud without the need of provisioning any web servers, they provide an excellent way for hosting static files like HTML, JavaScript, etc inside Azure. Of course, Azure takes care of aspects like server maintenance, scaling, content distribution, etc and we can just focus on our application without having to worry about any of those.
Azure Static Web Apps supports all major JavaScript and TypeScript based modern front-end apps including those developed with frameworks like Angular, React, Vue.js, etc. Additionally, It supports ASP.NET Core Blazor apps as well. With Static Web Apps, we can even build a back-end for our Blazor application using serverless Function API which is an added advantage.
In our Deploying ASP.NET Core Web API to Azure API Apps article, we learned how to deploy an ASP.NET Core with Angular Client App into Azure. However, If we want to deploy pure Javascript/Typescript apps like the Angular CLI apps or React apps, Azure Static Web Apps is the best choice out there right now.
In this tutorial, we are going to learn how to create an ASP.NET Core Blazor WebAssembly application that talks with a Serverless Function API in the back-end. After that, we’ll see how to deploy it to Azure Static Web apps as well. We are going to accomplish this by connecting a GitHub repository to the Static Web Apps in Azure Portal. This will configure the GitHub repository for Continuous Delivery and provide a seamless experience for building and publishing our Blazor application.
Configuring the Blazor Starter Application
The first step is creating and configuring a Blazor WebAssembly application. We have covered Blazor WebAssembly in detail in our Blazor WebAssembly Series. The process of creating web applications using Blazor WebAssembly is explained very well in that series. However, in this example, we are going to take a different approach by making use of a Blazor starter template for creating our project.
Blazor Starter Application Template is an excellent choice for creating a Static Web App project with Blazor. This starter kit will help us to quickly create a solution with a Blazor project. The template contains a Blazor WebAssembly client application, a serverless Function API back-end, and a C# class library that can contain code that is shared between the Client App and the API.
Creating the Project
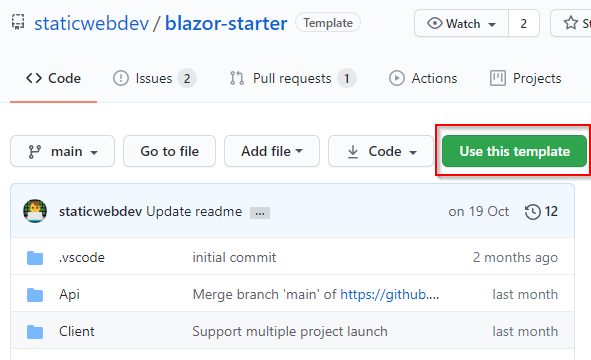
Let’s start by creating the project. For that, first, we need to log into GitHub and navigate to the blazor-starter repository. Then we can proceed to create a new GitHub repository using that template by clicking on the Use this template button:
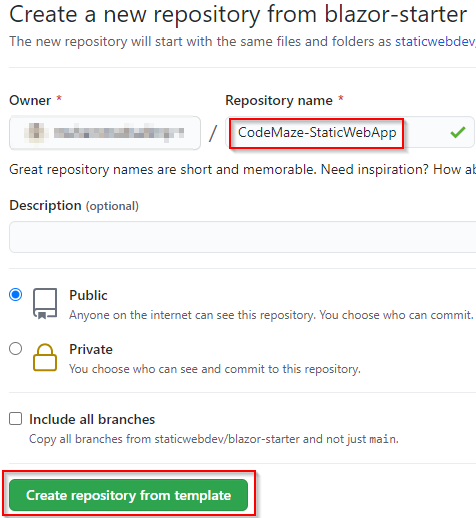
After that, on the next screen, we can generate the repository by clicking on the Create repository from template button after specifying a Repository Name:
Once the repository is created, we are going to clone it locally and analyze the source code.
Cloning the GitHub project
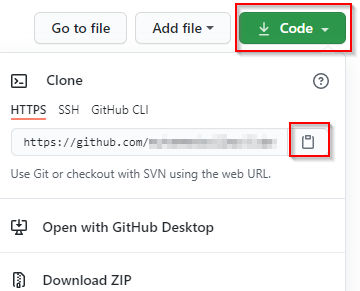
For cloning the project locally, from the GitHub repository, first, we need to click on the Code dropdown and then on the Copy button in the HTTPS tab:
Then, we can open Visual Studio and choose Clone a repository option.
After that, we need to provide the copied Git repository URL and a local folder path for the project in the Clone a repository screen and click on the Clone button:
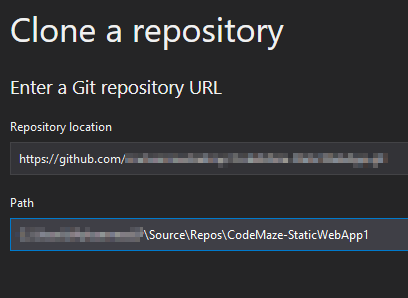
This will clone the GitHub project into our local system. Without further ado, let’s inspect the source code of the project that we just created.
Inspecting the Project
Now let’s open the solution in Visual Studio and inspect the project structure. We can see that there are three projects inside the solution:
- Client: This is the Blazor WebAssembly client application that fetches data from the API
- API: The API project is a C# Azure Functions App. We have explained Azure Functions in detail in our Creating Serverless Apps using Azure Functions article. The Blazor client application will get data from this back-end API. Currently, Azure Static Web Apps supports only Functions in the back-end
- Shared: This is a C# class library that is shared between the Blazor client and Functions API. This is a good place to put any code that is shared between the Client App and API
Now that we have analyzed the solution, let’s go ahead and test it locally.
Testing the Project Locally
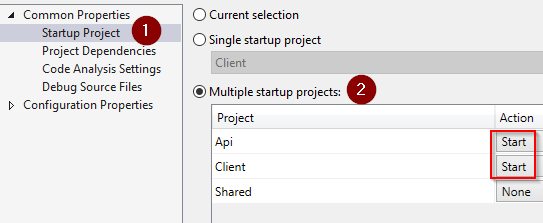
To run the app locally, we have to start both the API and Client projects. For setting multiple startup projects, we can select the Multiple startup projects option in the Startup Project property of the Visual Studio solution, and inside that, we can choose to start both the API and Client project:
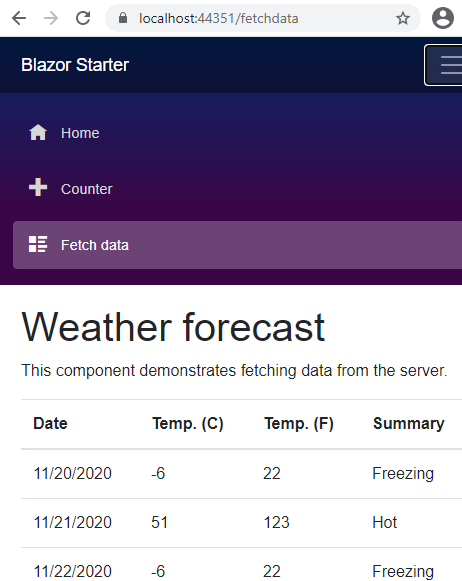
This will ensure that both projects will start when we run the solution. After running the solution, let’s navigate to the Fetch data page:
The Fetch data page in the app gets the weather forecast data from the backend Function API and displays it on the page.
Cool!
We have tested our Blazor Starter App locally. Without any further delay, let’s proceed to deploy it to Azure.
Creating Azure Static Web Apps
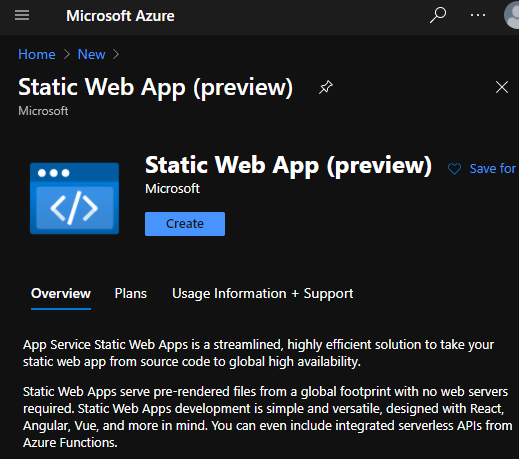
For deploying our Blazor application to Azure, first, we need to create an Azure Static Web App from the Azure Portal:
Please note that at the time of writing this article, Azure Static Web Apps is in Public Preview which means it can be used free of cost. Microsoft is planning to release this into General Availability(GA) soon and hopefully, they’ll announce the pricing details along with that. However, the serverless APIs that we implement using Azure Functions will incur a cost depending on the consumption plan that we choose. We have explained creating serverless applications using Azure Functions in our Creating Serverless Apps using Azure Functions article.
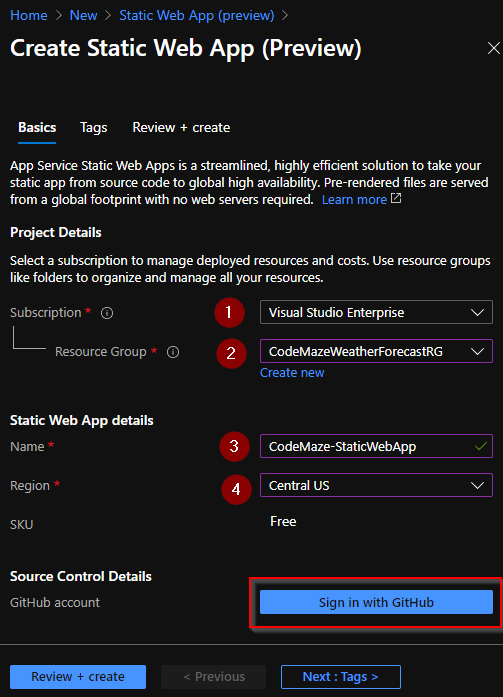
Once we click on the Create button, It will take us to the Create Static Web App screen where we need to provide some information about the App:
- First, we need to select a Subscription.
- Then, we need to either choose an existing Resource Group or create a new one.
- After that, we need to provide a Name for our App.
- Finally, we need to choose a Region.
After providing this information, we have to link our app with a GitHub account by clicking on the Sign in with GitHub button. We have learned how to link our GitHub account with Azure in the Continuous Deployment from GitHub to Azure App Service article. The same steps apply here as well.
Configuring the GitHub Actions Workflow
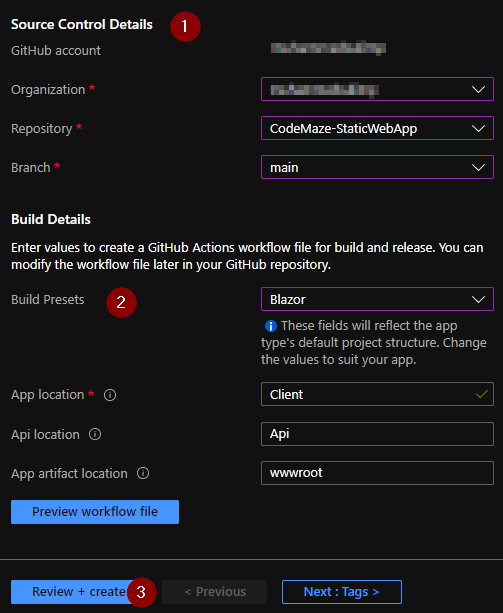
Once we sign into our GitHub account and Authorize it, we need to configure the Source Control and Build details:
- First, we need to provide the Source Control Details like Organization, Repository, and Branch.
- Then, we need to provide Build Details. We can choose the Build Presets as Blazor and leave the default values for the rest of the fields. Since we are using the Blazor starter template, it will automatically identify our Client App and API locations. Perfect!
- After that, we can click on the Review + Create button.
This will initiate the validation process and once that step is completed, we can finish the App creation process by clicking on the Create button. This process could take a few minutes to complete and we can view the progress in the portal.
Examining Azure Static Web Apps in Portal
Once the Azure Static Web App is created, the linked GitHub repository will trigger a CI/CD from its Action Workflow. Let’s wait till that process is completed.
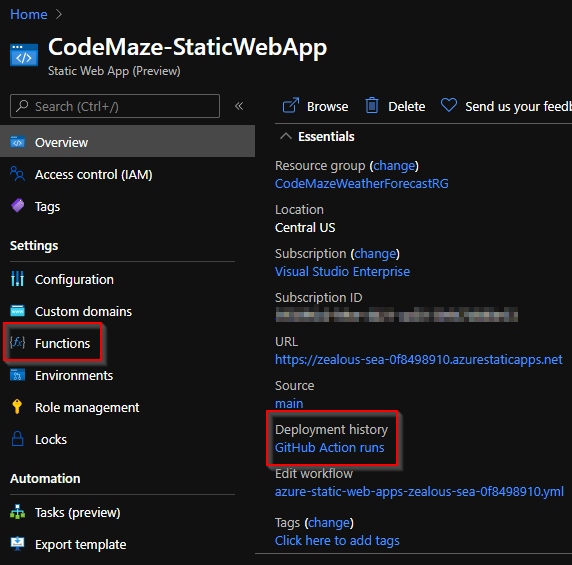
On completion of the deployment, we can see the GitHub Action runs link in the Deployment History. Also, note that there is a Functions section that will list the API Functions that we created as part of the solution:
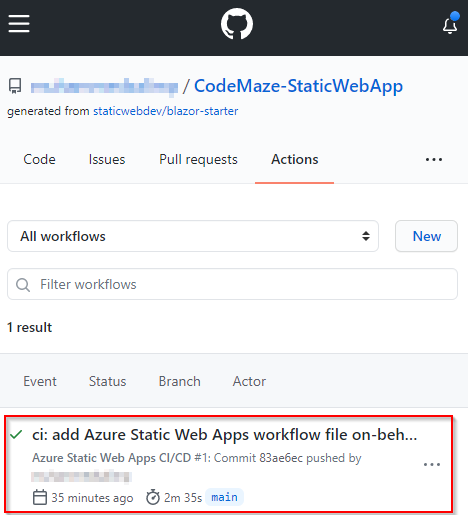
Clicking on the GitHub Action runs link will take us to the Actions section of the linked GitHub repository:
Here we can see the details of CI/CD pipelines that the GitHub Actions Workflow triggered.
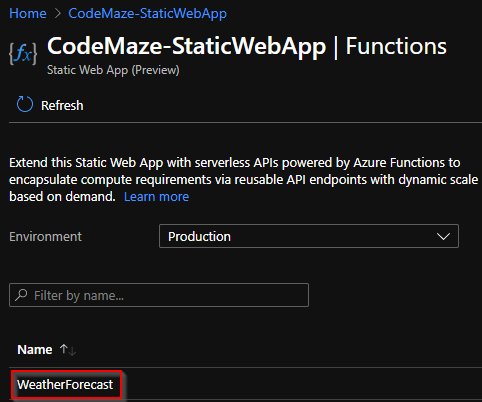
On navigating to the Functions section of the Azure Static Web App, we can see the serverless API functions that we implemented as part of the solution:
Great!
Now that we have completed examining the Azure Static Web App, let’s proceed to test it.
Testing Azure Static Web Apps
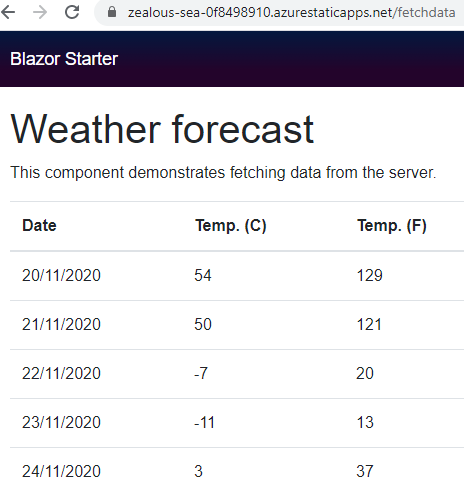
For testing the Azure Static Web App, we just need to navigate to its URL. Interestingly, unlike the App Services and Function Apps, the URL of Static Web Apps doesn’t contain the app name that we provided and instead has some random values. This could be because the Azure Static Web App is still in preview. After navigating to the application, let’s check the Fetch Data page:
We can see that the Fetch Data page retrieves data from our serverless API Function and displays it on the page.
Excellent!
We have tested the Azure Static Web App that we had just created. Now let’s take a step back and look at the architecture to understand the big picture.
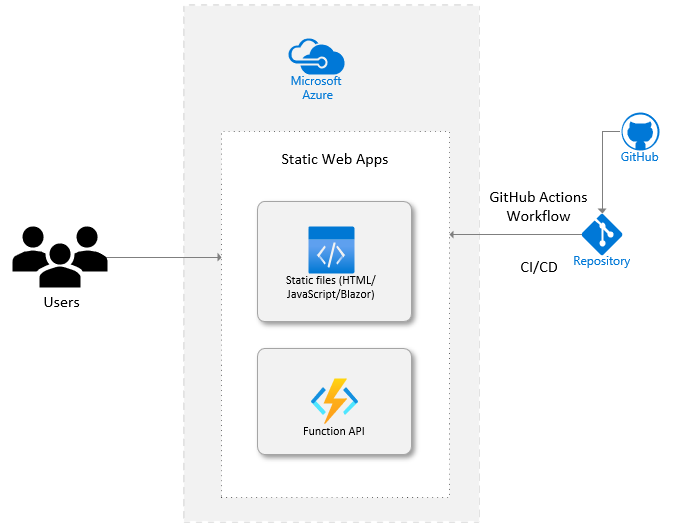
Let’s take a look at a diagram that represents deployment architecture for our scenario:
Our Static Web Application code resides in a GitHub repository. The GitHub Actions Workflow triggers CI/CD into the Azure Static Web Apps. Azure Static Web App contains static files(Blazor WASM in our example) in the client-side and Function API in the back-end. Users can access the static Web App over the internet via a URL just like how they access any other applications hosted in Azure.
Conclusion
We have learned the following concepts as part of this article:
- What an Azure Static Web App is
- Building a Blazor Application with a serverless back-end using Blazor Starter Template
- Testing a Blazor Application with serverless back-end locally
- Creating Azure Static Web Apps from Portal
- Configuring the GitHub Actions Workflow for Azure Static Web Apps
- Testing the Azure Static Web Apps


