

As a continuation of a previous post (where we learned how to use subscription), we will now implement that subscription to our HTTP requests to display the data on the page. Furthermore, we are going to use the advantage of Angular Lazy Loading, by using another module in our application – the owner module.
For complete navigation and all the basic instructions of the Angular series, check out the Introduction of the Angular series.
So, let’s start.
Create a New Module
So let’s start with the Angular CLI command for the module creation:
ng g module owner --routing=true --module app.module
This command does several things. It creates a new Owner module, it also creates a routing file for that module, and finally, updates the App module file:
CREATE src/app/owner/owner-routing.module.ts (248 bytes)
CREATE src/app/owner/owner.module.ts (276 bytes)
UPDATE src/app/app.module.ts (989 bytes)
Let’s inspect the owner.module.ts file:
import { NgModule } from '@angular/core';
import { CommonModule } from '@angular/common';

import { OwnerRoutingModule } from './owner-routing.module';


@NgModule({
  declarations: [],
  imports: [
    CommonModule,
    OwnerRoutingModule
  ]
})
export class OwnerModule { }
There are two small differences between this module file and the app module file. The first difference is that in the app module file we have an import statement for the BrowserModule, and in the owner module file, we have an import statement for the CommonModule. That’s because the BrowserModule is only related to the root module in the application.
The second difference is that we don’t have the providers array inside the owner module file. That’s because we should register all the services in the root module. That way components will inject the same instance of the service only once and you can keep the state in your service.
Of course, if we really want to register a service inside any child module, we could just add the providers array. But, by doing so we cannot keep the state inside our service because every time we create a new instance of that component a new instance of a service is created.
Finally, we can see that this module imports the OwnerRoutingModule from a separate file.
Owner Component and Angular Lazy Loading
Let’s start with the creation of the owner component files:
ng g component owner/owner-list --skip-tests
This command is going to create the required folder structure and it is going to import this component inside the owner.module.ts file as well.
What we want now is, when we click on the “Owner-Actions” menu, to show the content from this component’s HTML file. So first, just for the testing purposes, let’s modify the owner.component.html file by adding one paragraph (<p> tag):
<p>This is owner-list component page.</p>
After that, let’s modify the app-routing.module.ts file:
const routes: Routes = [
  { path: 'home', component: HomeComponent },
  { path: 'owner', loadChildren: () => import('./owner/owner.module').then(m => m.OwnerModule) },
  { path: '404', component: NotFoundComponent },
  { path: '', redirectTo: '/home', pathMatch: 'full' },
  { path: '**', redirectTo: '/404', pathMatch: 'full' }
];
With the modified part of the code, we are configuring the app-routing.module to load the owner module whenever someone searches for the http://localhost:4200/owner endpoint. As we can notice, we are using the loadChildren property which means, that the owner module with its components won’t be loaded until we explicitly ask for them. By doing this, we are configuring Angular lazy loading from the owner module content.
Now if we navigate to the Home page, we will get only resources from the root module, not from the owner module. And only by navigating to the owner-actions menu, we will load the owner module resources into the application. From the previous statement, we can see why is Angular lazy loading important for Angular applications.
Routing for the Owner Module
Now, to enable navigation to the OwnerList component, we have to modify the owner-routing.module.ts:
import { NgModule } from '@angular/core';
import { RouterModule, Routes } from '@angular/router';

import { OwnerListComponent } from './owner-list/owner-list.component';

const routes: Routes = [
  { path:'list', component: OwnerListComponent }
];

@NgModule({
  imports: [RouterModule.forChild(routes)],
  exports: [RouterModule]
})
export class OwnerRoutingModule { }
With this setup, we are exposing our OwnerListComponent on the http://localhost:4200/owner/list endpoint. Moreover, we are using the RouterModule.forChild function and not the forRoot function. This is the case because we should use the forRoot function only in the root module of the application.
Now we have to modify the menu.component.html file:
<div class="collapse navbar-collapse" id="collapseNav" [collapse]="!isCollapsed" [isAnimated]="true">
  <ul class="navbar-nav me-auto mb-2 mb-lg-0">
    <li class="nav-item">
      <a class="nav-link" [routerLink]="['/owner/list']" routerLinkActive="active"
      [routerLinkActiveOptions]="{exact: true}"> Owner Actions </a>
    </li>
    <li class="nav-item">
      <a class="nav-link" href="#">Account Actions </a>
    </li>
  </ul>
</div>
After all of these modifications, we can run our app and click the Owner Actions link. As soon as we do that, our new component will show up, and the link will get an active class style:
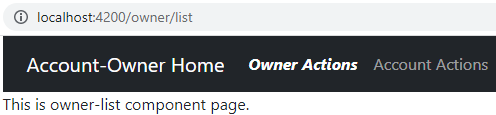
Now we know how to set up the routing for the child module, and for the component inside that module as well.
Subscription and Data Display
Let’s continue on.
When we navigate to the Owner Actions menu, we want to show all of the owners to the user. So that means when the owner component loads, the app automatically gets all the owners from the server.
We already have our Owner interface created (from the previous post) and we will use it here.
That said, let’s modify the OwnerListComponent file:
import { Component, OnInit } from '@angular/core';

import { Owner } from './../../_interfaces/owner.model';
import { OwnerRepositoryService } from './../../shared/services/owner-repository.service';

@Component({
  selector: 'app-owner-list',
  templateUrl: './owner-list.component.html',
  styleUrls: ['./owner-list.component.css']
})
export class OwnerListComponent implements OnInit {
  owners: Owner[];

  constructor(private repository: OwnerRepositoryService) { }

  ngOnInit(): void {
    this.getAllOwners();
  }

  private getAllOwners = () => {
    const apiAddress: string = 'api/owner';
    this.repository.getOwners(apiAddress)
    .subscribe(own => {
      this.owners = own;
    })
  }

}
We have the owners property with the and it is of the Owner array type. Next, we execute the subscribe function, which is going to populate that property with all the owners from the server. Using that owners property to create our HTML page is what we aim for.
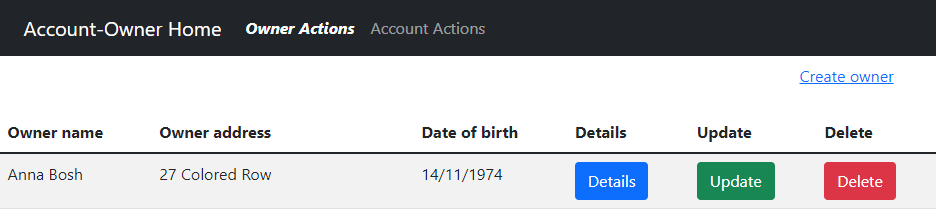
To accomplish that, let’s modify the HTML component:
<div class="row">
  <div class="offset-10 col-md-2 mt-2"> <a href="#">Create owner</a> </div>
</div> <br>
<div class="row">
  <div class="col-md-12">
    <div class="table-responsive">
      <table class="table table-striped">
        <thead>
          <tr>
            <th>Owner name</th>
            <th>Owner address</th>
            <th>Date of birth</th>
            <th>Details</th>
            <th>Update</th>
            <th>Delete</th>
          </tr>
        </thead>
        <tbody>
          <tr *ngFor="let owner of owners">
            <td>{{owner.name}}</td>
            <td>{{owner.address}}</td>
            <td>{{owner.dateOfBirth | date: 'dd/MM/yyyy'}}</td>
            <td><button type="button" id="details" class="btn btn-primary">Details</button></td>
            <td><button type="button" id="update" class="btn btn-success">Update</button></td>
            <td><button type="button" id="delete" class="btn btn-danger">Delete</button></td>
          </tr>
        </tbody>
      </table>
    </div>
  </div>
</div>
We could split this html file into two components (the parent component: OwnerList and the child component Owner). But because we didn’t explain how to use child components, which we’ll do in the next posts, we are going to leave it like this for now.
We use some basic Bootstrap classes to create a table showing the owner’s data. Inside that table, we loop over all the owners with the *ngFor directive. Then by using interpolation {{}}, we show owner properties on the page. For the dateOfBirth property, we are using just the Date pipe | date: 'dd/MM/yyyy' to format it the way we want to see it on a screen.
In our application, we are going to use the date format as MM/dd/yyyy, but here we are going to use dd/MM/yyyy just to demonstrate the way to change the format with pipes without too much effort.
Now, we can start our server app, which you can find on this GitHub repo. Once we start it, we can run our Angular app and navigate to the Owner Actions link:
Conclusion
By reading this post we have learned how to create a new module and what imports to use. Additionally, we’ve learned the way to configure Angular lazy loading and how it can help our application.
Also, now we know how to execute HTTP requests with a subscription and display result data on the page, and the way to reformat our date when displaying it.
In the next part of the series, I am going to show you my way of error handling while sending HTTP requests. Moreover, we are going to create a Details page for the single owner.

If you get results from the API but nothing shows up in the table except for buttons, you need to change the case on the Owner object properties to capitalize the first letter, which is how it is being returned by the API. As soon as I did that, the data appeared and the cells were not blank.
I double-checked things and tried various suggestions, but I can’t get beyond this error when trying to view the owner list
“Media type not present. Please add Accept header with the required media type.”
I see the code in owner-repository.service.ts generates headers for post and put, but not for get.
Just want to add that my code includes changes from https://code-maze.com/hateoas-aspnet-core-web-api/ which is what is throwing the error. It seems that it expects an Accept header from the angular call, which is not provided for Get.
I solved the issue by adding headers to the Get request
const headers = { ‘Accept’: ‘application/json’ };
return this.http.get<Owner[]>(this.createCompleteRoute(route, this.envUrl.urlAddress), { headers });
hi, the data you get in the owner list component name address dob etc where does that data come from we created an interface but i’m confused where the data comes from
an json serveror anything
Hello. This article is part of the Angular series, you can find the link to see all the articles from the series at the top of this article.
Now, in the previous article, we have created a repository file that sends an HTTP request to the API. In this one, once you create the OwnerList component, inside the .ts file, we call that method from the repository with:
private getAllOwners = () => {
  const apiAddress: string = 'api/owner';
  this.repository.getOwners(apiAddress)
  .subscribe(own => {
   this.owners = own;
  })
 }
As you can see the “this.repository.getOwners” will call the method from the repository and subscribe to the result.
So, this is where we get our data.
Hello Ben. My suggestion. Go through each article from the series and clear the cache on each post CTRL+F5. You are seeing some cached things currently from the previous posts. Once you clear the cache and visit the previous article in the series, the one working with HTTP, you will find both owner repository and the owner interface created.
Hi Marinko, I just tried Chrome Incognito and sure enough, the missing steps are there. 🙂 In my other Chrome tabs I can open Chrome Dev Tools then right-click-hold the refresh button and click Empty Cache and Hard Reload.
Thank you for your guidance and support.
Just curious… is it possible to please remove my large profile pic from the previous post? I did not realize it would come through as “larger than life” per se… ha, I don’t need to promote “self”. I was trying to have it appear as the smaller post pic on the left side but I can’t seem to figure out where you set that option on this blogging/comment platform.
Best regards.
Done. If you still see it, just clear the cache. All the best.
Thank you.
Hi there, I’ve been traipsing through the various series’ for several weeks now… very nice, lots to learn, that’s for certain! Actually, I was having to fit in some fixes on my end since I’d been using Angular 13, and was having issues with Bootstrap 5 & jQuery.
But then lo and behold yesterday I happened to either refresh one of the tut browser tabs I’ve had opened for days, or I checked the git repo, and noticed the source was updated 5 hours before to Angular 13! What! 🙂 It was a nice surprise. I started comparing the old guide tutorial notes against the new, Parts 7, 8, 9, etc, and found too many differences that I just started over at Angular Part 7 instead of trying to piecemeal in and retrofit the code blocks.
No worries though, still thankful just the same.
Best regards.
Hello Ben. Yes, I’ve cimpletely recreated this Angular series. I am sorry that it got you in the middle of the way but trust me this one is so much better. No JQuery or JqueryUI libraries. Now, you have ngx-bootstrap that provides only angular components, so we are Angular all the way. Much cleaner and better solution. I am pretty sure you will find it that way as well.
Thanks for a very good series. Dont know why when I run api alone it returns data but when I run angular form it just shows headers of the table and no data /Owners is returned. Any clue ?
Well, it can be many things. Have you tried opening developer tools and inspecting the Network tab once you send the request, probably you can find some info there? Also, try downloading our source code and comparing it with yours, maybe you missed something. Check if the request from your angular app even gets to the API’s endpoint… As I said, there can be many reasons.
Thanks for your quick response. Actually its status is pending due to unknown reason. Whole page is rendered except this get request. HTTPS issue ?
I can’t really be sure. Have you tried comparing it to our project? I never faced something similar with our project.
Issue is resolved. Actually port number which returns data when VS IIS express is run when pasted in the browser cannot be used in angular enviornment class. Changed webapi output to console application and got the actual port from console and used that in enviornment class.
Thanks for your timely responses
Hi, I have successfully completed pt10 of this series. When I run the server and client I get a CORS policy error in the console and no data is retrieved from the API. Is there something wrong with the Startup.cs and ServiceExtensions.cs code? It should work out of the box but doesn’t. I am using .NET 5
Hello James. It should work as shown in our articles. Have you tried comparing your solutions with ours? You can also download our source code (part 6 for the server app and part 10 for the client app) and test it on your machine.
Hi Marinko, you are correct. The problem is solved as my launchSettings.json was wrong. Thankyou.
For anyone else having this issue, I had to modify the following to use “name:” and then move app.UseCors(“CorsPolicy”) above other middleware.
options.AddPolicy(name: “CorsPolicy”,
builder => builder.AllowAnyOrigin()
.AllowAnyMethod()
.AllowAnyHeader());
Thanks Sam B,
I had the same issue and I did not know what to do as everything I did was the same as mentioned here in this great series, you made my day!
Thanks Again and many thanks for Marinko! you’re Awesome!
My code is written link this in app-routing.module.ts
import { NgModule, Component } from ‘@angular/core’;
import { Routes, RouterModule } from ‘@angular/router’;
import { HomeComponent } from ‘./home/home.component’;
import { MenuComponent } from ‘./menu/menu.component’;
import { NotFoundComponent } from ‘./error-pages/not-found/not-found.component’;
//import { OwnerModule} from ‘./owner/owner.module’
const routes: Routes = [
{ path: ‘home’, component: HomeComponent},
{ path: ”, redirectTo: ‘/home’, pathMatch: ‘full’ },
{ path: ‘404’, component : NotFoundComponent},
{ path: ‘**’, redirectTo: ‘/404’, pathMatch: ‘full’},
{ path: ‘owner’, loadChildren: () => import(‘./owner/owner.module’).then(m => m.OwnerModule) },
];
and in owner-module.ts
import { NgModule } from ‘@angular/core’;
import { CommonModule } from ‘@angular/common’;
import { OwnerListComponent } from ‘./owner-list/owner-list.component’;
import { RouterModule } from ‘@angular/router’;
@NgModule({
declarations: [OwnerListComponent],
imports: [
CommonModule,
RouterModule.forChild([
{ path: ‘list’, component: OwnerListComponent }
])
]
})
but it is redirect me on the error page, can you help me how to resolve and where I doing mistake, because I am unable to find the error and any warning as well as solution. I used routing file separately as par tutorial https://code-maze.com/angular-material-navigation/#creatingroutes
I can try to help you.
In the app-routing.module file you don’t have a CommonModule imported and in the imports array. Then, could you place your lazy loading to the second place, right below the route to the home component in the routes array in the same file. Also if you want to be completely sure that you are doing the right thing, please visit this repo and inspect these three files: https://github.com/CodeMazeBlog/angular-material-series/tree/material-table/ang-material-OwnerAccount/src/app
https://github.com/CodeMazeBlog/angular-material-series/blob/material-table/ang-material-OwnerAccount/src/app/owner/owner.module.ts
https://github.com/CodeMazeBlog/angular-material-series/blob/material-table/ang-material-OwnerAccount/src/app/owner/owner-routing/owner-routing.module.ts
Here you will find the lazy loading implemented with all the separate files, so you could compare with your code.
Modules, components, services, declarations, subscriptions… Oh man! 🙂
I never ever used angular for my frontend and it seems it’s developed especially for people who wants more control over whats happening on frontend side.
Probably I’ll finish the angular part and read it again. 🙂
Anyway thanks for great articles.
Hello Mursel. Just take your time and go step by step. It has a lot of things to learn, but it is a great framework, for me, the best one (Just personal opinion). I hope you will enjoy entire series. Best regards.
Doesn’t the “RepositoryService” be added into the owner.module.ts file? as a provider?? it throw an exception and adding the repo solved. Kindly clarify
Hello. You don’t need to add it to the owner.module.ts file. What so ever, you don’t need to add it to the app.module file (from angular 6+ version) because it is already provided in the root of your app. For more clarification, please read the previous article in this series, or at least this complete part: http://34.65.74.140/net-core-web-development-part9/#angularServices All the best
Is it not considered best practice to retrieve data within a resolve method in the router?
Hello ccpony. It is a good practice. You need a separate resolver service to do that. A little more steps but it works fine because a data is fetched prior navigating to our page.
Greetings Marinko and Vladimir I am amazed by the quality of the learning code you provide!
At this point I also created the Accounts List and all the data are being displayed perfectly. Although I wanted to show on the three collumns also the Name of the Account owner. So I went back to create the new API Call.
My solutions were a little dumb and provided 1) a foreach 2) an IQueryable join which I did not like.
How would you solve joining the tables?
Hello Akis. If you remember our previous conversation, where I explained to you how to populate AccountExtended object, the solution to this problem is the same. You need one request in which you will collect a list of AccountExtended objects (in the same way as I have explained to you in our conversation). Then on the client side you are going to have an array of AccountExtended objects where you can iterate through it and display an Owners name something like this: account?.owner.name… (for example)
Hope this helps. Just keep it going with a hard work, it always pays of.
Solid article.
Could be just in my case and it’s really small issue, easily solved by everyone, but this line inside owner-list.component.ts causes error
“import { RepositoryService } from ‘app/shared/services/repository.service’;”
error:
“ERROR in src/app/owner/owner-list/owner-list.component.ts(2,35): error TS2307: Cannot find module ‘app/shared/services/repository.service’.”
solution, use this path:
“import { RepositoryService } from ‘./../../shared/services/repository.service’;”
Hello mate. Well, I am using the AutoImport extension in Visual Studio Code and it is performing all the imports for my side. And, to this day I have never noticed that it is offering two paths: one like mine and one like yours. For me, both are working correctly but I believe you are right. All my other imports in that file are similar to your path “./../..” so I am going to modify this in the article as well.
Thank you very much for the suggestion.
Great tutorial!
One thing that is missing is that you need to add RepositoryService to the providers array in app.module.ts
providers: [
EnvironmentUrlService,
RepositoryService
],
Hi Bill. First of all thank you for the reading and commenting. You are totally right, I forgot to mention that part. You must include the RepositoryService inside the app module. Thank you very much for this suggestion, I am going to fix this in the HTTP part of this series. I am glad you like the tutorial series.
All the best mate.
You don’t need this if you use Angular 6+ method of providing services:
@Injectable({
providedIn: ‘root’,
})
when i click on link owner action its happened :
core.js:1448 ERROR Error: Uncaught (in promise): TypeError: __webpack_require__.e is not a function
TypeError: __webpack_require__.e is not a function
at webpackAsyncContext (eval at ./src/$$_lazy_route_resource lazy recursive (main.bundle.js:13), :11:29)
at SystemJsNgModuleLoader.loadAndCompile (core.js:6558)
at SystemJsNgModuleLoader.load (core.js:6542)
at RouterConfigLoader.loadModuleFactory (router.js:4589)
at RouterConfigLoader.load (router.js:4569)
at MergeMapSubscriber.eval [as project] (router.js:2061)
at MergeMapSubscriber._tryNext (mergeMap.js:128)
at MergeMapSubscriber._next (mergeMap.js:118)
at MergeMapSubscriber.Subscriber.next (Subscriber.js:92)
at ScalarObservable._subscribe (ScalarObservable.js:51)
at resolvePromise (zone.js:809)
at resolvePromise (zone.js:775)
at eval (zone.js:858)
at ZoneDelegate.invokeTask (zone.js:421)
at Object.onInvokeTask (core.js:4740)
at ZoneDelegate.invokeTask (zone.js:420)
at Zone.runTask (zone.js:188)
at drainMicroTaskQueue (zone.js:595)
at ZoneTask.invokeTask [as invoke] (zone.js:500)
at invokeTask (zone.js:1517)
Hi Leonardo. Thank you very much for reading the post. About the error. It is so large, one of those generic errors in the Angular and it doesn’t say to much. I have tried to scramble my code in so many ways to reproduce this error but I couldn’t do it 😀 So I have two suggestions for you. First one is to download the source code from this post and to compare it with your own. Second one is to upload your code somewhere and to share link with me, then I will take a look at it and will try to find the origin of this error. I would like to hear from you. All the best.
ok i Will try this.
vou will continue the post part 11 ?
Yes of course. In Monday the part 11 is going to be published. It is going to be continuation to this part. If you like my posts and find them useful, you may subscribe to the Code-maze. Then you are going to be notified when ever new article is published. Thank you one more time for reading our posts.
I cannot wait for the rest of the posts. I like of style of writing. You make hard to understand concept very easy to comprehend. Is there a reason you did not use the SPA Angular template in Visual Studio? Does the template offers any benefits than the app created by the cli? One thing I noticed about the template, it might not be suitable for large project since the front-end and the back-end are all in one project.
Hello Sumu. I am very glad that you like our posts and find them useful. Thank you very much for the reading and for all the nice words. About your question, well… you gave the right answer 😀 I am not using the VS template because I like to keep client side coding complete separate from the server side. So the main reason is the separation of concerns. I am not saying that VS template for angular is bad or anything like that, just this is my style and how I prefer to write a project.