In this article, we are going to learn how to implement Lazy Loading in Blazor WebAssembly. Lazy Loading enables us to improve the startup speed of our Blazor WebAssembly application by delaying the download of the resources we do not require yet. For example, if we have a large Blazor WebAssembly application, and our users just want to access the home or the contact page, there is no point in downloading all those files related to the products, authentication, etc. With lazy loading implemented, the app will download all these resources only when the user asks for them.
So let’s get started.
A New Blazor WebAssembly Project Creation
We are going to start by creating a new project and then explaining how to implement Lazy Loading in Blazor WebAssembly with an example.
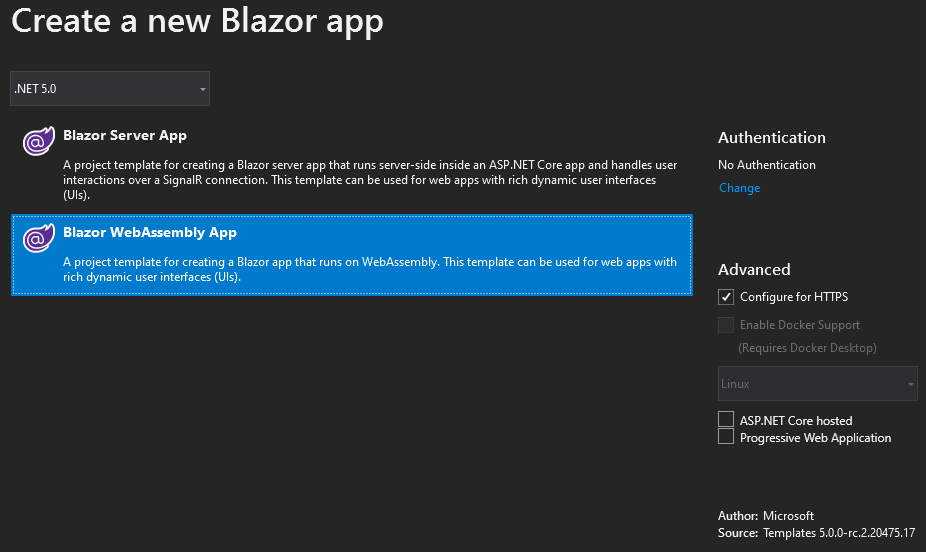
That said, let’s create a new Blazor WebAssembly project:
You can choose any name you want, but we named it Blazor WasmLazyLoading.
We are going to modify the launchSettings.json file and remove the IIS profile and iisSettings:
{
  "profiles": {
    "BlazorWasmLazyLoading": {
      "commandName": "Project",
      "dotnetRunMessages": "true",
      "launchBrowser": true,
      "inspectUri": "{wsProtocol}://{url.hostname}:{url.port}/_framework/debug/ws-proxy?browser={browserInspectUri}",
      "applicationUrl": "https://localhost:5001;http://localhost:5000",
      "environmentVariables": {
        "ASPNETCORE_ENVIRONMENT": "Development"
      }
    }
  }
}
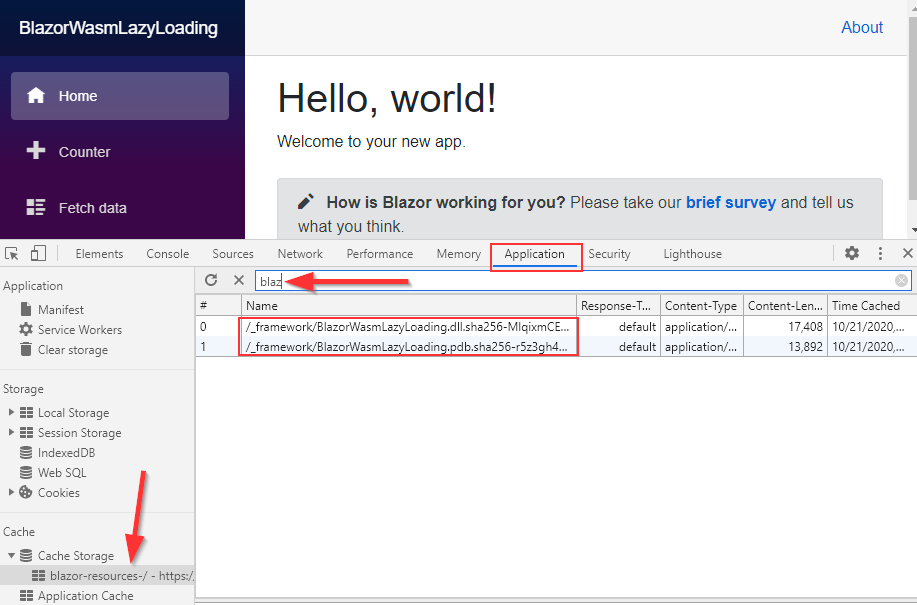
Now, if we start our application, open the Dev Tools window (F12), navigate to the Application tab, and inspect the cache:
We can see that our BlazorWasmLazyLoading.dll file is downloaded and cached, which is a normal thing, but this also means that all the components in this DLL are downloaded, even though we are still on the Home page, and didn’t navigate anywhere else. Of course, for small applications like this one, this is not an issue at all. But for the larger application, it could increase the download speed significantly. So, let’s learn how to prevent that.
Adding a new Razor Class Library to Extract Components from the Main Project
In our main project, next to the Home page, we have the Counter and FetchData pages. The FetchData page just fetches the data from the local file and displays them on the screen. In a real-world project, a component like this one would fetch data from a server and have a lot of child components like paging, sorting, filtering, searching, edit, update, etc. As you can see, a lot of resources to download even if we never navigate to the FetchData page. That said, we can agree that this component is a perfect one for our lazy loading example.
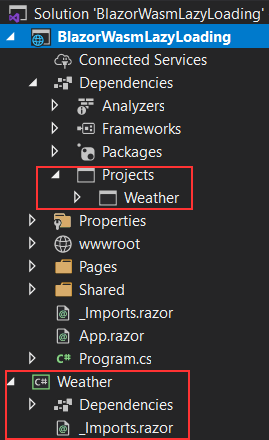
So, let’s create a new Razor class library project, name it Weather, and remove everything inside it except the _Imports.razor file. Also, we have to reference this project from the main one:
Now, let’s move the FetchData component file from the main project to the Weather project.
After we move the component file, we have to add required namespaces to the _Import.razor file in the Weather project:
@using Microsoft.AspNetCore.Components.Web
@using System.Net.Http
@using System.Net.Http.Json
These two namespaces are required for the HttpClient logic inside the FetchData component.
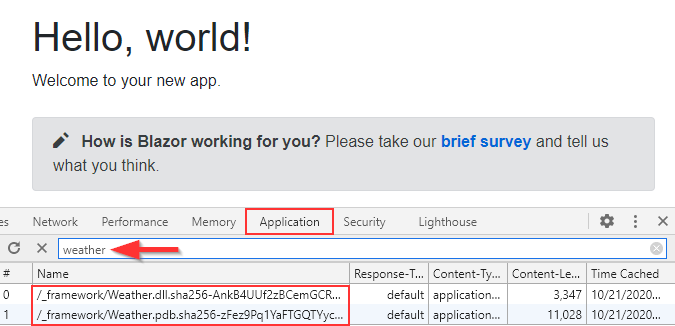
At this point, we have our two projects, but just because we created a new project it doesn’t mean it will not load as soon as the application starts. Well, we can confirm this by just starting our application and inspecting the cache as we previously did:
You can see that we are on the Home page, but nevertheless, the Weather.dll is downloaded. This means, we require an additional logic here, but at least, we are on the right track.
Implementing Lazy Loading in Blazor WebAssembly
In order to implement Lazy Loading in Blazor WebAssembly, we have to start with the main project file modification. So, let’s right-click on the BlazorWasmLazyLoading project and choose the EditProjectFile option:
<Project Sdk="Microsoft.NET.Sdk.BlazorWebAssembly">

    <PropertyGroup>
        <TargetFramework>net5.0</TargetFramework>
    </PropertyGroup>

    <ItemGroup>
        <PackageReference Include="Microsoft.AspNetCore.Components.WebAssembly" Version="5.0.0-rc.2.20475.17" />
        <PackageReference Include="Microsoft.AspNetCore.Components.WebAssembly.DevServer" Version="5.0.0-rc.2.20475.17" PrivateAssets="all" />
        <PackageReference Include="System.Net.Http.Json" Version="5.0.0-rc.2.20475.5" />
    </ItemGroup>

    <ItemGroup>
        <ProjectReference Include="..\Weather\Weather.csproj" />
    </ItemGroup>

    <ItemGroup>
        <BlazorWebAssemblyLazyLoad Include="Weather.dll" />
    </ItemGroup>

</Project>
We have to use the BlazorWebAssemblyLazyLoad item group to delay the loading of an assembly. That’s exactly what we do here.
Now, let’s save a file and rebuild a solution.
After that, we can start the project and inspect the cache files:
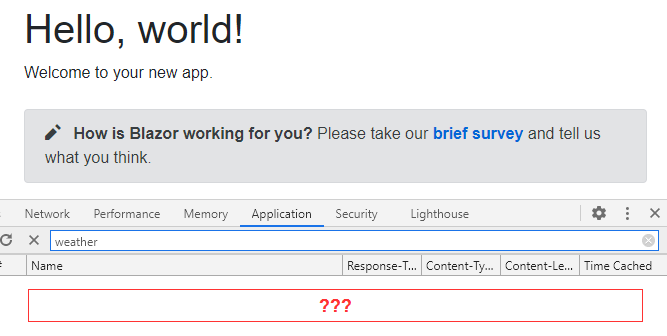
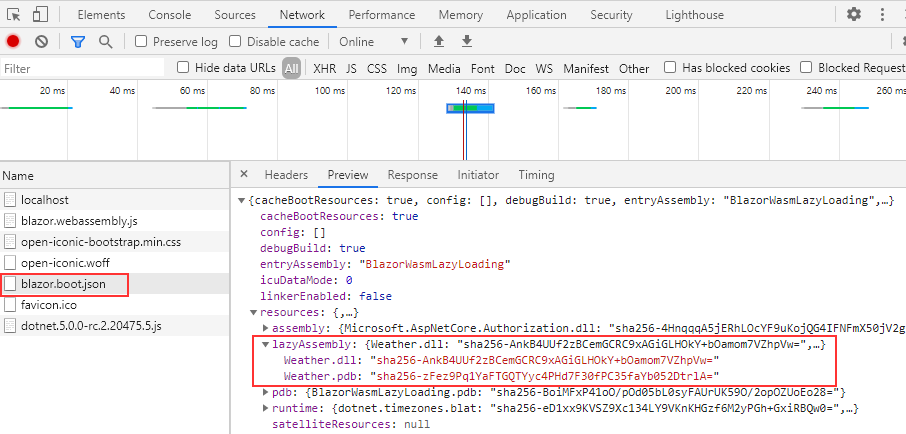
We can’t see the Weather.dll anymore. So, this means it is not loaded yet, which is great. Also, if we navigate to the Network tab, refresh the page, and inspect the blazor.boot.json file:
We can see that the lazyAssembly property is populated now (previously it was null).
Great.
But as soon as we try to navigate to the FetchData page, we are going to get a generic not found page instead. That’s because we need to load the Weather.dll before we navigate to the FetchData page.
Modifying App.razor File to Load the Required DLL
Let’s open the App.razor file and modify it:
@using System.Reflection
@using Microsoft.AspNetCore.Components.WebAssembly.Services
@inject LazyAssemblyLoader AssemblyLoader

<Router AppAssembly="@typeof(Program).Assembly"
        OnNavigateAsync="OnNavigateAsync"
        AdditionalAssemblies="_lazyLoadedAssemblies">
    <Found Context="routeData">
        <RouteView RouteData="@routeData" DefaultLayout="@typeof(MainLayout)" />
    </Found>
    <NotFound>
        <LayoutView Layout="@typeof(MainLayout)">
            <p>Sorry, there's nothing at this address.</p>
        </LayoutView>
    </NotFound>
</Router>
@code
{
    private List<Assembly> _lazyLoadedAssemblies = new List<Assembly>();

    private async Task OnNavigateAsync(NavigationContext context)
    {
        if (context.Path == "fetchdata")
        {
            var assemblies = await AssemblyLoader.LoadAssembliesAsync(new[] { "Weather.dll" });
            _lazyLoadedAssemblies.AddRange(assemblies);
        }
    }
}
First, we import the required using directives and inject the AssemblyLoader to be able to load our assembly. Then in the Router component, we assign the OnNavigateAsync method to the OnNavigateAsync event callback. The OnNavigateAsync event callback triggers the event before navigating to a new page. Also, we populate the AdditionalAssemblies property. This property sets additional assemblies, from our application, to search for the components that match the required URIs.
In the @code part, we create a private list of assemblies named _lazyLoadedAssemblies and the OnNavigateAsync method with the NavigationContext parameter. Inside the method, we use the context parameter to check the currently required route. If it matches the fetchdata, which is the route of our FetchData component, we use the LoadAssembliesAsync method to load the Weather.dll dependency when the user navigates to the fetchdata route, and then add it to a _lazyLoadedAssemblies list.
Good.
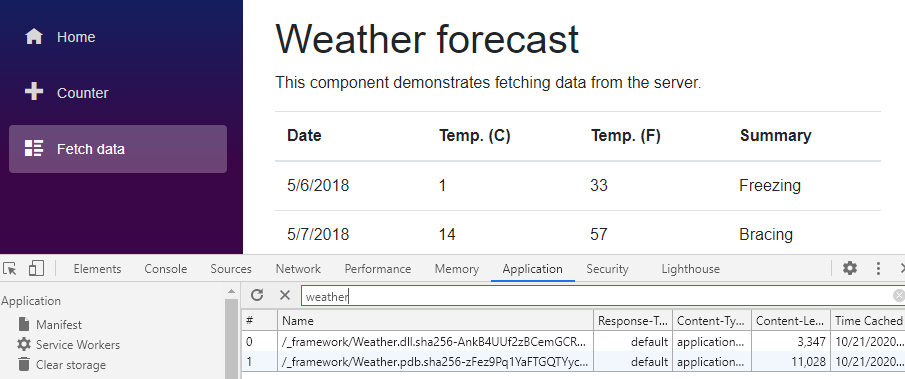
As we remember, if we start the app and inspect the cache, we won’t be able to find the Weather.dll downloaded for sure. But, as soon as we navigate to the FetchData page, we are going to see the content of the page and also we can see the dependencies downloaded:
This means, that only when we require some resources, our application will download them, which is exactly what we want.
Conclusion
Right now, we know how to load different dependencies only when we require them by using Lazy Loading in Blazor WebAssembly. As we said, this is a great feature because it allows us to speed up the loading time of our application.
Until the next article,
All the best.


