
In this article, we will learn about Integration Testing in ASP.NET Core. Additionally, we will prepare an in-memory database so we don’t have to use the real SQL server during integration tests. For that purpose, we will use the WebApplicationFactory class.
To navigate this series, you can visit ASP.NET Core Testing.
Let’s move on.
What is Integration Testing?
Integration testing ensures that different components inside the application function correctly when working together. The main difference between integration testing and unit testing is that integration testing often includes an application’s infrastructure components like a database, file system, etc. When we work with unit tests, we mock these components. But with integration testing, we want to ensure that the whole app is working as expected with all of these components combined.
Preparing a new Project for Integration Testing
So, let’s see how we can write integration tests in ASP.NET Core.
First, we are going to create a new xUnit project named EmployeesApp.IntegrationTests for integration testing purposes.
After the project creation, we are going to rename the UnitTest1.cs class to EmployeesControllerIntegrationTests.
Additionally, we are going to reference the main project and install two NuGet packages required for testing purposes:
- AspNetCore.Mvc.Testing – this package provides the TestServer and an important class
WebApplicationFactoryto help us bootstrap our app in-memory - Microsoft.EntityFrameworkCore.InMemory – In-memory database provider
Now we can continue on.
Using WebApplicationFactory class for Creating In-Memory Factory Configuration
The WebApplicationFactory class is a factory that we can use to bootstrap an application in memory for functional end-to-end tests. With .NET 6, new templates were introduced without the Startup class. This affects the implementation of WebApplicationFactory class compared to what we used to in .NET 5.
So, let’s see how we can use the WebApplicationFactory class in .NET 6 to create an in-memory factory configuration.
The first thing we are going to do is to create a new class TestingWebAppFactory and modify it:
public class TestingWebAppFactory<TEntryPoint> : WebApplicationFactory<Program> where TEntryPoint : Program
{
    protected override void ConfigureWebHost(IWebHostBuilder builder)
    {

    }
}
For this to work, we need two namespaces included:
using Microsoft.AspNetCore.Hosting;
using Microsoft.AspNetCore.Mvc.Testing;
Our class implements the WebApplicationFactory<Startup> class and overrides the ConfigureWebHost method, which allows us to configure the application before it gets built.
But we have a small problem. Our class doesn’t recognize the Program class even though we have the reference from the main project. That’s because in .NET 6 compiler generates the Program class behind the scenes as the internal class, thus making it inaccessible in our integration testing project. So to solve this, we can create a public partial Program class in the Program.cs file in the main project:
app.Run();

public partial class Program { }
After this modification, our issue will disappear in the TestWebAppFactory class.
Implementation of the ConfigureWebHost Method
After we’ve fixed our issue, we can implement the ConfigureWebHost method:
public class TestingWebAppFactory<TEntryPoint> : WebApplicationFactory<Program> where TEntryPoint : Program
{
    protected override void ConfigureWebHost(IWebHostBuilder builder)
    {
        builder.ConfigureServices(services =>
        {
            var descriptor = services.SingleOrDefault(
                d => d.ServiceType ==
                    typeof(DbContextOptions<EmployeeContext>));

            if (descriptor != null)
                services.Remove(descriptor);

            services.AddDbContext<EmployeeContext>(options =>
            {
                options.UseInMemoryDatabase("InMemoryEmployeeTest");
            });

            var sp = services.BuildServiceProvider();
            using (var scope = sp.CreateScope())
            using (var appContext = scope.ServiceProvider.GetRequiredService<EmployeeContext>())
            {
                try
                {
                    appContext.Database.EnsureCreated();
                }
                catch (Exception ex)
                {
                    //Log errors or do anything you think it's needed
                    throw;
                }
            }
        });
    }
}
A couple of things to mention here.
In the ConfigureWebHost method, we remove the EmployeeContext registration from the Program class.
After that, we add the database context to the service container and instruct it to use the in-memory database instead of the real database.
Finally, we ensure that we seed the data from the EmployeeContext class (The same data you inserted into a real SQL Server database at the beginning of this series).
With these preparations in place, we can return to the test class and start writing our tests.
Integration Testing of the Index Action
In our test class, we can find a single test method with the default name. But let’s remove it and start from scratch.
The first thing we have to do is to implement a previously created TestingWebAppFactory class:
public class EmployeesControllerIntegrationTests : IClassFixture<TestingWebAppFactory<Program>>
{
    private readonly HttpClient _client;

    public EmployeesControllerIntegrationTests(TestingWebAppFactory<Program> factory)
        => _client = factory.CreateClient();
}
So, we implement the TestingWebAppFactory class with the IClassFixture interface and inject it in a constructor, where we create an instance of the HttpClient. The IClassFixture interface is a decorator, which indicates that tests in this class rely on a fixture to run. We can see that the fixture is our TestingWebAppFactory class.
Now, let’s write our first integration test:
[Fact]
public async Task Index_WhenCalled_ReturnsApplicationForm()
{
    var response = await _client.GetAsync("/Employees");

    response.EnsureSuccessStatusCode();

    var responseString = await response.Content.ReadAsStringAsync();

    Assert.Contains("Mark", responseString);
    Assert.Contains("Evelin", responseString);
}
We use the GetAsync method to call the action on the /Employees route, which is the Index action, and return a result in a response variable. With the EnsureSuccessStatusCode method, we verify that the IsSuccessStatusCode property is set to true.
If it is false, it means that the request is not successful, and the test will fail.
Finally, we serialize our HTTP content to a string using the ReadAsStringAsync method and verify that it contains our two employees.
Right now, if we start the test runner, our test will fail due to the migration issue:
System.InvalidOperationException : Relational-specific methods can only be used when the context is using a relational database provider.
That’s because our MigrationManager class can execute migrations only with the real SQL server and not with the in-memory one. So to fix this issue, we are going to modify the try block in that class:
try
{
    if (appContext.Database.ProviderName != "Microsoft.EntityFrameworkCore.InMemory")
        appContext.Database.Migrate();
}
Now, we can run our test:
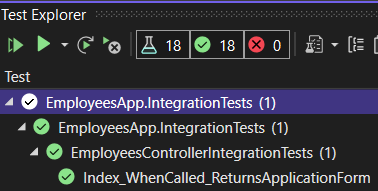
We can see that the test passed and that we successfully returned our employees from the in-memory database. If you want to ensure that we are really using the in-memory database and not the real one, you can always stop the SQLServer service in the Services window and run the test again.
Excellent!
Now, we can continue towards the integration testing of both Create actions.
Integration Testing of the Create (GET) Action in ASP.NET Core
Before we continue with testing, let’s open the Create.cshtml file, from the Views\Employees folder, and modify it by changing the h4 tag (just to have more than one word to test):
<h4>Please provide a new employee data</h4>
Great.
Now, we are ready to write our test code.
We want to verify when the Create (GET) action executes, it returns a create form:
[Fact]
public async Task Create_WhenCalled_ReturnsCreateForm()
{
    var response = await _client.GetAsync("/Employees/Create");

    response.EnsureSuccessStatusCode();

    var responseString = await response.Content.ReadAsStringAsync();

    Assert.Contains("Please provide a new employee data", responseString);
}
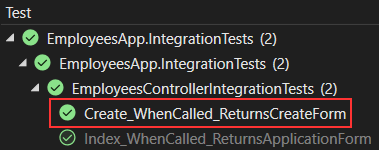
And it does.
Testing the Create (POST) Action
To continue, we will write some integration testing code for the POST action. For the first test method, we will verify that our action returns a view with an appropriate error message when the model sent from the Create page, is invalid. And yes, in a previous article, we had test methods for the invalid model, but without an HTTP request.
That said, let’s write the test code:
[Fact]
public async Task Create_SentWrongModel_ReturnsViewWithErrorMessages()
{
    var postRequest = new HttpRequestMessage(HttpMethod.Post, "/Employees/Create");

    var formModel = new Dictionary<string, string>
    {
        { "Name", "New Employee" },
        { "Age", "25" }
    };

    postRequest.Content = new FormUrlEncodedContent(formModel);

    var response = await _client.SendAsync(postRequest);

    response.EnsureSuccessStatusCode();

    var responseString = await response.Content.ReadAsStringAsync();

    Assert.Contains("Account number is required", responseString);
}
We create a post request and the formModel object as a dictionary, which consists of the elements that we have on the Create page. Of course, we didn’t provide all the elements, the AccountNumber is missing because we want to send invalid data.
After that, we store the formModel as a content in our request, send that request with the SendAsync method and ensure that the response is successful.
Finally, we serialize our response and verify assertions.
If we take a look at the Employee model class, we are going to see that if the AccountNumber is not provided, the error message should appear on the form:
[Required(ErrorMessage = "Account number is required")]
public string AccountNumber { get; set; }
That is exactly what we verify in our test method.
Now, we can run the Test Explorer:
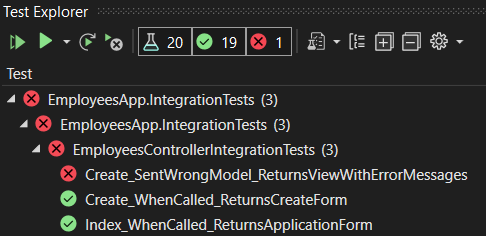
Well, this test fails. But there is nothing wrong with the code; the test code is good. For some reason, we are getting the 400 Bad Request message.
Why is that?
The ValidateAntiForgeryToken Attribute Causing Integration Test to Fail
If we open our controller and look at the Create (POST) action, we can see the ValidateAntiForgeryToken attribute. Our action expects the anti-forgery token to be provided, but we are not doing that, so the test fails. For now (just as a temporary solution), we are going to comment out that attribute and run the test again.
Now, the test passes. As we said, this is just a temporary solution. There are a couple of steps required to configure the Anti-Forgery token in our testing code, and in the next article, we are going to show you how to do that step by step. For now, let’s just continue with another test while the ValidateAntiForgeryToken is commented out.
Testing Successful POST Request
Let’s write the final test in this article, where we verify that the Create action returns the Index view if the POST request is successful:
[Fact]
public async Task Create_WhenPOSTExecuted_ReturnsToIndexViewWithCreatedEmployee()
{
    var postRequest = new HttpRequestMessage(HttpMethod.Post, "/Employees/Create");

    var formModel = new Dictionary<string, string>
    {
        { "Name", "New Employee" },
        { "Age", "25" },
        { "AccountNumber", "214-5874986532-21" }
    };

    postRequest.Content = new FormUrlEncodedContent(formModel);

    var response = await _client.SendAsync(postRequest);

    response.EnsureSuccessStatusCode();

    var responseString = await response.Content.ReadAsStringAsync();

    Assert.Contains("New Employee", responseString);
    Assert.Contains("214-5874986532-21", responseString);
}
So, this code is not too much different from the previous one, except we send a valid formModel object with the request and the assertion part. Basically, once the POST request is finished successfully, the Create method should redirect us to the Index method. There, we can find all the employees, including the created one. You can always debug your test code and inspect the responseString variable to visually confirm that the response is the Index page with a new employee.
Once we run the Test Explorer, the test will pass.
Conclusion
In this article, we have learned about integration testing in ASP.NET Core. We have created an In-Memory database to use during tests instead of the real database server. Additionally, we have learned how to test our Index action and how to write integration tests for the Create actions. This testing methodology could also be applied to other actions (PUT, Delete…).
Finally, we have seen the problem with the anti-forgery token. In the next article, we will learn how to solve that problem by introducing several new functionalities to our code.

