
Updated on
In the previous article, we have learned how to write integration tests for different actions (Index and Create), but while we were testing the Create (POST) action, we faced a problem with AntiForgeryToken validation. We skipped that problem by commenting out that validation attribute and our test passed, but that was just a temporary solution.
In this article, we are going to solve that problem. We will learn how to extract AntiForgeryToken from the HTML response and how to use it in our tests. After fixing our problem, we will be able to test our actions that are protected with the anti-forgery validation attributes.
For the complete navigation of this series, you can visit ASP.NET Core Testing.
Injecting AntiForgeryToken into the IserviceCollection
To start, let’s create the AntiForgeryTokenExtractor class in the EmployeesApp.IntegrationTests project, with two properties:
public static class AntiForgeryTokenExtractor
{
    public static string AntiForgeryFieldName { get; } = "AntiForgeryTokenField";
    public static string AntiForgeryCookieName { get; } = "AntiForgeryTokenCookie";
}
In this class, we are going to wrap all the logic required for extracting the anti-forgery field and a cookie.
For now, we just define the field and the cookie names. In a bit, we are going to add additional methods. But for now, let’s move on to the TestingWebAppFactory class, and inject our token details in IServiceCollection.
So, let’s write our code right bellow the services.AddDbContext<EmployeeContext> part:
services.AddAntiforgery(t =>
{
    t.Cookie.Name = AntiForgeryTokenExtractor.AntiForgeryCookieName;
    t.FormFieldName = AntiForgeryTokenExtractor.AntiForgeryFieldName;
});
With this code, we add the anti-forgery service in the specified IServiceCollection with the cookie and the field names. Once we do this, we can extract those properties from the HTML response by using the same names as declared in the AntiForgeryTokenExtractor class.
Extracting the Field and Cookie from the HTML Response
That being said, let’s go back to the AntiForgeryTokenExtractor class and add the required code for extracting the cookie first:
private static string ExtractAntiForgeryCookieValueFrom(HttpResponseMessage response)
{
    var antiForgeryCookie = response.Headers.GetValues("Set-Cookie")
        .FirstOrDefault(x => x.Contains(AntiForgeryCookieName));

    if (antiForgeryCookie is null)
        throw new ArgumentException($"Cookie '{AntiForgeryCookieName}' not found in HTTP response", nameof(response));

    var antiForgeryCookieValue = SetCookieHeaderValue.Parse(antiForgeryCookie).Value.ToString();

    return antiForgeryCookieValue;
}
In our code, we fetch the value of the Set-Cookie property from the Header of our response that contains the name of the defined cookie. After that, if that cookie doesn’t exist we throw an exception. Otherwise, we just parse its value and return it.
Now, we can add another method to extract the field:
private static string ExtractAntiForgeryToken(string htmlBody)
{
    var requestVerificationTokenMatch =
        Regex.Match(htmlBody, $@"\<input name=""{AntiForgeryFieldName}"" type=""hidden"" value=""([^""]+)"" \/\>");

    if (requestVerificationTokenMatch.Success)
        return requestVerificationTokenMatch.Groups[1].Captures[0].Value;

    throw new ArgumentException($"Anti forgery token '{AntiForgeryFieldName}' not found in HTML", nameof(htmlBody));
}
With this method, we are using a regex expression to extract the HTML control from the htmlBody string that contains the anti-forgery field value. If the expression is successful, we return its value, otherwise, we throw an exception.
Finally, we can create a main method that will return the results of both these methods:
public static async Task<(string fieldValue, string cookieValue)> ExtractAntiForgeryValues(HttpResponseMessage response)
{
    var cookie = ExtractAntiForgeryCookieValueFrom(response);
    var token = ExtractAntiForgeryToken(await response.Content.ReadAsStringAsync());

    return (fieldValue: token, cookieValue: cookie);
}
So, we just call both methods, collect their results and return them as a Tuple object.
That is it, we can now modify our testing methods and include AntiForgeryToken validation in the controller.
Modifying Test Methods
So, let’s start by removing a comment from the validation attribute on top of the Create action in the EmployeesController class. As soon as we do that, we can move on to the EmployeesControllerIntegrationTests class.
We are going to modify the Create_SentWrongModel_ReturnsViewWithErrorMessages method:
[Fact]
public async Task Create_SentWrongModel_ReturnsViewWithErrorMessages()
{
    var initResponse = await _client.GetAsync("/Employees/Create");
    var antiForgeryValues = await AntiForgeryTokenExtractor.ExtractAntiForgeryValues(initResponse);

    var postRequest = new HttpRequestMessage(HttpMethod.Post, "/Employees/Create");
    postRequest.Headers.Add("Cookie", new CookieHeaderValue(AntiForgeryTokenExtractor.AntiForgeryCookieName, antiForgeryValues.cookieValue).ToString());

    var formModel = new Dictionary<string, string>
    {
        { AntiForgeryTokenExtractor.AntiForgeryFieldName, antiForgeryValues.fieldValue },
        { "Name", "New Employee" },
        { "Age", "25" }
    };

    postRequest.Content = new FormUrlEncodedContent(formModel);

    var response = await _client.SendAsync(postRequest);

    response.EnsureSuccessStatusCode();

    var responseString = await response.Content.ReadAsStringAsync();

    Assert.Contains("Account number is required", responseString);
}
So, we have to send a GET request first in order to get the response, which we use to extract our anti-forgery values. Once extracted, we assign the cookie value to the Header of our POST request and assign the field value in the formModel object.
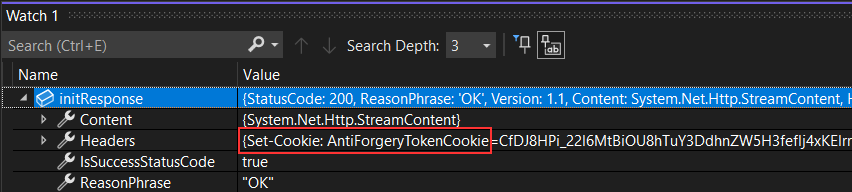
Let’s see how those cookie and field values look like in the response.
First the cookie from the response:
And the field from the HTML body:
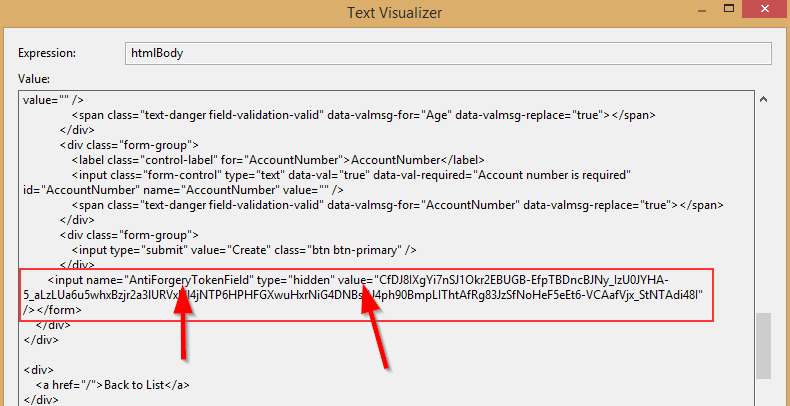
We can see that both the cookie and the field have the same names as we declared in the TestingWebAppFactory class.
Modifying Additional Test Method
Let’s add the same modifications to the Create_WhenPOSTExecuted_ReturnsToIndexView method:
[Fact]
public async Task Create_WhenPOSTExecuted_ReturnsToIndexView()
{
    var initResponse = await _client.GetAsync("/Employees/Create");
    var antiForgeryValues = await AntiForgeryTokenExtractor.ExtractAntiForgeryValues(initResponse);

    var postRequest = new HttpRequestMessage(HttpMethod.Post, "/Employees/Create");
    postRequest.Headers.Add("Cookie", new CookieHeaderValue(AntiForgeryTokenExtractor.AntiForgeryCookieName, antiForgeryValues.cookieValue).ToString());

    var modelData = new Dictionary<string, string>
    {
        { AntiForgeryTokenExtractor.AntiForgeryFieldName, antiForgeryValues.fieldValue },
        { "Name", "New Employee" },
        { "Age", "25" },
        { "AccountNumber", "214-5874986532-21" }
    };

    postRequest.Content = new FormUrlEncodedContent(modelData);

    var response = await _client.SendAsync(postRequest);

    response.EnsureSuccessStatusCode();

    var responseString = await response.Content.ReadAsStringAsync();

    Assert.Contains("New Employee", responseString);
    Assert.Contains("214-5874986532-21", responseString);
}
Additionally, we have changed the method name and a single variable in this method, for better readability. All we have to do is to verify that our tests pass:
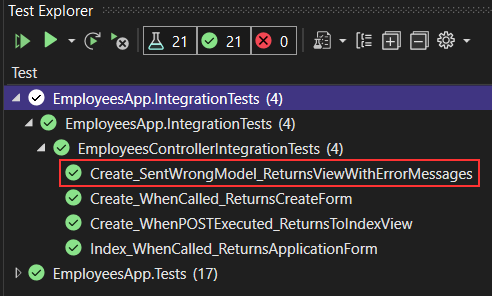
And they do.
Excellent.
Conclusion
In this article, we have learned:
- How to inject an anti-forgery service in IServiceCollection
- The way to extract the anti-forgery cookie and the anti-forgery field values from the response
- How to modify our test methods to work with AntiForgeryToken validation
In the next article, we are going to learn about UI testing with the Selenium library.

Thanks for this post, it really helped a lot.
One thing I came across:
When running different integration test cases for forms, the server will send the AntiForgeryCookie only once, because HttpClient stores it in the CookieContainer.and re-uses it for next requests. In this case it’s necessary to create a new HttpClient per test case. AntiForgeryTokenExtractor.ExtractAntiForgeryValues(…) will only succeed with the first test case.
Thank you Norbert for sharing this here.