

In this article, we are going to get started with Entity Framework Core (EF Core). We are going to go through some of the basic but crucial information that will be valuable to you when starting with an ASP.NET Core project that uses Entity Framework Core.
We strongly recommend you visit the main page for this tutorial which contains all the basic instructions and complete navigation.
What is Entity Framework Core?
Entity Framework Core (EF Core) is an object-relational mapper (ORM), that helps us work with the database through our .NET source code. It eliminates the need to write data access code and has a lot of helpful features that make our lives easier.
It’s lightweight, cross-platform, and open-source, so it’s easy to integrate it into our code base.
On the other hand, Entity Framework Core has gone through a lot of critique from developers because of what it does. It abstracts the data access layer and thus it can potentially lead to misuse due to not understanding how things work under do hood.
A valid argument, but let’s learn more about Entity Framework Core, and learn how to use it properly.
Let’s start by defining and learning what entities are first.
Entities – The Classes That Map to the Database
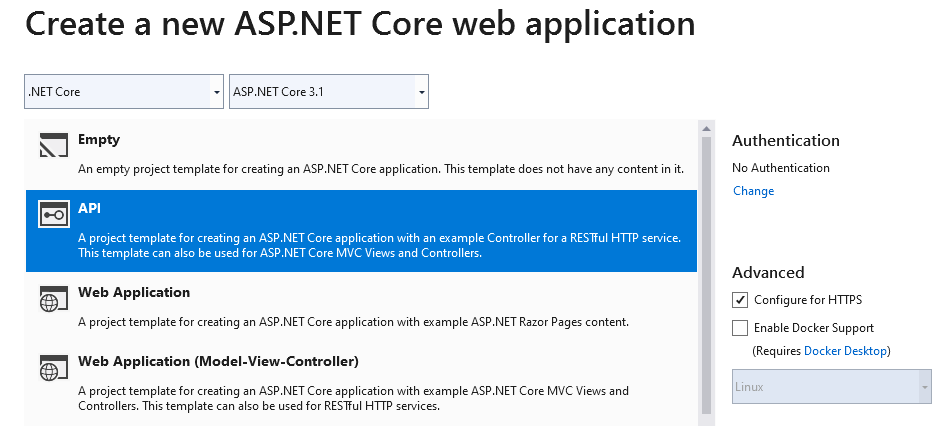
Before we start talking about entities (model classes), we need to create an ASP.NET Core project for the model classes to reside in. So, we are going to create an ASP.NET Core Web API project by using ASP.NET Core version 3.1:
We have to install the Microsoft.EntityFrameworkCore NuGet package first either with .NET CLI, Package Manager or through the Visual Studio. This is the core package we need to enable Entity Framework Core in our project. Make sure to use version 3.1.0 if you want to follow this tutorial dotnet add package Microsoft.EntityFrameworkCore --version 3.1.0.
And since we’re going to use an SQL Server database, we need to install the Microsoft.EntityFrameworkCore.SqlServer NuGet package as well (also 3.1.0).
The model (entity) class is a class that Entity Framework Core uses for mapping to the database table. So, let’s create our first entity and then explain how EF Core creates a table from the created class.
Let’s create a folder called Entities and inside it, a class called Student:
public class Student
{
    public Guid StudentId { get; set; }
    public string Name { get; set; }
    public int Age { get; set; }
}
There are a couple of rules that help EF Core to map this class to the database table and we are going to explain the whole process.
First of all, by using the name of our class, EF Core has the information on which table to use for the columns and configuration mappings (as soon as we create the context class it will become much easier to understand how EF Core knows that).
Next, all the public properties from this class are going to be mapped to the table’s columns with the same names. Finally, EF Core uses a naming convention to create a primary key.
For example, the name of the StudentId property will be used to create a primary key in the database table called Student.
We’ll learn exactly how this works.
How to Create a Connection String in Entity Framework Core?
Creating a model class or model classes is just one piece of the puzzle. In order for EF Core to have the required information about the database, we need to provide a connection string by modifying the appsettings.json file.
Placing a connection string into the appsettings.json file is a common practice (but not a good one) because we can use different appsettings files for different environments:
- appsettings.json – The base configuration file, provides the configuration for all environments
- appsettings.Development.json – Can override the settings from the base file and add new settings for the “development” environment
- appsettings.Production.json – Can override the settings from the base file and add new settings for the “production” environment
Because we are not going to publish our app to the production environment, we are going to modify the appsettings.json file:
{
  "Logging": {
    "LogLevel": {
      "Default": "Information",
      "Microsoft": "Warning",
      "Microsoft.Hosting.Lifetime": "Information"
    }
  },
  "ConnectionStrings": {
    "sqlConnection": "server=.; database=CodeMaze; Integrated Security=true"
  },
  "AllowedHosts": "*"
}
As you can see, we are providing the database server name, the name of the database itself, and the authorization information. Of course, you need to provide a valid name for the server. If you use SQL Server Express, for example, the server name would be .\\SQLEXPRESS by default.
We’re going to call our database CodeMaze in this case.
By enabling Integrated Security, we bypass the username and password. If your database has a user, you need to add username and password information to your connection string.
What is DbContext?
The context class is another important part of the application.
This class must inherit from the DbContext base class which contains information and configuration for accessing the database. So, let’s create our context class named ApplicationContext in the Entities folder:
public class ApplicationContext : DbContext
{
    public ApplicationContext(DbContextOptions options)
        :base(options)
    {
    }

    public DbSet<Student> Students { get; set; }
}
Additional options are sent to the base DbContext class through the ApplicationContext constructor by using DbContextOptions parameter. Finally, we see the Students property of type DbSet<Student> and this is an important part.
EF Core looks for all the public DbSet properties, inside the application’s context class, and then maps their names to the names of the tables in the database. Then it goes inside a class which is provided in the DbSet<T> property (in our case it is a Student class) and maps all the public properties to the table columns in the table with the same names and types (StudentId, Name, and Age).
If our Student class has any references towards other classes (right now it doesn’t but we will create relationships in the following articles), EF Core would use those reference properties and create relationships in the database.
Registering a Context Class With ASP.NET Core
After we have finished creating the ApplicationContext class, we can proceed towards its registration.
To do that, we are going to open the Startup.cs class and modify the ConfigureServices method:
public void ConfigureServices(IServiceCollection services)
{
    services.AddDbContext<ApplicationContext>(opts =>
        opts.UseSqlServer(Configuration.GetConnectionString("sqlConnection")));

    services.AddControllers();
}
We are using the AddDbContext extension method to register our ApplicationContext class into the IOC container. Inside the UseSqlSrver method we are providing the connection string to our context class and we can provide additional options as well (when it comes to that).
AddDbContext method, we can use the AddDbContextPool method. We can use either the first or the second method, but with the second method, we enable DbContext pooling. This will not create a new instance every time but will check first if there are available instances in the pool and if there are, it will use one of those.Right now our context class is ready to be used with the Dependency Injection (DI) inside our application. So let’s add the Values (API empty) controller and modify it:
public class ValuesController : ControllerBase
{
    private readonly ApplicationContext _context;

    public ValuesController(ApplicationContext context)
    {
        _context = context;
    }

    [HttpGet]
    public IActionResult Get()
    {
        //Logic with the injected _context object.
    }
}
We can see that we are injecting our context class inside the controller’s constructor, which is the usual way for DI.
To learn more about DI and IOC, and service lifetime overall, you can read the Configuring Services in ASP.NET Core part of our article.
Diving Deeper into the DbContext Class
Our ApplicationContext class currently accepts one parameter of type DbContextOptions inside a constructor. But we can provide the generic version of the DbContextOptions parameter as well:
public ApplicationContext(DbContextOptions<ApplicationContext> options)
    :base(options)
{
}
Whether we use the generic or the non-generic version of the DbContextOptions parameter, our application is going to work the same. The main difference is that the non-generic version is not recommended if our application has multiple context types, which is not the case right now.
If we navigate to the DbContext class definition, we are going to see that it has three properties inside:
- Database – This property is responsible for the Transactions, Database Migrations/Creations, and Raw SQL queries (we are going to talk about all of these in the following articles)
- ChangeTracker – This property is used to track states of the entities retrieved via the same context instance (this will be covered as well in the following articles)
- Model – This property provides access to the database model that EF Core uses when connecting or creating a database.
We can use the Model property to access the information for each entity and its properties.
But before we do that, let’s install the required Microsoft.EntityFrameworkCore.Relational package.
After the installation, we can modify our Get() action:
var entity = _context.Model
    .FindEntityType(typeof(Student).FullName);

var tableName = entity.GetTableName();
var schemaName = entity.GetSchema();
var key = entity.FindPrimaryKey();
var properties = entity.GetProperties();
These are just a few examples of using the Model property. We’re going to learn more about it as we go further in the series.
Conclusion
So far, we’ve successfully integrated Entity Framework Core inside our ASP.NET Core application and we can move on towards all the different features it provides us.
In the next article, we are going to talk about Configuring Nonrelational Properties in EF Core.

My ef Core 5 rest api is much like yours except its about hourly workers and timecards. My configuration in Startup.cs is just like yours. My derived DbContext class has the DbContextOptions constructor with base. But, when I debug, the application fails on the derived class not having a construction string. So, DoI doesn’t work, apparently? My derived class is added to the services, uses sql server, and gets the connection string by way of the Startup configuration.
Do I completely misunderstand DoI, EntityFrameworkCore 5, or some basic coding feature?
Any help would be greatly appreciated.
Thanks.
Honestly it would be much easier if you could share your GitHub repo or code sample. I am not sure what is the problem just from the description you provided.
Hi Marinko,
I see you use the Guid datatype for primary keys and I do see a case for this. Is this Microsoft best practice? Aren’t ints faster than Guids (strings) and since they are PKs, they are used often in joins and you’d want the faster performance.
Thank you.
Hi Kevin. Well, I am not sure if itnis a best practice, I don’t think so, but nevertheless I always used guids in my large projects and never had a single speed or memory problem. Yes, INT is smaller, but again, as I said, it works and it worked for me like a charm. I wouldn’t go here in pros and cons, you can find a lot abot that on Google, but I trust my expirience 🙂
OK, thanks – you answered the part about performance and memory – good to know. I like the concept, I just have always used ints without thinking about it much, but I do see an advantage. It is a bit curious that for the Id field in the AspNetUsers table, Microsoft chose to use nvarchar(450) instead of an int or guid.
Hi Marinko,
I’m reading where you say:
I’m must not exactly sure what you mean by “environment variables” – can you provide an example?
Thanks very much for this great EF series!
Hello Kevin. Thank you for the comment and for the support. About environment variables – This is much safer way of storing sensitive data, because you are not exposing them in a file such as appsettings.json which is deployed to the server. With env variables you can store your data on the machine itself and only your software can access it. You can see one example in the lunchsettins.json file in asp.net core project. There you have :
“environmentVariables”: {
“ASPNETCORE_ENVIRONMENT”: “Development”
}
which sets this variable to the Development value. Of course, you don’t have to create it like this. You can use the command window to generate and populate env variable and then just use it in your app.
In our Ultimate ASP.NET Core Web API book, we have a great example of using env variable for the authentication with JWT.
Thanks for pointing me in the right direction, Marinko. Just curious – is your book strictly online – no hard copy, right?
No, we don’t have a hard copy. But it is not strictly online, once you buy it, it is yours with all the source code and bonuses.
Sounds good.
Hi,
i am trying the same way you explained but getting an error that “Not all code paths returns a value” at public IActionResult Get() in ValuesController.cs
Please help me out.
thanks
Hello. The code you see is just a snippet requited inside the action. You must have entire action implemented. Use at keast return Ok() in your action. For all the code, you can download our source code. The link is at the begining of each article.
Hi ,
Can you please explain how to map entity types to db context in generic way.
Let i have some 100 model classes and i wanted to map it to dbcontext in generic way .
What about registering the context with AddDbContextPool? Doesn’t it make sense to always use this method? Also, in EF Core I cannot find the entity.Relational() call, are you planning to update this series to 3.0?
Hello Konstantinos. First of all, thank you for reading our series. About your questions. I didn’t use AddDbContextPool, because there is no need for it in this application, but you are completely right. It has some benefits over the AddDbContext method (due to the available contexts in the pool) and it could be used as well. I will make additional note about it in this article. Regarding your second question, we are working on updating our articles to 3.0 (or 3.1 now) but it takes time. To solve your specific problem, you have to install Microsoft.EntityFrameworkCore.Relationl package and then to use sintax like this:
     var tableName = entity.GetTableName();

     var schemaName = entity.GetSchema();

     var key = entity.FindPrimaryKey();

     var properties = entity.GetProperties();
Thank you again for the questions, I will add additional notes in the article. If you continue reading, you will find that I have already added some notes regarding the Migration article.
Best regards.
Registering a Context Class in the ASP.NET Core’s IOC
services.AddDbContext(opts =>
opts.UseSqlServer(Configuration.GetConnectionString(“sqlConnection”))); DOES NOT GET YOUR CONNECTION STRING FROM the appsettings.json Did you even run this code
First of all there is no need for the all caps letters, the lower ones are just fine. The second thing: You should check your code one more time. Everything works, I just checked the source code and the article. Check your connection string, if you have some spaces or anything that could corupt it. And finally, please don’t waste your energy on a hate. If you find some mistake in any article, not just ours, be so kind and kindly report it, you don’t need to hate all the world around you. There is no any sastisfaction in that.
Good read!
Could the further series done via CLI? As much as all steps possible 🙂
It will add value to the developers in Unix based systems as well, like Ububtu users.
And also I believe doing projects more via CLI based approach add more value to understand more, deeper sense in many ways.
Well if only possible as I am very much happy to read and look forward to the future editions.
Thank you.
Hello Anit. Thank you for reading and commenting as well. I must admit that I am more of a Visual Studio Windows guy 😀 , but your suggestion makes sence and we are going to see to do something about it. I hope you will enjoy our other articles from the series. Best regards.
My pleasure Marinko! Looking forward read the further series.
Excellent written and explained article.
Thank you Ilija. This is a starting point for this series, in other articles we are going to go in more detailed explanations. We hope you will enjoy them as well. Best regards, and have a nice Monday 😀
Hi ,
Can you please explain how to map entity types to db context in generic way.
Let i have some 10 model classes and i wanted to map it to dbcontext in generic way .