

In this article, we are going to learn how to send emails using FluentEmail in an ASP.NET Core Web API application.
FluentEmail is a popular open-source library for sending emails from .NET applications. It provides an easy-to-use fluent interface. That means we can easily create an email message, add recipients, set the subject, etc. by chaining methods. Furthermore, we can define email templates using popular markup syntaxes like Razor or Liquid templates and reuse them.
So let’s get going.
VIDEO: Send Emails in ASP.NET Core With Fluent Email.
Configure FluentEmail in .NET
Now let’s see how we can use FluentEmail in an ASP.NET Core Web API application.
Let’s start by creating an ASP.NET Core Web API project by using the dotnet new command:
dotnet new webapi
After that, let’s configure FluentEmail in the project.
FluentEmail NuGet Packages
To configure FluentEmail, the first step is to add the FluentEmail NuGet packages.
FluentEmail provides a bunch of NuGet packages with different functionalities. That said, we are going to add a couple of packages that provide the basic functionalities for sending an email:
dotnet add package FluentEmail.Core
dotnet add package FluentEmail.Smtp
FluentEmail.Core is the core package that provides all the basic functionalities. This is included with most other FluentEmail packages. For sending emails using an SMTP server, we can use FluentEmail.Smtp NuGet package.
Email Service
The next step is configuring the FluentEmail services.
For that, first, we need to create an extension method:
public static class FluentEmailExtensions
{
    public static void AddFluentEmail(this IServiceCollection services,
        ConfigurationManager configuration)
    {
        var emailSettings = configuration.GetSection("EmailSettings");

        var defaultFromEmail = emailSettings["DefaultFromEmail"];
        var host = emailSettings["SMTPSetting:Host"];
        var port = emailSettings.GetValue<int>("Port");
        var userName = emailSettings["UserName"];
        var password = emailSettings["Password"];

        services.AddFluentEmail(defaultFromEmail)
            .AddSmtpSender(host, port, userName, password);
    }
}
Here, we start by reading the configuration values corresponding to defaultFromEmail, host, port, username, and password.
After that, we add the FluentEmail service by calling the AddFluentEmail() method. Along with that, we configure the SMTP sender by calling the AddSmtpSender() method. This will add support for sending emails using an SMTP server.
Now we can call this extension method from the Program class:
builder.Services.AddFluentEmail(builder.Configuration);
This will add FluentEmail support to our project.
Next, let’s create an email service to take care of the email-sending functionality.
For that, first, let’s define an IEmailService interface with a Send() method signature:
public interface IEmailService
{
    Task Send(EmailMetadata emailMetadata);
}
Notice that we use an EmailMetadata class for holding the details of the email. So let’s go ahead and create the class:
public class EmailMetadata
{
    public string ToAddress { get; set; }
    public string Subject { get; set; }
    public string? Body { get; set; }
    public string? AttachmentPath { get; set; }

    public EmailMetadata(string toAddress, string subject, string? body = "",
        string? attachmentPath = "")
    {
        ToAddress = toAddress;
        Subject = subject;
        Body = body;
        AttachmentPath = attachmentPath;
    }
}
In this class, we define properties for ToAddress, Subject, Body, and AttachmentPath. However, both Body and AttachmentPath are optional parameters in the constructor.
Next, let’s create an EmailService class by implementing the IEmailService interface:
public class EmailService : IEmailService
{
    private readonly IFluentEmail _fluentEmail;

    public EmailService(IFluentEmail fluentEmail)
    {
        _fluentEmail = fluentEmail
            ?? throw new ArgumentNullException(nameof(fluentEmail));
    }

    public async Task Send(EmailMetadata emailMetadata)
    {
        await _fluentEmail.To(emailMetadata.ToAddress)
            .Subject(emailMetadata.Subject)
            .Body(emailMetadata.Body)
            .SendAsync();
    }
}
First, we inject the IFluentEmail interface which provides the functionality to send emails. After that, we implement the Send() method to send email using the IFluentEmail interface by passing the ToAddress, Subject, and Body.
Finally, we must remember to configure our EmailService as a scoped service in the Program class:
builder.Services.AddScoped<IEmailService, EmailService>();
It’s worth noting that some of the FluentEmail library services are scoped and hence we need to add the EmailService either as scoped or transient service, based on how we need to set its lifetime. However, if we try to add it as a singleton, it will not be able to resolve the dependency and will throw an error.
With this, our EmailService is ready.
API Controller
The next step is creating a controller class and implementing an API endpoint for sending email:
[Route("api/[controller]")]
[ApiController]
public class EmailController : ControllerBase
{
    private readonly IEmailService _emailService;

    public EmailController(IEmailService emailService)
    {
        _emailService = emailService
            ?? throw new ArgumentNullException(nameof(emailService));
    }

    [HttpGet("singleemail")]
    public async Task<IActionResult> SendSingleEmail()
    {
        EmailMetadata emailMetadata = new("[email protected]",
            "FluentEmail Test email",
            "This is a test email from FluentEmail.");

        await _emailService.Send(emailMetadata);

        return Ok();
    }
}
First, we inject the IEmailService interface. After that, in the SendSingleEmail() action method, we build the EmailMetadata object and send the email by calling the Send() method of the IEmailService interface.
Next up, let’s see how to test the email-sending functionality.
Test FluentEmail Sending Functionality
In our example, we configured the SMTP sender for sending emails. For testing the functionality, we just need to provide the details such as SMTP Host, Port, Username, and Password in the app configuration. Along with that, we need to configure a DefaultFromEmail as well.
Once we add all the configuration values, let’s run the application and execute the /singleemail endpoint. This will send an email with the details we previously configured:
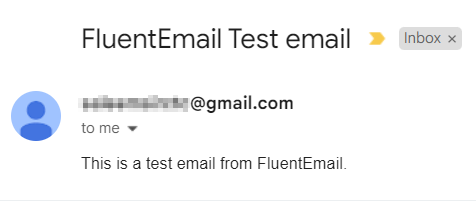
This way we can test email-sending functionality using an SMTP server.
However, sending actual emails every time we want to test an email functionality is not a good approach. Fortunately, it is easy to set up a fake SMTP server like smtp4dev for testing the email functionality.
Setup Smtp4dev Locally
For setting up smtp4dev, we just need to install the smtp4dev tool and run it. By default, it will take port 25 and URLs http://localhost:5000 and https://localhost:5001 for the web-based UI. Of course, we can override these values if we wish to.
After that, in the application configuration, we just need to specify the SMTP host as localhost and provide the smtp4dev port as 25. Configuring a username and password is optional and let’s skip those for development and testing purposes. Based on these, we need to modify the AddFluentEmail() extension method a bit:
public static void AddFluentEmail(this IServiceCollection services,
    ConfigurationManager configuration)
{
    var emailSettings = configuration.GetSection("EmailSettings");

    var defaultFromEmail = emailSettings["DefaultFromEmail"];
    var host = emailSettings["SMTPSetting:Host"];
    var port = emailSettings.GetValue<int>("Port");

    services.AddFluentEmail(defaultFromEmail)
        .AddSmtpSender(host, port);
}
Here, we remove the Username and Password variables and call an overload of the AddSmtpSender() method that doesn’t require the Username and Passwordproperties.
After making these changes, let’s run the application once again and execute the /singleemail endpoint. This time, the application will send emails to the smtp4dev server. To check out the emails, we can open the smtp4dev UI:
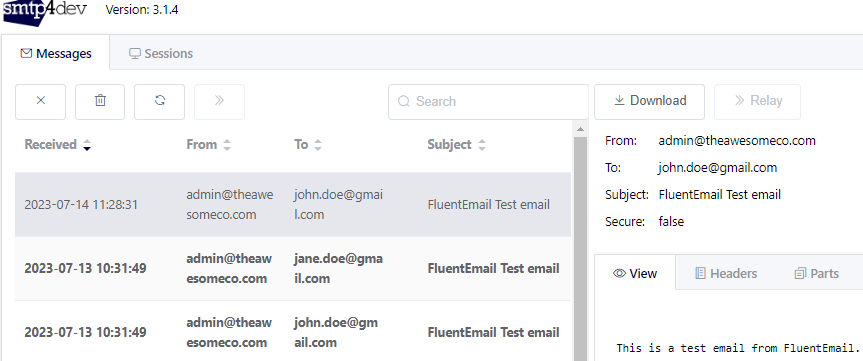
This is an excellent way of testing email functionality during development without sending actual emails.
Different Email Senders in FluentEmail
FluentEmail supports sending emails using popular email-sending providers like SMTP, SendGrid, Mailgun, MimeKit, etc. along with a bunch of other open-source senders. Not only that, it is even possible to build a custom email-sending provider by implementing the ISender interface.
FluentEmail allows us to easily plug in an email-sending provider and use that for sending emails. Regardless of the sender that we configure, it always uses the same core library methods for sending emails. That said, let’s see a few email senders that are available as official libraries:
- SMTP Sender – For sending emails using an SMTP server, we use the
FluentEmail.SmtpNuGet package. - Mailgun Sender – We can use
FluentEmail.MailgunNuGet package for sending email using Mailgun. - SendGrid Sender –
FluentEmail.SendGridNuGet package is available for integration with SendGrid. - Mailtrap Sender – For sending emails using Mailtrap, we can use the
FluentEmail.MailtrapNuGet package. - Mailkit Sender – We can use the
FluentEmail.MailKitNuGet package for integrating with Mailkit.
Apart from these, there are plenty of open-source email senders available which are compatible with FluentEmail.
For using a particular email sender, we just need to add the corresponding NuGet package and then configure it with the FluentEmail service. For instance, we can configure the SMTP sender by calling the AddSmtpSender() method and passing the corresponding parameters:
services.AddFluentEmail(defaultFromEmail)
    .AddSmtpSender(host, port, username, password);
Similarly, for configuring the SendGrid sender, we just need to replace the AddSmtpSender() method with the AddSendGridSender() method and pass the required parameters:
services.AddFluentEmail(defaultFromEmail)
    .AddSendGridSender(apikey);
This way, for switching email senders, we just need to configure the corresponding service. There is no need to make any changes in the email-sending logic.
Template Renderers in FluentEmail
FluentEmail supports multiple template renderer providers like Razor,Liquid, etc. Not just that, we can even create custom renderers by implementing the ITemplateRenderer interface.
Razor Renderer in FluentEmail
The Razor renderer uses the RazorLight library under its hood and renders the razor strings. For generating email using the Razor template, first, we need to add the FluentEmail.Razor NuGet package:
dotnet add package FluentEmail.Razor
After that, we can configure the Razor renderer in the extension method by making an additional call to the AddRazorRenderer() method:
services.AddFluentEmail(defaultFromEmail)
    .AddSmtpSender(host, port)
    .AddRazorRenderer();
Next, let’s add a new method in the IEmailService interface for sending emails using a Razor or Liquid template:
Task SendUsingTemplate(EmailMetadata emailMetadata, string template, User user);
After that, let’s implement the method in the EmailService class:
public async Task SendUsingTemplate(EmailMetadata emailMetadata,
    string template,
    User user)
{
    await _fluentEmail.To(emailMetadata.ToAddress)
        .Subject(emailMetadata.Subject)
        .UsingTemplate(template, user)
        .SendAsync();
}
Here, we call the UsingTemplate() method of the IFluentEmail interface and pass the template and model.
Along with that, let’s define a User model class as well:
public class User
{
    public string Name { get; set; }
    public string Email { get; set; }
    public string? MemberType { get; set; }

    public User(string name, string email, string? memberType)
    {
        Name = name;
        Email = email;
        MemberType = memberType;
    }
}
After that, let’s add an action method to send email using a Razor template in the controller class:
[HttpGet("razortemplate")]
public async Task<IActionResult> SendEmailWithRazorTemplate()
{
    User model = new("John Doe", "[email protected]", "Platinum");

    EmailMetadata emailMetadata = new(model.Email,
        "FluentEmail test email with razor template");

    var template = "Dear <b>@Model.Name</b>, </br>" +
    "Thank you for being an esteemed <b>@Model.MemberType</b> member.";

    await _emailService.SendUsingTemplate(emailMetadata, template, model);

    return Ok();
}
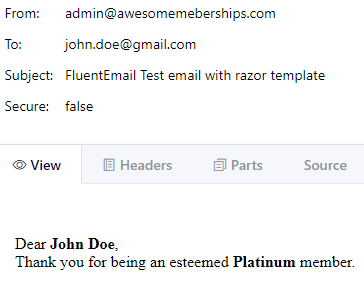
First, we create the EmailMetadata object and define the template. After that, we pass those along with the model to the SendUsingTemplate() method.
Once we run the application and invoke the /razortemplate endpoint, we can see that it uses the template and model for building the email body:
Next up, let’s see how to use a Liquid template for sending an email.
Liquid Renderer in FluentEmail
For creating emails using the Liquid template, first, we need to add the FluentEmail.Liquid NuGet package:
dotnet add package FluentEmail.Liquid
After that, we can configure the Liquid renderer in the extension method by replacing the AddRazorRenderer() method call with a call to the AddLiquidRenderer() method:
services.AddFluentEmail(defaultFromEmail)
    .AddSmtpSender(host, port)
    .AddLiquidRenderer();
That’s pretty much all the changes needed. We can reuse the SendUsingTemplate() method of the EmailService class to send email using the Liquid template as well:
[HttpGet("liquidtemplate")]
public async Task<IActionResult> SendEmailWithLiquidTemplate()
{
    User model = new("Jane Doe", "[email protected]", "Gold");

    EmailMetadata emailMetadata = new(model.Email,
        "FluentEmail test email with liquid template");

    var template = @"Dear <b>{{ Name }}</b>,</br>
    Thank you for being an esteemed <b>{{ MemberType }}</b> member.";

    await _emailService.SendUsingTemplate(emailMetadata, template, model);

    return Ok();
}
Here, we just change the template from Razor to Liquid. The rest of the code is similar to sending emails using the Razor template.
To verify this, we can run the application and invoke the /liquidtemplate endpoint:
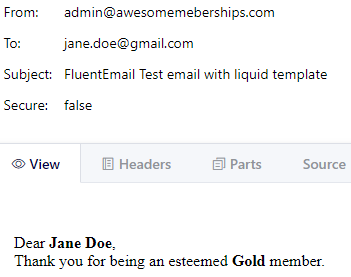
Excellent! We can see the email based on the liquid template that we defined.
So far, we defined templates inline and sent emails using them. However, in real-world applications, we usually save email templates to some external storage and use those. Next up, we are going to see how to do that.
Use Email Template File From Disk
FluentEmail supports specifying the template from a file on the disk as well. So let’s create a MyTemplate.cshtml file in the application root path and add the template to it:
@model FluentEmailExample.Model.User
Dear <b>@Model.Name</b>,
<br />
Thank you for being an esteemed <b>@Model.MemberType</b> member.
After that, let’s add a new method in the EmailService class for sending emails using a template file:
public async Task SendUsingTemplateFromFile(EmailMetadata emailMetadata, User user, string templateFile)
{
    await _fluentEmail.To(emailMetadata.ToAddress)
        .Subject(emailMetadata.Subject)
        .UsingTemplateFromFile(templateFile, user)
        .SendAsync();
}
Here, we make a call to the UsingTemplateFromFile() method and pass the template file and model.
Now let’s create an action method SendEmailWithRazorTemplateFromFile() that uses this method:
[HttpGet("razortemplatefromfile")]
public async Task<IActionResult> SendEmailWithRazorTemplateFromFile()
{
    User model = new("John Doe", "[email protected]", "Platinum");

    EmailMetadata emailMetadata = new(model.Email,
        "FluentEmail test email with razor template file");

    var templateFile = $"{Directory.GetCurrentDirectory()}/MyTemplate.cshtml";

    await emailService.SendUsingTemplateFromFile(emailMetadata, model, templateFile);

    return Ok();
}
Here we create the EmailMetadata object and get the path of the template file. After that, we pass those along with the model to the SendUsingTemplateFromFile() method of the EmailService.
Now let’s run the application and navigate to the /razortemplatefromfile endpoint. This will send a new email:
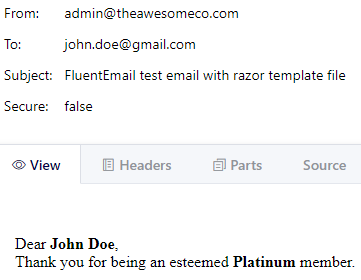
We can see that the email uses content from the template file and replace the placeholders with the model values.
Next up, let’s explore how to add attachments to the emails.
Attachments With FluentEmail
FluentEmail supports adding attachments to emails as well. For adding a single attachment, we can use the AttachFromFilename() method of the FluentEmail and for adding multiple attachments, we can use the Attach() method.
Let’s try out the AttachFromFilename() method by creating a new SendWithAttachment() method in the EmailService:
public async Task SendWithAttachment(EmailMetadata emailMetadata)
{
    await _fluentEmail.To(emailMetadata.ToAddress)
        .Subject(emailMetadata.Subject)
        .AttachFromFilename(emailMetadata.AttachmentPath,
            attachmentName: Path.GetFileName(emailMetadata.AttachmentPath))
        .Body(emailMetadata.Body)
        .SendAsync();
}
Here, we make a call to the AttachFromFilename() method and pass the attachment path and name. Optionally, we can specify the content type as well.
After that, let’s add a new SendEmailWithAttachment() action method that uses the SendWithAttachment() method of the EmailService:
[HttpGet("withattachment")]
public async Task<IActionResult> SendEmailWithAttachment()
{
    EmailMetadata emailMetadata = new("[email protected]",
        "FluentEmail Test email",
        "This is a test email from FluentEmail.",
        $"{Directory.GetCurrentDirectory()}/Test.txt");

    await emailService.SendWithAttachment(emailMetadata);

    return Ok();
}
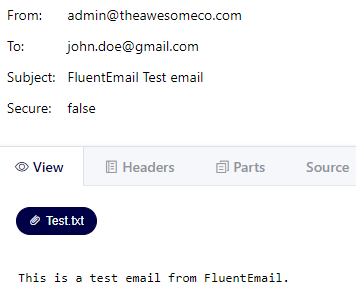
Here, we build the EmailMetadata object and pass it to the SendWithAttachment() method. Along with that, let’s add a Test.txt file to the application’s root directory and use that as the attachment path.
With these changes in place, let’s run the application once again and navigate to the /withattachment endpoint. We can see that it sends an email with the attachment:
Similarly, if we want to attach multiple files, we can call the Attach() method of FluentEmail and pass multiple Attachment objects. For each Attachment object, we can specify the file name, content type, and data as a stream.
Send Multiple Emails
So far we used the IFluentEmail interface for sending emails. However, it supports sending only one email at a time. If we want to send multiple emails in the same context, we need to use the IFluentEmailFactory interface.
So let’s add a new SendMultiple() method in the EmailService for sending multiple emails:
public class EmailService : IEmailService
{
    private readonly IFluentEmail _fluentEmail;
    private readonly IFluentEmailFactory _fluentEmailFactory;

    public EmailService(IFluentEmail fluentEmail,
        IFluentEmailFactory fluentEmailFactory)
    {
        _fluentEmail = fluentEmail
            ?? throw new ArgumentNullException(nameof(fluentEmail));
        _fluentEmailFactory = fluentEmailFactory
            ?? throw new ArgumentNullException(nameof(fluentEmailFactory));
    }

   // code removed for brevity

    public async Task SendMultiple(List<EmailMetadata> emailsMetadata)
    {
        foreach (var item in emailsMetadata)
        {
            await _fluentEmailFactory
                .Create()
                .To(item.ToAddress)
                .Subject(item.Subject)
                .Body(item.Body)
                .SendAsync();
        }
    }
}
Here, first, we inject the IFluentEmailFactory interface. After that, in the SendMultiple() method, we iterate through the emailsMetadata list for sending emails one by one. However, instead of the IFluentEmail interface, we use the IFluentEmailFactory interface to send emails. Notice that we use the IFluentEmailFactory.Create() method for creating a new instance of IFluentEmail in every iteration and use it for sending emails.
After that, in the controller class, let’s add a new SendMultipleEmail() action method that calls this new method in the service:
[HttpGet("multipleemail")]
public async Task<IActionResult> SendMultipleEmails()
{
    List<User> users = new()
    {
        new("John Doe", "[email protected]", "Platinum"),
        new("Jane Doe", "[email protected]", "Gold")
    };

    List<EmailMetadata> emailsMetadata = new();

    foreach (var user in users)
    {
        EmailMetadata emailMetadata = new(user.Email,
            "FluentEmail Test email",
            "This is a test email from FluentEmail.");

        emailsMetadata.Add(emailMetadata);
    }

    await _emailService.SendMultiple(emailsMetadata);

    return Ok();
}
Here, we first create a list of users and then build a collection of email metadata with that. After that, we make a call to the SendMultiple() method of the EmailService and pass the collection of email metadata to it.
Finally, let’s run the application once again and navigate to the /multipleemail endpoint. This time, we can see that it send multiple emails with the details that we provided:
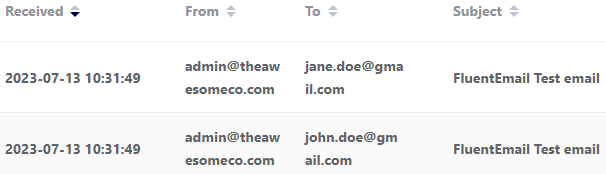
Remember that the IFluentEmail interface has a limitation due to which it can send only one email at a time. For sending multiple emails in the same context, we have to use IFluentEmailFactory interface as illustrated in this example.
Conclusion
In this article, we learned how to use FluentEmail to send emails from an ASP.NET Core Web API application. Additionally, we looked at the different email senders and template renderers that it supports. Finally, we looked at adding attachments to emails and sending multiple emails as well.
