

In the previous article, we had a brief look at how to use FluentValidation in an ASP.NET Core application, as an alternative to using Data Annotations. We’ve created a simple API and demonstrated the basic concepts of FluentValidation. So, in this article, we are going to go a bit deeper and focus more on different validators with FluentValidation, covering the types of scenarios we’re likely to hit as developers.
This time, the concepts we’ll go over can be applied to any .NET application, not just ASP.NET Core applications. To demonstrate this, we’re going to be building all our code in a .NET Core class library, but pulling that into an ASP.NET Core API to demonstrate the end result.
Let’s start.
Project Setup
Let’s start by opening up Visual Studio 2019, and creating a new Class Library (.NET Core) C#:
![]()
Next, let’s go ahead and install FluentValidation via the Package Manager Console:
PM>> install-package FluentValidation
Now, let’s add a new OrderStatus enumeration to the project:
public enum OrderStatus
{
    Accepted,
    Processing,
    Complete
}
Furthermore, we are going to add a class called Product:
public class Product
{
    public string Name { get; set; }
}
Next, let’s add a class called Order:
public class Order
{
    public string Name { get; set; }
    public int Price { get; set; }
    public string CustomerEmail { get; set; }
    public OrderStatus OrderStatus { get; set; }
    public Product Product { get; set; }
}
Finally, let’s set up our validator:
public class OrderValidator : AbstractValidator<Order>
{
    public OrderValidator()
    {

    }
}
ASP.NET Core API
To test things out, we are going to add a new ASP.NET Core API project and reference the class library.
Let’s select “Add > New Project” from the Solution Explorer, and select “ASP.NET Core Web Application”:
![]()
Let’s accept all the defaults, and then we end up with the following solution structure:
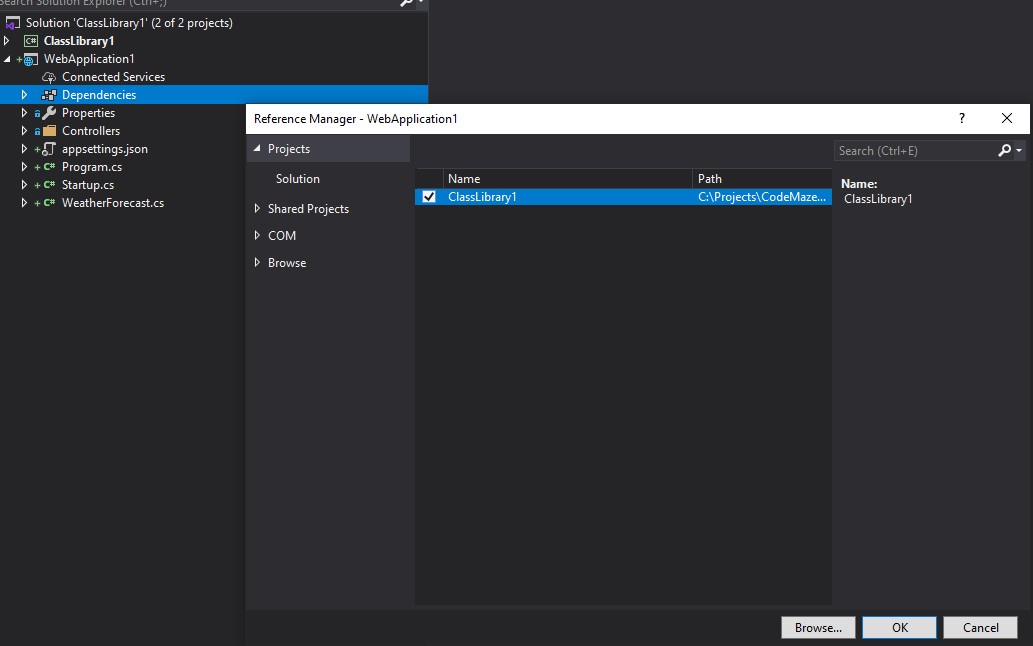
To continue, we have to add a reference to our ClassLibrary1 project from WebApplication1:
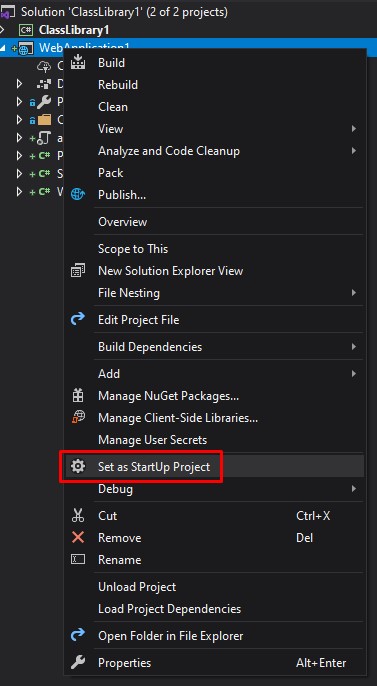
Let’s right-click on WebApplication1 and select “Set as Startup Project” to make our API the default startup project:
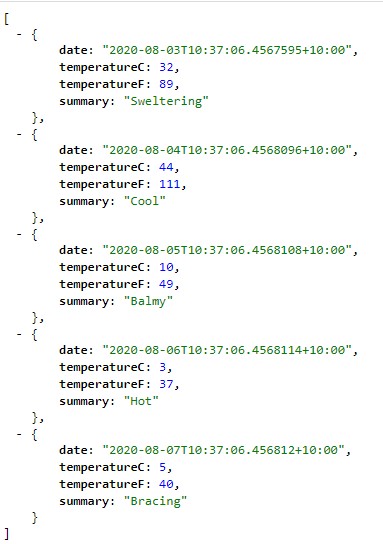
Right after that, we are going to hit the “CTRL-F5” shortcut to start our API without debugging, and we should see the familiar weather forecast result displayed in our default browser:
Setting up the Controller
Now that we have a basic ASP.NET Core API setup with our project referenced, we need to add a controller to accept an Order object.
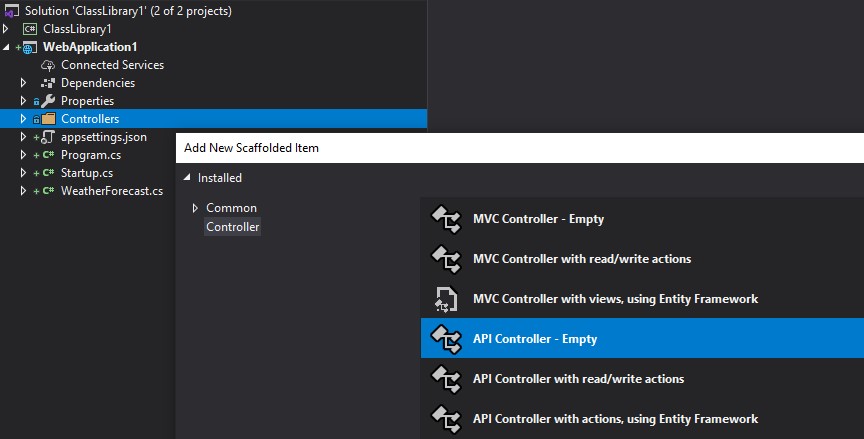
To do that, let’s right-click on the Controllers folder and select Add > Controller, and select “API Controller – Empty” from the dialog:
Let’s name the controller OrdersController, so it represents the resource we are going to interact with.
In the created OrdersController, let’s add a using statement to reference our ClassLibrary:
using ClassLibrary1;
Next, let’s add the following method:
[HttpPost]
public ActionResult Post([FromBody] Order order)
{
    return Ok("Success!");
}
This method is identical to our previous article, in which we are simply accepting an object in the request body from a POST request, and returning a 200 (OK) response with the text “Success!”.
Wiring up FluentValidation
Now, we need to add the FluentValidation ASP.NET middleware. To do that, let’s open up the Package Manager Console and install a new project to our WebApplication1:
PM>> install-package FluentValidation.AspNetCore
Then, let’s open up Startup.cs and add the necessary using statements:
using ClassLibrary1;
using FluentValidation.AspNetCore;
Additionally, we have to register the OrderValidator class in the ConfigureServices method:
services
    .AddControllers()
    .AddFluentValidation(fv => fv.RegisterValidatorsFromAssemblyContaining<OrderValidator>());
This will register the OrderValidator class we created previously with FluentValidation, and make sure FluentValidation runs on all requests to our API.
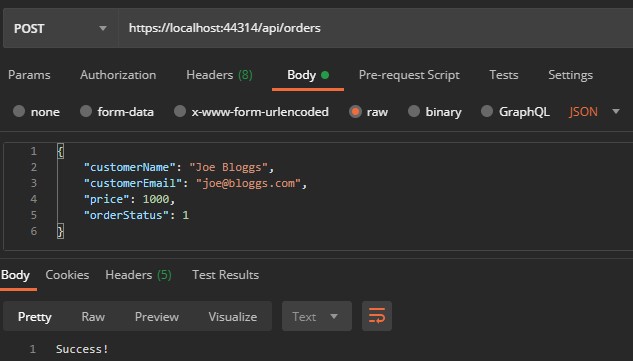
Let’s open up Postman and make sure everything is working, by adding the POST request:
If we hit the Send button, we should see a 200 (OK) status returned and the “Success!” message:
Now that we have everything set up, we are going to add validation to our models and test it out against our API as we go.
Built-in Validators
FluentValidation has a number of built-in validators, which saves us writing code to perform the most common validation. Let’s go over a few examples.
Null & Empty Validation
The most common and simple validation is ensuring value is set, and in the case of string or sequences, ensuring the value is not empty.
Let’s add the following two rules to our OrderValidator:
RuleFor(model => model.CustomerName).NotNull();
RuleFor(model => model.CustomerEmail).NotEmpty();
These two rules ensure a value is present for CustomerName, and we have a non-whitespace value for CustomerEmail. In most cases, you’d just use the NotEmpty() validator, unless you want to allow whitespace as a valid value, however, it’s worth showing both options.
Length Validation
After we’ve ensured our strings contain a non-whitespace value, the next validation we would normally like is around the length.
Let’s amend the rule we just created for CustomerName:
RuleFor(model => model.CustomerName).MinimumLength(10);
Now we are ensuring the name is at least 10 characters long. If we prefer, we can make use of the following similar length validators:
MaximumLength(useful if we want to ensure a string is less than or equal to a specified number of characters)Length(when we want the string to be exactly a certain number of characters)
Range Validation
Generally, whenever we have integers on our model, we need to apply some kind of reasonable bounds over the value. This is where we can make use of the range validators.
Let’s get back to the OrderValidator class and add a validator against our Price property:
RuleFor(model => model.Price).InclusiveBetween(1,1000);
Here we have simply ensured the value of the price is between 1-1000 inclusive. We can also use the following similar length validators whose usage is thankfully obvious due to the naming:
ExclusiveBetweenLessThan/LessThanOrEqualToGreaterThan/GreaterThanOrEqualTo
Email Validation
Another commonly required validation is against email addresses. All we need to do to enable this is to add the following rule against our Email property, replacing the NotEmpty() rule we had previously:
RuleFor(model => model.CustomerEmail).EmailAddress();
The EmailAddress() validator behind the scenes makes use of regular expressions (which is another built-in validator). This very handy validator covers all the various email formats and edge cases so that we don’t need to.
Enum Validation
Most .NET applications make use of enumerations to signify the state of an object. Often painfully when validating these, we need to do casting/boxing/unboxing and check all the various members of the enum to see if the input is valid.
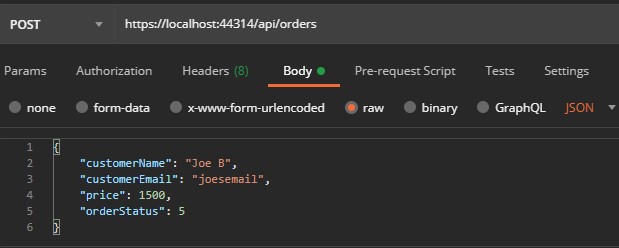
With FluentValidation it’s extremely easy. To demonstrate that, let’s add enum validation against our Status property:
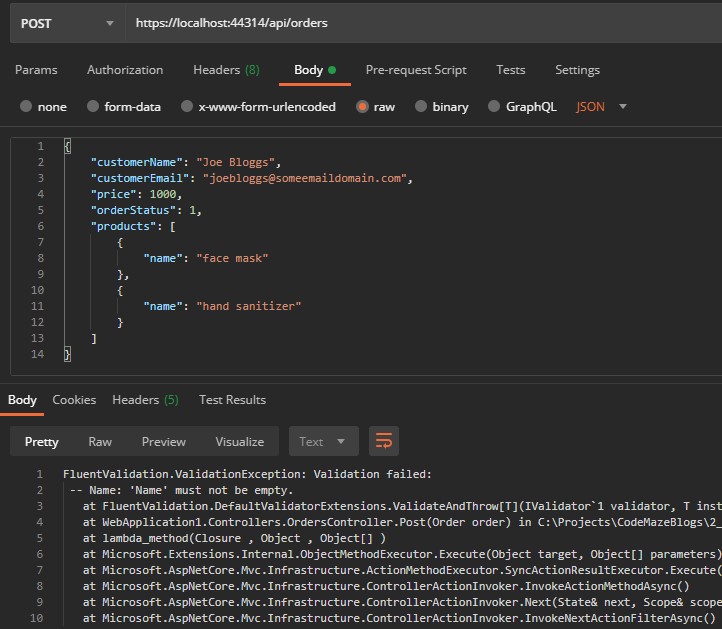
RuleFor(model => model.OrderStatus).IsInEnum();
The IsInEnum() method will ensure the value is one of the included members of the enum.
While it may seem simple here, consider the scenario of an API like in the previous article. In that scenario, if we had an enum on our model we would accept the value from the calling application in the form of an int or string, which would then be model-bound to our enum property. Since we have no control over these input values, we need to apply a ‘whitelist-style’ approach to the enum validation to ensure the bound value is what we allow. This is exactly what the IsInEnum() method does for us.
Let’s send the same request in Postman we had previously and see the result:
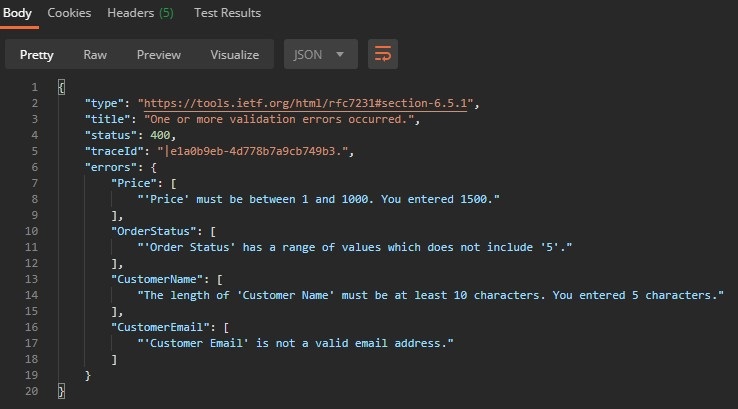
Now, we see we are receiving validation errors for the rules we created, which means everything is working well.
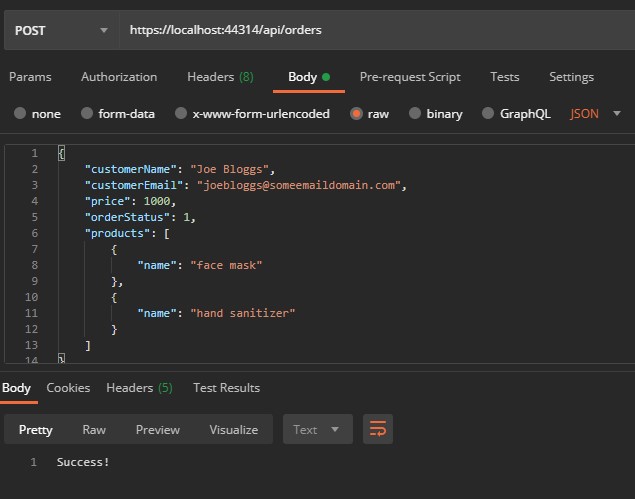
Let’s change the body of the request to make everything succeed again:
We’ve now covered most of the built-in validators we’d normally make use of. In the next section, we’ll discuss how to chain validators together.
Chaining Validators
Often we need to apply more than one validation rule to a particular property. That’s where chaining comes in.
Let’s demonstrate this by chaining a validator to our existing EmailAddress() validator:
RuleFor(model => model.CustomerEmail)
    .EmailAddress()
    .MinimumLength(20);
Here we are ensuring two things:
- The value of
CustomerEmailis a valid email address - The value of
CustomerEmailis at least 20 characters
It’s quite a contrived example, but it demonstrates a technique we can apply when we want to make use of a built-in validator, but it doesn’t quite meet our needs and we want to be more specific.
Let’s modify the value of customerEmail in the Postman request to “AAAAA” and hit Send:
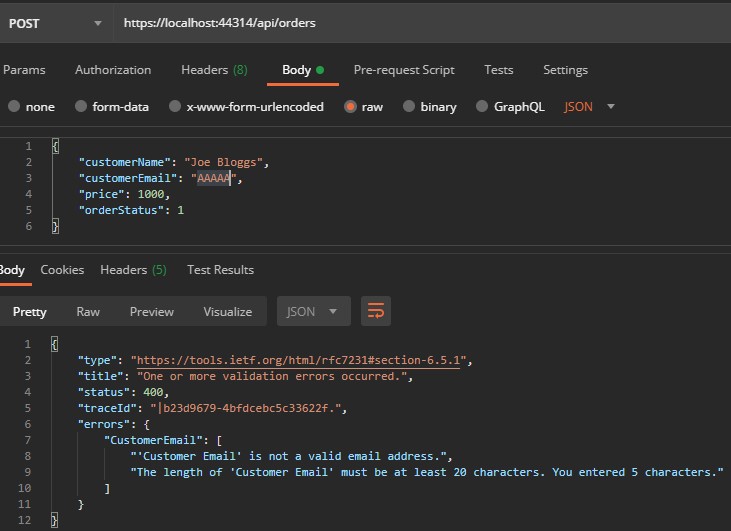
Notice we are now receiving 2 validation errors, for each of our chained rules.
Here it’s also worth mentioning how the “cascade” mode of FluentValidation works. In the above example, the EmailAddress() validator is applied, and regardless if the validation succeeds or fails, the MinimumLength() validation is then also applied.
This has the side effect of applying extra validation (and therefore processing) when the call is going to fail anyway. Sometimes this is not desired.
To prevent this, let’s change the email validation rule:
RuleFor(model => model.CustomerEmail)
    .Cascade(CascadeMode.StopOnFirstFailure)
    .EmailAddress()
    .MinimumLength(20);
Now, if the EmailAddress() validation fails, the MinimumLength() validator is not executed. The Cascade method can also be applied to the entire validator in the constructor, or globally to all validators.
Let’s run the app and hit the same request in Postman again:
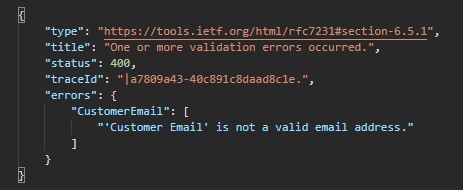
Now only the first validation rule is displayed. Let’s change the value of customerEmail back to “[email protected]” so our input is valid again.
In the next section, we’ll discuss how we can use nested validators if we have multiple classes.
Nested Validators
In our current project, we have two classes Order and Product. So far, we’ve only applied validation to our Order class. What if we wanted to apply validation to our Product class also? How would we then ensure that validation is called when we validate the Order? This is a common scenario, so let’s see how to implement it.
First, let’s add a simple validator for our Product class:
public class ProductValidator : AbstractValidator<Product>
{
    public ProductValidator()
    {
        RuleFor(model => model.Name).NotEmpty();
    }
}
Let’s keep it simple here because we want to focus on how to call this validator from the Order class.
That said, let’s add a new rule to our Order validator:
RuleFor(model => model.Product)
    .NotNull()
    .SetValidator(new ProductValidator());
Very simply, we are ensuring value for Product is sent, and handover validation to the ProductValidator. This is a great example of separation of concerns, as if/when the Product class evolves (and therefore, the validation rules), it’s not a concern of the OrderValidator.
Let’s run our API and execute the existing request in Postman:
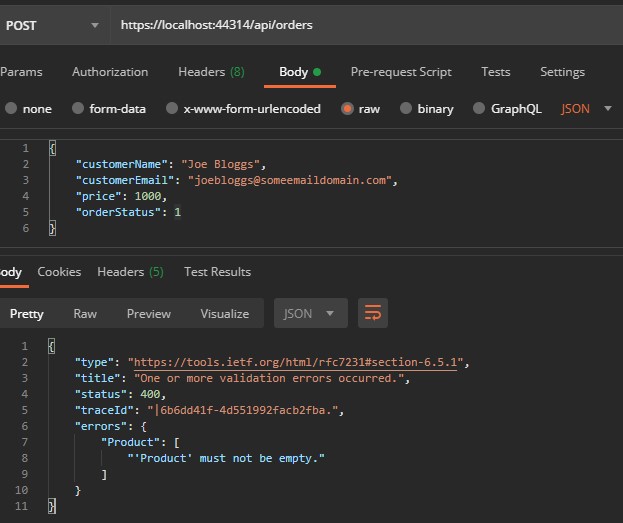
Now, we receive an error for the product property, specifying it needs to exist. This is our NotNull() validation rule firing.
Let’s try changing the value of the product to an empty object:
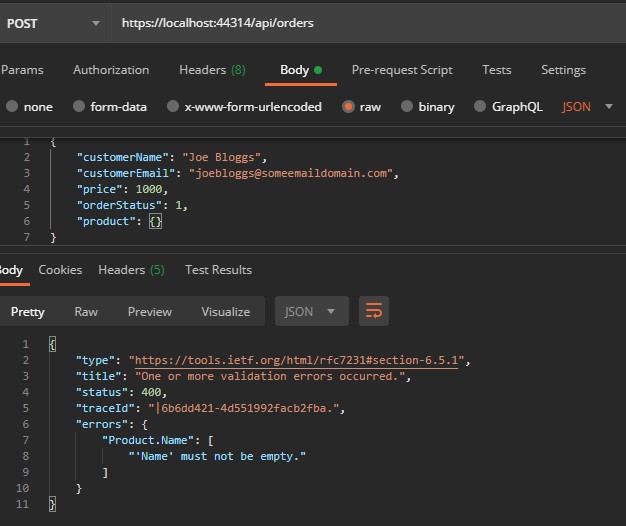
We are still receiving an error, but notice it’s now the nested validation rule firing for the Product.Name property.
To fix the input, let’s change the input again:
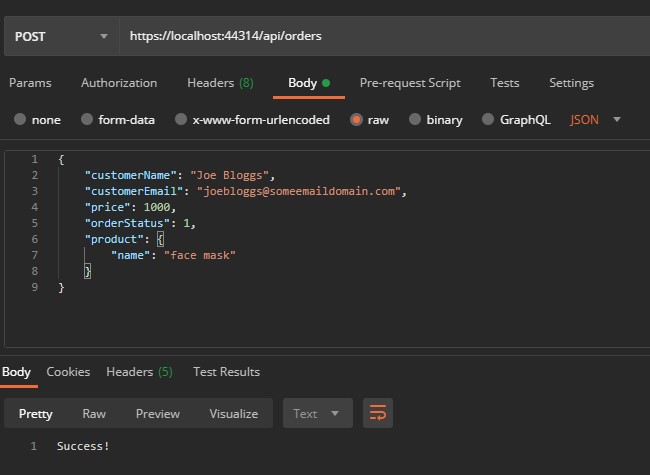
We can see the request is now succeeding.
Next, let’s talk about how we can validate collections.
Collections
In our current project, a single Order has a single Product. But what if a single order has many products? (a more realistic scenario).
Let’s update our Order class to reflect that:
public Product[] Products { get; set; }
If we jump over to our OrderValidator, we now see that we have a build error on the following line:
RuleFor(model => model.Product)
    .NotNull()
    .SetValidator(new ProductValidator());
What we’d like to do now is still make use of our ProductValidator, but invoke it for each product.
To do that, we are going to modify the erroring line:
RuleForEach(model => model.Products).SetValidator(new ProductValidator());
Now, we ensure that each product is validated against the ProductValidator rules.
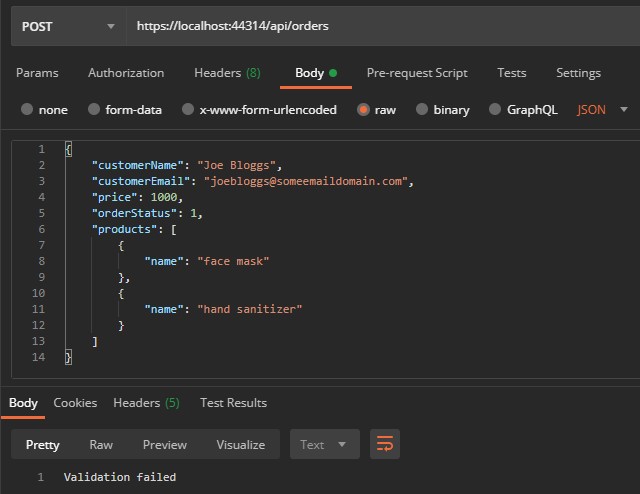
Let’s run the app, and modify our Postman request:

Notice how we have two products in the input, but validation is failing for the second (index 1) product because the “name” property is empty. This proves validation is being executed for each item in the array.
Let’s fix up the Postman request:
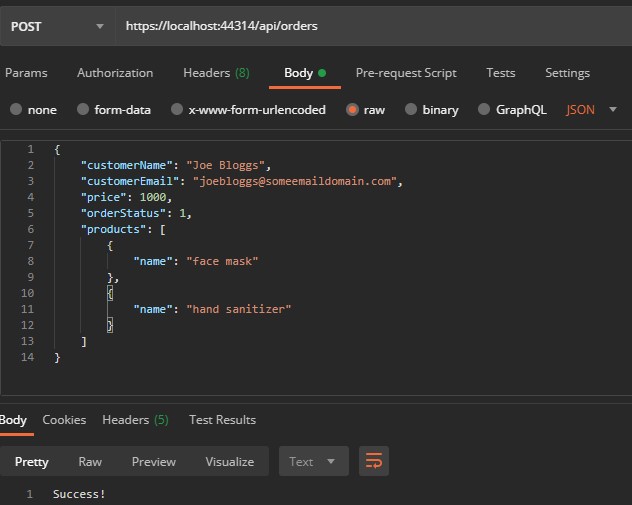
Now everything is working again.
In the next section, we’ll talk about how to throw validation exceptions.
Throwing Exceptions
When it comes to invoking our validators, the most common way is by using the Validate() method, and then interrogating the ValidationResult().
However, what if we want to automatically throw an exception and short-circuit the code?
We can do that by using the ValidateAndThrow() method:
orderValidator.ValidateAndThrow(order);
Notice this time we’re not capturing the validation result. This is because ValidateAndThrow returns void. Either the validation succeeds and the code continues, or a ValidationException is thrown.
The most common reason we do this is due to global error handling. Instead of constantly checking for validation results all over our code and acting appropriately (which would violate the “DRY” principle), we can instead throw a ValidationException and catch that exception higher up in our code.
Default Behavior
In our API this behavior is in fact happening implicitly with the FluentValidation.AspNetCore middleware. In other words, we don’t need to call Validate() or ValidateAndThrow(), as this happens automatically.
But to demonstrate the behavior, let’s amend our existing API method:
[HttpPost]
public ActionResult Post([FromBody] Order order)
{
    var product = new Product
    {
        Name = null // will fail validation
    };
    var validationResult = new ProductValidator().Validate(product);
    return validationResult.IsValid
        ? (ActionResult) Ok("Success!")
        : BadRequest("Validation failed");
}
Let’s explain our code:
- First, we create a new
Productwith values we know will fail validation - Next, we create a
ProductValidator()and validate the product - Finally, we return
OkorBadRequestdepending on the validation result
If we run our API and execute the existing request in Postman:
We can see the response “Validation failed”.
Using ValidateAndThrow()
Let’s now change our code to throw instead. First, let’s add a reference to FluentValidation:
using FluentValidation;
Next, let’s modify our method:
[HttpPost]
public ActionResult Post([FromBody] Order order)
{
    var product = new Product
    {
        Name = null // will fail validation
    };
    new ProductValidator().ValidateAndThrow(product);
    return Ok("Success!");
}
Now let’s run our API and execute the request in Postman:
Notice this time, the response code is 500 (Internal Server Error), and the response shows that a ValidationException was thrown.
This isn’t a great response payload for a bad request. This is why the FluentValidation.AspNet middleware is preferred, as it “catches” this exception, unpacks the validation errors, and returns a 400 (Bad Request) with a nice response model.
However, if we were on other flavors or platforms of .NET or wanted different behavior, we would want to imitate this behavior in the form of a try/catch statement.
Let’s revert our method back to the previous section:
[HttpPost]
public ActionResult Post([FromBody] Order order)
{
    return Ok("Success!");
}
In the final section, we’ll talk about how to take FluentValidation to the next level in the form of custom validators.
Custom Validators
So far, we’ve mostly had FluentValidation take care of all the hard work for us. What if we had very specific logic that wasn’t covered by the built-in validators with FluentValidation? That’s where we can make use of custom validators. In fact, if you right-click on any built-in validator we’ve used so far, and select “Go to definition”, you’ll see it exists in a class called DefaultValidatorExtensions. These validators extend the IRuleBuilder interface to perform validation.
Let’s take a look at our existing validation for the CustomerName property on our Order class:
RuleFor(model => model.CustomerName).MinimumLength(10);
What if we want to do more than ensure it’s at least 10 characters? What if we want to make sure it’s actually a real name with a first and surname, with a space in the middle? Let’s build a custom validator to encapsulate that logic.
Adding a Custom FullName Validator
First, let’s add a FluentValidationExtensions class with a new extension method:
public static class FluentValidationExtensions
{
    public static IRuleBuilderOptions<T, string> FullName<T>(this IRuleBuilder<T, string> ruleBuilder)
    {
        return ruleBuilder
                   .MinimumLength(10)
                   .Must(val => val.Split(" ").Length >= 2);
    }
}
Let’s explain our code:
- Firstly, we can see that there are 2 type parameters on the method signature,
Tandstring. Essentially this means that the custom validator can be applied to any validator of a class, as long as the property being validated is a string. If we want to restrict it to certain classes, we could make use of C# generic constraints, but we keep it simple for demonstration purposes. - In the implementation, we use the existing
MinimumLengthvalidator, and add the validation code:
.Must(val => val.Split(" ").Length >= 2);
We’re making use of “chaining validators” (which we discussed previously), and also making use of the Must validator which accepts a predicate requiring a return type of bool. Essentially, this is where we can put any custom logic. In this case, we’re splitting the value by space into an array and ensuring there are at least two elements (first name, then potentially a middle and last names). Of course, this is a very naive implementation, but again we keep it simple to focus on different validators with FluentValidation and not complicated logic.
Using Our Custom Validator
Let’s modify our validation rule to use the new validator:
RuleFor(model => model.CustomerName).FullName();
Now, let’s run our API again and execute the Postman request:
Our request still succeeds.
Let’s see what happens if we change the value of customerName to “JoeBloggs” (no space) and execute the request again:
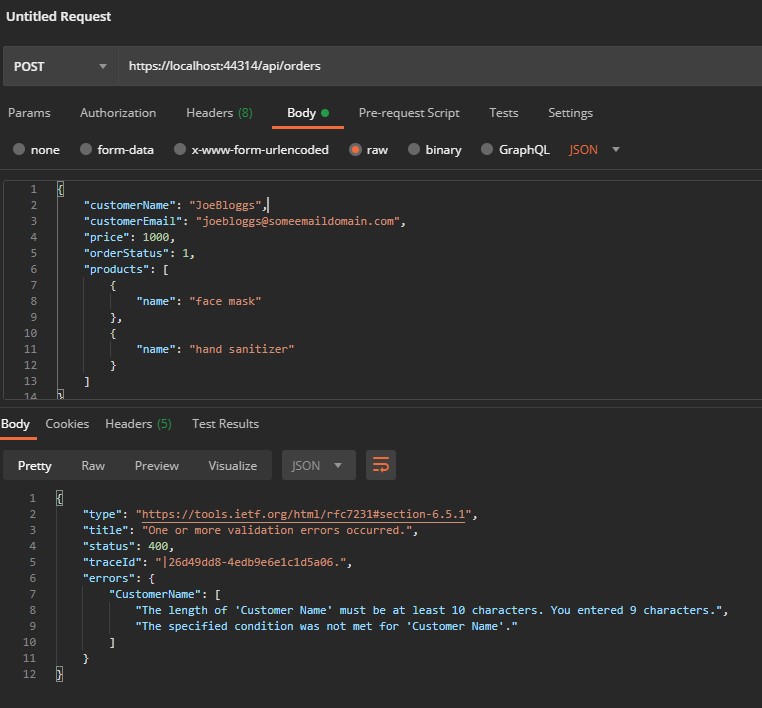
Notice both our validation rules failed. Also, we can see the second validation rule isn’t very user friendly, so let’s amend the custom validator and make use of the WithMessage() method:
return ruleBuilder
           .MinimumLength(10)
           .Must(val => val.Split(" ").Length == 2)
           .WithMessage("Name must contain a single space and be at least 10 characters long");
This should make the error a bit easier to understand. Let’s run our API and execute the request again:
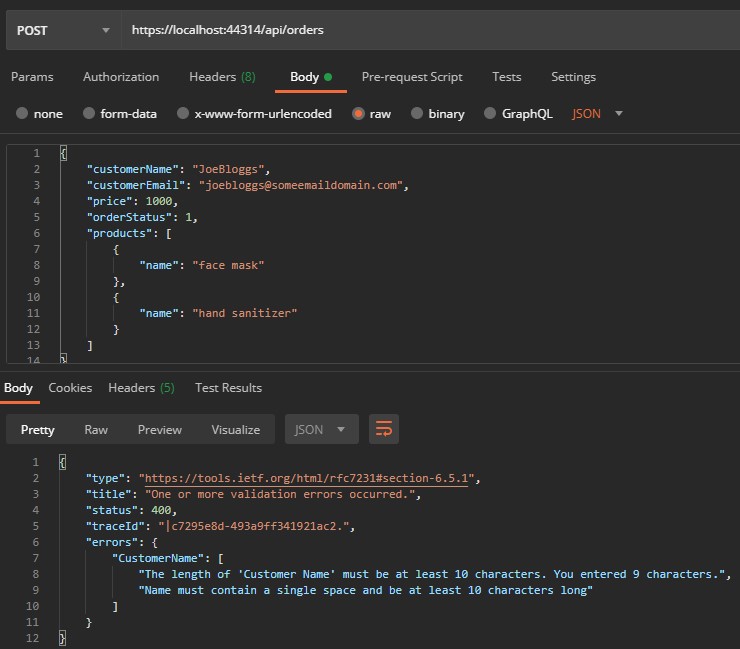
Now the client should be able to easily understand why their request failed, and make the necessary adjustments. The WithMessage() method is useful for this purpose when we want to provide better error information that FluentValidation provides by default, which is especially important when building a public API.
Now that we’ve seen how to write custom validators, let’s wrap things up.
Conclusion
In the previous article, we discussed the basics of FluentValidation and how to get a simple ASP.NET Core API up and running. In this article, we went down the rabbit hole and covered many scenarios we’d usually need to deal with when validating objects in a .NET application.
For most companies, our data is our most valuable asset so it’s important we protect what goes into our system. That’s why it’s essential to be equipped with a great library like FluentValidation and know which rules to apply to what scenarios. Hopefully, after this article, you’re now well skilled in these situations.
Happy validating and remember.. “never trust user input!”.

This article was great about “Fluent Validation”. My only complaint is that you put a link at the end to be able to download
the entire article cleanly as a PDF document. Now that would be awesome if you could do that.
Thank you Nelson. I am glad you like the article. We will think about your suggestion but for now, you have to come to our site to read our articles 🙂