

In this article, we are going to learn how to use Azure Active Directory B2C to secure our Blazor WebAssembly Hosted application. We will see how to register both the server and the client app on the Azure Active Directory B2C tenant and how to integrate provided information in our app.
We have already covered how to use Azure Active Directory to secure Blazor apps, and now, we are going to see that the B2C process is quite similar to that one.
So, let’s start.
Azure Active Directory B2C Tenant Creation
The first thing we have to do is to navigate and log in to our Azure portal.
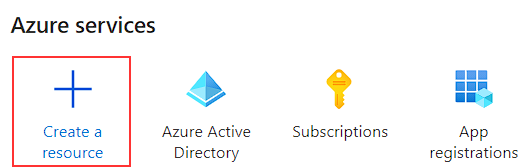
After we do that, we can start with the Azure Active Directory B2C tenant creation by clicking the Create a resource button:
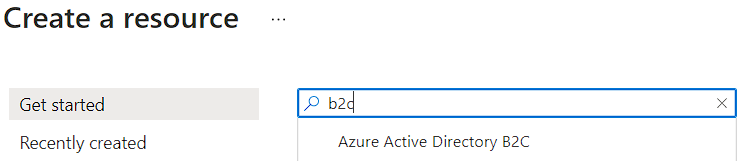
And then we can just write “b2c” in the search field to get a required resource option:
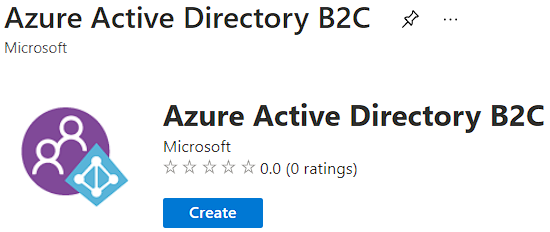
By clicking the Azure Active Directory B2C option, we are going to get a new screen with the Create button:
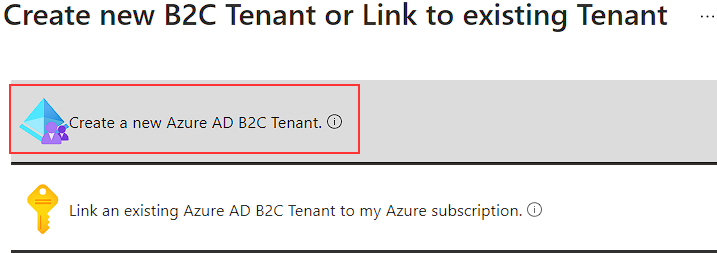
So, let’s just click that button and select the Create a new Azure AD B2C Tenant option:
There, we have to provide some required information:
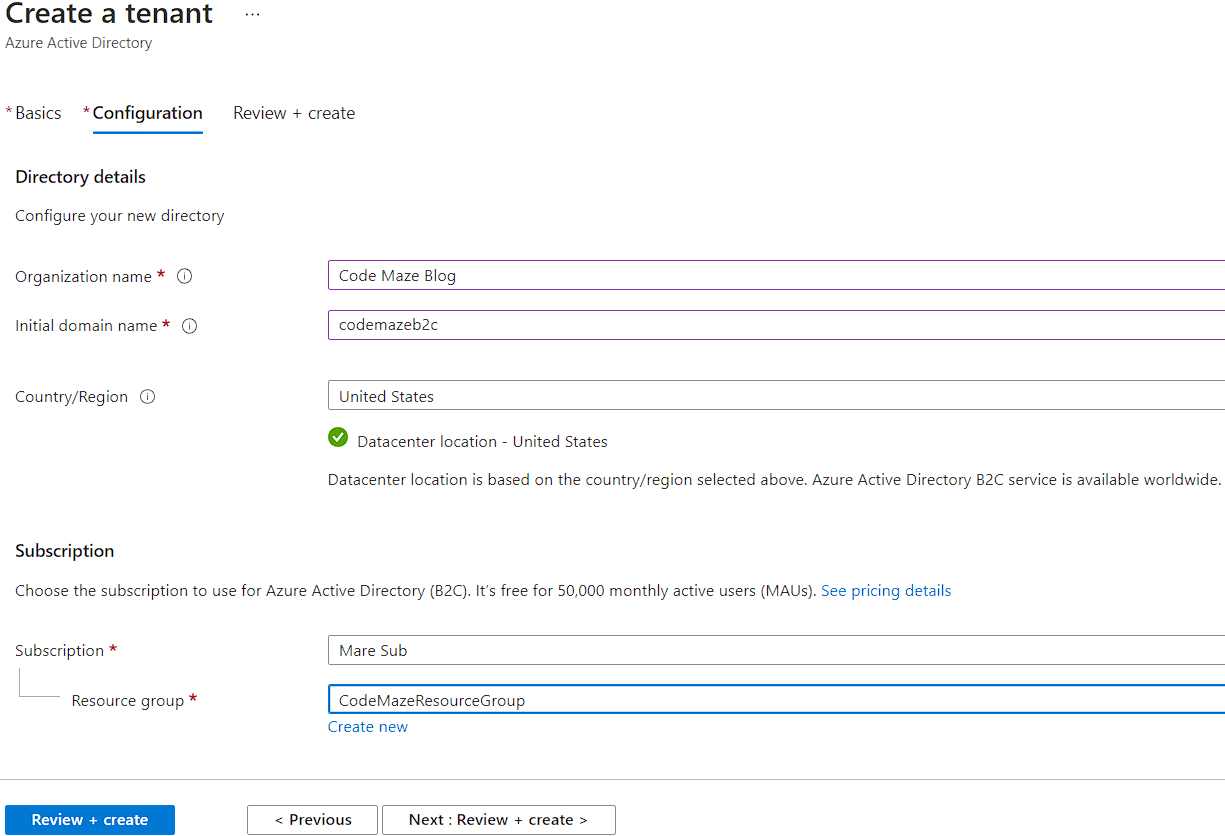
And click the Review + create button.
After we pass the validation, we can click the Create button and wait some time for the create action to complete.
Once the creation completes, we can click the linked message to navigate to our new tenant:
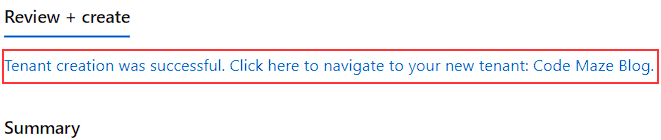
That’s it. We can continue and register our applications.
Server App Registration
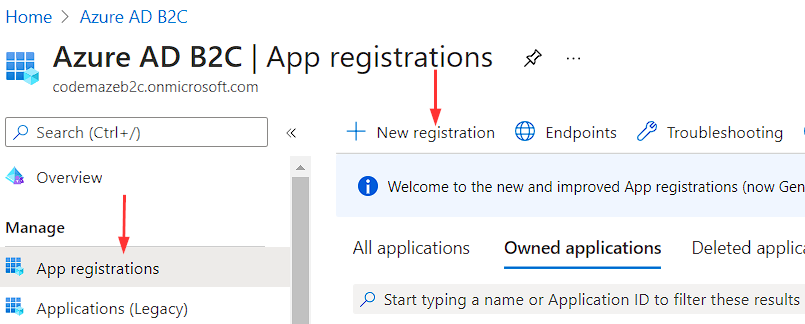
In our newly created tenant, we have to navigate to the Azure AD B2C service. Under the Manage section, we are going to choose the App registrations menu item and then click the New registration button:
Here, we have to provide a name for our app, select an account type for authenticating users with user flows, and click the Register button:
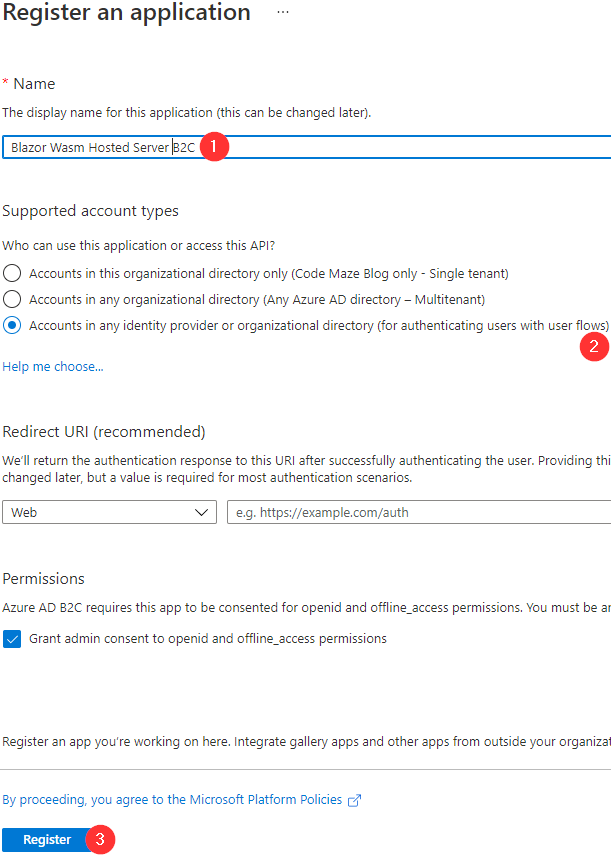
We are not modifying the Redirect URI option because we don’t need it for the server app. Also, we have to grant admin consent, which is checked by default.
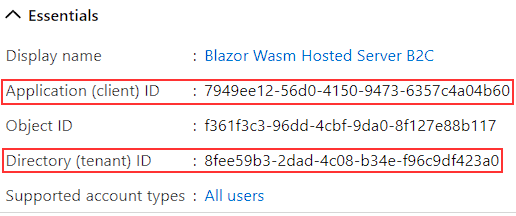
Once we register the server app, we can write down four things. The first two are Application ID and Directory (tenant) ID from the Overview page:
The next thing we need is the AAD B2C Instance, which we can find in the Endpoints tab under the same (Overview) page:

We will write it down with the trailing slash as marked in the picture.
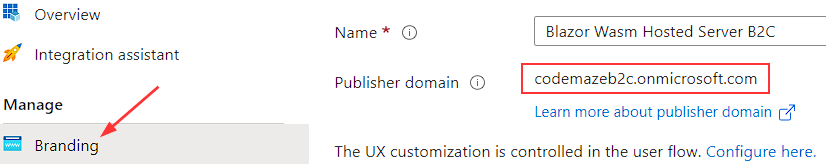
Finally, we need the Publisher domain, which we can find under the Branding page:
Exposing an API
To expose our API, we have to add a new scope that the client app will use to enable access to the server app.
To do that, let’s navigate to the Expose an API page (under the Manage section), click the Add a scope button and click Save and continue button.
Then, we have to provide the required information for our new scope:

After we create a scope, the portal will navigate us on the Expose an API page where we can copy the App ID URI with the scope attached:

That’s it for the server app, and we can continue with the client app registration.
Client App Registration
So, let’s get back to the App registrations page and click the New registration button once again:
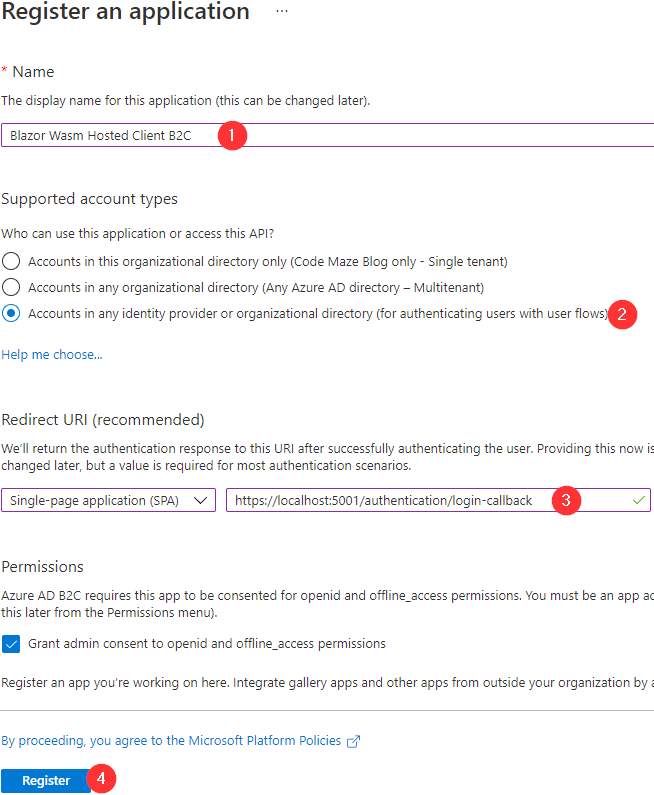
As you can see, we populate the name, select the account type, choose the SPA option and provide the Redirect URI (we will force our app to run on port 5001), and click the Register button.
After the registration process, we can write down the Application (client) ID value from the Overview page.
Now, to confirm the client app registration, we can navigate to the Authentication page:

Here, we can confirm our redirect URI is valid and also we can see that we are going to use Authorization Code Flow with PKCE, which is a recommended flow for a SPA. If you want to use the Implicit or the Hybrid flow, you can check any of the two checkboxes (Access tokens and ID tokens) provided a bit below on the Authentication page. Since we are using the Authorization Code flow, we are not going to check any of these options.
Now, to allow access to the server app’s endpoints with our client app, we have to add API permission to our client app.
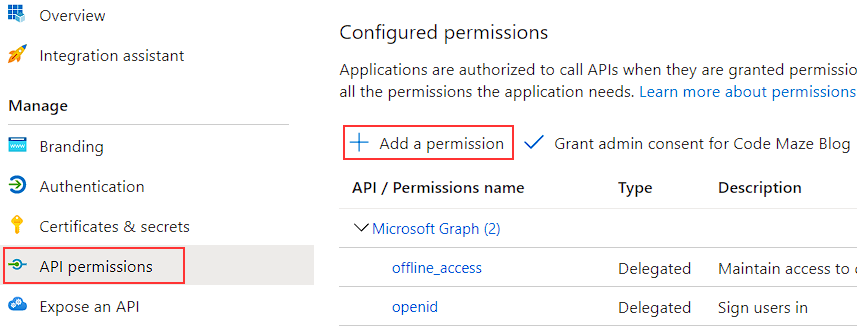
To do that, let’s navigate to the API permissions page and click the Add a permission button:
In the Request API permissions window, we are going to select the My APIs tab, and select our server app:
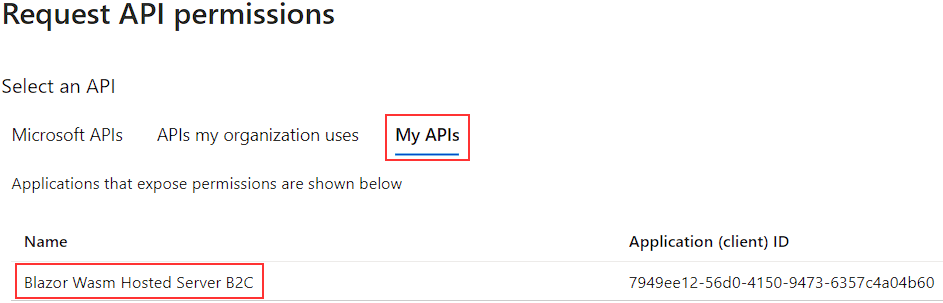
In the next window, we have to select our API Scope (BlazorHostedB2CServer.Access) and click the Add permissions button.
After we do that, the portal is going to navigate us back to the API permissions page where we can find our new permission. But if we check the status of the new permission, we are going to see the Not granted message. To fix that, we have to click the Grant admin consent for Code Maze Blog button. We can find it right next to the Add a permission button. We have to confirm our action, and after a few seconds, our new permission will have an admin consent granted.
Creating a New Sign-up/Sign-in User Flow
To enable sign-up and sign-in actions for our users when they visit our application, we have to create the flow for these actions.
To do that, we have to navigate back to the Azure AD B2C page.
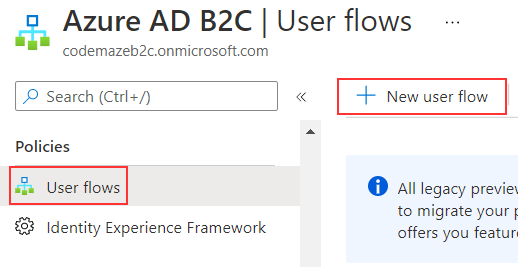
Under the Policies sections, we are going to navigate to the User flows page, and the New user flow button:
And select the Sign up and sign in option:

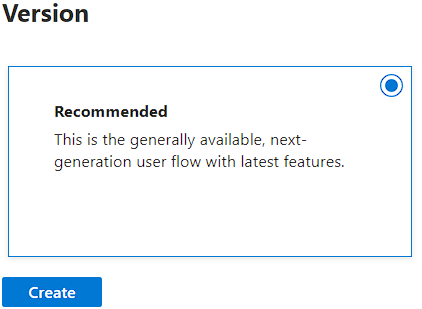
Choose the Recommended version and click the Create button:
On the new page, we have to provide:
- Name of the flow –
signupsigninflow - Identity providers – we are going to select the Email signup option
- Multifactor authentication – Email is selected by default, and we are going to leave it as-is
- Conditional access – we are going to leave it unchecked
- User attributes and token claims – We can click the
Show more...link and select the claims we want to return in the token. You can select whichever claims you need for your app and click theOkbutton - Finally, we have to click the
Createbutton
After the flow is created successfully, we can see its name, in our case B2C_1_signupsigninflow, and we can write it down.
Creating Blazor WebAssembly Hosted Application
Now, we can create our Blazor WebAssembly hosted application. We can do that by using the .NET CLI or by using Visual Studio’s template.
So, let’s see how we can do it with the command:
dotnet new blazorwasm -au IndividualB2C --aad-b2c-instance "{AAD B2C INSTANCE}" --api-client-id "{SERVER API APP CLIENT ID}" --app-id-uri "{SERVER API APP ID URI}" --client-id "{CLIENT APP CLIENT ID}" --default-scope "{DEFAULT SCOPE}" --domain "{TENANT DOMAIN}" -ho -o {APP NAME} -ssp "{SIGN UP OR SIGN IN POLICY}"
In our case:
- AAD B2C INSTANCE is the Azure B2C instance, which we can find in the Endpoints window =>
https://codemazeb2c.b2clogin.com/ - SERVER API APP CLIENT ID is the Application ID of the server app =>
7949ee12-56d0-4150-9473-6357c4a04b60 - SERVER API APP ID URI is the Application ID URI of the server app =>
7949ee12-56d0-4150-9473-6357c4a04b60we are using just the APP ID part of the URI because the command will add thehttps://codemazeb2c.onmicrosoft.com/part by default in theProgram.csfile of the client app - CLIENT APP CLIENT ID is the Application ID of the client app =>
16d0f20e-0b61-4674-8a6b-7f7d076c5b6c - DEFAULT SCOPE is the scope we’ve created in API permissions =>
BlazorHostedB2CServer.Access - TENANT DOMAIN is the primary domain =>
codemazeb2c.onmicrosoft.com - APP NAME is the name of our application =>
BlazorWasmHostedB2C - SIGN UP OR SIGN IN POLICY is the name of the Sign-up/Sign-in flow =>
B2C_1_signupsigninflow
This command will create a new Blazor WebAssembly Hosted app and configure the Azure AD B2C authentication with the provided parameters.
Let’s also see how we can do the same thing using Visual Studio’s template.
Using Visual Studio’s Template
First, let’s create the Blazor WebAssembly Hosted app with the Microsoft identity platform authentication type:

This is going to create a template for us with the placeholders for the required information.
Then, we are going to modify the server’s launchsettings.json file to force the app to always start on port 5001:
{
    "profiles": {
        "BlazorWasmHostedB2C.Server": {
            "commandName": "Project",
            "dotnetRunMessages": "true",
            "launchBrowser": true,
            "inspectUri": "{wsProtocol}://{url.hostname}:{url.port}/_framework/debug/ws-proxy?browser={browserInspectUri}",
            "applicationUrl": "https://localhost:5001;http://localhost:5000",
            "environmentVariables": {
                "ASPNETCORE_ENVIRONMENT": "Development"
            }
        }
    }
}
Furthermore, we have to modify the appsettings.json file in the server project and populate the required information:
"AzureAd": {
    "Instance": "https://codemazeb2c.b2clogin.com/",
    "Domain": "codemazeb2c.onmicrosoft.com",
    "TenantId": "8fee59b3-2dad-4c08-b34e-f96c9df423a0",
    "ClientId": "7949ee12-56d0-4150-9473-6357c4a04b60",
    "SignUpSignInPolicyId": "B2C_1_signupsigninflow",
    "CallbackPath": "/signin-oidc"
},
Here, we just provide the required information for the instance, server application id, tenant id, and domain. The CallbackPath property stays the same.
The last thing we have to do for the server-side app is to open the WeatherForecastController file and modify the scopeRequiredByApi variable:
static readonly string[] scopeRequiredByApi = new string[] { "BlazorHostedB2CServer.Access" };
Instead of the placeholder value, we have to add the name of the scope. If you take a look at the Get action in the same controller, you will see that the scopes are verified with the VerifyUserHasAnyAcceptedScope method.
Client Modification
After these modifications, we have to add the information for the client app as well. We are going to do that in the appsettings.json file under the wwwrooot folder:
"AzureAd": {
    "Authority": "https://codemazeb2c.b2clogin.com/codemazeb2c.onmicrosoft.com/B2C_1_signupsigninflow",
    "ClientId": "16d0f20e-0b61-4674-8a6b-7f7d076c5b6c",
    "ValidateAuthority": false
}
Here, we add the combination of the instance, tenant domain, and flow name values for the Authority property. Also, for the ClientId property, we use the client’s application id value.
Now, the last thing we have to do is to open the Program.cs file of the client project, and modify the default access token scope:
builder.Services.AddMsalAuthentication(options =>
{
    builder.Configuration.Bind("AzureAd", options.ProviderOptions.Authentication);
    options.ProviderOptions.DefaultAccessTokenScopes.Add("https://codemazeb2c.onmicrosoft.com/7949ee12-56d0-4150-9473-6357c4a04b60/BlazorHostedB2CServer.Access");
});
With the AddMsalAuthentication method, we add the authentication to our Blazor app. It also accepts the callback where we provide our configuration from the appsettings.json file and our default access token scopes.
Regarding the access token scope, we add the value we copied from the Expose an API page. It is basically the APP ID URI value plus the scope name.
Testing the Application
So, we can start our app, and as soon as it loads, we are going to see the Login link in the top-right corner of the screen.
Once we click that link, the new popup window will appear. Here, we are going to click the Sing up now link to create a new user.
In the new window, we have to provide a valid email and click the Send verification code button.
Then, we can use the code from the email message and click the Verify code button.
After the code verification succeeds, we can provide a password for our user, confirm it, provide additional information (City, Name…), and click the Create button.
After a few seconds, the login action will complete and we are going to see a new welcome message with the name of our user, and the Log out link:
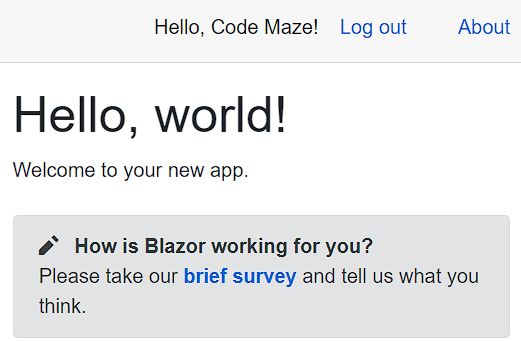
Now, we can click the Fetch data page, which is protected from unauthorized users, and see the data on the screen.
Additional Application’s Components
We have seen the appsettings.json files from both the server and client apps. Also, we’ve seen the WeatherForecastController file and the client’s Program.cs file. But, the template provides us with many different components and installed libraries, which help us achieve our goal – Azure Active Directory B2C Authentication.
We have already explained all of these additional components/libraries in our previous article where we talked about the Azure AD security with the Blazor WebAssembly Hosted app. So, if you want to learn more about those additional components, which is our recommendation as well, feel free to visit the Projects Overview section of that article and learn about all the additional things the template provides for us.
Conclusion
Well, that’s all we need to do to secure our Blazor WebAssembly Hosted application with the Azure Active Directory B2C. Now, our users can register and log in to our application.
Until the next article,
All the best.

Great article – still works for Net7.0 – and with current Azure configuration.
@context.User.Identity.Name! doesn’t seem to work. Does it require at least one claim to be drawn from flow?
Also the login process doesn’t work when you deploy the app to Azure – so a little guidance on what needs to change there – i.e. what ports to open up – would help. Looks like a firewall issue.
Great article indeed. Thank you Marinko!
One more good thing about authenticating Blazor app with B2C is that its sign in page can be easily localized from within B2C. Currently the sign in page can be translated to the customer’s browser language by selecting Enable language customization on the Languages tab of the User Flow in Azure AB B2C.
In our Blazor app, the user can select another language of their choice and we’d like to be able to show the sign in page in the language selected by the user.
Does anyone know how to set the ui_locales value from within the Blazor app so that the sign in page would include this ui_locales query string in it?
Thank you so much for your excellent article. I’ve followed all the steps. Now how do I host the Blazor WebAssembly Hosted application in Azure? Plus I would like to add Azure SQL.
Hi Marinko. Any guidance on deployment please? Mul.
Well, I am not sure that I can put it all in a single comment. Basically, for something like that we should have an entire article, and a big one to say. In our video course https://code-maze.com/blazor-webassembly-course/?source=nav we’ve deployed our entire app Blazor WASM + Web API and dedicated one entire section for the publish topic. You can check out the TOC to see all the things we cover in our course.
Great article. Thanks !!
In my opinion Microsoft must improve the AD Service. Actually is very complex work with custom claims. For example get custom roles to an user.
Thank you very much.
If you referring to Azure B2C then yes, it is hard, I am not even sure that B2C supports roles at all in the manner we used to. But if you referring to Azure AD, then it is not that hard, and you can read more about roles and Azure AD here: https://code-maze.com/using-app-roles-with-azure-active-directory-and-blazor-webassembly-hosted-apps/
SorryI’m sorry, you’re right. I mean Azure B2C. If it supports roles and / or custom claims, but you have to create custom User Flow. Much work and many small details that leave room for error. A shame 🙁