In this article, we are going to talk about what IDE is and how we can use Visual Studio to create a new project.
For the complete navigation of this series check out: C# Back to Basics.
In this article, we are going to cover the following topics:
Integrated Development Environment (IDE)
IDE stands for Integrated Development Environment. It is basically a tool that helps us develop applications more easily. It has many features that can make our lives easier.
For example, some common features include:
- Source code editor
- Debugger
- Compiler
- Templates for different kinds of projects
- Much more
Our IDE of choice will be Visual Studio 2017 Community Edition. To download it, visit Visual Studio Download Page. Visual Studio has support for multiple programming languages, which makes it a very popular development tool.
After the installation, we can start a new project by clicking the File menu and choosing New => Project:
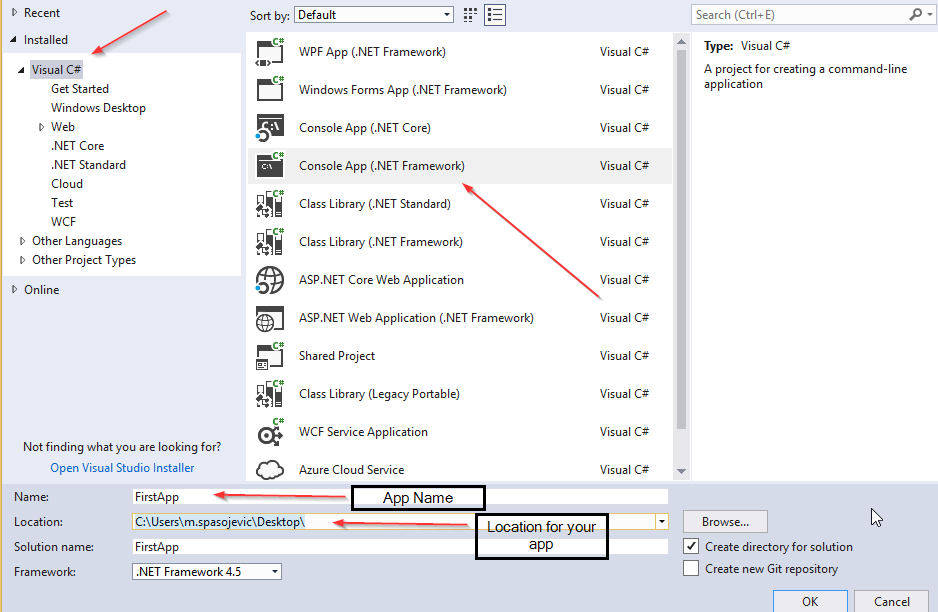
For this tutorial, we will use the console application project the most, so let’s choose that option:
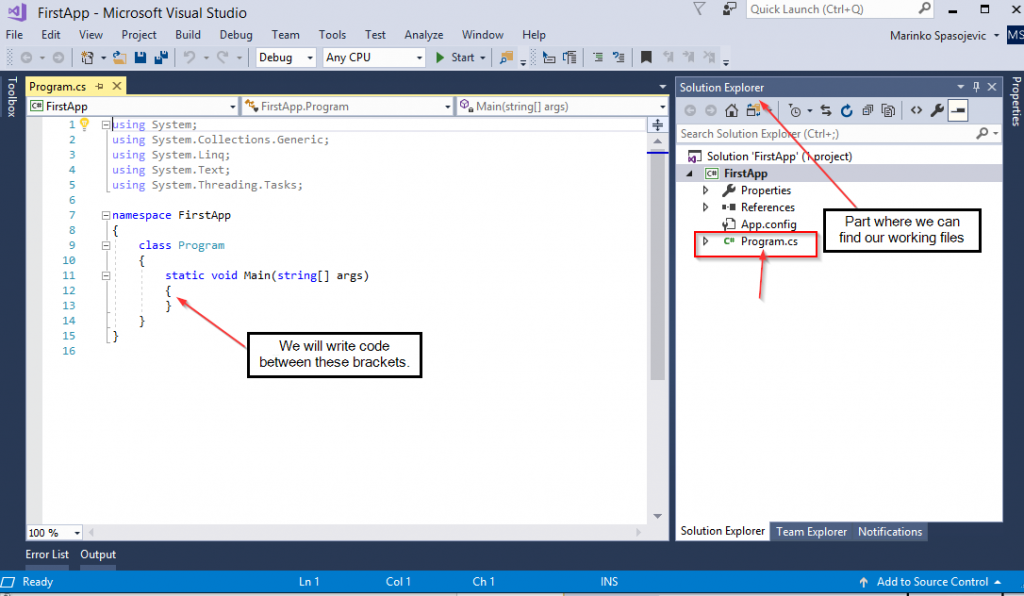
After we click on the OK button, we are going to see our created project. The main file to work with is the Program.cs and soon enough we are going to talk more about it:
Watch Window
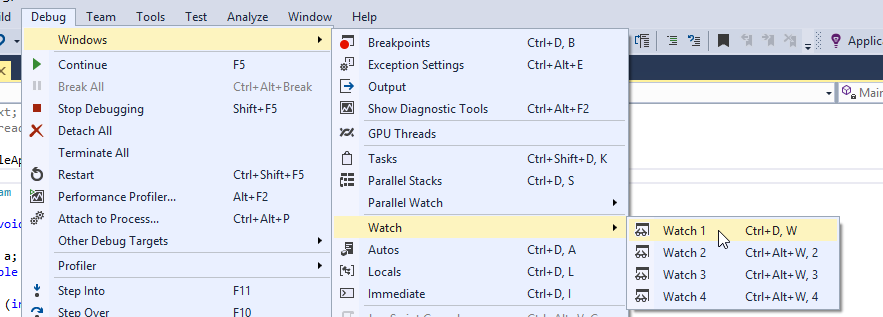
In some examples, we are going to use this window to examine results. To open it we need to place a breakpoint on any code line first (by clicking left mouse button):
Then start our application by pressing F5, and finally to open the watch window:
Conclusion
Now we have the perfect IDE that will help us and the knowledge to create a new project. Soon enough we are going to use this knowledge in our applications.
In the next part, we will learn about data types, declarations and definitions.


