In this article, we are going to learn how to use Roles in Blazor WebAssembly Hosted applications for an additional level of security for both Blazor-Client pages and Blazor-Server controllers.
If you want to learn more about Blazor WebAssembly, we strongly suggest visiting our Blazor WebAssembly series of articles, where you can read about Blazor WebAssembly development, authentication, authorization, JSInterop, and other topics as well.
So, let’s start.
Adding Roles in the Database
We have already created the Blazor WebAssembly Hosted project with applied authentication in our previous article. So, we will just continue with the same project.
First of all, we have to support roles for ASP.NET Core Identity. To do that, let’s modify the configuration in the Startup class or the Program class if you are using .NET 6 and above:
services.AddDefaultIdentity<ApplicationUser>(options => options.SignIn.RequireConfirmedAccount = false)
    .AddRoles<IdentityRole>()
    .AddEntityFrameworkStores<ApplicationDbContext>();
All we do here is use the AddRoles method to include role services for ASP.NET Core Identity.
Now, we have to add roles to the database. To do that, we are going to create a new class in the Data folder:
public class RoleConfiguration : IEntityTypeConfiguration<IdentityRole>
{
    public void Configure(EntityTypeBuilder<IdentityRole> builder)
    {
        builder.HasData(
            new IdentityRole
            {
                Name = "Visitor",
                NormalizedName = "VISITOR"
            },
            new IdentityRole
            {
                Name = "Administrator",
                NormalizedName = "ADMINISTRATOR"
            }
        );
    }
}
Also, we have to include this class in the ApplicationDbContext class and override the OnModelCreating method:
public class ApplicationDbContext : ApiAuthorizationDbContext<ApplicationUser>
{
    public ApplicationDbContext(
        DbContextOptions options,
        IOptions<OperationalStoreOptions> operationalStoreOptions) : base(options, operationalStoreOptions)
    {
    }

    protected override void OnModelCreating(ModelBuilder builder)
    {
        base.OnModelCreating(builder);

        builder.ApplyConfiguration(new RoleConfiguration());
    }
}
After that, we are going to create our migration files and execute them to update the database:
Add-Migration RolesAdded -o Data/Migrations
Update-Database.
As you can see, when we create new migration files, we use the -o flag to specify the output folder.
Finally, since we have a single user in the database, let’s attach an admin role to that user:
INSERT INTO AspNetUserRoles
VALUES ('UserId','Administrator RoleId')
Of course, you will use your id values for the existing user and the Administrator role.
Implementing Roles in a Blazor WebAssembly Hosted Application
Now that we have roles configured and placed in the database, we can use that to protect our pages and actions.
Let’s first modify the FetchData component to allow the Administrator role only:
@page "/fetchdata"
@using Microsoft.AspNetCore.Authorization
@using Microsoft.AspNetCore.Components.WebAssembly.Authentication
@using BlazorWasmHostedAuth.Shared
@attribute [Authorize(Roles = "Administrator")]
@inject HttpClient Http
Then, we can do the same thing for the WeatherForecastController:
[Authorize(Roles = "Administrator")]
[ApiController]
[Route("[controller]")]
public class WeatherForecastController : ControllerBase
What we want to do now is to modify the user registration logic to include the Visitor role as soon as we register a new user. To do that, we have to include the Register.cshtml and Register.cshtml.cs files in our project (add a new scaffolded item). We did the same thing in the previous article with the Account/Login page (Customizing Components section), so in the same way, we can include the Account/Register page.
Once we have the Register page in our project, we can open the Register.cshtml.cs file and modify the OnPostAsync method to include the Visitor role for newly created users:
...
else
{
    await _userManager.AddToRoleAsync(user, "Visitor");
    await _signInManager.SignInAsync(user, isPersistent: false);
    return LocalRedirect(returnUrl);
}
Okay.
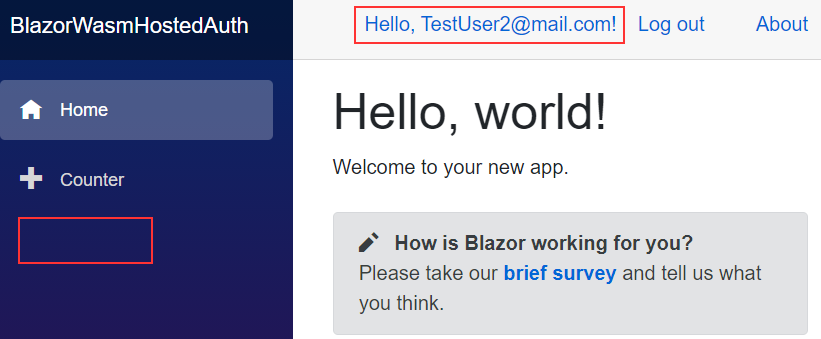
Let’s start the app, register a new user, try to click Fetch data, and inspect the result:
We can see that the user with the Visitor role can’t access this page.
If we do the same with the Administrator user (the one we already have in the database), we will see the same response. Well, that’s not what we expect.
To see the reason for that, let’s remove the Roles property from the [Authorize] attribute in both FetchData (client project) and WeatherForecastController (server project) files.
Also, we are going to add a bit more code to the FetchData page to show user claims:
<h2>Claims</h2>
<AuthorizeView>
    <ul>
        @foreach (var claim in context.User.Claims)
        {
            <li><b>@claim.Type</b>: @claim.Value</li>
        }
    </ul>
</AuthorizeView>
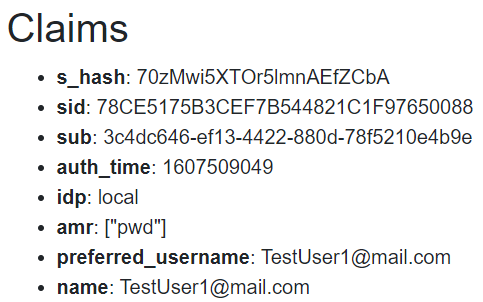
At this point, we can start the app, log in with the admin user, and navigate to the FetchData page:
We can see there is no Role claim, and that’s the reason why both Administrator and Visitor can’t access the page.
Now we can return the Roles property in both files.
Adding Roles to the Claims
To solve our problem with a role claim, we have to include it in the claim list. To do that, we are going to modify the ConfigureServices method in the Startup class or the Program class in .NET 6 and above (the code we are adding is the same for .NET 5 or .NET 6 and above):
services.AddIdentityServer()
    .AddApiAuthorization<ApplicationUser, ApplicationDbContext>(opt =>
    {
        opt.IdentityResources["openid"].UserClaims.Add("role");
        opt.ApiResources.Single().UserClaims.Add("role");
    });
JwtSecurityTokenHandler.DefaultInboundClaimTypeMap.Remove("role");
Here we are using the Action delegate parameter of the AddApiAuthorization method to configure additional options. We add the role claim to user claims collection for both Identity resources and API resources. Also, we prevent the default mapping for roles in the JWT token handler.
Now if we start the app, and log in as the administrator, we will be able to access the FetchData page and we will see the role claim in the claims list. Of course, we won’t be able to do that with the Visitor user.
Additionally, if we don’t want to show the FetchData link for the non-administrator users, we can modify the NavMenu.razor file:
<AuthorizeView Roles="Administrator">
    <Authorized>
        <li class="nav-item px-3">
            <NavLink class="nav-link" href="fetchdata">
                <span class="oi oi-list-rich" aria-hidden="true"></span> Fetch data
            </NavLink>
        </li>
    </Authorized>
</AuthorizeView>
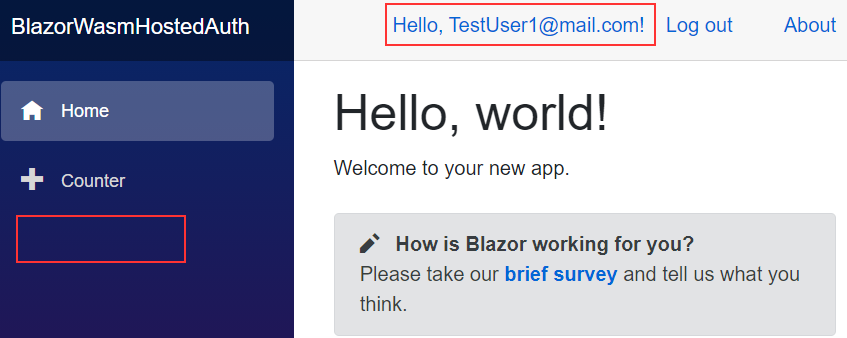
Once we log in as a Visitor, we won’t be able to see the page link:
Supporting Multiple Roles
Before we implement logic to support multiple roles, let’s add a new role for our admin user:
INSERT INTO AspNetUserRoles
VALUES ('UserId','Visitor RoleId')
Now, we can start the app, and log in as the Administrator:
What we can see is that we are missing the FetchData menu even though our user should be able to see it.
So, where is the problem?
The problem is that IdentityServer sends multiple roles as a JSON array in a single role claim: role: ["Administrator", "Visitor"]. So, what we need to do is to create a way to split this array into multiple role claims with a single role as a value.
To do that, we are going to create a new factory class on the client-side and modify it:
public class CustomUserFactory : AccountClaimsPrincipalFactory<RemoteUserAccount>
{
    public CustomUserFactory(IAccessTokenProviderAccessor accessor)
        : base(accessor)
    {
    }

    public async override ValueTask<ClaimsPrincipal> CreateUserAsync(
        RemoteUserAccount account,
        RemoteAuthenticationUserOptions options)
    {
        var user = await base.CreateUserAsync(account, options);
        var claimsIdentity = (ClaimsIdentity)user.Identity;

        if (account != null)
        {
            MapArrayClaimsToMultipleSeparateClaims(account, claimsIdentity);
        }

        return user;
    }

    private void MapArrayClaimsToMultipleSeparateClaims(RemoteUserAccount account, ClaimsIdentity claimsIdentity)
    {
        foreach (var prop in account.AdditionalProperties)
        {
            var key = prop.Key;
            var value = prop.Value;
            if (value != null &&
                (value is JsonElement element && element.ValueKind == JsonValueKind.Array))
            {
                claimsIdentity.RemoveClaim(claimsIdentity.FindFirst(prop.Key));
                var claims = element.EnumerateArray()
                    .Select(x => new Claim(prop.Key, x.ToString()));
                claimsIdentity.AddClaims(claims);
            }
        }
    }
}
So, we create a new class that inherits from the AccountClaimsPrincipalFactory class and overrides the CreateUserAsync method. We use the AccountClaimsPrincipalFactory class to enable a default implementation for converting a RemoteUserAccount into a ClaimsPrincipal. In the overridden CreateUserAsync method, we extract the ClaimsIdentity from the created user and call the MapArrayClaimsToMultipleSeparateClaims method. In this method, we iterate through every property from the account’s AdditionalProperties collection and if we find the value and that value is a JSON array, we map each element of the array as a separate claim.
Finally, we have to register this custom factory in the Program class:
builder.Services.AddApiAuthorization()
    .AddAccountClaimsPrincipalFactory<CustomUserFactory>();
Excellent.
Now, we can test our solution.
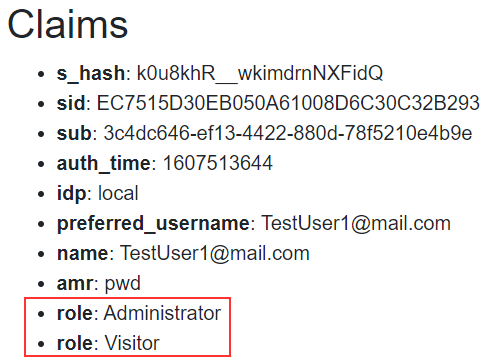
First of all, as soon as we log in as Administrator, we can see the FetchData menu. Once we navigate there, we can see the content and both roles:
So, that’s all it takes to handle multiple roles for a single user.
Conclusion
In this article, we have learned:
- How to use ASP.NET Core Identity and Migrations to create roles in the database
- How to implement roles in Blazor WebAssembly Hosted applications
- The way to handle multiple roles for a single user
In the next article, we are going to learn about external Google authentication in Blazor WebAssembly Hosted applications.
Until then.
All the best.


