

In this article, we’re going to learn how to use Mapster in ASP.NET Core applications.
First, we’ll learn what Mapster is and how we can install it inside the .NET Core application. Then, we are going to try different options for mapping data when using Mapster. After that, we’ll learn about Mapster functionalities for generating code and flattening objects inside our Web API project.
VIDEO: Using Mapster in ASP.NET Core Applications.
Let’s start.
What is Mapster?
As the name suggests, Mapster is a library that maps one object type to a different object type. It is a convention-based mapper that is easy to configure and use. Writing code to map one object to another can be very repetitive and boring. Because of this, Mapster frees us from writing error-prone boilerplate code.
In most cases, we shouldn’t try to reinvent the wheel but use the available options.
Let’s find out if Mapster is a good option.
How to Get Mapster?
The initial step is to install the Mapster NuGet package:
Install-Package Mapster
That’s how easy it is. Now we have Mapster ready to use in our project.
Prepare the Environment
Initially, let’s create two classes to represent the entities and one class for the DTO object to which we will map the values from the entities:
public class Person
{
    public string? Title { get; set; }
    public string? FirstName { get; set; }
    public string? LastName { get; set; }
    public DateTime? DateOfBirth { get; set; }
    public Address? Address { get; set; }
}
Here, we create the Person class we will use throughout the examples. Also, we have the Address class inside it, so let’s add that one as well:
public class Address
{
    public string? Street { get; set; }
    public string? City { get; set; }
    public string? PostCode { get; set; }
    public string? Country { get; set; }
}
Now, we have our entities in place. It is time to create our first DTO class:
public class PersonDto
{
    public string? Title { get; set; }
    public string? FirstName { get; set; }
    public string? LastName { get; set; }
    public DateTime? DateOfBirth { get; set; }
}
The PersonDto class has all of the properties from the original Person entity, except for Address which we will use later in the article. It’s important to note that all of our properties inside the DTO class are named the same as our entity properties, so we can map them without additional configuration.
Seeding Entity Data
To prepare our examples, we will create a simple class DemoData to create a simple Person entity and a Person collection. In a real-life project, we would get this data from a database.
Let’s add our first method for creating a person:
public static Person CreatePerson()
{
    return new Person()
    {
        Title = "Mr.",
        FirstName = "Peter",
        LastName = "Pan",
        DateOfBirth = new DateTime(2000, 1, 1),
        Address = new Address()
        {
            Country = "Neverland",
            PostCode = "123N",
            Street = "Funny Street 2",
            City = "Neverwood"
        },
    };
}
Here we create a new method called CreatePerson() that returns a Person object with its Address added.
Similarly, we add the CreatePeople() method that works the same as our first method but returns a collection of Person objects.
Basic Mapping With Mapster
It’s time to look at the basic usage of Mapster for mapping objects and collections on the fly without configuration.
First, let’s create a new static class named MappingFunctions, which we will use to implement all of the different mapping functionalities:
public static class MappingFunctions
{
    private static readonly Person _person = DemoData.CreatePerson();
    private static readonly ICollection<Person> _people = DemoData.CreatePeople();
}
Here we add two static read-only fields and initialize a single entity and a collection of Person entities.
We have two different ways of mapping a single object to another using the generic Adapt() method:
- Mapping to a new object
- Mapping to an existing object
Mapping to a New Object
First, let’s create a new static method inside our MappingFunctions class:
public static PersonDto MapPersonToNewDto()
{
    var personDto = _person.Adapt<PersonDto>();

    return personDto;
}
In the MapPersonToNewDto() method, we initialize a new variable personDto as a destination to which we map all values from the _person object.
Secondly, let’s create a new controller in our project with a method to retrieve the data from the function:
[Route("api/people")]
[ApiController]
public class PeopleController: ControllerBase
{
    [HttpGet("new-person")]
    public IActionResult GetNewPerson()
    {
        var person = MappingFunctions.MapPersonToNewDto();
        return Ok(person);
    }
}
Here we implement the PeopleController class so we can consume our API actions. We add a new action called GetNewPerson() that uses the MapPersonToNewDto() method from our MappingFunctions class. Once we store the result in the person variable, we return the data with the OK status code.
Let’s test this with Postman:
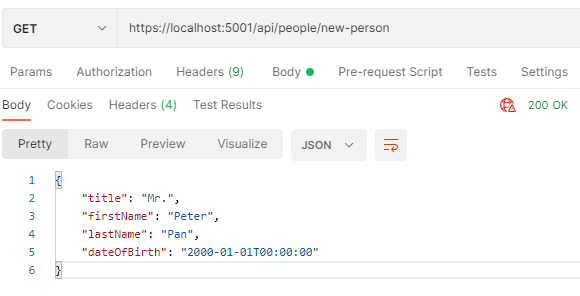
Perfect, our first mapping function works.
Mapping to an Existing Object
We can use another way of mapping when we want to map data to an existing object:
public static PersonDto MapPersonToExistingDto()
{
    var personDto = new PersonDto();
    _person.Adapt(personDto);

    return personDto;
}
Unlike the previous example, in this case, we create a new PersonDto object first. After that, we map the data from the _person object to the existing personDto variable.
We use the same Adapt() method as before, which is currently mapping data based on the property names without custom logic.
Let’s create a new action in our controller:
[HttpGet("existing-person")]
public IActionResult GetExistingPerson()
{
    var person = MappingFunctions.MapPersonToExistingDto();

    return Ok(person);
}
Here we add the GetExistingPerson() action together with a new URI specified on the action.
Similarly, let’s test this with Postman:
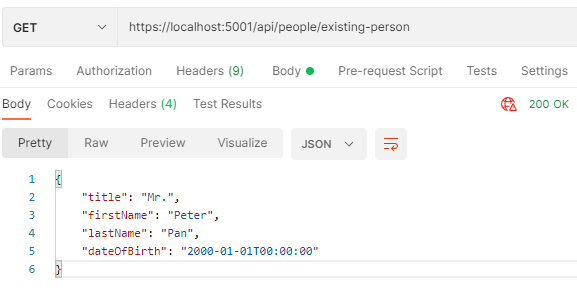
Works like a charm.
Mapping Collections
Mapster library also provides extensions to map from Queryable in .NET. With that, we can speed up the process of mapping data we get from the database inside the Queryable data type.
Let’s create another method in our MappingFunctions class:
public static IQueryable<PersonDto> MapPersonQueryableToDtoQueryable()
{
    var peopleQueryable = _people.AsQueryable();
    var personDtos = peopleQueryable.ProjectToType<PersonDto>();

    return personDtos;
}
In the MapPersonQueryableToDtoQueryable() method, we store the data from the _people object into the peopleQueryable variable with the AsQueryable() method. In the next step, we use the ProjectToType() generic method from Mapster to map the data to the personDtos variable.
Again, let’s create a new endpoint in our controller to test the functionality:
[HttpGet]
public IActionResult GetPeopleQueryable()
{
    var people = MappingFunctions.MapPersonQueryableToDtoQueryable();

    return Ok(people);
}
Finally, let’s call the API from our Postman client to get the results:
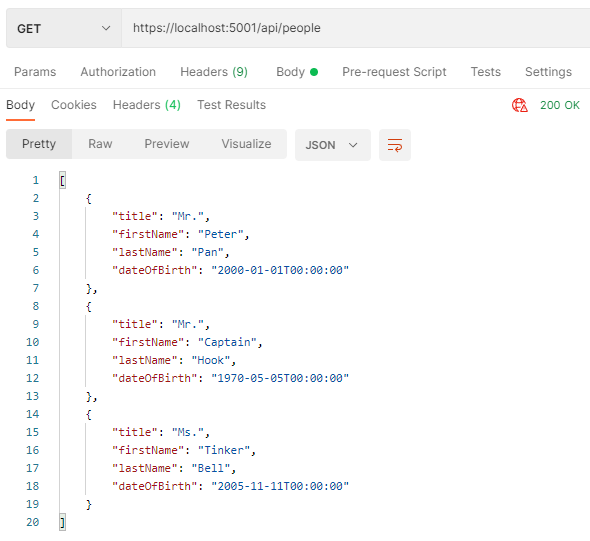
We can see all of our DTO objects with correct data.
Custom Mapping With Mapster
Now, we are going to implement functionalities with custom mapping to see the potential of the Mapster library.
Let’s tackle some of the challenges we might encounter when mapping data, shall we?
We need to add a custom Mapster configuration to implement custom mapping logic. For that, we will use the TypeAdapterConfig class.
First, let’s add a MapsterConfig static class with an extension method for Mapster configuration:
public static class MapsterConfig
{
    public static void RegisterMapsterConfiguration(this IServiceCollection services)
    {
    }
}
Then, we can use the RegisterMapsterConfiguration() extension method from our services in the Program class:
builder.Services.RegisterMapsterConfiguration();
Great, now we are ready to implement custom mapping with Mapster.
Mapping to Different Members
What if we have properties with different names inside our DTO classes? Well, Mapster has a solution for that.
Let’s add another DTO class which we will use to present information for our Person entity:
public class PersonShortInfoDto
{
    public string? FullName { get; set; }
}
In our PersonShortInfoDto class, we have only one property which we will use to store the full name of our Person entity, called FullName.
After that, we add a new configuration to our RegisterMapsterConfiguration() extension method:
public static void RegisterMapsterConfiguration(this IServiceCollection services)
{
    TypeAdapterConfig<Person, PersonShortInfoDto>
        .NewConfig()
        .Map(dest => dest.FullName, src => $"{src.Title} {src.FirstName} {src.LastName}");
}
We use the TypeAdapterConfig generic class with the Person class for the source and the PersonShortInfoDto class as our destination.
Then, we use the Map() method that accepts two Func delegates. Here we use string interpolation to map Title, FirstName, and LastName from our src object to the FullName field of the dest object.
Lastly, we need to call the Scan() method inside the RegisterMapsterConfiguration() method:
TypeAdapterConfig.GlobalSettings.Scan(Assembly.GetExecutingAssembly());
The Scan() method scans the assembly and adds the registration to the TypeAdapterConfig.
Now, we can implement a new method in our MappingFunctions class which we will later use from our controller:
public static PersonShortInfoDto CustomMapPersonToShortInfoDto()
{
    var personShortInfoDto = _person.Adapt<PersonShortInfoDto>();

    return personShortInfoDto;
}
Here we use the same functionality with the Adapt() method, but our custom mapping from the MapsterConfig class will define how we map the data.
Let’s add a controller action:
[HttpGet("short-person")]
public IActionResult GetShortPerson()
{
    var person = MappingFunctions.CustomMapPersonToShortInfoDto();

    return Ok(person);
}
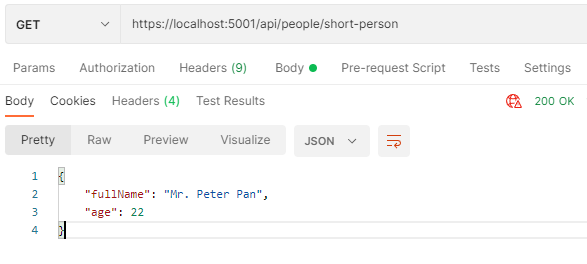
And check the results:
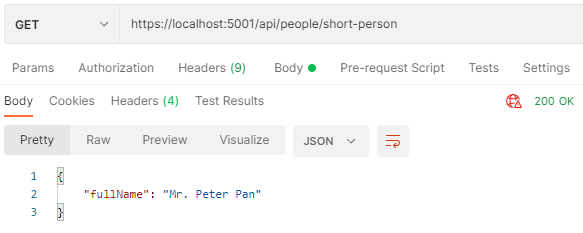
There is our new DTO with the full name.
Awesome.
Mapping Based on Condition
The Map() method from Mapster can accept a third parameter which we can use to set a condition based on the source object. In a case where the condition is not met, null or a default value will be assigned to the destination object.
Let’s add another property to our PersonShortInfoDto class:
public int? Age { get; set; }
With that, let’s modify our Mapster configuration to add a conditional mapping:
TypeAdapterConfig<Person, PersonShortInfoDto>
      .NewConfig()
      .Map(dest => dest.FullName, src => $"{src.Title} {src.FirstName} {src.LastName}")
      .Map(dest => dest.Age,
            src => DateTime.Now.Year - src.DateOfBirth.Value.Year,
            srcCond => srcCond.DateOfBirth.HasValue);
Here we add the third parameter to the Map() function, which is a Func delegate that returns a boolean value. We assign a value to the Age property by subtracting the year of birth from today’s date year, but only if the DateOfBirth property has value.
We can now call our GetShortPerson() action from our controller again to see the result:
There we go. We can see the age of our person.
Mapping Nested Members
Another example of custom mapping is the mapping of nested members.
Let’s add a new property to our PersonShortInfoDto class:
public string? FullAddress { get; set; }
Now, we can modify the configuration to populate the FullAddress property of the destination class:
TypeAdapterConfig<Person, PersonShortInfoDto>
      .NewConfig()
      .Map(dest => dest.FullName, src => $"{src.Title} {src.FirstName} {src.LastName}")
      .Map(dest => dest.Age,
            src => DateTime.Now.Year - src.DateOfBirth.Value.Year,
            srcCond => srcCond.DateOfBirth.HasValue)
      .Map(dest => dest.FullAddress, src => $"{src.Address.Street} {src.Address.PostCode} - {src.Address.City}");
Here we access the nested property through the Address property on our entity class. Based on the Address value, we construct the FullAddress with the string interpolation.
It is important to note that Mapster applies null propagation by default. From the above example, if the Address property is null on the src object, a null value will be assigned to the FullAddress instead of throwing a NullPointerException.
Let’s call our controller action and check the result from Postman:
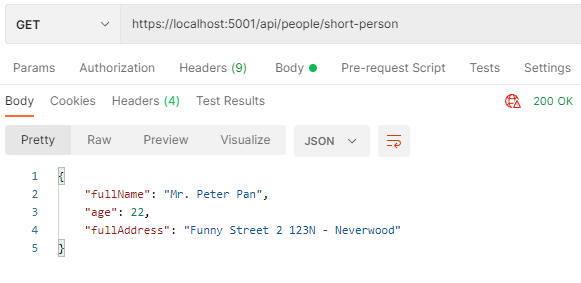
Success.
Ignoring Custom Members
By default, Mapster will map properties by their names without the configuration. We don’t need that in all use cases, so we can use the Ignore() method to ignore specific members:
TypeAdapterConfig<Person, PersonDto>
        .NewConfig()
        .Ignore(dest => dest.Title);
In this case, we ignore the Title property on our destination object, which is the PersonDto.
With that in place, let’s call our GetNewPerson() action and check the result again:
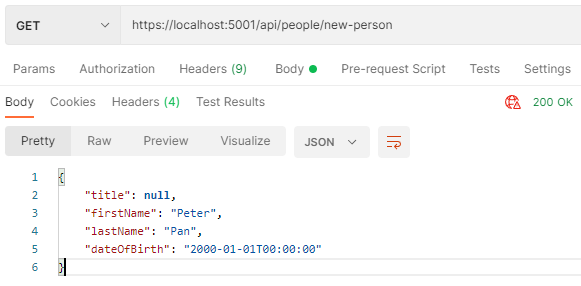
We can see the difference from our previous call since the Title value is now null.
With Mapster, we can use the IgnoreNonMapped() method to ignore all members that are not explicitly set in the configuration. In addition to that, we can use the IgnoreIf() method with the condition based on the source or target object. When the condition is met, Mapster will skip the property.
Another way to ignore members with Mapster is to use the AdaptIgnore attribute on the class itself.
To implement that, we can add the annotation above our Title property:
[AdaptIgnore]
public string? Title { get; set; }
This will work in the same way as our rule-based Ignore() method from the previous example.
Two-Way Mapping
The two-way mapping in Mapster is a simple way to configure mapping in both ways, from source to destination and from the destination to the source object.
We can achieve this by calling a TwoWays() method in our configuration:
TypeAdapterConfig<Person, PersonDto>
        .NewConfig()
        .Ignore(dest => dest.Title)
        .TwoWays();
After that, let’s create a new method for returning our entity based on the DTO:
public static Person MapPersonDtoToPersonEntity()
{
    var personDto = MapPersonToNewDto();
    var person = personDto.Adapt<Person>();

    return person;
}
And add a new action to our controller:
[HttpGet("entity")]
public IActionResult GetPersonEntity()
{
    var person = MappingFunctions.MapPersonDtoToPersonEntity();

    return Ok(person);
}
Finally, we can call our action to confirm that two-way mapping is working:
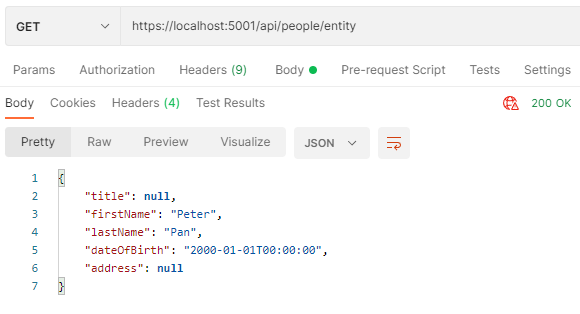
We see that all of the properties from the DTO are successfully mapped, with the title ignored.
Before and After Mapping
Mapster has more options for custom mapping, and it is essential to mention Before and After mapping functionalities. We can use the BeforeMapping() method to perform actions before the mapping operation.
To check this functionality, let’s add a new method to our PersonDto class:
public void SayHello()
{
    Console.WriteLine("Hello...");
}
Here we implement the SayHello() method that outputs some text.
Now, let’s go to the MapsterConfig class and add a new configuration for PersonDto:
TypeAdapterConfig<Person, PersonDto>.ForType()
        .BeforeMapping((src, result) => result.SayHello());
We use the BeforeMapping() method from Mapster and then call the SayHello() method from our result variable.
Finally, let’s call our GetNewPerson() action again and check the console to see the output:
info: Microsoft.Hosting.Lifetime[14]
      Now listening on: https://localhost:5001
info: Microsoft.Hosting.Lifetime[14]
      Now listening on: http://localhost:5002
info: Microsoft.Hosting.Lifetime[0]
      Application started. Press Ctrl+C to shut down.
info: Microsoft.Hosting.Lifetime[0]
      Hosting environment: Development
info: Microsoft.Hosting.Lifetime[0]
      Content root path: D:\GITHUB\CodeMaze\CodeMazeGuides\dotnet-client-libraries\HowToUseMapster\HowToUseMapster\
Hello...
We can see the output in our console.
Similarly, let’s now add another method to the PersonDto class:
public void SayGoodbye()
{
    Console.WriteLine("Goodbye...");
}
We will use the SayGoodbye() method to demonstrate how AfterMapping() method works in Mapster.
That said, let’s modify the MapsterConfig class:
TypeAdapterConfig<Person, PersonDto>.ForType()
        .BeforeMapping((src, result) => result.SayHello())
        .AfterMapping((src, result) => result.SayGoodbye());
And then check the console after calling the same action:
info: Microsoft.Hosting.Lifetime[14]
      Now listening on: https://localhost:5001
info: Microsoft.Hosting.Lifetime[14]
      Now listening on: http://localhost:5002
info: Microsoft.Hosting.Lifetime[0]
      Application started. Press Ctrl+C to shut down.
info: Microsoft.Hosting.Lifetime[0]
      Hosting environment: Development
info: Microsoft.Hosting.Lifetime[0]
      Content root path: D:\GITHUB\CodeMaze\CodeMazeGuides\dotnet-client-libraries\HowToUseMapster\HowToUseMapster\
Hello...
Goodbye...
We can see the output from both methods.
Code Generation with Mapster
One of the problems we often mention when using mapping libraries is the potential regression that can occur when changing property names in our classes. To avoid that, it would be great to see the actual code that Mapster uses for mapping members.
Well, Mapster has a solution for that. We can use the code generation option to generate the source code of mapping functions.
First, let’s create a new configuration class and implement ICodeGenerationRegister interface from Mapster:
public class CodeGenerationConfig : ICodeGenerationRegister
{
    public void Register(Mapster.CodeGenerationConfig config)
    {
        config.AdaptTo("[name]Model")
            .ForType<Person>()
            .ForType<Address>();

        config.GenerateMapper("[name]Mapper")
            .ForType<Person>()
            .ForType<Address>();
    }
}
Here we automatically create two classes with the “Model” prefix based on the first AdaptTo() method. With this approach, we also can avoid writing DTO classes in our projects.
Then we use the GenerateMapper() method to dynamically create two classes with the mapping logic. By default, Mapster stores all new classes in the “Models” folder.
Now, let’s add the following code to our csproj file to generate classes on build:
<Target Name="Mapster" AfterTargets="AfterBuild">
<Exec WorkingDirectory="$(ProjectDir)" Command="dotnet tool restore" />
<Exec WorkingDirectory="$(ProjectDir)" Command="dotnet mapster model -a "$(TargetDir)$(ProjectName).dll"" />
<Exec WorkingDirectory="$(ProjectDir)" Command="dotnet mapster extension -a "$(TargetDir)$(ProjectName).dll"" />
<Exec WorkingDirectory="$(ProjectDir)" Command="dotnet mapster mapper -a "$(TargetDir)$(ProjectName).dll"" />
</Target>
Finally, let’s run the dotnet build command in our console to see the results in our project structure:
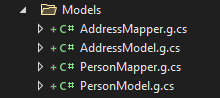
Fantastic, we have four new classes automatically generated from Mapster. Let’s check our PersonMapper class to see the actual mapping code:
public static PersonModel AdaptToModel(this Person p1)
{
    return p1 == null ? null : new PersonModel()
    {
        Title = p1.Title,
        FirstName = p1.FirstName,
        LastName = p1.LastName,
        DateOfBirth = p1.DateOfBirth,
        Address = p1.Address == null ? null : new AddressModel()
        {
            Street = p1.Address.Street,
            City = p1.Address.City,
            PostCode = p1.Address.PostCode,
            Country = p1.Address.Country
        }
    };
}
public static PersonModel AdaptTo(this Person p2, PersonModel p3)
{
    if (p2 == null)
    {
        return null;
    }
    PersonModel result = p3 ?? new PersonModel();

    result.Title = p2.Title;
    result.FirstName = p2.FirstName;
    result.LastName = p2.LastName;
    result.DateOfBirth = p2.DateOfBirth;
    result.Address = funcMain1(p2.Address, result.Address);
    return result;

}
We can see the logic for mapping functions AdaptToModel() and AdaptTo() that we can now use. With that in place, we can be sure that the compiler will report any potential errors we could have when modifying properties on our entities and models.
Another way to use Mapster’s code generation is through data annotations. We can use the AdaptTo attribute to achieve this:
[AdaptTo("[name]Model"), GenerateMapper]
public class Person
Flattening and Unflattening Complex Objects With Mapster
By default, Mapster will perform flattening for us. Let’s say that we have a Person entity that has the Address property with the Street property inside it. Now we can add a new property called AddressStreet to our PersonDto class. At that point, Mapster will perform the mapping without any additional configuration.
Let’s add the AddressStreet property to our PersonDto class:
public string? AddressStreet { get; set; }
Now, let’s call our GetNewPerson() action again without additional configuration and check the result:
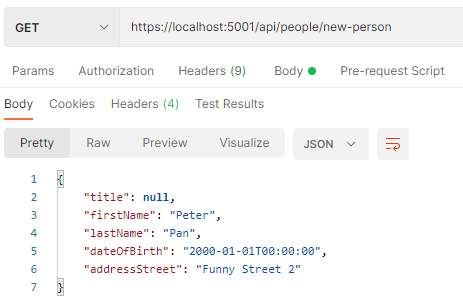
We can see the address street populated automatically based on the flattening.
However, we need to configure unflattening process explicitly. So, if we want to map to Address.Street from AddressStreet, we can call the Unflattening method from the TypeAdapterConfig class and set the first parameter to true.
Conclusion
In this article, we’ve learned how to use Mapster to perform basic mapping operations on our data in the ASP.NET Core project. We have seen how automatic code generation works with Mapster, and how we can flatten or unflatten our objects with a few steps.
The main conclusion is that Mapster is a very useful and simple library as far as mapping in the .NET ecosystem is concerned, so check it out.

