

In this article, we are going to learn how to integrate and use HttpClient in ASP.NET Core Applications. We are going to consume the Web API’s resources while learning about different HttpClient functionalities. We are going to learn how to fetch data from Web API and how to use the HttpRequestMessage class directly to accomplish that. In our future articles, we are going to learn how to send POST, PUT and DELETE requests as well as how to send PATCH requests with HttpClient.
You can also visit our HttpClient Tutorial page, to see all the articles from this tutorial.
So, let’s start.
Starting Projects Overview
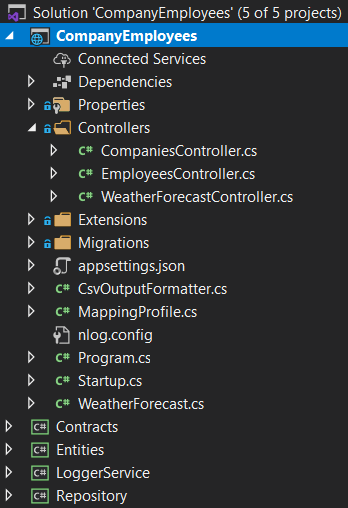
If you open our main branch of the HttpClient repository, you will find two projects: CompanyEmployees and CompanyEmployees.Client. The first project is the ASP.NET Core Web API project, and it will be our server-side project for this tutorial. It consists of several projects:
The API project isn’t that important for our article and the complete series as well. We use this project in our Ultimate ASP.NET Core Web API book, and if you are interested more in that topic, feel free to visit the linked page. The important part is that it uses the SQL database, so all you have to do is to modify the connection string in the appsettings.json file and run the Update-Migration command. All the required data will be seeded in the database.
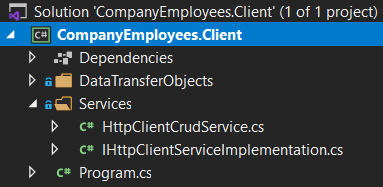
Then, there is the client application – ASP.NET Core Console Application. All it has is a single service HttpClientCrudService, which we are going to modify in this article, a single interface IHttpClientServiceImplementation all the HttpClient services will inherit from, data transfer classes and a modified Program class:
Of course, let’s show the current code from the Program class:
class Program
{
    static async Task Main(string[] args)
    {
        var services = new ServiceCollection();

        ConfigureServices(services);

        var provider = services.BuildServiceProvider();

        try
        {
            await provider.GetRequiredService<IHttpClientServiceImplementation>()
                .Execute();
        }
        catch (Exception ex)
        {
            Console.WriteLine($"Something went wrong: {ex}");
        }
    }

    private static void ConfigureServices(IServiceCollection services)
    {
        services.AddScoped<IHttpClientServiceImplementation, HttpClientCrudService>();
    }
}
Nothing special here. We prepare our service collection, add service to the IOC, and execute the default method from the service class. As we add different services in this entire tutorial, we are going to expand the ConfigureServices method.
About HttpClient
We won’t dive too deep into the theory about HttpClient since we are going to learn a lot from our examples, but let’s look at some basics.
HttpClient is a class that enables us to send HTTP requests and receive HTTP responses from resources identified by URI. We can use this class to send all kinds of HTTP requests like GET, POST, PUT, DELETE, PATCH… and accept responses from the server.
HttpClient uses HTTP message handlers to send requests and get responses. This is the main job of the default message handler. If we read Microsoft’s documentation, we are going to read that the default one for the .Net Framework and .NET Core 2.0 and earlier is HttpClientHander. But from the .NET Core 2.1 and later the default one is SocketsHttpHandler.
But, HttpClient doesn’t have to use only one message handler. We can attach multiple message handlers and create a pipeline. Some of those handlers can manipulate only the headers of the request, some may work with timeouts, etc.
Using HttpClient in ASP.NET Core Applications to Send a GET Request
Now, let’s start with the modification of the HttpClientCrudService class:
public class HttpClientCrudService : IHttpClientServiceImplementation
{
    private static readonly HttpClient _httpClient = new HttpClient();

    public HttpClientCrudService()
    {
        _httpClient.BaseAddress = new Uri("https://localhost:5001/api/");
        _httpClient.Timeout = new TimeSpan(0, 0, 30);
    }

    public async Task Execute()
    {
    }
}
Here, we create a new HttpClient field, initialize it, and add the configuration in a constructor. As a configuration, we pass the URI of our API and set the time out of the request. Of course, we can find a lot more properties to use in this configuration, but for now, this will be enough. Later on, when we start learning about HttpClientFactory, we are going to move this configuration to a different place.
Now, we can add a new method in this class:
public async Task GetCompanies()
{
    var response = await _httpClient.GetAsync("companies");
    response.EnsureSuccessStatusCode();

    var content = await response.Content.ReadAsStringAsync();
    var companies = JsonSerializer.Deserialize<List<CompanyDto>>(content, _options);
}
In this method, we use the GetAsync shortcut method from HttpClient and pass the address of our controller’s action. We have to ensure that the response is successful, so we call the EnsureSuccessStatusCode method. Once we are sure that we have a response with a successful status code, we read the content of the response as a string. Finally, we deserialize our response to a list of companies. As you can see, we are using one additional parameter of type JsonSerializerOptions, so let’s add it to our class, and let’s call this method in the Execute method:
private readonly JsonSerializerOptions _options;

public HttpClientCrudService()
{
    _httpClient.BaseAddress = new Uri("https://localhost:5001/api/");
    _httpClient.Timeout = new TimeSpan(0, 0, 30);

    _options = new JsonSerializerOptions { PropertyNameCaseInsensitive = true };
}

public async Task Execute()
{
    await GetCompanies();
}
We are setting up the case insensitive deserialization option for our JsonSerializer. Without it, our response won’t be deserialized properly.
Now, we can add a breakpoint in the GetCompanies method, start the Web API project, and then start the client app:

As we can see, we have our result in the companies variable.
We can continue on.
Supporting Different Response Formats
In this example, we received a JSON as a default response format. Our API supports that type by default. But some APIs don’t default to JSON, they maybe support XML as a default response format or any other. In such cases, our logic would not work.
In addition to JSON, our API supports an XML response format as well due to implemented Content Negotiation. That said, let’s see how we can explicitly ask for a format in our client app.
First of all, the Http request, as well as the response, contains a set of headers, which we can use to pass additional information between the client and the server apps. The common header for HTTP requests is the Acceptheader. We use this header to tell the server which media type the client is going to accept: Accept: application/json, text/xml.
So, let’s see how we can set up the header in our requests:
public HttpClientCrudService()
{
    _httpClient.BaseAddress = new Uri("https://localhost:5001/api/");
    _httpClient.Timeout = new TimeSpan(0, 0, 30);
    _httpClient.DefaultRequestHeaders.Clear();
    _httpClient.DefaultRequestHeaders.Accept.Add(
        new MediaTypeWithQualityHeaderValue("application/json"));
    _httpClient.DefaultRequestHeaders.Accept.Add(
        new MediaTypeWithQualityHeaderValue("text/xml"));

    _options = new JsonSerializerOptions { PropertyNameCaseInsensitive = true };
}
Here, we use the DefaultRequestHeaders property and clear it out. Then, we use the Accept property, and since it is a collection, we add two MediaTypeWithQualityHeaderValue objects. With a first object, we support a JSON format, and with a second, we support the XML format. For this, we need to add a new using statement: using System.Net.Http.Headers;
Now, if we have a configuration like this one, we have to add some additional code in our method, to decide how to deserialize our response:
public async Task GetCompanies()
{
    var response = await _httpClient.GetAsync("companies");
    response.EnsureSuccessStatusCode();

    var content = await response.Content.ReadAsStringAsync();

    var companies = new List<CompanyDto>();

    if(response.Content.Headers.ContentType.MediaType == "application/json")
    {
        companies = JsonSerializer.Deserialize<List<CompanyDto>>(content, _options);
    }
    else if(response.Content.Headers.ContentType.MediaType == "text/xml")
    {
        var doc = XDocument.Parse(content);
        foreach (var element in doc.Descendants())
        {
            element.Attributes().Where(a => a.IsNamespaceDeclaration).Remove();
            element.Name = element.Name.LocalName;
        }

        var serializer = new XmlSerializer(typeof(List<CompanyDto>));
        companies = (List<CompanyDto>)serializer.Deserialize(new StringReader(doc.ToString()));
    }
}
So, since we support both JSON and XML formats, we have to check which ContentType is applied to the response. If it is JSON, we just do the standard deserialization. But if it is XML, we parse the Content into the XDocument type and then just remove the declarations and use a LocalName for the Name property. Finally, we create a new XmlSerializer and deserialize our XDocument.
At this point, if we start both applications, and place a breakpoint inside the method, we will see that our default format is JSON:

Of course, once we continue execution, we will get our companies as a result (as we did previously).
Preference One over Another Accept Header in HttpClient
With our Accept header setup, we support two formats with equal preference. The value of the preference is 1, which is a maximum value. But, we can set a lower preference for one of these two headers – the value must be between 0 and 1. The one with the higher preference will have an advantage.
So, let’s lower the preference of the JSON Accept header in our constructor:
_httpClient.DefaultRequestHeaders.Clear();
_httpClient.DefaultRequestHeaders.Accept.Add(
    new MediaTypeWithQualityHeaderValue("application/json", 0.9));
_httpClient.DefaultRequestHeaders.Accept.Add(
    new MediaTypeWithQualityHeaderValue("text/xml"));
As we can see, the MediaTypeWithQualityHeaderValue constructor accepts another parameter. We set the value for it to 0.9. Since we didn’t add any value for the XML Accept header, the value is 1 by default.
Now, if we start our applications, we are going to find out that XML is the format we prefer:

So, execution will skip this part and execute our XML deserialization.
Let’s inspect the response body before XDocument parsing:
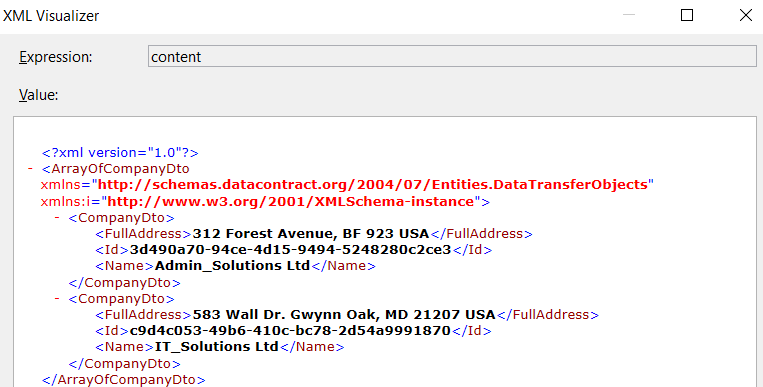
And then, let’s inspect our doc variable after the parsing actions:

We can see the difference.
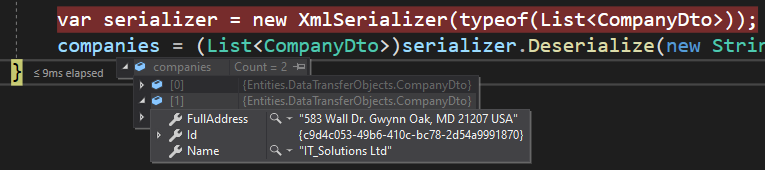
After the parsing actions, our deserialization completes successfully:
Excellent. We’ve seen how we can add preference to our HTTP Accept header in our request.
But now the question emerges.
What if we want to use some headers for some requests and other headers for other requests?
Using HttpRequestMessage Class to Send HTTP Requests
With this implementation, we are using the same header configuration for each request. So, if want to send an HTTP request that defaults to JSON format, we can’t do that with the HTTP configuration in this class. That’s because we set the XML format to be the default one.
This means we have to provide a different solution.
If we think this through, we can conclude that the BaseAddress and Timeout properties are related to HttpClient, but the properties of the Accept header are connected to the request itself. Also, when we use the GetAsync method, it internally creates a new HttpRequestMessage with the GET HTTP method. That’s why we call it the shortcut method. That said, we can create our own HttpRequestMessage and provide headers for that request.
The best practice is to set up the default configuration on the HttpClient instance and the request configuration on the HTTP request itself. Of course, if we always want to use the JSON format for the Accept header, we can set it up on the HttpClient instance level.
Implementation
Now, let’s see how we can implement the HTTP request using the HttpRequestMessage class.
First, let’s remove the accept header configuration from our constructor:
public HttpClientCrudService()
{
    _httpClient.BaseAddress = new Uri("https://localhost:5001/api/");
    _httpClient.Timeout = new TimeSpan(0, 0, 30);
    _httpClient.DefaultRequestHeaders.Clear();

    _options = new JsonSerializerOptions { PropertyNameCaseInsensitive = true };
}
Then, we can revert the GetCompanies method to its previous implementation:
public async Task GetCompanies()
{
    var response = await _httpClient.GetAsync("companies");
    response.EnsureSuccessStatusCode();

    var content = await response.Content.ReadAsStringAsync();
    var companies = JsonSerializer.Deserialize<List<CompanyDto>>(content, _options);
}
Finally, we can add our new method:
public async Task GetCompaniesWithXMLHeader()
{
    var request = new HttpRequestMessage(HttpMethod.Get, "companies");
    request.Headers.Accept.Add(new MediaTypeWithQualityHeaderValue("text/xml"));
    var response = await _httpClient.SendAsync(request);

    response.EnsureSuccessStatusCode();

    var content = await response.Content.ReadAsStringAsync();

    var doc = XDocument.Parse(content);
    foreach (var element in doc.Descendants())
    {
        element.Attributes().Where(a => a.IsNamespaceDeclaration).Remove();
        element.Name = element.Name.LocalName;
    }

    var serializer = new XmlSerializer(typeof(List<CompanyDto>));
    var companies = (List<CompanyDto>)serializer.Deserialize(new StringReader(doc.ToString()));
}
So, we create a new request with the HttpRequestMessage class providing the HTTP method as an argument and the address of our API action. Then, we add headers to our request and call the SendAsync method to send the request. After we extract the Content, we repeat the same steps we did in our previous method.
We have to do one final thing.
Let’s make sure that this method is called as soon as our client application starts:
public async Task Execute()
{
    //await GetCompanies();
    await GetCompaniesWithXMLHeader();
}
As we did before, we are going to place a breakpoint in this method and start both apps:
As you can see, we have the same result as before, but this time we are using a separate method with the HttpRequestMessage class to send an HTTP request with the XML Accept header.
Conclusion
In this article, we’ve talked about HttpClient, and how we can use it in our ASP.NET Core application to consume data from Web API.
To sum up, we have learned:
- More about the HttpClient class
- How to configure the required properties to use for each request
- The way to use the GetAsync shortcut method to send the HTTP Get request
- How to add headers to our requests and to add a preference for each one
- To use HttpRequestMessage to send the HTTP request
In the next article, we are going to use the HttpClient to send the POST, PUT and DELETE requests using both shortcut methods and HttpRequestMessage class.
Until then.
Best regards.

