

In this article, we will provide an overview of machine learning and explain how ML.NET enables it. We will learn how to build, train, and optimize a simple machine-learning model. Finally, we will see how the model can be used in a real-life application.
Machine learning is one of the most exciting and rapidly evolving fields in computer science. Lately, we have seen the emergence of advanced AI tools such as ChatGPT. The basis for these tools is machine learning, and its growing prevalence should make developers sit up and take notice.
What Is Machine Learning and How Does ML.NET Enable It?
Machine Learning, or ML for short, is a field of computer science that involves training algorithms to recognize patterns in data. Predictions or decisions are made based on these patterns. The goal of the machine learning model is to predict a new system state based on previous states.
From a clear C# developer’s point of view, Machine Learning can be challenging because building and training models require a lot of specialized knowledge and resources. That is where ML.NET comes into play.
ML.NET is an open-source machine learning framework that makes it simpler for C# developers to build and deploy machine learning models.
ML.NET provides a range of algorithms for supervised and unsupervised learning, explained below, as well as tools for data preparation, training, evaluation, and deployment.
One of the key advantages of ML.NET is that it integrates seamlessly with the .NET ecosystem. It makes it easy to incorporate machine learning functionalities into our C# applications. This means we can build machine learning models and deploy them alongside our existing code without learning new programming languages or tools.
ML.NET also provides a range of features for optimizing the performance of machine learning models, including hyperparameter tuning, feature (the ML-specific term) selection, and automatic model selection. This makes it easier to build models that are accurate and reliable, even when working with large and complex datasets.
Setting up the Development Environment
Let’s see how to add ML.NET to our project. The first thing we need to do is to install the required ML.NET packages. We can do it using a command line:
PM> Install-Package Microsoft.ML
Or via NuGet Package Manager:
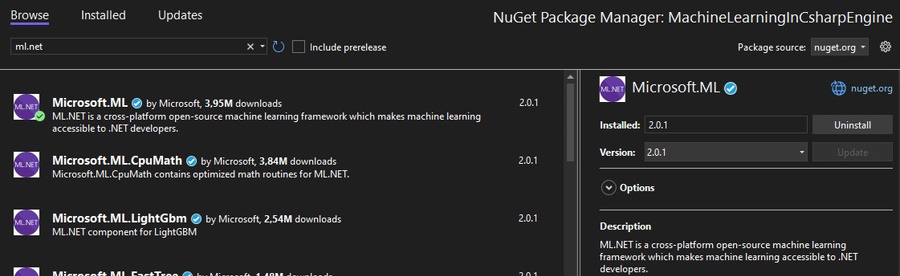
Here we can see there are multiple ML.NET packages available to install. Depending on project requirements, we might need to install additional packages, but for our example, we will install only the Microsoft.ML package.
Understanding Supervised Learning
To better understand machine learning, it’s important to know the three main categories of machine learning models: supervised, unsupervised, and semi-supervised.
Unsupervised learning involves training a model on unlabeled data to find patterns or structures within the data, while semi-supervised learning combines labeled and unlabeled data to train a model.
We will focus on the supervised learning model.
Supervised learning involves training a model on labeled data, where each data point is associated with a known outcome. The goal of supervised learning is to use this labeled data to build a model that can accurately predict outcomes for new, unlabeled data.
Several algorithms are commonly used in supervised learning, including linear regression, logistic regression, decision trees, and more. The details of these algorithms are beyond the scope of this article, but each has its own strengths and weaknesses, and the choice of algorithm will depend on the specific problem being solved and the characteristics of the data.
One of the key benefits of supervised learning is that we can use it to build models for a wide range of applications, from predicting customer behavior to detecting fraud. However, it does require access to labeled data. When we talk about labeled data, we refer to a dataset that has been assigned one or more categories or labels. Data categorization or labeling is usually done manually, and it serves as a basis for the machine learning model to learn from. Considering this, it is not strange that gathering data can be challenging in some cases.
Supervised learning is a powerful tool for building machine learning models to make accurate predictions and automated decisions based on labeled data.
Building and Training a Simple Model With ML.NET
Having covered the theoretical stuff, let’s see how to build and train a simple ML model using ML.NET.
It all starts with the data. For our example, we will use Credit Risk Customers dataset available on Kaggle:

This data set contains 21 columns with credit-related customer data. To simplify our example, we will use only columns credit_amount, duration, age, and class.
The class column is the one we want to predict based on other values.
Let’s define our ModelInput class:
public class ModelInput
{
    [ColumnName("duration"), LoadColumn(1)]
    public float Duration { get; set; }

    [ColumnName("credit_amount"), LoadColumn(4)]
    public float CreditAmount { get; set; }

    [ColumnName("age"), LoadColumn(12)]
    public float Age { get; set; }

    [ColumnName("class"), LoadColumn(20)]
    public string Class { get; set; }
}
Here we map our properties with the column names in the dataset.
Next, let’s define ModelOutput class:
using Microsoft.ML.Data;
namespace MachineLearningInCsharpEngine.DataModels.MulticlassClassification;

public class ModelOutput
{
    [ColumnName("PredictedLabel")]
    public string Prediction { get; set; }
}
It contains only Prediction property which is enough for the algorithm we use.
Now we define ModelBuilder class:
public class ModelBuilder
{
    private MLContext _mlContext = new MLContext(seed: 0);
    private PredictionEngine<ModelInput, ModelOutput> _predictionEngine;
    private IDataView _trainingDataView;
    private IDataView _testDataView;
    private ITransformer _mlModel;

    ...
}
Here we define private variables:
_mlContext– the common context for allML.NEToperations_predictionEngine– aPredictionEngineinstance used to getModelOutputfromModelInputbased on the trained model_trainingDataView– a data collection (IDataView) used for training the model_testDataView– a data collection (IDataView) used to evaluate the trained model_mlModel– anITransformerinstance used to transform the data
Next, we will define a CreateModel() method :
public void CreateModel(string dataFilePath, string savingPath)
{
    LoadAndSplitData(dataFilePath);

    var pipeline = PreProcessData();

    BuildAndTrainModel(_trainingDataView, pipeline);

    EvaluateModel();

    SaveModel(savingPath);

    _predictionEngine = _mlContext.Model.CreatePredictionEngine<ModelInput, ModelOutput>(_mlModel);
}
We can divide machine learning model development into steps. We will examine these steps through our example.
Collecting Data
Although it’s important to note that data collection can often represent a fair amount of time and research, our focus will just be on loading the data. For this, we define a LoadAndSplitData() method:
private void LoadAndSplitData(string dataFilePath)
{
    var allDataView = _mlContext.Data.LoadFromTextFile<ModelInput>(
                                  path: dataFilePath,
                                  hasHeader: true,
                                  separatorChar: ',');

    var split = _mlContext.Data.TrainTestSplit(allDataView, testFraction: 0.1);
    _trainingDataView = split.TrainSet;
    _testDataView = split.TestSet;
}
First, we load the data from our data source. We use the LoadFromTextFile() method to do so. By default, it expects tab-delimited content. In our example, we set the separator character to comma (,) and specify that our data has a defined header row.
Next, we need to split our data into train and test data. For this, we use the TrainTestSplit() method, which splits our data by the testFraction parameter. A 0.1 value means we use 90% of the data as a train set while the remaining 10% is a test set.
Preparing The Data
Our next step is pre-processing the data. This usually involves cleaning the data, handling missing data, and other actions to make the data as neat as possible for our task. Eventually, this will also lead to better model performance:
public IEstimator PreProcessData()
{
    var pipeline = _mlContext.Transforms.Conversion
        .MapValueToKey(inputColumnName: "class", outputColumnName: "Label");
    pipeline.Append(_mlContext.Transforms.Concatenate("Features", "duration", "credit_amount", "age"));

    return pipeline;
}
As a preparatory step in our example, we need to convert the column class, which is a string type, to a numerical value. We do that with the MapValueToKey() method, where we specify input and output columns.
In the machine learning context, we refer to a feature as a measurable aspect or property of the data that can be used to make predictions or to identify patterns in the dataset. Machine learning models are based on mathematical operations or statistical models that rely on numerical data to calculate probabilities and make predictions. Thus, we must define our data as numerical objects called features vector. For that, we use the Concatenate() method to convert our input values duration, credit_amount, and age to a Features vector.
Training the Model
Finally, we are ready to train our model:
public IEstimator<ITransformer> BuildAndTrainModel(IDataView trainingDataView, IEstimator<ITransformer> pipeline)
{
    var trainingPipeline = pipeline
            .Append(_mlContext.MulticlassClassification.Trainers.SdcaMaximumEntropy("Label", "Features"))
            .Append(_mlContext.Transforms.Conversion.MapKeyToValue("PredictedLabel"));

    _mlModel = trainingPipeline.Fit(trainingDataView);

    return trainingPipeline;
}
In the first place, we need to choose an algorithm. As mentioned, selecting the right algorithm is a topic that is out of the scope of this article, and we may cover it in the future. But for our purposes, we will move forward with the SdcaNonCalibrated algorithm.
We do that by appending a multiclass classification SdcaNonCalibrated trainer to the input pipeline.
The highlighted line shows the step in which we convert the predicted labels from their numeric form to their original string representation using MapKeyToValue() method.
Once the training pipeline is defined, we use it to train (or fit) the model to the training data using the Fit() method. During this process, the model learns to identify the patterns and uses this knowledge to make new predictions.
The trained model is then stored in the _mlModel variable.
Evaluating the Model
The next step is the process is model evaluation. In other words, we want to see how well our model works on a data set with known data. We do that with the Evaluate() method:
public void EvaluateModel()
{
    var testMetrics = _mlContext.MulticlassClassification.Evaluate(_mlModel.Transform(_testDataView));
    Console.WriteLine($"Evaluation Metrics:");
    Console.WriteLine($"- MicroAccuracy:\t{testMetrics.MicroAccuracy:0.###}");
    Console.WriteLine($"- MacroAccuracy:\t{testMetrics.MacroAccuracy:0.###}");
    Console.WriteLine($"- LogLoss:\t\t{testMetrics.LogLoss:#.###}");
    Console.WriteLine($"- LogLossReduction:\t{testMetrics.LogLossReduction:#.###}");
}
And these are our results:
Evaluation Metrics:
- MicroAccuracy:	0.796
- MacroAccuracy:	0.514
- LogLoss:		34.539
- LogLossReduction:	-69.23
Without going into detail about how to interpret these results, we can say our model has decent overall accuracy. Still, there is room for improvements in macro accuracy and log loss.
We also define a method to save our model to a file:
private void SaveModel(string saveModelPath)
{
    _mlContext.Model.Save(_mlModel, _trainingDataView.Schema,
        Path.Combine(Environment.CurrentDirectory, saveModelPath));
}
To be able to make predictions on new data, we also need to create a PredictionEngine:
private void CreatePredictionEngine()
{
    _predictionEngine = _mlContext.Model.CreatePredictionEngine<ModelInput, ModelOutput>(_mlModel);
}
Improving Model Performance
Similar to choosing the right algorithm in the first place, improving model performance requires additional knowledge and experimentation to achieve optimal performance. Let’s explore some of the techniques we can use to improve our model:
- Algorithm Selection – Not surprisingly, our chosen algorithm can significantly impact model performance. It is important we consider the specific characteristics of the data and the problem being addressed because certain algorithms may be better suited to certain types of data or tasks.
-
Feature Engineering – This involves selecting or creating new features from the raw data that are more informative or relevant to the prediction task. This can involve scaling or transforming existing features, creating new features from existing ones, or selecting a subset of the most important features.
-
Hyperparameter Tuning – Many machine learning algorithms have hyperparameters we can fine-tune to optimize the model’s performance. Hyperparameters are settings that are not learned from the data but rather are set manually by the user. Techniques such as grid search or randomized search can be used to find the optimal values for these hyperparameters.
-
Regularization – A technique used to prevent overfitting, where the model is too complex and fits the training data too closely, eventually leading to poor generalization performance on new data. Thus, regularization involves adding a penalty term to the loss function that encourages the model to have simpler weights or coefficients.
-
Ensemble Methods – These involve combining multiple models to improve performance. Examples include bagging, boosting, and stacking. Consequently, these methods can help to reduce overfitting. Furthermore, they can improve model stability and increase predictive accuracy.
-
Data Augmentation – Involves generating additional training data by applying transformations to the existing data. Augmentation can help increase the training set’s size and thus improve the model’s ability to generalize to new data.
Deploying the Model
This is where all of our hard work and preparation finally pay off. For deploying our model, we define a LoadModel() method in our ModelBuilder class:
public void LoadModel(string path)
{
    _mlModel = _mlContext.Model.Load(path, out _);
    _predictionEngine = _mlContext.Model.CreatePredictionEngine<ModelInput, ModelOutput>(_mlModel);
}
To make the actual prediction, we define thePredict() method:
public ModelOutput Predict(ModelInput input)
{
    return _predictionEngine.Predict(input);
}
And lastly, we can use our well-trained, optimized model in the application:
private static string savedModelFilename = "trainedModel.zip";

...

var modelBuilder = new ModelBuilder();
modelBuilder.LoadModel(savedModelFilename);

var modelInput = new ModelInput()
{
    Age = 300,
    CreditAmount = 100000,
    Duration = 120
};

var prediction = modelBuilder?.Predict(modelInput);
Console.WriteLine($"\nExample input class is {prediction?.Prediction.ToUpper()}!");
Here we can see the usage of the model is pretty straightforward in practice.
What Can We Do With ML.NET?
Now we know how to build, train and use a simple ML model. Let’s quickly mention some examples of what we can do with ML.NET:
-
Image and Video Analysis – Classification of images or videos based on their content, detecting objects or faces in images, or performing other tasks related to image or video analysis.
-
Natural Language Processing – Sentiment analysis, named entity recognition, or language translation.
-
Anomaly Detection – Identification of outliers in data sets, which can be useful for detecting fraud, network intrusions, or other unusual events.
-
Predictive Modeling – Building predictive models that can forecast future trends or identify patterns in data.
-
Recommender Systems – Building personalized recommendation systems that can suggest products, movies, or other items based on a user’s preferences.
-
Speech Recognition – Analysis, voice synthesis, or speaker identification.
Conclusion
In this article, we’ve covered the basic concepts of machine learning and explored how to create a simple ML model in C# using ML.NET. We also learned about techniques to improve model performance and proposed some interesting ML.NET usage scenarios.
In the end, we can conclude that ML.NET is a great addition to the Microsoft stack that enables us, as C# developers, to keep pace with this exciting and rapidly evolving technology.
