

In this article, we will learn about generating images in C# using ImageSharp.
Let’s get started.
What is ImageSharp?
ImageSharp is a free and open-source cross-platform library for the .NET Ecosystem. It is designed to simplify the processing of images by providing a powerful yet simple API. ImageSharp is fully managed and can be used in device, cloud, and embedded/IoT scenarios. It does not rely on the System.Drawing namespace or window-specific functions, as in the case of System.Drawing.Common.
ImageSharp offers functionality for various operations like resizing, cropping, flipping, rotating, and adjusting the brightness, contrast, and gamma of images.
We will use this library to generate an image and then draw a polygon (triangle) on it. First, we need to import it into our project:
dotnet add package SixLabors.ImageSharp
Image Generation
Next, let’s create an ImageService static class where we will define some static methods, beginning with one for creating a blank image:
public static Image<Rgba32> CreateBlankImage(int width, int height)
{
    return new Image<Rgba32>(width, height);
}
Here we see our CreateBlankImage() method that creates and returns a new blank image of a specified width and height. The Image is of type Rgba32, which implies that each pixel is represented by four 8-bit values: Red, Green, Blue, and Alpha (transparency).
Image Manipulation
Next, let’s create a static method to draw a triangle on an image:
public static void DrawTriangleOnImage(Image<Rgba32> image, PointF point1, PointF point2, PointF point3)
{
    ValidatePoint(point1);
    ValidatePoint(point2);
    ValidatePoint(point3);
    var pen = Pens.Solid(Color.Red, 3);
    image.Mutate(ctx => ctx.DrawPolygon(pen, [point1, point2, point3, point1]));
}

public static void ValidatePoint(PointF point)
{
    if (point.X <= 0 || point.Y <= 0)
    {
        throw new ArgumentException("Point coordinates cannot be less than or equal to zero.");
    }
}
Our DrawTriangleOnImage() method takes 4 parameters: the image to draw on, along with three PointF values that define the vertices of our triangle. PointF is a struct representing an ordered pair of single-precision floating-point X and Y coordinates defining a point in a 2D plane.
First, we call our ValidatePoint() helper method to ensure all of the vertices are valid positive coordinates.
Next, we create a solid red pen with a thickness of 3 pixels. In the ImageSharp library, Pens is a static class that maintains a collection of common pen styles. The Solid() method creates a SolidPen, i.e. one without any drawing patterns.
Finally, we use the Mutate() method to perform modifications on our image. Its single argument is an Action<IImageProcessingContext>. In our case, we pass in a lambda to call the DrawPolygon() method of the IImageProcessingContext, providing our pen and an array of vertices. DrawPolygon(), as one might guess, renders a polygon on the image context using the provided pen and coordinate array.
Note, we repeat point1 in the array because it defines the point of closure for our triangle. Thus, we draw a line from the last point (point3) back to the first point (point1) to complete our polygon.ctx represents the context of the image, i.e., the work area where we make changes to our image.
Saving the Image
Now, let’s define a method to save an image:
public static void SaveImage(Image<Rgba32> image, string outputPath)
{
    image.SaveAsPng(outputPath);
}
Here we see our SaveImage() method, which takes two parameters: the image we wish to save and and an outputPath defining where to save it.
Then, we save our image in our desired png format by calling the SaveAsPng() method, passing in our outputPath as the destination.
Generating Sample Images
Now, let’s bring our previously created methods into our Program class to finalize our image generation:
string outputPath = @"outputImage.png";

using var image = ImageService.CreateBlankImage(width: 350, height: 280);

var point1 = new PointF(50, 50);
var point2 = new PointF(250, 50);
var point3 = new PointF(150, 200);
ImageService.DrawTriangleOnImage(image, point1, point2, point3);

ImageService.SaveImage(image, outputPath);

Console.WriteLine("Image generated and saved successfully.");
First, we define our output path as a .png file in our current working directory.
Next, we create a blank image with a width of 350 pixels and a height of 280 pixels via our CreateBlankImage() method. Note that since Image objects are disposable we need to add a using declaration.
Next, we define the vertices of our triangle (point1, point2, point3), with values for their (x, y) coordinates. We then call our DrawTriangleOnImage() method with those points to render a triangle on our blank image.
Finally, we save our modified image to our specified outputPath, with a confirmation message printed on the console:
Image generated and saved successfully.
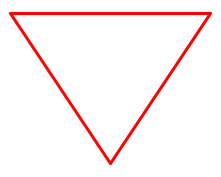
Let’s have a look at our newly saved image:
Conclusion
In this article, we have looked at generating images in C# by making use of the ImageSharp library.
