

In this article, we will discuss how to generate QR codes, specifically with the .NET library QRCoder. We will generate basic QR codes that contain simple strings, discuss reading from and writing QR codes to a database, and try out real-life use cases, such as phoning numbers and opening web pages.
Let’s first align on what a QR Code is.
What is a QR Code?
QR is the abbreviation for “Quick-Response”, so it is a quick-response two-dimensional barcode that can store various types of data. After a QR code is created, we may access the encoded data behind it by scanning it with a QR code reader.
Because of their versatility and ease of use, they have exploded in sectors like marketing and advertising, where quick access to data is essential to success.
Now that we’ve covered the theoretical aspect let’s look at adding QRCoder to a .NET web application and start generating some Quick-Response codes!
Setting up a QR Code Generator
Let’s use a basic web application to generate and display our QR codes on a page.
First off, let’s create an ASP.NET Core Web Application (Model-View-Controller), and then add the QRCoder library from the package manager console:
PM> install-package QRCoder
Next, let’s add a new record in the Models folder:
public record HomeModel(Dictionary<string, string> QRCodes);
We will use this record to hold the encoded QR Codes, which we can then display in our view.
Let’s update the Home/Index view to display our QR codes:
@model HomeModel;

<div class="text-center">
    @foreach (var qr in Model.QRCodes)
    {
        <hr/>
        <h2>@qr.Key</h2>
        <img width="250px" src="@qr.Value" />
    }
</div>
Finally, let’s modify the HomeController class:
public class HomeController : Controller
{
private readonly QRCodeGenerator qrGenerator = new();
public IActionResult Index()
{
var qrCodes = new Dictionary<string, string>
{
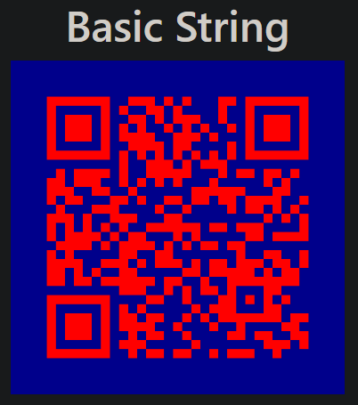
{ "Basic String", GenerateQRCodeString() }
};
var model = new HomeModel(qrCodes);
return View(model);
}
private string GenerateQRCodeString()
{
var qrCodeData = qrGenerator.CreateQrCode("Hello CodeMaze readers", QRCodeGenerator.ECCLevel.Q);
return GeneratePng(qrCodeData);
}
private static string GeneratePng(QRCodeData data)
{
using var qrCode = new PngByteQRCode(data);
var qrCodeImage = qrCode.GetGraphic(20);
return $"data:image/png;base64,{Convert.ToBase64String(qrCodeImage)}";
}
}
Here we are creating a QR code that holds a simple string, and rendering it on the page as a PNG image.
For now, let’s ignore the parameters of the CreateQrCode() and the GetGraphic() methods, as we’ll delve into those a bit later.
Now, let’s run our app and see our first QR Code displayed on the page:

Great! Now that we have a basic QR Code generated, let’s look at generating more interesting codes using payload generators.
QR Code Payload Generators
We began by generating a QR Code containing a basic string. Let’s look at other examples, like offering a call-to-action that permits a smooth interaction with an external application.
All QR Codes are strings, but some are “special” structured strings that QR Code Readers can decipher and process. The QRCoder library makes this easier for us with some convenience classes, all deriving from the Payload class. This class contains the behavior to construct these sQR codes. Let’s look into a few of these special helpers.
Generating QR Codes for URLs
One of the most common use cases of QR Codes is navigating to a web page. For instance, if we wanted readers of our printed materials to fill out a survey, it would be more convenient to provide a QR code for scanning instead of a long URL that would have to be typed.
So, let’s add a new method to generate a URL:
private string GenerateQRCodeURL()
{
    var qrCodeData = qrGenerator.CreateQrCode(new Url("https://www.code-maze.com"));

    return GeneratePng(qrCodeData);
}
This Url class derives from the Payload class we mentioned earlier, and takes a URL as an argument.
Let’s update our Index() method:
public IActionResult Index()
{
    var qrCodes = new Dictionary<string, string>
    {
        { "Basic String", GenerateQRCodeString() },
        { "URL", GenerateQRCodeURL() }
    };

    var model = new HomeModel(qrCodes);

    return View(model);
}
Finally, let’s run our app and scan the QR Code for the expected URL:
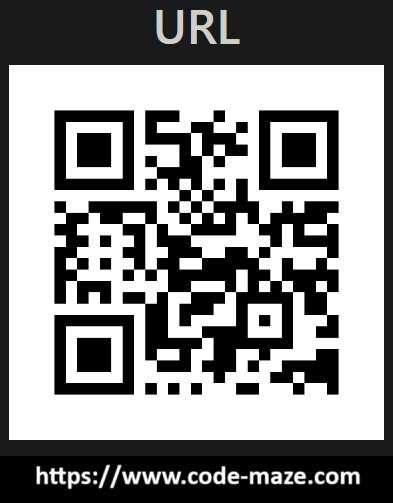
It’s worth noting that while the URL in the QR Code will be “static” (i.e. unchangeable), we can always dynamically redirect if needed on our webserver. For example, we can generate a URL that points to an endpoint on our web server (e.g. https://mysite.com/qr-code-campaign), but configure that endpoint to redirect to another resource.
Now, let’s try another payload generator.
Generating QR Codes for Phone Numbers
Phone numbers are another typical use case for QR Codes, especially when aimed at mobile devices. A classic example would be a business card with a QR code on it. Instead of typing the phone number, consumers can scan the code to be taken to their call app.
Let’s see how we can implement this.
First, let’s add the GenerateQRCodePhoneNumber() method:
private string GenerateQRCodePhoneNumber()
{
    var qrCodeData = qrGenerator.CreateQrCode(new PhoneNumber("+123456789"));

    return GeneratePng(qrCodeData);
}
We use the PhoneNumber class which derives from the Payload class, and provide the phone number.
Let’s update our Index() method:
public IActionResult Index()
{
    var qrCodes = new Dictionary<string, string>
    {
        { "Basic String", GenerateQRCodeString() },
        { "URL", GenerateQRCodeURL() },
        { "Phone Number", GenerateQRCodePhoneNumber() }
    };

    var model = new HomeModel(qrCodes);

    return View(model);
}
Let’s now scan the code to reveal the embedded phone number:
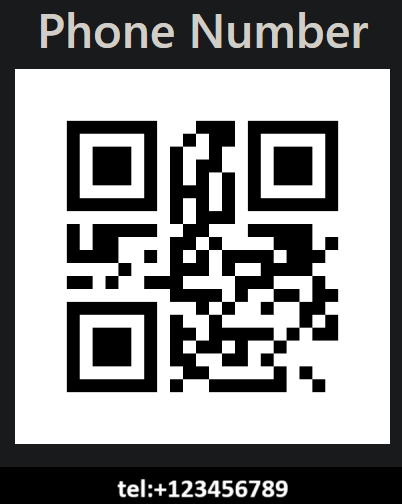
We can then attempt to call or save the number. This is how easy it is to set up these calls to action.
But still, what if we wanted to create a custom generator? Let’s look at doing that next.
Building a Custom QR Code Generator
Creating a custom payload generator is straightforward. We just need to create a class derived from the Payload class:
public class CustomPayload(string name) : Payload
{
    private readonly string _name = name;

    public override string ToString()
    {
        return $"Hello {_name}, hope you're having a great time :) ";
    }
}
Now, let’s create a method to generate our custom QR Code:
private string GenerateQRCodeCustom()
{
    var qrCodeData = qrGenerator.CreateQrCode(new CustomPayload("Reader"));

    return GeneratePng(qrCodeData);
}
Lastly, let’s add our GenerateQRCodeCustom() method to the Index() method:
public IActionResult Index()
{
    var qrCodes = new Dictionary<string, string>
    {
        { "Basic String", GenerateQRCodeString() },
        { "URL", GenerateQRCodeURL() },
        { "Phone Number", GenerateQRCodePhoneNumber() },
        { "Custom", GenerateQRCodeCustom() }
    };

    var model = new HomeModel(qrCodes);

    return View(model);
}
Now, let’s scan our code to see our embedded text:

There are a lot more built-in payload generators that QRCoder supplies. We can’t cover all of them here, so be sure to check out the extensive documentation at the QRCoder Wiki.
Let’s now move on to reading/writing QR codes.
Reading and Writing QR Codes
So far, we have generated and displayed QR codes within a single operation. While this works for on-the-fly use cases, it’s probably unrealistic for a real-world scenario. For a real application, we might want to pre-generate a QR code, and then display it later on a page without having to re-generate it each time. To achieve this, we must persist the data, and then read it back.
Writing QR Codes
To demonstrate this concept, let’s create QrCodesDb class to hold the QR codes in memory:
public class QrCodesDb
{
    private readonly Dictionary<string, byte[]> _qrCodes = [];

    public void Add(string key, QRCodeData data)
    {
        if (!_qrCodes.ContainsKey(key))
        {
            _qrCodes.Add(key, data.GetRawData(QRCodeData.Compression.Uncompressed));
        }
    }

    public byte[]? Get(string key)
    {
        _qrCodes.TryGetValue(key, out var value);

        return value;
    }
}
The QRCodeData class has a unique method GetRawData() that provides us with access to the underlying raw data before rendering. By choosing compressed or uncompressed, we can adjust the compression.
Let’s register our QRCodeData class in the Program class:
builder.Services.AddSingleton<QrCodesDb>();
Reading QR Codes
Now, let’s modify our GenerateQRCodeCustom() method:
private string GenerateQRCodeCustom()
{
    const string key = "Custom";
    var raw = db.Get(key);
    if (raw == null)
    {
        var qrCodeData = qrGenerator.CreateQrCode(new CustomPayload("Reader"));
        db.Add(key, qrCodeData);
        raw = qrCodeData.GetRawData(QRCodeData.Compression.Uncompressed);
    }

    return GeneratePng(new QRCodeData(raw, QRCodeData.Compression.Uncompressed));
}
Here, we are using the data from our in-memory database.
By adopting this approach instead of the previous on-the-fly code generation approach, we may generate data once, store it, and then render it as much as desired.
Next up, let’s look at some tips and tricks regarding QR Codes.
QR Code Tips and Tricks
There are a few parameters that impact the effectiveness of quick-response codes.
Let’s examine them.
Error Correction
Starting with the error correction level, a parameter of the CreateQrCode() method:
QRCodeGenerator.ECCLevel.Q
What does ECCLevel.Q mean? ECC stands for Error Correction Code. QR Codes are meant to be robust, ensuring that they can be read by a range of devices even in the presence of physical damage. There is an underlying algorithm that goes into how this works, but we need to be aware that we can control this tolerance level:
- Level L: 7% restoration
- Level M: 15% restoration
- Level Q: 25% restoration
- Level H: 30% restoration
Each level corresponds to how much the algorithm can restore the QR code. For example, a level of “M” means that if 15% (or less) of the QR code is damaged, the QR code will still be readable. Therefore, we would use a higher level based on the damage we expect our code to sustain. If we are printing a business card, for instance, we would want to use level H as it can withstand damages that may occur in a wallet. However, for events where we don’t anticipate significant damage, we can choose a lower level.
It’s important to note that, there is a performance cost associated with data restoration. Because of this, level M (15%) is the standard choice for ECC level, as it provides a good balance between reduced performance and robustness.
Version
We can also specify a version of our quick-response code. There are about forty versions, each with a different module configuration. A module corresponds to a single black or white dot that makes up the QR code, and a module configuration specifies how many modules can exist. The higher the version we specify, the larger the number of modules that will be used, and the greater the data that is accommodated. The version encompasses the number of modules needed, the error correction level, and the type of data. In other words, the larger the data we need to encode, the more modules required, and therefore the higher version.
Choosing the right version is aided by understanding the type of data we want to save, how large the data is, and the necessary error correction. We can use the information on qrcode.com to help us make this decision.
Once we choose a version, we need to provide it in the requestedVersion parameter of the CreateQrCode() method:
var qrCodeData = qrGenerator.CreateQrCode("Hello CodeMaze readers", QRCodeGenerator.ECCLevel.Q, requestedVersion: 3);
Colors
So far, our QR codes have been grayscale in color, which is the default, but we can change the colors. Let’s say our brand colors are red and dark blue. We can pass our colors as parameters into the GetGraphic() method in our GeneratePng() helper method:
var qrCodeImage = qrCode.GetGraphic(20, [255, 0, 0], [0, 0, 139]);
Finally, let’s run our app to see the color change:
Conclusion
In this article, we’ve looked at generating QR Codes with the .NET library QRCoder. We have looked at how to set it up and go into the details of how to use payload generators, store the codes, and retrieve them later.
We’ve also looked at a few parameters we can set to customize our quick-response codes to make them more tolerable, expand their data storage capacity, and make them more visually appealing.

