

In this article, we are going to explore how to generate images in an ASP.NET Core application using OpenAI.
Let’s get going.
Introduction to OpenAI Models
OpenAI has developed a range of specialized AI models, of which the GPT (Generative Pre-trained Transformer) series lays the groundwork for numerous natural language processing applications. Codex takes this further by focusing on code generation and comprehension, powering tools like GitHub Copilot to assist programmers. Additionally, the CLIP model can connect images with textual descriptions, enhancing the interaction between visual and textual data.
OpenAI’s DALL·E series has pioneered the creation of images from text, allowing us to turn written descriptions into detailed visuals. The original DALL·E model blended language comprehension with image generation, producing everything from realistic to fantastical images. DALL·E 2 improved upon this with higher quality, more consistent images, and the capability for subtle image modifications. DALL·E 3 has advanced the technology further, offering greater flexibility and the ability to mimic diverse artistic styles.
Generate Images Using OpenAI in ASP.NET Core
Let’s take a look at how to generate images in an ASP.NET Core application using the OpenAI image generation models.
To integrate OpenAI into our application, we could either sign up for an OpenAI subscription and use the APIs directly or use a cloud-hosted OpenAI instance such as the Azure OpenAI Service. By using Azure OpenAI Service, we can access the OpenAI’s advanced language models through a REST API. We can also access the service through SDKs or web-based interfaces in the Azure OpenAI Studio, which is a unified platform for developing and deploying generative AI apps.
In this article, we’ll use the Azure OpenAI Service. However, all the examples will work well even if we use the OpenAI APIs directly. The only difference is the authentication mechanism. While using the OpenAI service directly, we only need to provide the API key, whereas while using the Azure OpenAI, we need to provide an endpoint URL as well.
Setup Azure OpenAI Service
To set up the Azure OpenAI service, we must first have an Azure account with a valid subscription.
Then we need to fill out the Azure OpenAI access form, after which it may take a few hours to be granted access. Due to high demand, continuous improvements, and responsible AI practices, Azure OpenAI access is currently limited. Priority is given to current Microsoft partners and users with low-risk applications committed to responsible use. Microsoft outlines the specific requirements in the application form and is working on responsibly broadening access.
Once we’re given access, we can create a new OpenAI resource from the portal:
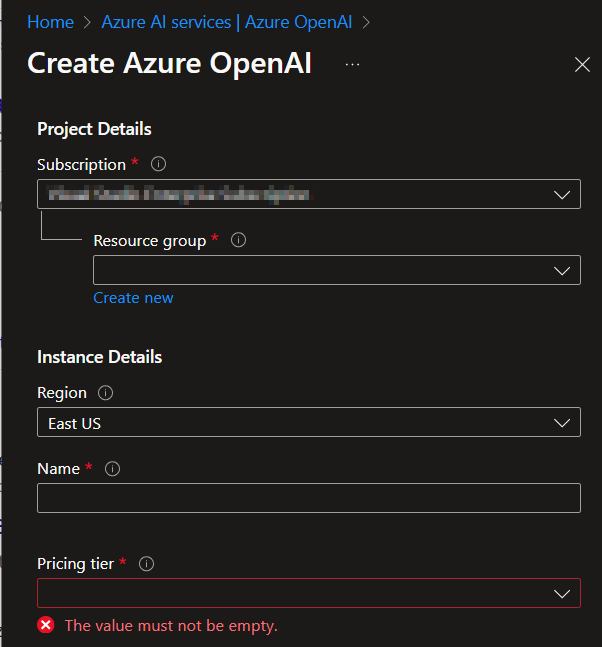
After providing the required fields, such as the Subscription, Resource Group, Region, and Name, and selecting a Pricing Tier, we can proceed to create a new OpenAI resource.
Once the resource is created, let’s copy the Endpoint and Key from its Keys and Endpoint blade and store it safely:
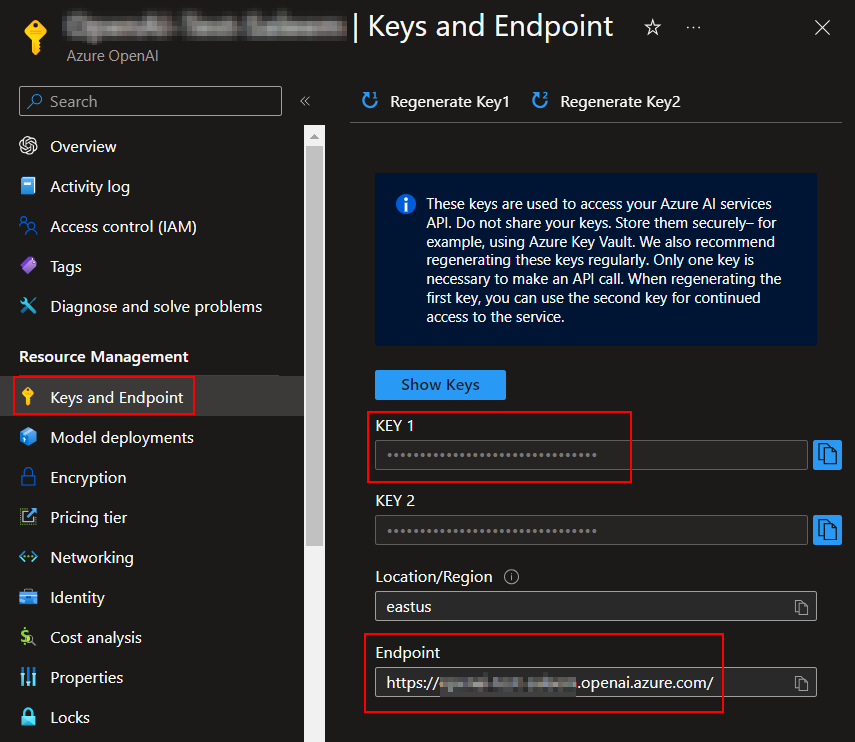
We will be using this key and endpoint in our API application.
Deploy the DALL·E 3 Model
The next step is to deploy a model in Azure OpenAI Studio. In order to generate text or images using Azure OpenAI, we need to deploy the corresponding model in Azure OpenAI Studio and use it in our application.
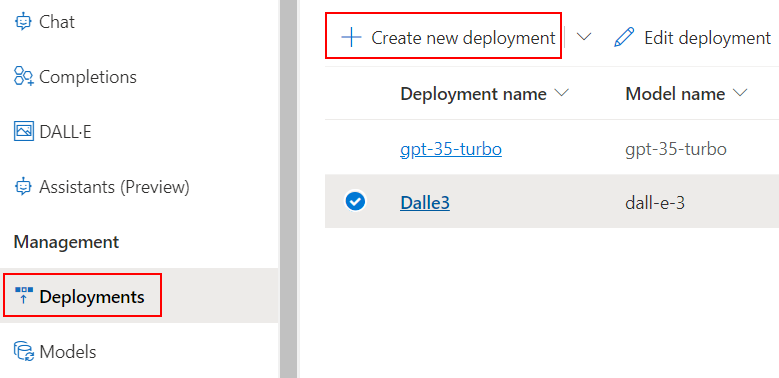
First, let’s sign in to Azure OpenAI Studio and select the subscription and OpenAI resource that we want to use. After that, let’s navigate to the Deployments area and click on Create new deployment:
In the Deploy model popup, let’s select a model, version, and deployment type:
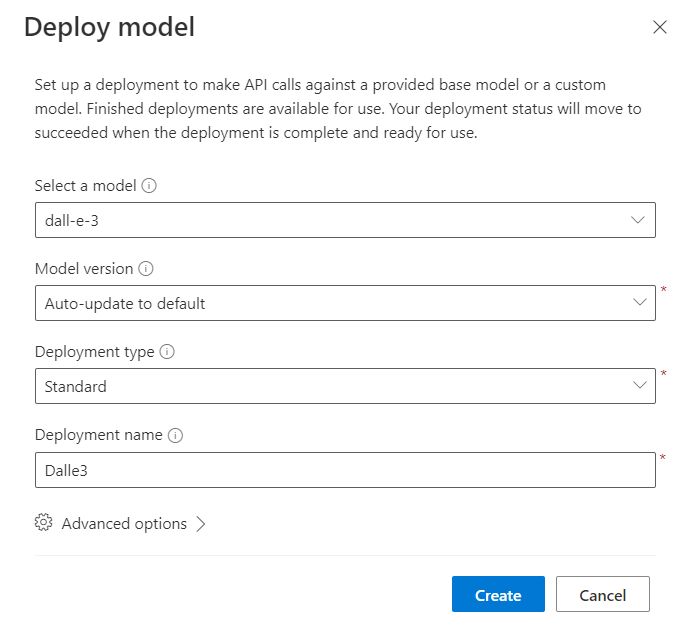
For image generation, we’ve chosen the dall-e-3 model, Auto-update to the default model version, and Standard deployment type. We’ve also provided a unique Deployment name and left the advanced settings as they are.
After clicking on create, it will deploy the model, a process that could take a couple of minutes. Once the deployment is successful, we can use the provided endpoint in our application to make API calls.
Remember that when calling the model via the API, we use the deployment name that we have provided and not the model name. This is a key difference between using OpenAI directly and using Azure OpenAI.
Create and Configure an ASP.NET Core Application
Now let’s configure an ASP.NET Core Web API application with Azure OpenAI support.
First, let’s create an ASP.NET Core Web API application, using either the Visual Studio templates or the dotnet new webapi command.
After that, let’s add the Azure.AI.OpenAI NuGet package:
Install-Package Azure.AI.OpenAI
Then let’s configure the OpenAIClient service in the Program class:
builder.Services.AddScoped(sp =>
{
    return new OpenAIClient(
        new Uri(builder.Configuration["AzureOpenAiEndpoint"]),
        new AzureKeyCredential(builder.Configuration["AzureOpenAiApiKey"]));
});
Notice that we are reading the configuration values corresponding to the OpenAI endpoint and API key and passing those.
So let’s make sure we add those configuration values in the AppSettings file. Additionally, let’s add the deployment name that we provided earlier as well:
"AzureOpenAiEndpoint": "{provide Azure OpenAI endpoint here}",
"AzureOpenAiApiKey": "{provide Azure OpenAI API key here}",
"AzureOpenAiDeploymentName": "Dalle3",
With this, we have configured the OpenAI client in our application.
Implement the Image Generation Logic Using OpenAI
Next, let’s implement a service with image generation capability.
First, let’s define the IOpenAIService interface:
public interface IOpenAIService
{
    Task<Uri> GenerateImageAsync(ImageGenerationApiModel imageGenerationApiModel);
}
After that, let’s create the OpenAIService class and implement our new interface:
public class OpenAIService : IOpenAIService
{
    readonly IConfiguration _configuration;
    readonly OpenAIClient _openAIClient;

    public OpenAIService(IConfiguration configuration, OpenAIClient openAIClient)
    {
        _configuration = configuration ?? throw new ArgumentNullException(nameof(configuration));
        _openAIClient = openAIClient ?? throw new ArgumentNullException(nameof(openAIClient));
    }

    public async Task<Uri> GenerateImageAsync(ImageGenerationApiModel imageGenerationApiModel)
    {
        ImageGenerationOptions imageGenerationOptions = new()
        {
            Prompt = imageGenerationApiModel.Prompt,
            Size = imageGenerationApiModel.Size,
            DeploymentName = _configuration["AzureOpenAiDeploymentName"],
            Quality = imageGenerationApiModel.Quality,
            Style = imageGenerationApiModel.Style
        };

        var imageGenerations =
            await _openAIClient.GetImageGenerationsAsync(imageGenerationOptions);

        return imageGenerations.Value.Data[0].Url;
    }
}
The service class encapsulates the logic for generating an image using the OpenAI API. It takes in the ImageGenerationApiModel parameter, creates an ImageGenerationOptions object, calls the API to generate the image, and returns the URL of the generated image.
Let’s define the ImageGenerationApiModel class as well:
public class ImageGenerationApiModel
{
    public required string Prompt { get; set; }
    public required string Size { get; set; }
    public required string Style { get; set; }
    public required string Quality { get; set; }
}
Finally, let’s implement an API endpoint to expose this capability in a new ImageGeneratorController class:
public class ImageGeneratorController(IOpenAIService openAIService) : ControllerBase
{
    [HttpPost]
    public async Task<IActionResult> PostAsync(ImageGenerationApiModel apiModel)
    {
        try
        {
            var imageUri = await openAIService.GenerateImageAsync(apiModel);

            return Ok(new { ImageUri = imageUri });
        }
        catch (Exception ex)
        {
            return StatusCode(StatusCodes.Status500InternalServerError, ex.Message);
        }
    }
}
Here we define a POST endpoint that takes the image generation options as a parameter and returns the generated image URL. The endpoint method accepts the ImageGenerationApiModel as the POST body and generates an image using the OpenAIService, then returns an object with the image URL.
DALL·E 3 Image Generation Options
While creating images with the DALL·E 3 model, we can customize the output by specifying the image size, artistic style, and quality level of the generated image, in addition to the text prompt that we provide.
For the Size parameter, DALL·E 3 supports generating images at resolutions of 1024x1024, 1024x1792, or 1792x1024. The DALL·E 2 model is required for smaller image sizes, such as 512x512 or 256x256. The Quality setting in DALL·E 3 allows us to choose between standard for faster and more cost-effective image creation, and hd for higher-quality images with greater detail. Of course, HD images come at a higher cost and with increased generation time.
The introduction of the Style parameter offers further customization, with vivid (the default) and natural as the current options to influence the visual aesthetics of the generated images. Due to system considerations, DALL·E 3 supports generating only one image per API call, so there is no need to set the ImageCount parameter. For multiple images, the recommended approach is to make concurrent API calls.
Create a UI App
Next, create a new ASP.NET Core Web Application with Razor Pages, either with the dotnet new razor command or by using the Visual Studio templates.
Once we set up the Razor Pages application, let’s add the HTML elements to the index.cshtml file:
<div class="container">
    <div class="form-container">
        <h2>Image Generator</h2>
        <form method="post">
            <div class="form-group">
                <label for="Prompt">Enter your prompt:</label>
                <textarea id="Prompt" name="Prompt" asp-for="Prompt" rows="4" required></textarea>
            </div>

            <div class="form-group">
                <label for="Size">Select image size:</label>
                <select id="Size" name="Size" asp-for="Size">
                    <option value="1024x1024">1024x1024</option>
                    <option value="1792x1024">1792x1024</option>
                    <option value="1024x1792">1024x1792</option>
                </select>
            </div>

            <div class="form-group">
                <label for="Style">Select style:</label>
                <select id="Style" name="Style" asp-for="Style">
                    <option value="natural">Natural</option>
                    <option value="vivid">Vivid</option>
                </select>
            </div>

            <div class="form-group">
                <label for="Quality">Select quality:</label>
                <select id="Quality" name="Quality" asp-for="Quality">
                    <option value="standard">Standard</option>
                    <option value="hd">HD</option>
                </select>
            </div>

            <div class="form-group">
                <button type="submit">Generate Image</button>
            </div>
        </form>
    </div>
    <div class="image-container">
        <h2>Generated Image</h2>
        @if (Model.ImageUrl != null)
        {
            <img src="@Model.ImageUrl" alt="Generated Image" className="generated-image" />
        }
        else
        {
            <div class="placeholder">
                <label>@Model.Message</label>
            </div>
        }
    </div>

</div>
Here, we added the input controls for the image generator web application, allowing users to enter a prompt, select image size, style, and quality, and generate an image based on their choices. Additionally, we have written a logic to display the generated image on the page. In case the image is not available, we show a placeholder message.
Next, let’s modify the index.cshtml.cs code-behind file:
public class IndexModel(IHttpClientFactory clientFactory,
    IConfiguration configuration) : PageModel
{
    [BindProperty]
    public required string Prompt { get; set; }
    [BindProperty]
    public required string Size { get; set; }
    [BindProperty]
    public required string Style { get; set; }
    [BindProperty]
    public required string Quality { get; set; }
    public string? ImageUrl { get; set; }
    public string Message { get; set; } = "Please submit a prompt to generate an image.";
}
Here we inject the IHttpClientFactory and IConfiguration into the IndexModel class. Additionally, we define properties such as Prompt, Size, Style, and Quality decorated with the [BindProperty] attribute. Remember that, these properties will have their values automatically bound to the corresponding form inputs in the Razor page. We use the ImageUrl property to hold the generated image URL and the Message property to show the placeholder message,
Next, let’s update the PostAsync() method. This method is executed when we submit the form on the page:
public async Task<IActionResult> OnPostAsync()
{
    if (!ModelState.IsValid)
    {
        return Page();
    }

    var client = clientFactory.CreateClient();

    var requestBody = new
    {
        Prompt,
        Size,
        Style,
        Quality
    };

    var content = new StringContent(JsonSerializer.Serialize(requestBody), Encoding.UTF8, "application/json");

    try
    {
        var response = await client.PostAsync(configuration["ApiUrl"], content);

        if (response.IsSuccessStatusCode)
        {
            var responseContent = await response.Content.ReadAsStringAsync();

            var options = new JsonSerializerOptions
            {
                PropertyNameCaseInsensitive = true
            };
            var result = JsonSerializer.Deserialize<ImageResponse>(responseContent, options);

            ImageUrl = result?.ImageUri;
        }
        else
        {
            Message = "An error occurred while generating the image. Please try again later.";
        }
    }
    catch
    {
        Message = "An error occurred while generating the image. Please try again later.";
    }

    return Page();
}
Here, first, we validate the form data. Next, we build a request object from the model properties and serialize it. After that, we use the HttpClient to send the serialized JSON data as a POST request to the API.
Once we receive the response from API, we deserialize it and update either the image URL or the error message based on the response status.
Note that we are reading the API URL from the configuration. So let’s make sure to configure it in the AppSettings file:
{
  "ApiUrl": "{API URL here}",
  "Logging": {
...
    }
  },
  "AllowedHosts": "*"
}
Finally, let’s create an ImageResponse record for capturing the API response:
public record ImageResponse(string ImageUri);
Next, let’s add the styling for our UI App in the site.css file:
.container {
    display: flex;
    justify-content: flex-start;
    align-items: flex-start;
    gap: 20px;
    max-width: 1324px;
}

.form-container {
    margin-right: 20px;
}

.image-container {
    flex: 1;
    width: 724px;
    display: flex;
    flex-direction: column;
}
.generated-image {
    width: 1024px;
    margin-top: 20px;
}
Here we define the layout and styling for the elements container, form-container, image-container, and generated-image.
After that, let’s add a code block to define the styles for the form-groups, including labels, textareas, selects, and buttons, as well as a placeholder element.
.form-group {
    margin-bottom: 1rem;
}

    .form-group label,
    .form-group textarea,
    .form-group select,
    .form-group button {
        display: block;
        width: 100%;
        margin-bottom: 0.5rem;
    }

    .form-group button {
        cursor: pointer;
    }

.placeholder {
    width: 824px;
    height: 100%;
    display: flex;
    text-align: center;
    border: 1px dashed;
    border-radius: 4px;
    padding: 20px;
    box-sizing: border-box;
    background-color: white;
    color: black;
}
With this, our ASP.NET Core Razor Pages UI app is ready.
Run and Test the Application
Let’s run both the back-end API and the ASP.NET Core Razor Pages App together.
The API will open the Swagger UI and the Razor Pages App will open the web UI in the browser:
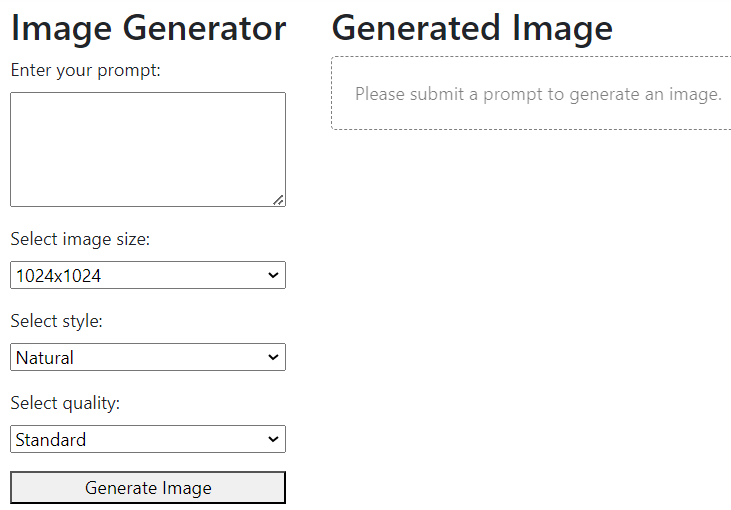
Now let’s provide a prompt and either choose the desired values for size, style, and quality, or leave the defaults as-is, and click on the Generate Image button:
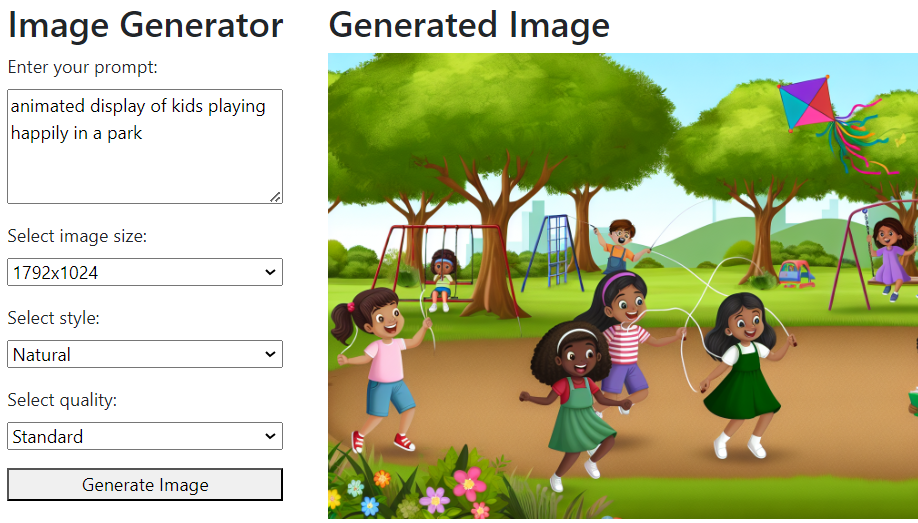
This calls the API to generate an image using OpenAI and display it on the right side.
If we change the prompt and choose different options for size, style, and quality, the image will vary.
Conclusion
In this article, we learned how to generate images by integrating OpenAI image generation capabilities into an ASP.NET Core application. We started with an introduction to OpenAI and its various models, including a detailed look at the image generation models. We then navigated the process of setting up the Azure OpenAI service and creating an ASP.NET Core Web API application with the image generation logic. Finally, we created an ASP.NET Core Razor Pages App to consume the API, implementing a complete end-to-end workflow.
