This article explores how to cancel an HTTP request and the associated backend operation inside a Blazor component. After a brief introduction to the architecture for canceling backend operations, we will familiarize ourselves with cancellation tokens and how to utilize them to cancel an operation when the user navigates away. Let’s start.
Setup a Blazor Project to Test HTTP Request Cancellation
We’ll use .NET 8’s new Blazor Web App template, which combines the previous Blazor Server and Blazor WebAssembly templates. Benefits include server-side prerendering, rendering static components entirely on the server, and only requiring interactive components to be rendered on the client side. Moreover, since we have a project running on the server, we can implement a simple backend API in the same project.
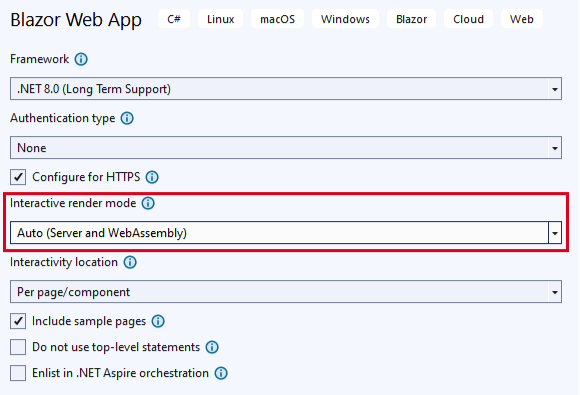
Let’s start by creating a new Blazor App project, with the interactive render mode set to auto:
This will generate a BlazorApp project, which includes the server containing the server-side components, and a BlazorApp.Client project containing the client-side components. We’ll use the provided Weather page in our example of canceling backend operations.
Client-Side Setup
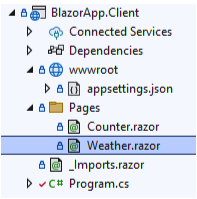
The Weather component is created as part of the server-side project, in the Components/Pages folder. Let’s move it into the Client project’s Pages folder:
Next, let’s update our relocated Weather component to make it suitable for client-side use and data fetching from the backend. First, we need to remove the StreamRendering attribute from the top of the page. Then, we need to add the following highlighted lines:
@page "/weather"
@rendermode @(new InteractiveWebAssemblyRenderMode(false))
@inject HttpClient HttpClient
Here, we’ve set the render mode to InteractiveWebAssemblyRenderMode with prerendering disabled, as we don’t need the added complexity of prerendering for our example. Also, we’ve injected an HttpClient, which we’ll need for fetching data from the server.
Finally, we need to replace the OnInitializedAsync() method’s contents:
protected override async Task OnInitializedAsync()
{
    forecasts = await HttpClient.GetFromJsonAsync<WeatherForecast[]>("/api/weather");
}
We’ll come back to the /api/weather endpoint implementation in our server-side setup. This is the operation that we’ll be canceling.
The last step on the client side is to register the HttpClient into the dependency injection container in the Program class:
builder.Services.AddScoped(
    sp => new HttpClient { BaseAddress = new(sp.GetRequiredService<NavigationManager>().BaseUri) });
Now that we’ve finished our client-side setup, let’s move on to the server side.
Server Side Setup
On the server side, our only task is to add the /api/weather endpoint to the Program class:
app.MapGet("/api/weather", async (CancellationToken cancellationToken) =>
{
    // Simulate asynchronous loading
    await Task.Delay(5000, cancellationToken);

    var startDate = DateOnly.FromDateTime(DateTime.Now);
    var summaries = new[] { "Freezing", "Bracing", "Chilly", "Cool", "Mild", "Warm", "Balmy", "Hot" };
    return Enumerable.Range(1, 5).Select(index => new Weather.WeatherForecast
    {
        Date = startDate.AddDays(index),
        TemperatureC = Random.Shared.Next(-20, 55),
        Summary = summaries[Random.Shared.Next(summaries.Length)]
    }).ToArray();
});
The code is almost the same as it was in the Weather page, but we increased the delay to allow us more time to cancel the operation. The only parameter we pass to the handler function is a CancellationToken. We’ll use this token, provided by ASP.NET Core, to cancel the request.
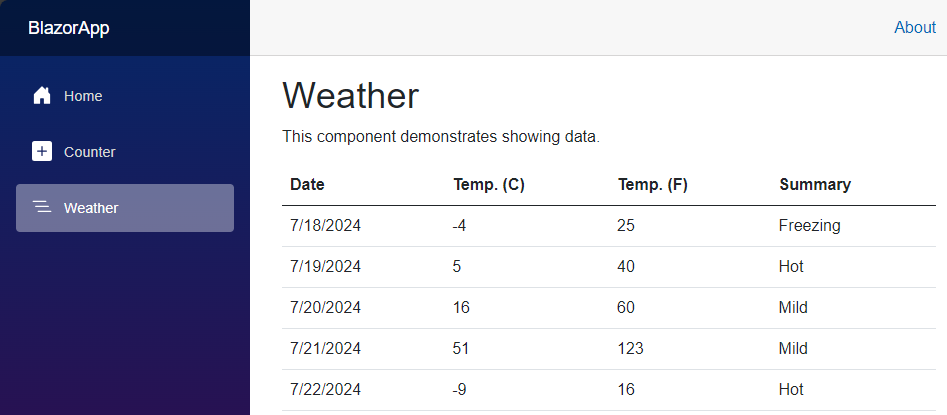
With everything set up, let’s start the application and navigate to the Weather page to ensure everything is as expected. After 5 seconds, the weather data should appear:
Cancellation Tokens
In .NET, we primarily use cancellation tokens to request the cancellation of an operation. Cancellation tokens allow a running function to exit gracefully and early. The CancellationTokenSource object creates and manages cancellation tokens, and we use it to request a cancellation. Let’s create one in the Weather page:
private CancellationTokenSource _cancellationTokenSource = new();
It’s important to dispose of a CancellationTokenSource when it’s no longer needed, so let’s implement the IDisposable interface on the Weather page:
@page "/weather"
@rendermode @(new InteractiveWebAssemblyRenderMode(false))
@inject HttpClient HttpClient
@implements IDisposable

//code omitted for brevity

public void Dispose()
{
    _cancellationTokenSource.Dispose();
}
A razor page’s Dispose() method is called automatically when the component is removed from the DOM tree, so our CancellationTokenSource will also release its resources. Finally, let’s pass the CancellationToken to the GetFromJsonAsync() method:
forecasts = await HttpClient.GetFromJsonAsync<WeatherForecast[]>("/api/weather", _cancellationTokenSource.Token);
With that done, our @code block should now look like this:
private WeatherForecast[]? _forecasts;
private readonly CancellationTokenSource _cancellationTokenSource = new();

protected override async Task OnInitializedAsync()
{
    forecasts = await HttpClient.GetFromJsonAsync<WeatherForecast[]>("/api/weather", _cancellationTokenSource.Token);
}

public class WeatherForecast
{
    public DateOnly Date { get; init; }
    public int TemperatureC { get; init; }
    public string? Summary { get; init; }
    public int TemperatureF => 32 + (int)(TemperatureC / 0.5556);
}

public void Dispose()
{
    _cancellationTokenSource.Dispose();
}
We are ready with the setup. The only thing left is to trigger the cancellation when the user leaves the page. Let’s explore how to do that.
Using the Dispose Pattern to Cancel an HTTP Request in Blazor
Since we already implemented the dispose pattern within our page component, let’s trigger a cancellation in the Dispose() method before disposing our CancellationTokenSource:
public void Dispose()
{
    _cancellationTokenSource.Cancel();
    _cancellationTokenSource.Dispose();
}
Since we passed the token to the GetFromJsonAsync() method, it will abort the HTTP request as soon as the cancellation is requested. ASP.NET Core will detect that the HTTP request was aborted on the server side and will trigger the cancellation for the other token.
It is important to note that no token is passed from the client side to the server side; they are completely independent tokens triggered for different reasons and by different sources.
Testing an HTTP Request Cancellation in Blazor
It’s time to test our solution. Let’s launch the application, and open the browser’s developer tools. We can monitor HTTP requests on the network tab.
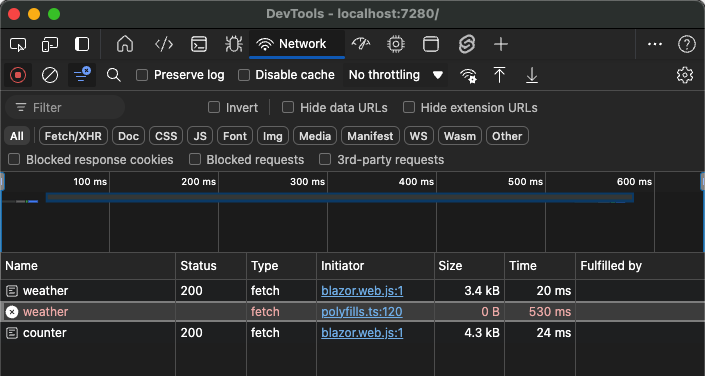
Now let’s navigate to the Weather page, then navigate away within 5 seconds, either with the browser’s back button or by simply clicking another menu item:
In the developer tools, we see that the HTTP request didn’t complete, so we successfully aborted it. But what about the backend? Will it still process the request after we abort it? Let’s find out by adding a logging statement after the Task.Delay() method in the minimal API handler:
app.MapGet("/api/weather", async (CancellationToken cancellationToken) =>
{
    Console.WriteLine("Delay started");
    // Simulate asynchronous loading
    await Task.Delay(5000, cancellationToken);

    Console.WriteLine("Delay ended");

    //code omitted for brevity
});
Let’s restart the application and repeat the same navigation as before, then wait for the 5 seconds to expire. When checking the console output, we will only see one line:
Delay started
So we can be confident that our solution works, and that the server will abandon the work when the user navigates away from the page.
Conclusion
In this article, we learned how to cancel an HTTP request in Blazor. We briefly discussed .NET 8’s new Blazor Web App architecture and implemented an API endpoint for cancellation. We then discussed what a CancellationToken is and how it works on the client versus the server. Finally, we triggered a complete operation cancellation when the user left our page.


